


Tips to Installing Cabinet Pulls You'll Kick Yourself for Not Knowing

We recently renovated a condo kitchen by painting the cabinets blue and adding long cabinet pulls to make it look elegant. You can view the entire project and income/expenses made on the condo flip here. It was a quick and easy way to update a kitchen that had bland old oak cabinets. But boy did I make a lot of mistakes along the way! Learn from me, and make your job easier...
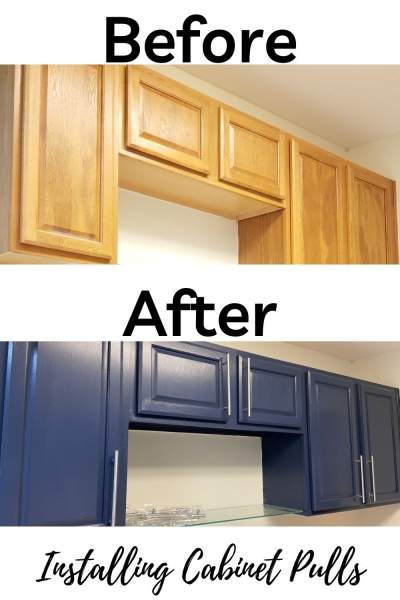
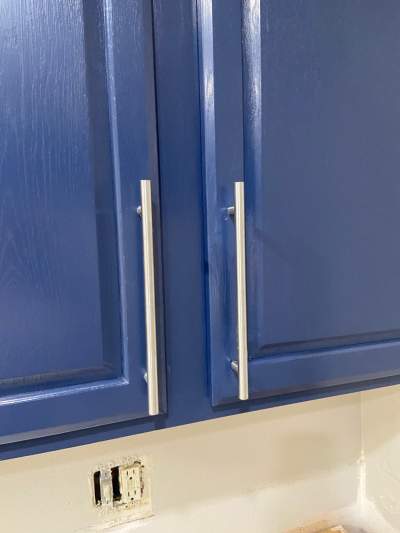
Here's a quick close up look at how the cabinets looked before, and then how they looked after being painted and having the handles installed.
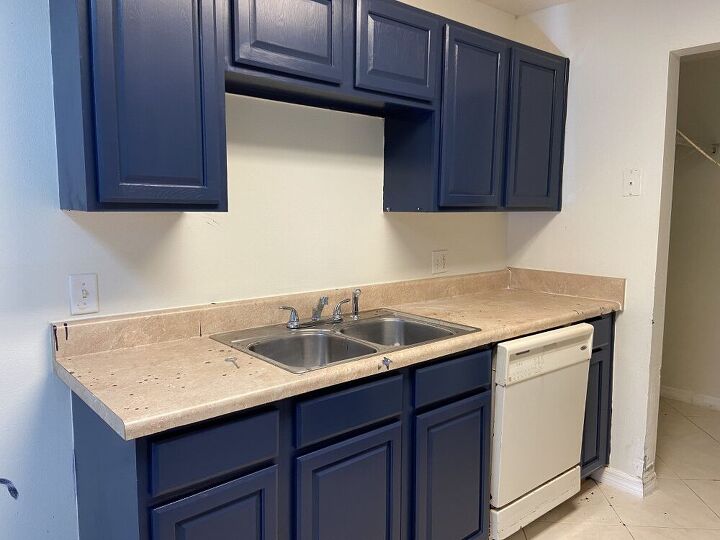
Here's a look at the cabinets once they were painted blue, but before adding the handles to the cabinets.
Mistakes I made:
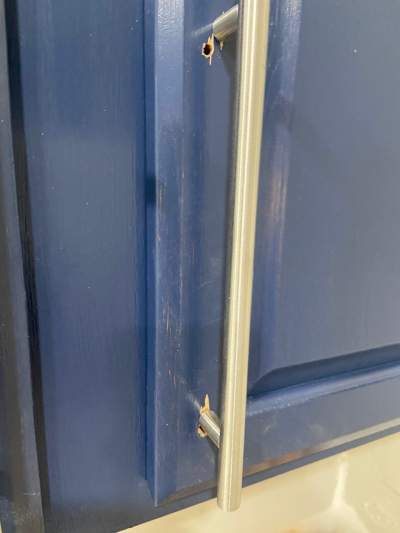
Here's a look at the first cabinet door I worked on and the mistakes I made.
First, I drilled the holes from the inside of the cabinet to the outside, which resulted in the wood on the cabinet face splintering. It looked terrible.
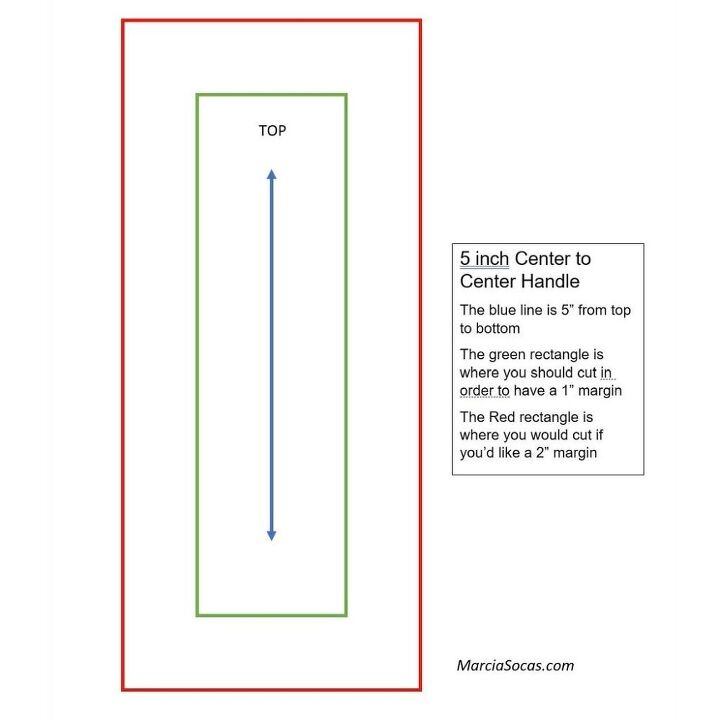
Also, I didn't originally use a template that was straight ( I created a great free template for you that you can download to make it easier). So my original holes came out crooked and they also weren't the right distance for the screws to attach to the handles.
You can see in this picture how I had to re-drill some holes and how terrible it looked!
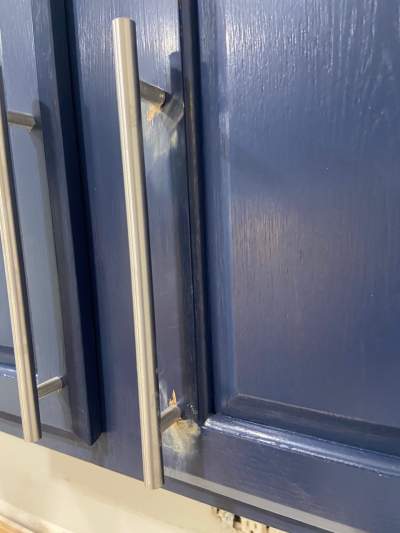
Here's a view of the door fronts after I added the wood putty filler to correct my many mistakes.
After filling and sanding the errors, you can paint over the mistakes and it'll look good as new!
Here's the RIGHT WAY to do it:
I created a template for the common cabinet handle sizes so that it'll make your project easier. You can download the free template from my website here.
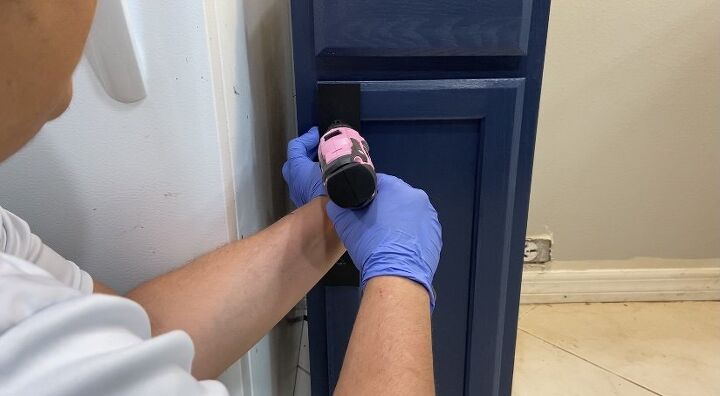
Using the template (I had it on black cardstock so you have to look closely in the photo), I drilled from the OUTSIDE of the cabinet to the INSIDE. This way the wood didn't splinter on the cabinet front. I made sure to line everything up nice and straight.
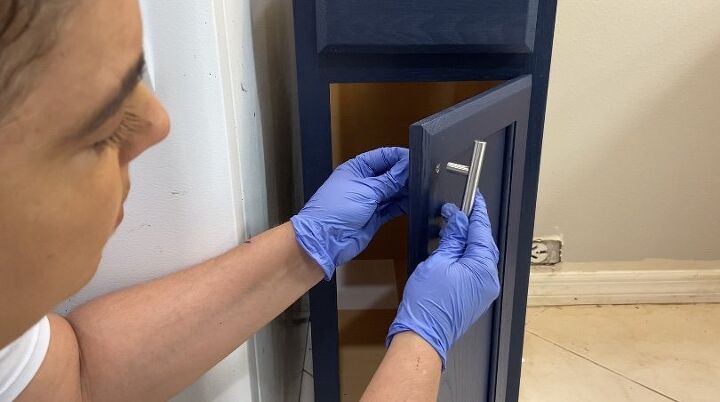
Here I'm adding the screws to the back of the handles. It's important to make sure the holes are placed properly so that they'll line up with the openings for the screws.
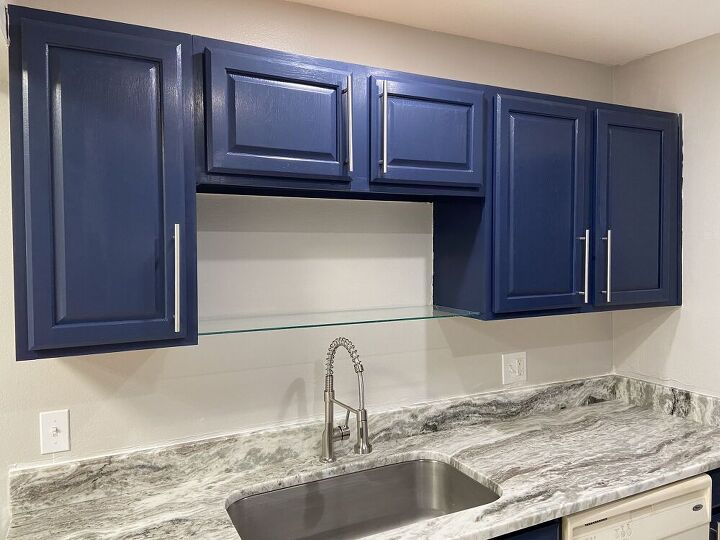
Look at how much better the completed kitchen looks! The cabinet handles really do make a big difference.
Here are the top tips you need to remember:
- Determine where you want to position the handles and make sure you keep this uniform throughout the kitchen
- Buy, create, or download a free template from my website.
- Keep track of top/bottom on your template so that you don't mess up on your spacing
- Measure twice, drill once. Line up your drill marks and mark them with a pencil first. Hold up your handle and make sure it isn't crooked. Also make sure the width of your marked holes lines up with the screw entry points on the back of the cabinet handle.
- Cover the drain! It sounds silly, but I lost two screws down the drain and had to reach my hand inside (this is ok when its you're home, but when it's a house you're flipping, it just feels gross)
- Have wood putty on hand for any mistakes
- Be brave and have fun!
If you prefer to watch the 5 minute video, you can view it here!
Resources for this project:
See all materials


Frequently asked questions
Have a question about this project?
Thanks for tips. Now could you tell me the color blue you used please?