


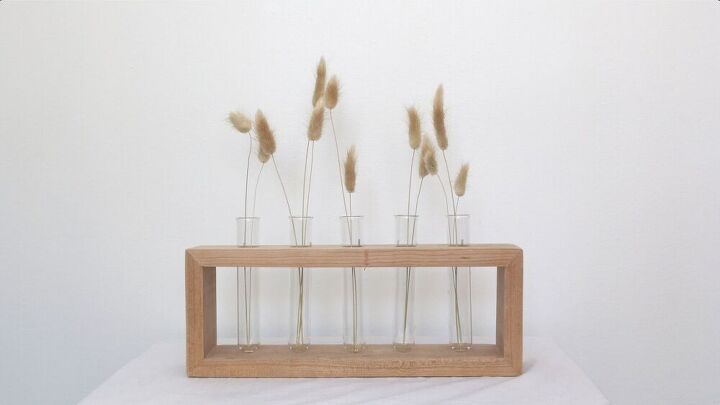
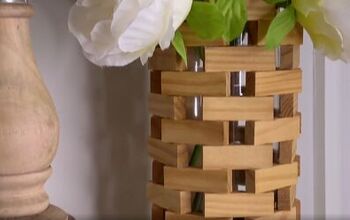
DIY Test Tube Vase

Spring is in the air and now the smell of flowers can be too! This test tube flower vase is a great project for beginners as it doesn't require too many tools, time, or money. I bought a whole box of test tubes since they were such a great price, so I will definitely be making more. If you're interested in seeing more test tube vases, make sure you subscribe!
Click here so you don't miss a video! https://bit.ly/2Xe639L
JOIN ME ONLINE:
Instagram: https://www.instagram.com/timberandtea_
Best test tube vase!
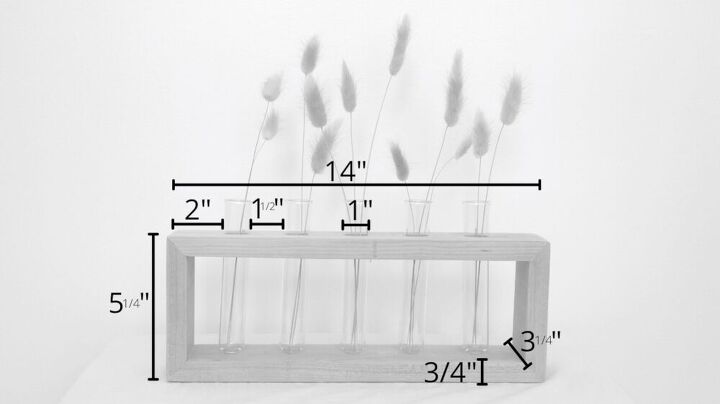
My vase is 14" long, by 5" high and I used cherry wood that was 3" wide by 3/4" thick.

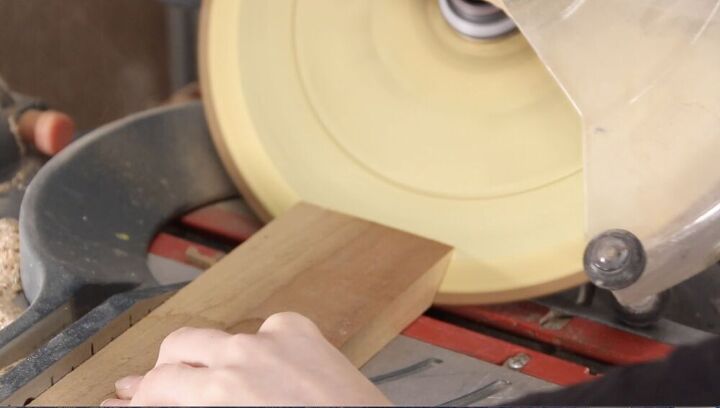
Before we get cutting, you need to turn your saw to 45 degrees, and cut your first end.
Rather than flipping the saw blade back and forth to make our next 45 degree cut, I’m going to flip my wood. You want to move the blade as little as possible to get the tightest mitre, as the slightest variation in where the blade falls could leave you with a gap.
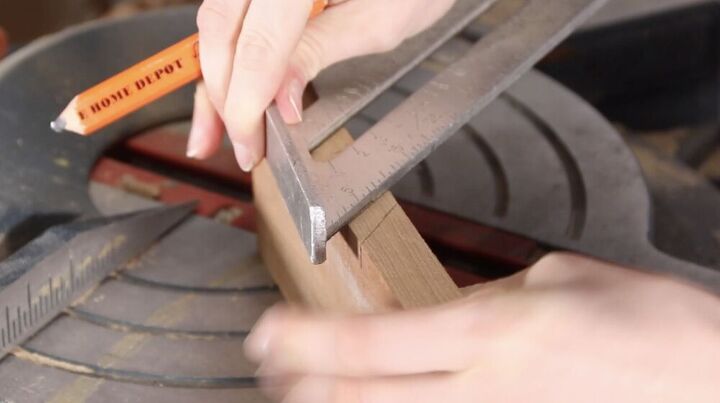
Since my measurements are for the outside, longest side of the board, to transfer my measurement to the other side, I used my speed square.
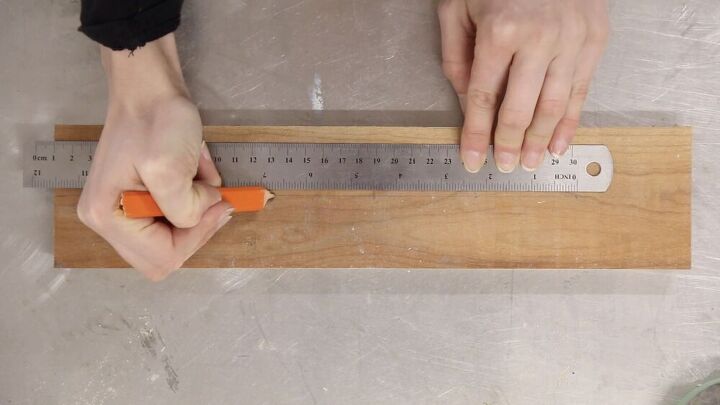
Once I’ve got all 4 sides cut, I’m going to mark where my holes need to go for my test tubes. First I marked the centre line across the board and then I made my marks 2.5” in from either side and then marked the rest of the holes 2 1/4” apart. Once my holes are drilled this will leave 2” on the ends with 1.5” between the test tubes.
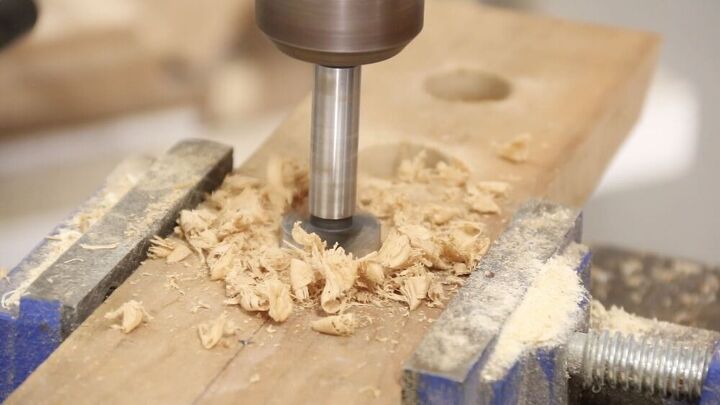
I’m using 1” test tubes, which I’ve linked to in the materials, so I’m using a 1” forester bit in my drill press to make my holes.
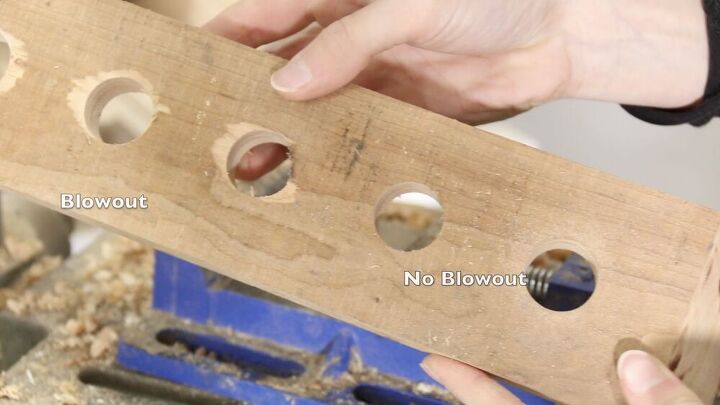
As I was drilling my holes, I was getting a little bit of blow out on the back. To prevent this, I drilled most of the way through until the tip of the bit just came through the back and then I flipped it over and drilled the rest of the way from the other side.
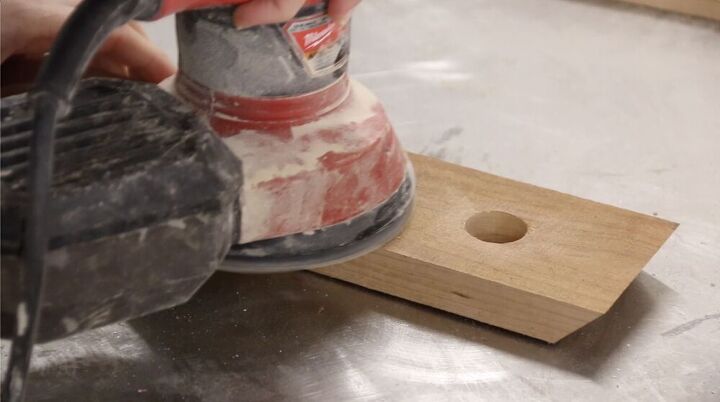
Once I got my holes drilled I have all my boards a good sand.
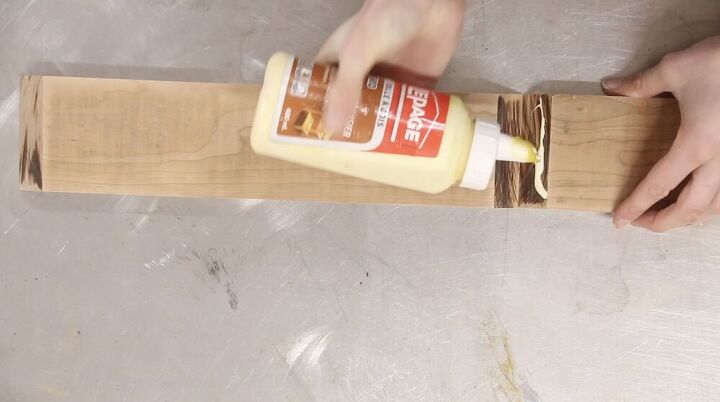
Im using wood glue to assemble my vase.
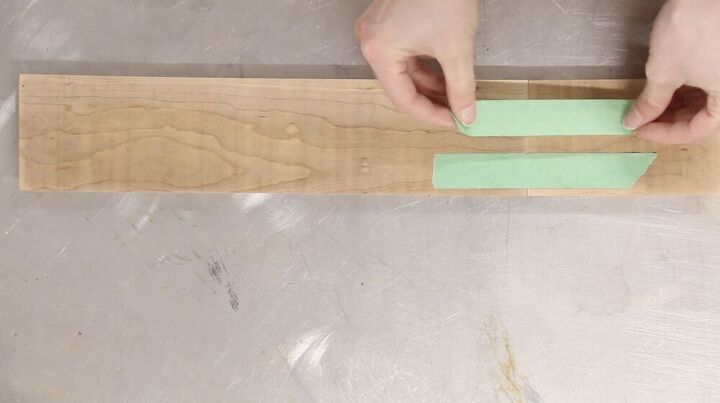
I could use brad nails to help keep things in place, but they din’t really offer much strength and I’d rather not have the holes to fill, so I’m using tape to hold it together until it dries.
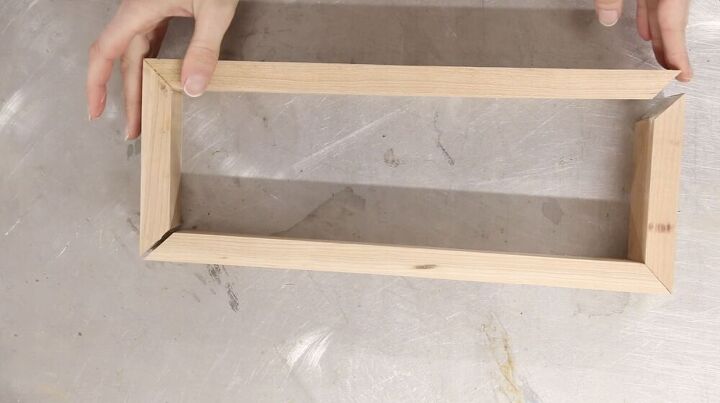
I’m assembling it in two pieces and them putting those two pieces together.
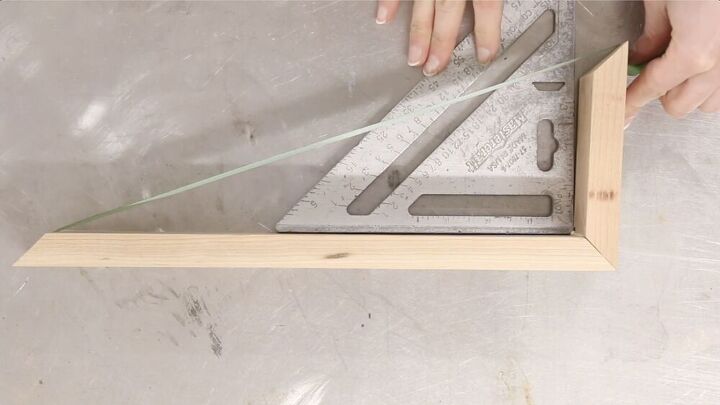
Make are when you are putting your corners together that you use a square ti make them perfect.
Once its all dry, you can perfect your corners if need be using a screwdriver and running it along the outside of the corners. You can also use a mix of sawdust and glue or wood filler to help with any other imperfections.
I gave mine one more sand and then filled it up!
Resources for this project:
See all materials


Comments
Join the conversation
-
Rather lovely. I could see me buying fresh flowers every week to keep vases fresh.


Frequently asked questions
Have a question about this project?