


Spring Bee Sign and Skep Made From Thrifted Items

Pairing up oddball items to create new looks is just something I love to do, sometimes it doesn't meet up with my expectations other times it surpasses them. These items I'm about to share were a success story so I knew I had to create a post about it for my Hometalk folks.
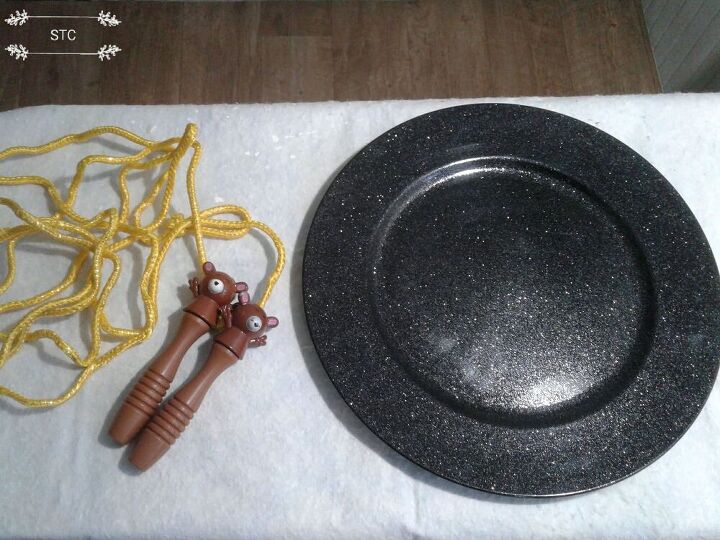
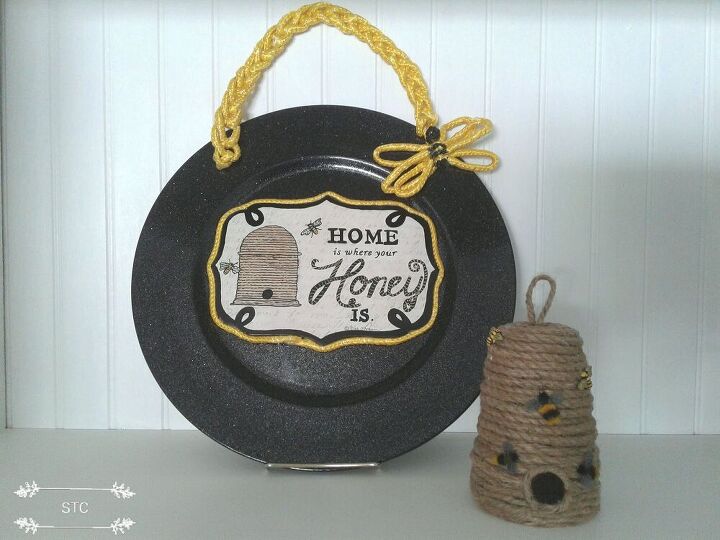
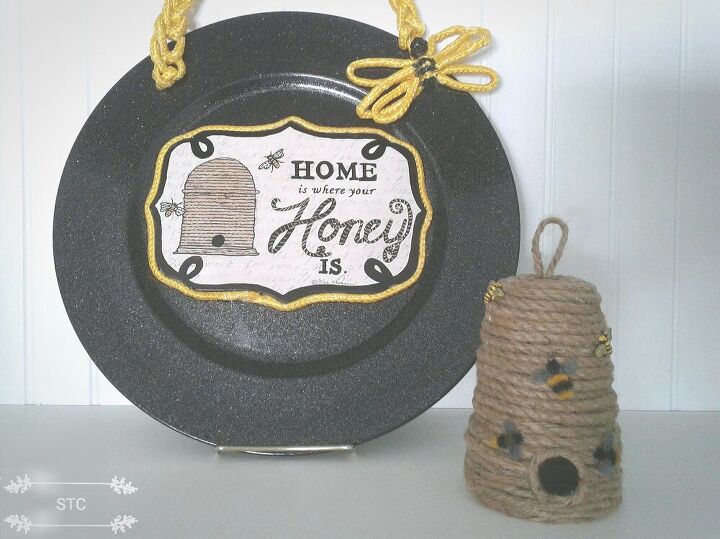
Two bright yellow skipping ropes and a black, sparkly charger plate. These items have nothing in common except I can create word play with them...skip the dishes ? Lol.

How about I show you the sign I found too, it was the inspiration for this project! It was just a small, worn, papered mdf. sign but I knew I could make it into something more eye catching. Just by adding it to the charger plate immediately gave it more impact.
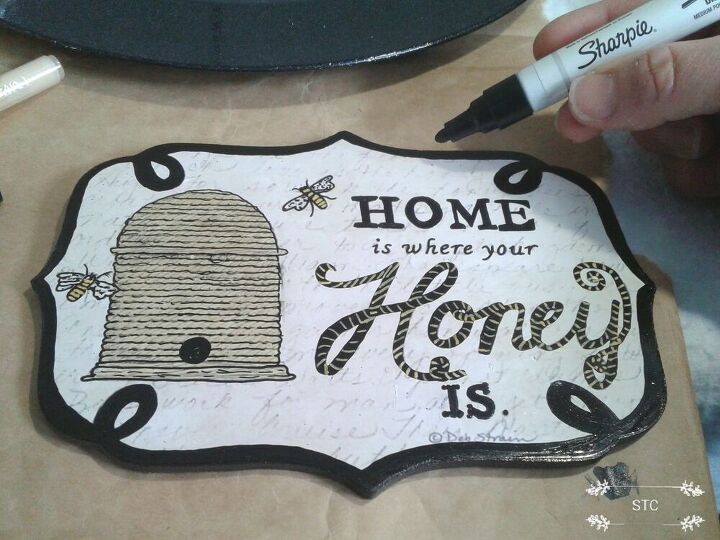
The coloring on the sign was quite pale so I used my Sharpie and Artistro markers to enhance the outlines. I even did a bee stripe on the word "honey". I made sure the lettering was good and dry with my heat gun as I worked being careful to not make smudges with my hand as I traced over everything.
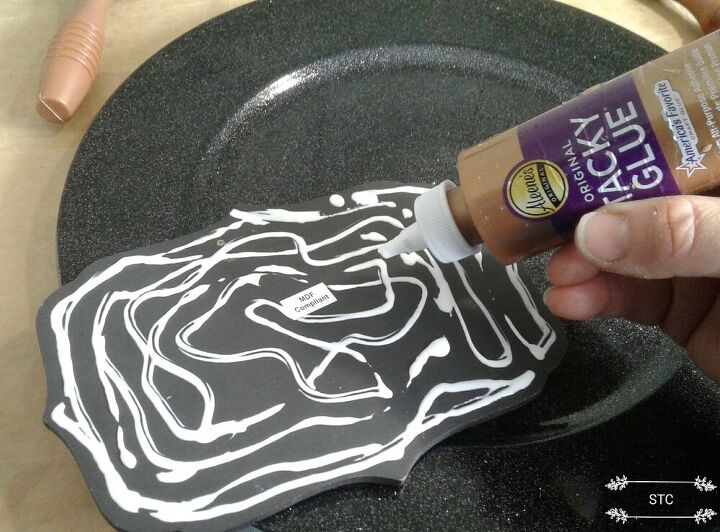
I used all purpose tacky glue on the back to glue it to the charger plate.
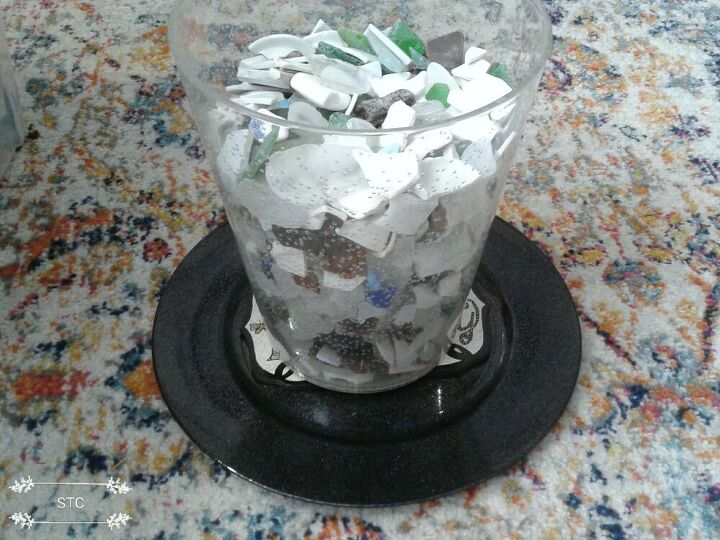
I set the plate on the floor and used my bucket of seaglass as a heavy weight to firmly set the sign in place while the glue dried.
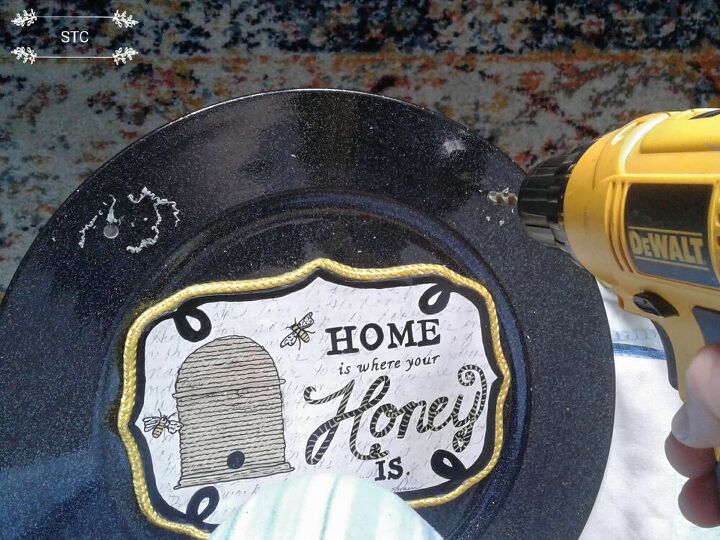
Once the sign was set in place, I trimmed the edge with the yellow skipping rope to make it pop. I'm sorry there's no photo but I used hot glue for to attach it. Here I'm drilling holes into the plate to give me something to feed the rope into and create a hanger for my sign.
*Note if you do not have access to a drill I'm sure the rope could be glued and or taped onto the back of the plate.
In order to make it a little more interesting I did my signature, go to weave with the rest of the skipping rope to create some texture for my sign. I had to join it because they weren't very long to begin with and the weaving takes up extra length to create.
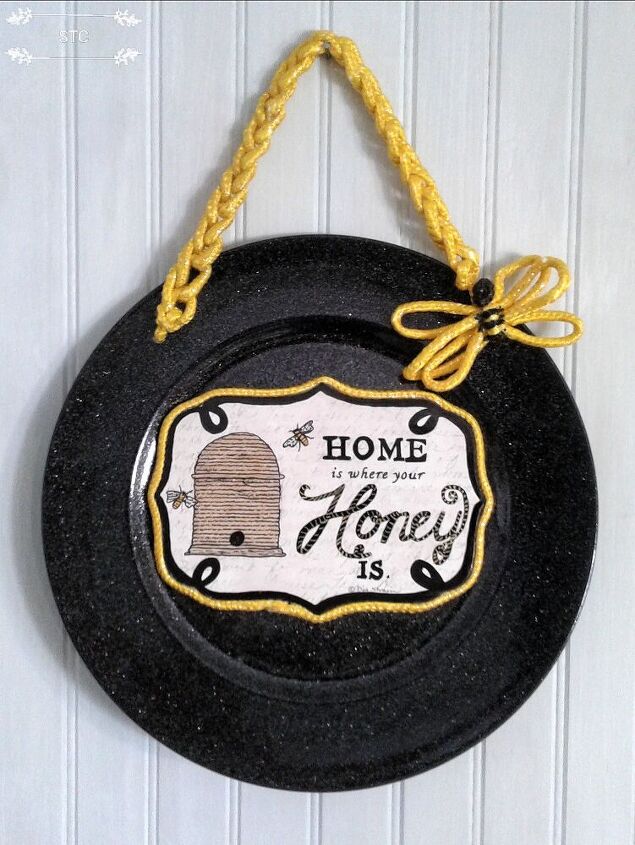
Here it is finished, the ropes were fed through the holes and knotted at the back to prevent them from slipping back through the holes. The accent? Too funny...I used up the remaining rope trying to maybe create a flower with just a series of loops tied at center with the floral wire you saw in an earlier photo. The tiny tail that was left after making the loops I just wrapped around the center to hide the floral wire then hot glued it down at the back. Somehow I ended up with what looked like a bee! I just went with it and added the stripe to the body.
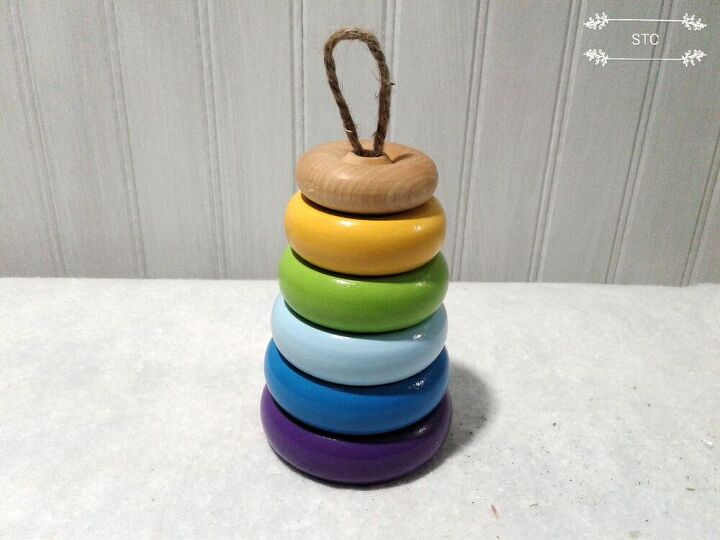
Onward with the bee theme, this time I 've chosen a stackable set of wood rings. They were removed from the stacking block and glued together with wood glue. The top ring I added a string loop into, its secured with a knot tied down inside.
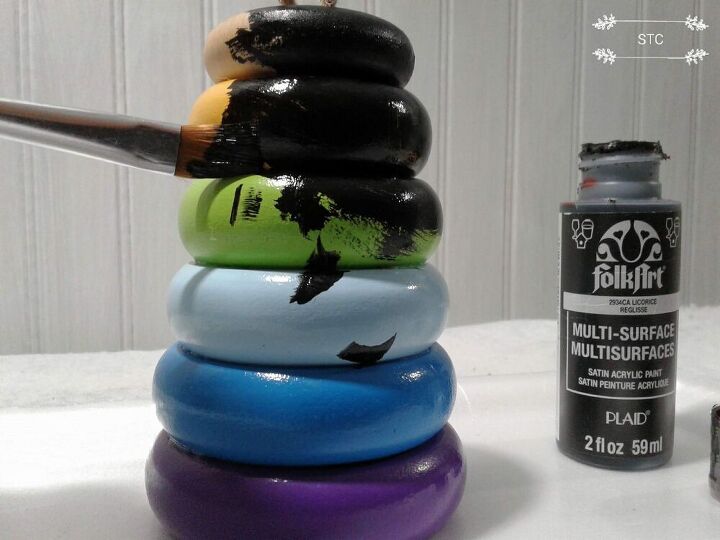
I decided to give it an even coat of black paint so if there were any peekaboo spaces it wouldn't show up as much.
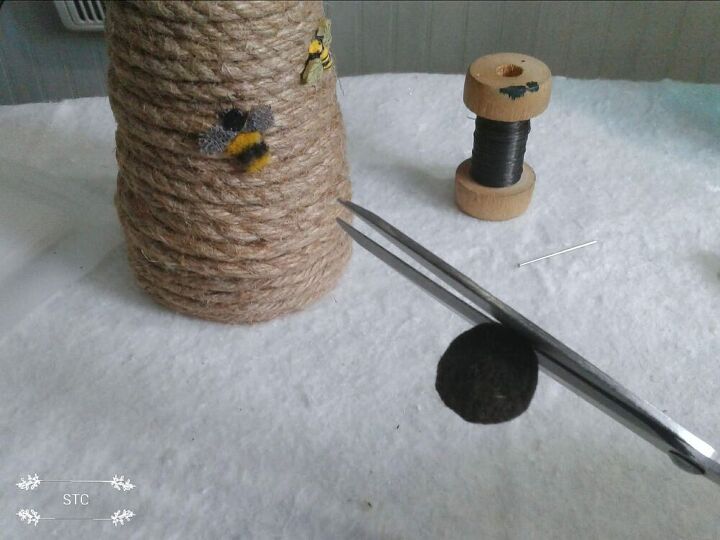
To make the entry hole for the skep, I cut a circle out of some dark felt and glued it towards the bottom as seen in the skep on the sign.
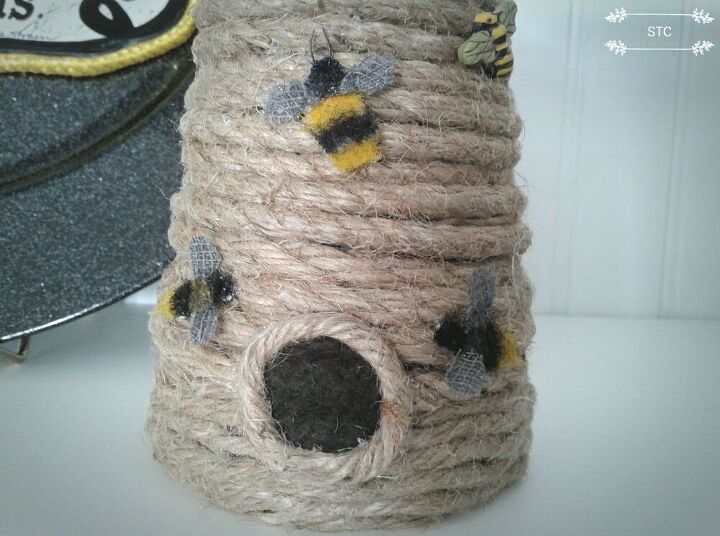
To create the finished look I glued more string around the felt circle edge to create depth to the fake opening.
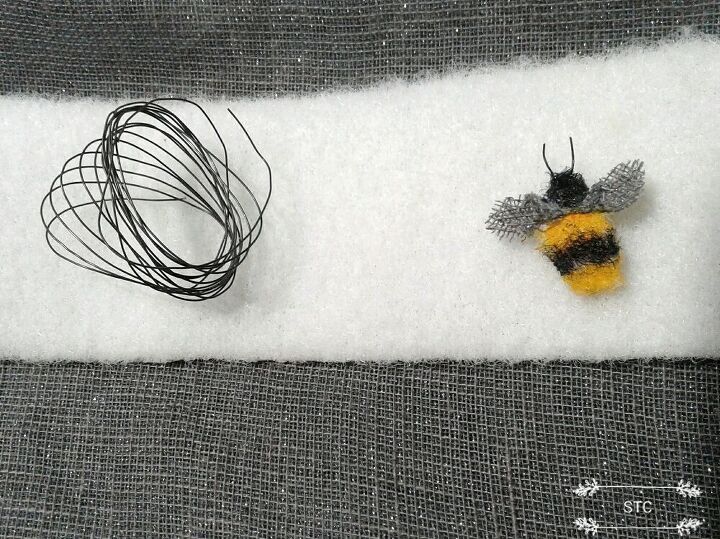
The fuzzy bees? They were a creative fluke! My thought process was that some bees are fuzzy, what do I have in my craft room that's fuzzy? The soft part of Velcro...but it's white! Ok, my paint markers can make the black and yellow stripes. The wings? That gray underneath is a metallic mesh scarf, it sparkled just like insect wings do in the sunlight! I very lightly glued a square of two layers together, I then kept cutting down until I got a small enough, elongated, figure 8 shape to create the wings. They were glued on and then for the antennae I snipped off a tiny piece of floral wire, folded it at center and weaved it into the loops of the Velcro....done!
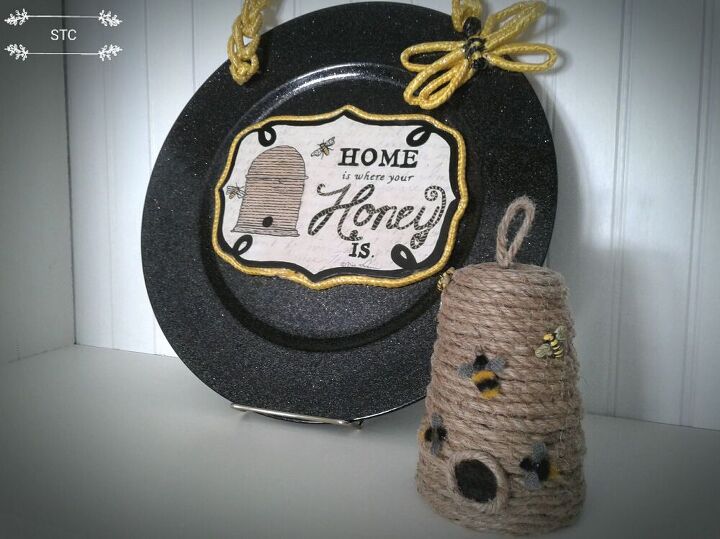
How sweet is that? Sweet like honey of course and all created for just pennies using those odd thrifted items. The sign can rest in a plate stand beside the skep with maybe a beautiful bunch of flowers? You can also hang it on a wall or a door as you would hang a wreath.
I really, really hope this moves you to look beyond what the item actually is and create a little something beautiful for a friend or for yourself.
We all need a little happy, sunshine right now to get us through these challenging months. Take care and "bee" safe!
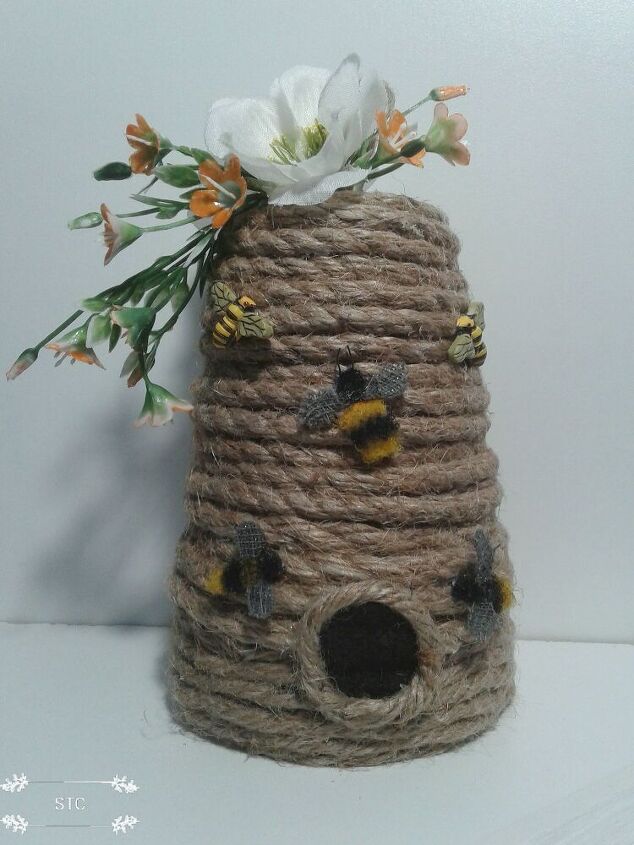
Update: I couldnt just let it "bee".....the more I looked at the skep the more I felt it was missing something?? Silly me with a garden full of flowers how could I have forgotten blooms for the bees? Now I think it has a more finished look by adding just a few small blooms at the top and cascading down over the side.
Resources for this project:
See all materials


Comments
Join the conversation
-
What an awesome creation ! I love the sign and the bee hive , and the bees are so ingenious !
-
Awesome DIY,thanks for sharing!


Frequently asked questions
Have a question about this project?
THIS IS GORGEOUS & CREATIVE - WARM AND LOVING. Home is Where OUR MOST SPECIAL human Honeys are....... do you sell them? Fabulous!