


$50 IKEA RAST Nightstand Turned Into a $650 West Elm DUPE!

Yup... you read the title right! I took the $50 IKEA Rast nightstand and turned it into a West Elm dupe! I fell in love with the West Elm Quinn but the price tag didn't quite fit my budget. I decided that if I can't buy it, I'll DIY it!
With a few materials, I was able to get two almost identical nightstands for half of the price at West Elm! I will explain the process in this post but if you'd like to see a quick video of it coming together, here is my Instagram reel recapping the process. I also have an entire highlight.
As for any IKEA hack, the first step is to put together the IKEA furniture. I know, I know... this is no fun. In fact, it is probably the worst part of this whole tutorial. If you absolutely hate IKEA furniture, you could do this hack with any piece you wish or even something you already own. The IKEA Rast isn't the best in terms of quality but that is what $50 will get you. We don't use our nightstands for much so I was willing to sacrifice the quality for the looks. To each their own!
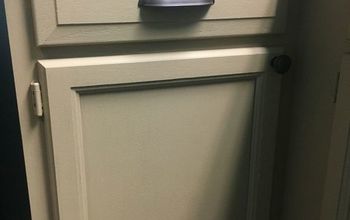
After putting together the furniture, I purchased fluted trim from Lowe's for the drawer fronts to match the West Elm fronts. I cut the trim to the size of the fronts and nailed it in with 5/8" nails. Easy peasy!
I decided if I was going to add legs to the bottom, I needed to cut off a few inches from the nightstand. This was super easy with the Kreg Rip-Cut and Circular saw. I was then able to add the furniture legs.
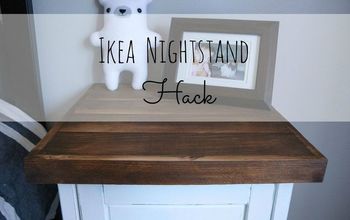
To really mimic the West Elm piece, I decided to paint the nightstands white. I used BEHR's Cabinet and Trim Enamel in the color Polar Bear. I honestly think this would look super pretty in any color! After painting, I finished them off with some simple and sleek edge pulls.
Overall, this was a really easy IKEA hack! In total, the two nightstands cost me about $250 (or $150 each). What a steal compared to the $650 West Elm Quinn! Just because you can't afford something doesn't mean you can't have it. Get creative and good luck!
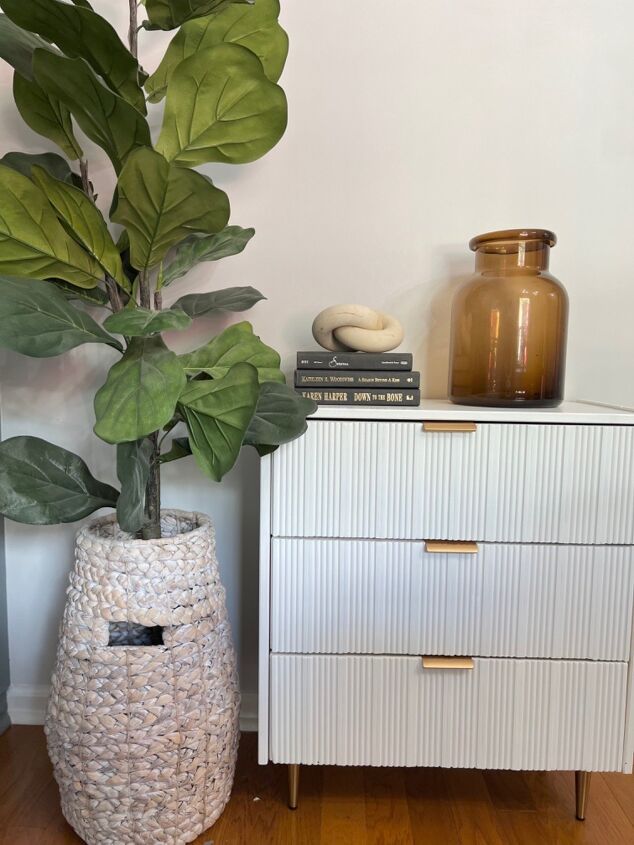
The finished look!
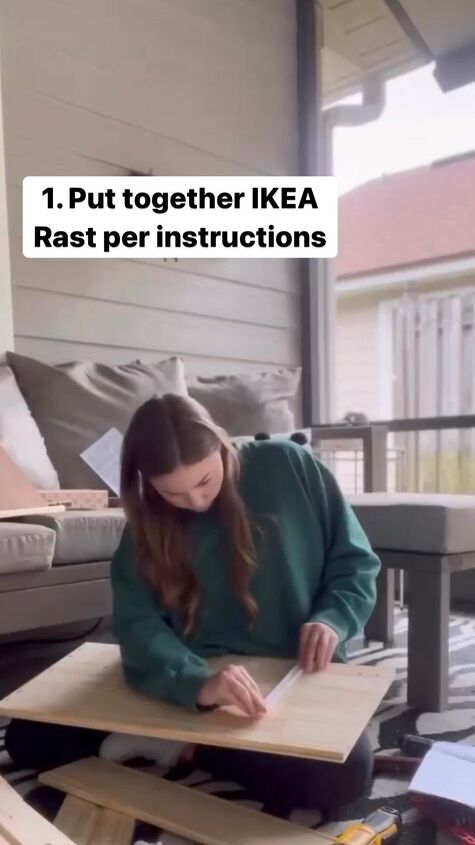
The first step is putting together the IKEA nightstands. I'm not kidding when I say that this was the hardest part of the whole "hack". Assembling IKEA furniture is no fun!
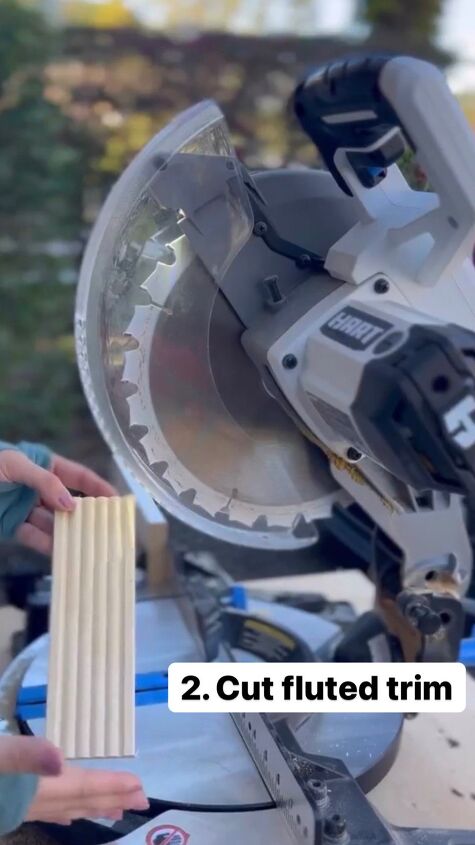
Step 2 is to cut your fluted trim to the size of your drawer fronts.
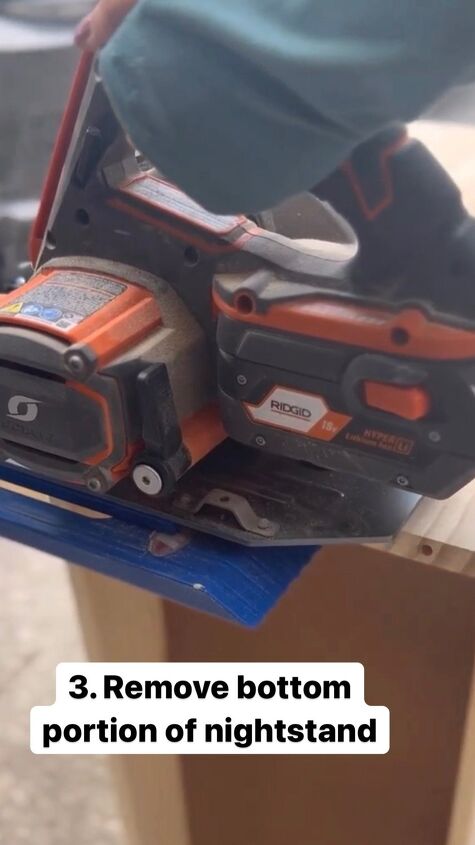
Since I wanted to add new furniture legs, I decided to cut off the bottom of the nightstand. This is optional but it would've been too tall with the legs had I not.
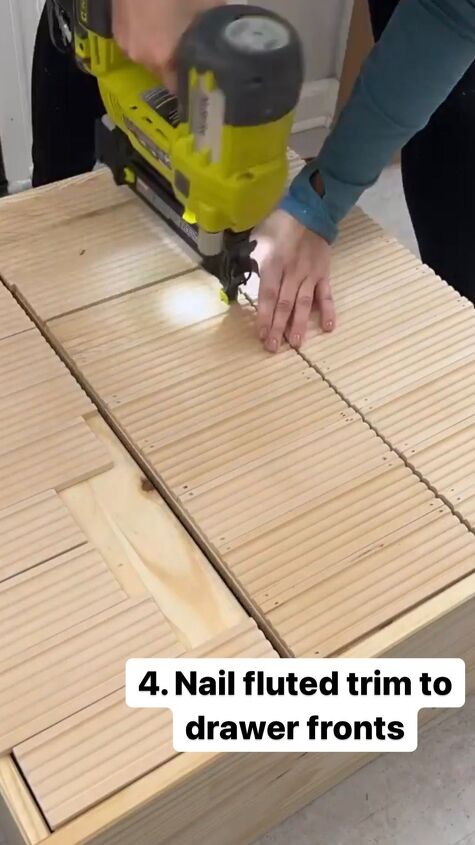
Step 4 is to nail the fluted trim to the fronts. I used 5/8" brad nails!
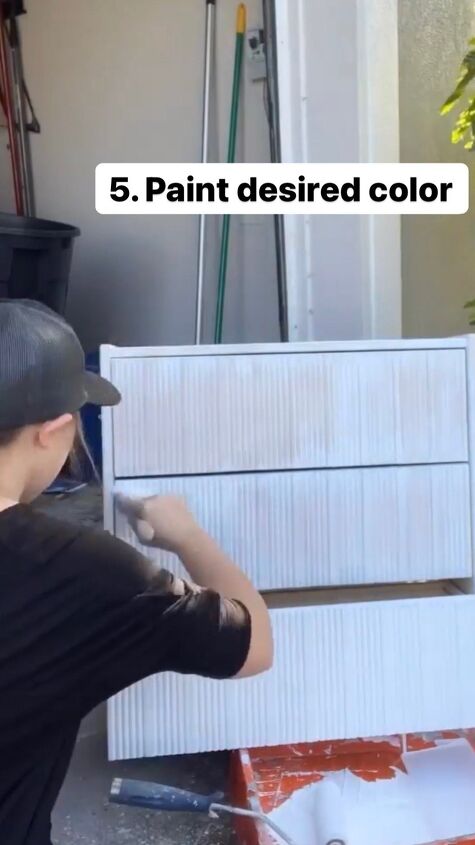
Step 5: paint! I used white to really look like the West Elm ones but you could get creative! Any color would be stunning.
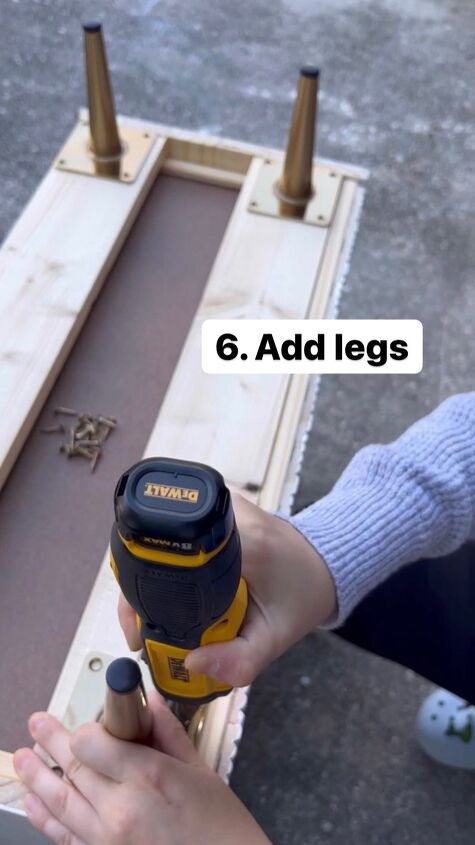
The legs really pulled it all together! Love the brass.
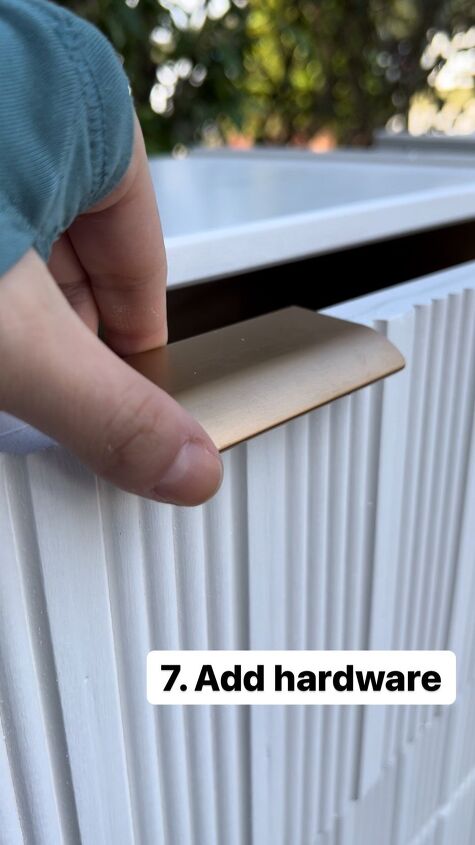
Last but not least, hardware! Simple edge pulls add so much modern elegance to this piece.
Resources for this project:
See all materials


Comments
Join the conversation
-
Awesome! Love it!👏👏👏👏
-
Would you please break down the total cost-
nightstand, legs, decorative pulls, paint, trim pieces?
Thank you. It looks great!!


Frequently asked questions
Have a question about this project?
Looking down from above front, did the flutted wood bring the drawerfronts out past the top of the chest?
I think your idea is genius.