


DIY Router Table (Safe & Accurate)
6 Materials
$84
8 Hours
Medium
Build this very safe and super accurate router table for a fraction of the cost of a name-brand version.
Cut both pieces of the MDF sheets
- Cut the 3/4" thick MDF to its final dimensions: 20" x 36" (or whatever size you choose)
- Cut the 1/4" thick MDF sheet an inch larger in all directions.
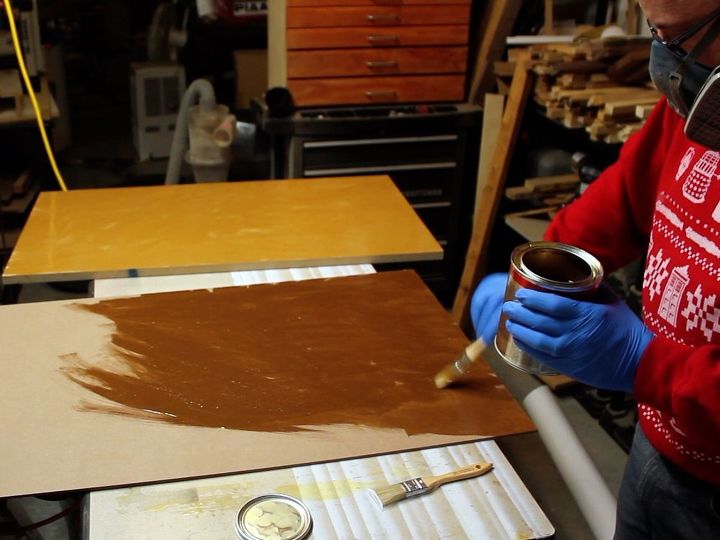
Bond both MDF sheets together
- Apply contact cement to both pieces of MDF. Let the cement dry. When it's tacky to the touch, it's ready. That should take approximately 30 minutes.
- Place small pieces of scrap wood on the thick base. Align the thinner top piece.
- Remove the scrap wood and apply downward pressure to bond both boards together.
Trim excess material
- Use a router with a flush trim bit to remove the extra 1/4" MDF material.
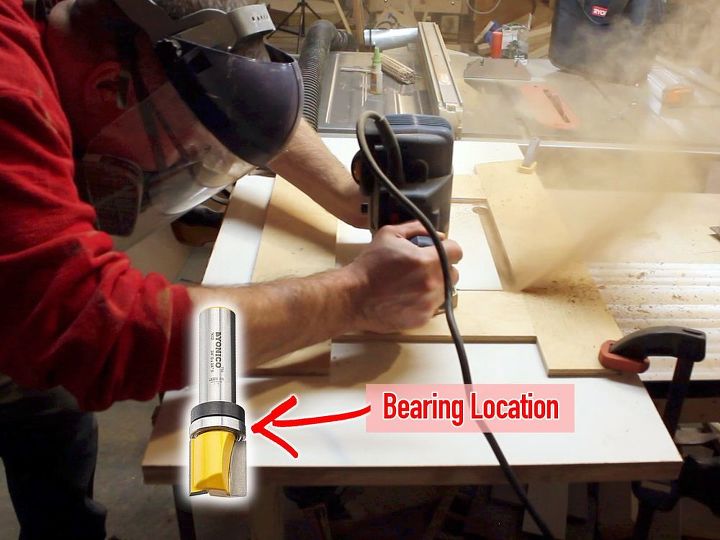
Pattern
Use 3/8 inch thick plywood to create a pattern with an opening the size of your router plate.
Ledge
The router plate needs to sit on a ledge within the table surface.
- Use a router with a pattern bit to remove material. The bit should have a bearing between the blade and the shank, that way, the bearing will ride along the plywood jig. Set the depth of the bit deeper than the thickness of the router plate. All router plates should be 3/8 inches thick... measure yours to be sure.
- Remove the center by cutting along the inside edge with a jigsaw.
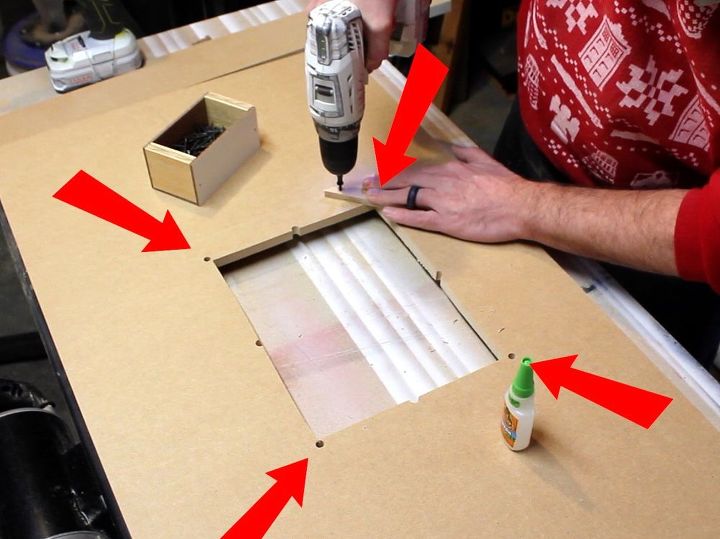
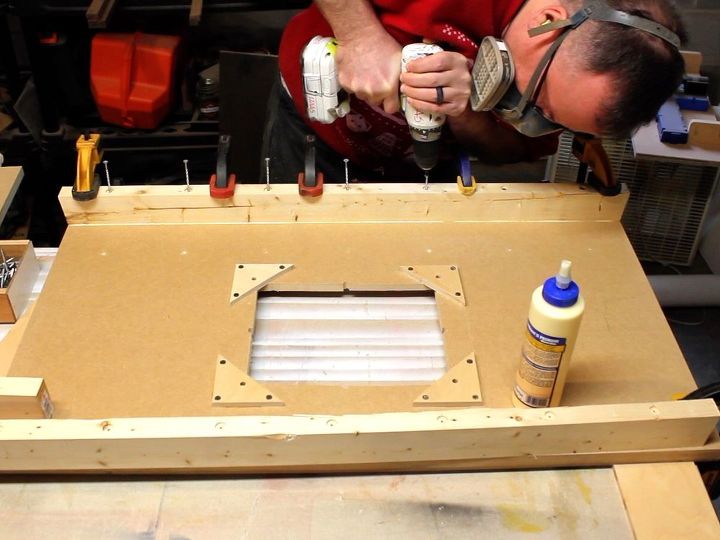
Reinforce router plate area
- Cut a section of the 3/8 inch thick plywood into triangles. Exact size is not critical.
- On the underside of the table, cover the corners with this triangle and secure them with small wood screws. I also used CA glue but the CA glue was likely unnecessary. However, it certainly doesn't hurt to use CA glue in addition to screws.
Reinforce the table surface
- Cut two sections of 2x3 lumber to the length of the table.
- Glue the lumber to the underside of the table and apply with deck screws.
Create the table legs
- Cut four pieces of 2x3 lumber for the legs. The length you choose it up to you.
- Set your table saw's miter guide to 5 degrees and cut the legs to size.
Install the table legs
- Apply wood glue to the legs and hold them in place with clamps.
Use deck screws to secure the table legs to the reinforcing frame.
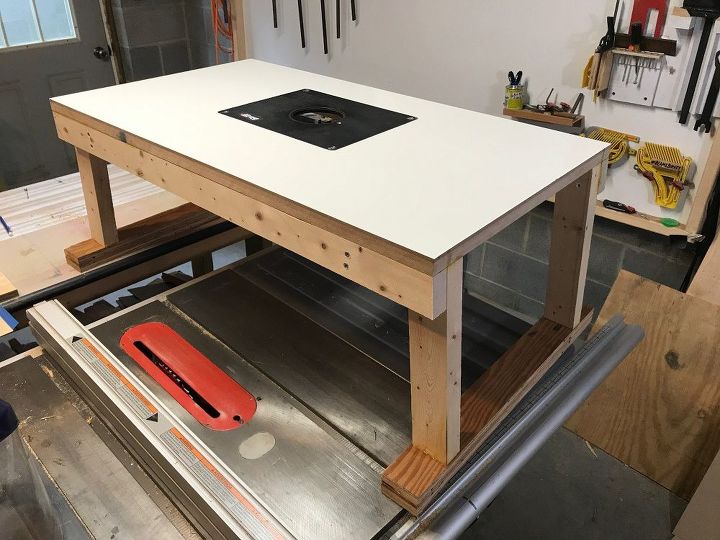
Installing your router
Follow the router plate's instructions for mounting your router. Each manufacturer has slightly different steps. Don't worry, it's easy!
Power
Use an electrical power strip to easily turn the router on and off. Position this power strip where it cannot be accidentally powered on, ideally on the legs of the router table facing away from the front.
Fence
Use a thick piece of lumber as a fence. Ensure the lumber is flat! Use clamps to secure the fence to the table. Although this won't look as fancy as professional router fences, rest assured, it will absolutely be as accurate... if not more accurate!
Secure your table so it never moves
Clamp your router table to your workbench before using it! Even better, use screws to secure it.
Your DIY Router Table is now ready to use! Wooo!!
{
"id": "4614189",
"alt": "",
"title": "",
"video_link": "https://www.youtube.com/embed/qQnhVIfW324",
"youtube_video_id": "qQnhVIfW324"
}
{
"width": 634,
"height": 357,
"showRelated": true
}
This table is very sturdy and will give you a lifetime of accuracy! It's inexpensive too!

Want more details about this and other DIY projects? Check out my blog post!
Comments
Join the conversation
1 comment
-
This is a fantastic tutorial!! And I'm loving that tardis Christmas sweater


Frequently asked questions
Have a question about this project?