


A New Pallet Table for Hometalk

by
Zev Kornbluh
2 Materials
A few weeks ago I found a plastic table laying outside the dumpster across the street from my house. It was a very heavy outdoor white plastic table. The metal legs were hurting and the plastic top was broken . I took it into my work shop and removed the entire top. I looked at the perfect folding system and started thinking about how I could fix the legs without my welder from work. Being home after knee replacement has given me the opportunity to embark on challenging and enjoyable projects such as this. "Hmm, no welder," I thought to myself. "Somehow using wood with long rivets I shall overcome." I was able to get the frame back to full functionality. The topless table had been sitting in my workshop for a short time, when I received an email from Hometalk. They were inviting me to a challenge to DIY something for their office. I knew this was a perfect opportunity to give that old junky table a new chance at life.
My mind began racing. Old table , Hometalk logo , get the grandchildren to draw the letters (I am no good at that), what wood will I use for the top? I asked my wife to drive me around to my favorite old pallet piles. We found 5 pallets. My wife saw trash but I saw gold. I took the pallets apart carefully.
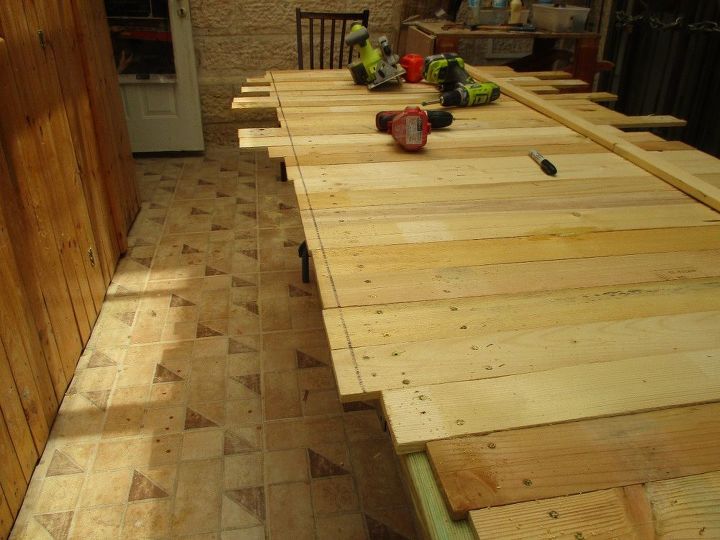
With the help of a saw, a 4.5 inch grinder with velcro sanding disks, and some tender care, the wood was good as new. I picked and matched each of the boards for its grain, color, and knots. I wanted good placement of knots for good color once it would be varnished. It was also important that each of the boards be straight so as to partner up to its neighbor without leaving gaps in between pieces. I don't put in a screw without first drilling a hole, so the wood does not split or crack. Most of the drilled holes are then tapered countersunk so that when I sand I don't hit or grind the screw tops. The sparks are a fire hazard around paint and turpentine. Next I sanded with a robo vibrating sander and use a quick drying wood filler that I made using a mixture of super glue and sawdust (that way it matches the wood color exactly). I let it dry for 2 hours, then fine sanded again.
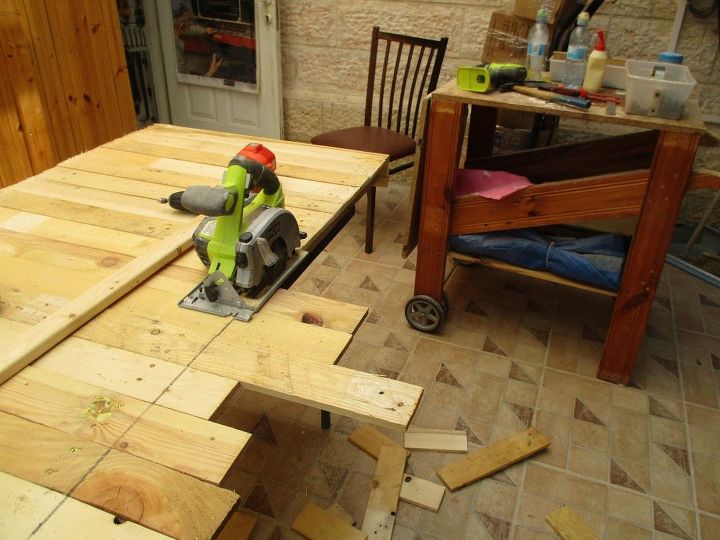
I trimmed or cut off all edges of the wood that were sticking out with a circular saw and sanded the edges.
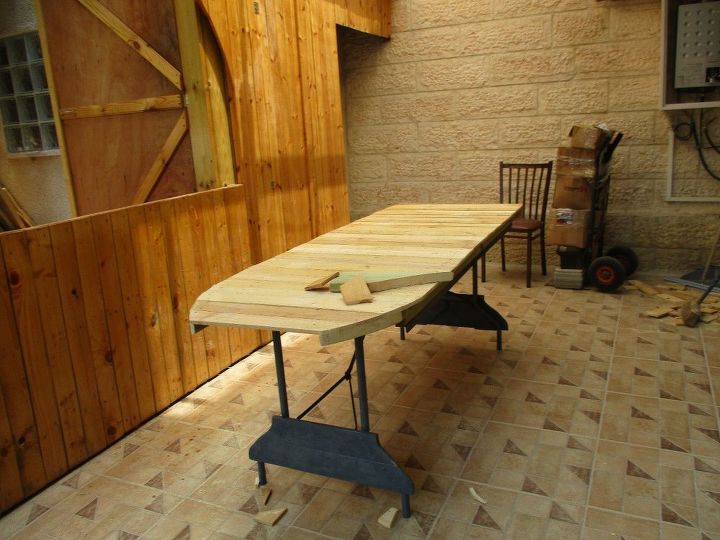
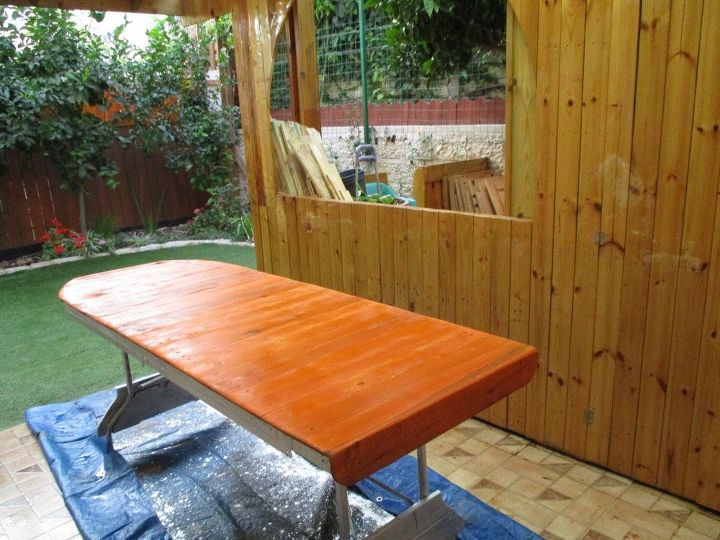
Finally, I washed the table, waited a few hours and stained lightly with just one coat.
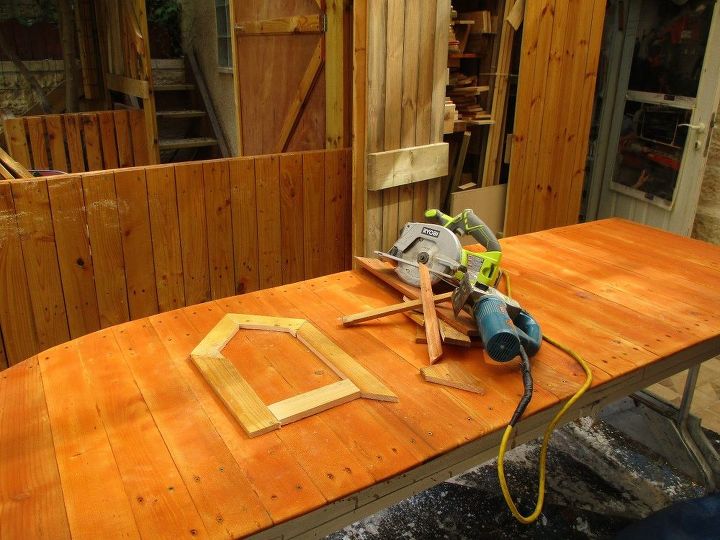
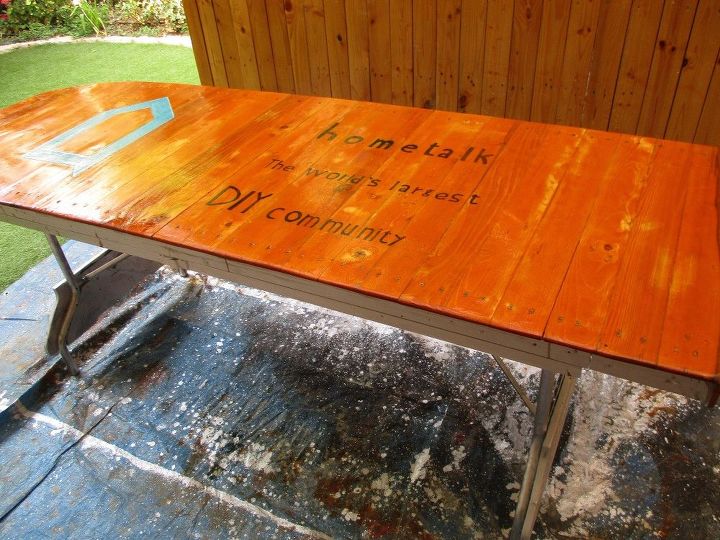
Now it was time to add the Hometalk logo and the wording. I made up a stencil out of wood for the logo, penciled around it, and sanded out the light stain.
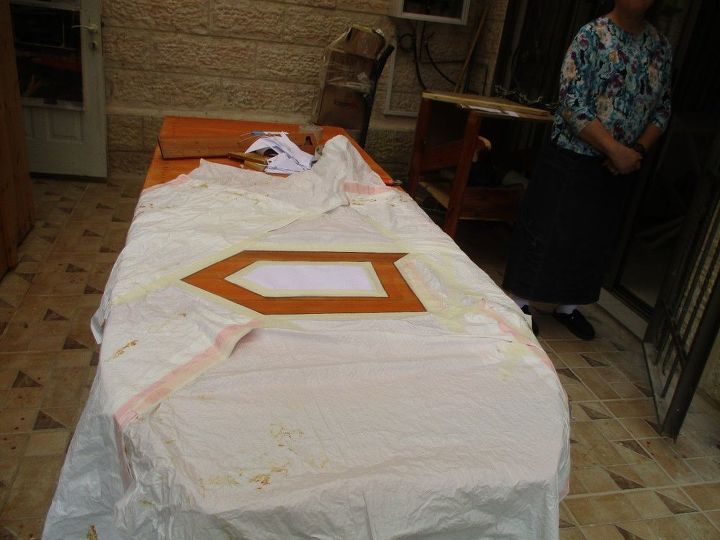
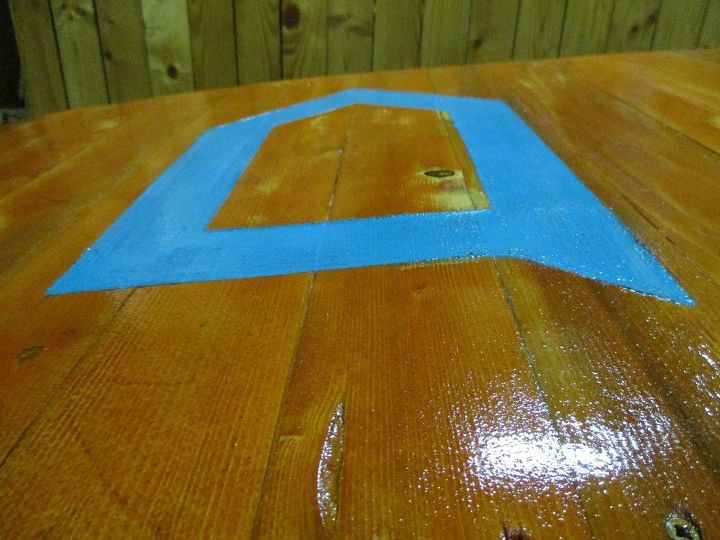
Then I taped up the wooden logo and covered half of the table completely with plastic to prevent getting a blue mist on the table stain. I painted the blue logo really heavy.
I also wanted to include that Hometalk is "the largest DIY community in the world". Although I wasn't so keen on doing the lettering myself, I grabbed a few pencils and tried my hand at outlining the letters.
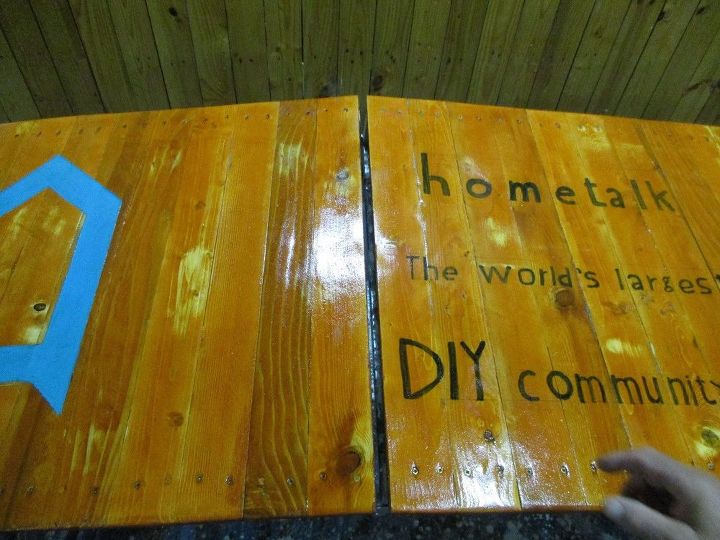
Once the logo and wording were finally finished. I added a coat of varnish, then sanded and varnished 2 more times. The first coat on soft pallet wood always is absorbed into the wood and needs a few more coats to get a good shine . The table is very heavy, so I added handles on the sides to carry it with once folded up.
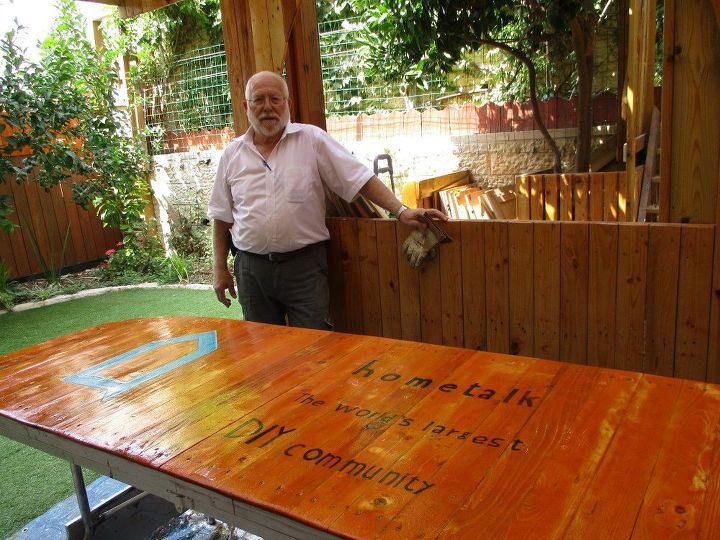
And that's about it - from dumpster to the Hometalk office - a brand new DIY table. I hope the Hometalk team likes it. And I hope you have enjoyed the story.
Comments
Join the conversation
2 of 13 comments
-
Love the teamwork that went into this cool table! And yes, enjoyed the story, too!
-
Oh, my goodness! I love how this came out, and I want it! ;-D I love your small garden. it's so quaint.


Frequently asked questions
Have a question about this project?