


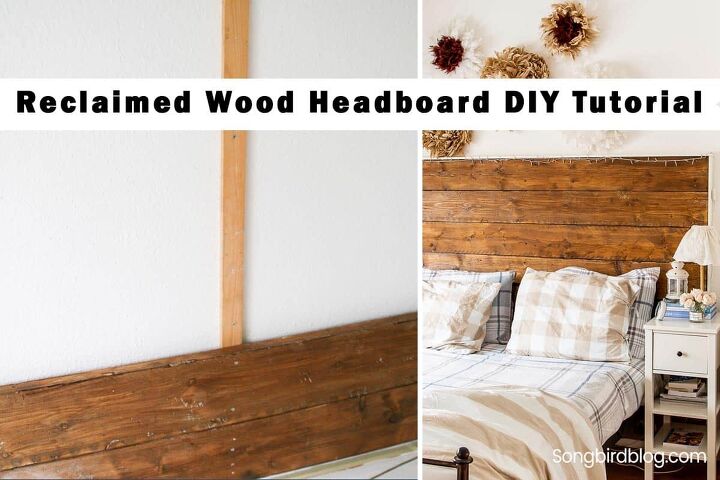
Reclaimed Wood Headboard DIY Tutorial
This post shows how to build a reclaimed wood headboard for a queen-sized bed. This DIY reclaimed wood headboard is the perfect rustic decor for a master bedroom.
I struggled a long time with what to do with our bedroom who was in desperate need of a makeover. I had a shortlist of things I wanted (actually I better call it a Long List), but it took me forever to come up with a plan. I knew I wanted some texture and color in there, some raw materials with a ‘tough’ look to counteract with the more romantic bedding I like so much.
The two people sleeping in this bedroom don’t actually see eye to eye when it comes to decorating. Our styles and preferences couldn’t be more different. Modern, slick, and cool on the one hand, while my style is more romantic, vintage with a beachy cottage vibe.
I decided that I wanted to come up with a way to incorporate both our styles, and settled that a rustic, industrial look would satisfy us both.
And that’s how I came up with the idea to build a reclaimed wood headboard.
The main materials are:
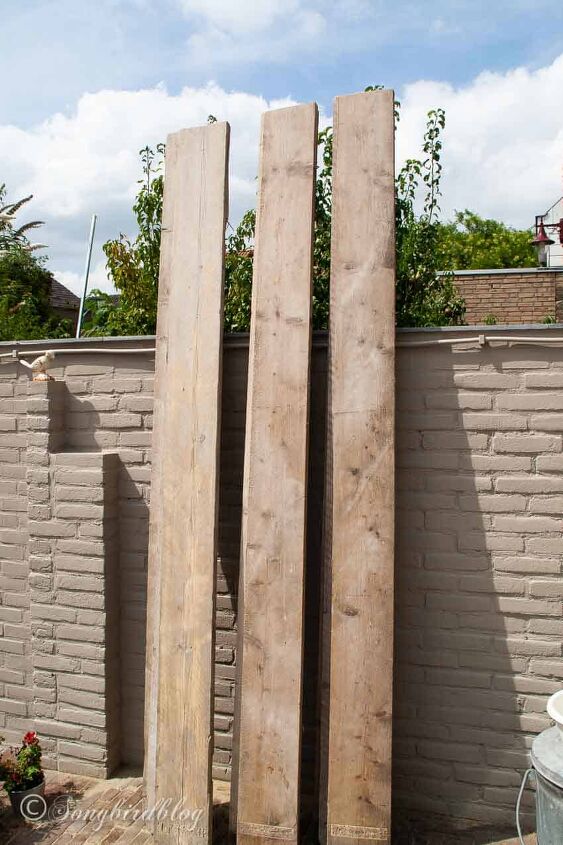
- 8 Scaffold boards (20cm wide 2 m long). We found ours at a salvage store.
- Stain
- Leftover trim
- White paint
- Wood screws
The only thing I had to buy was the scaffold boards. I needed so little of the other materials that I could use leftovers from other projects. Win!
The tools you will need to build a headboard from reclaimed wood:
- Orbital sander
- Saw, this can be a hand saw, but a powerful jig saw or a miter saw works faster.
- Laser level
- Battery powered screwdriver
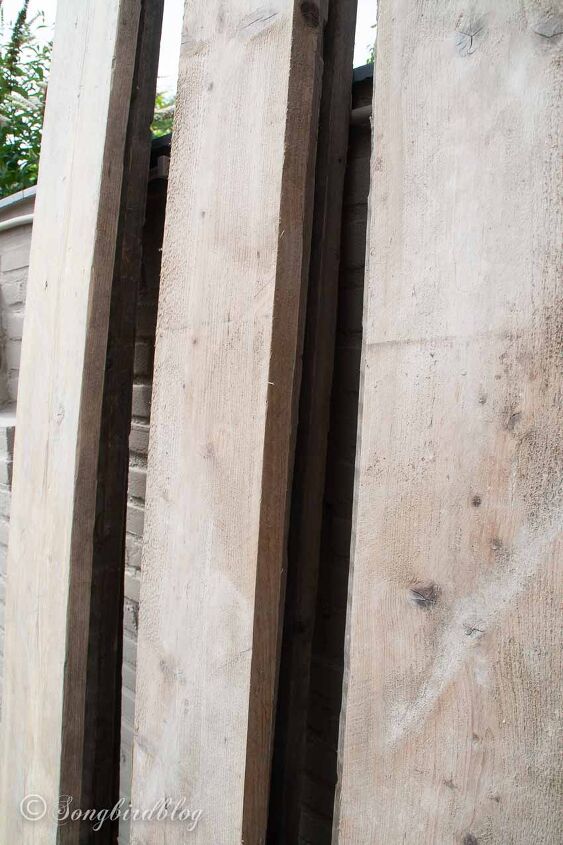
The bare wood planks that we used come from building sites where they have been used on the scaffolding. Although I didn’t know that at first.
Building instructions / Construction directions
- Step 1: Cut To Size
- Step 2: Sand and Stain
- Step 3: Placement
- Step 4: Attach boards to wall
- Step 5: Make holes for outlets
- Step 6: Frame the headboard
The first steps involve preparing the repurposed wood for the build.
Here is a closeup of the old wood. Can you see how banged up and damaged it is? There are stains and spatters and dings and scratches everywhere. The whitewash you see comes from cement residue. Love it!
We first cut the wood to size with our miter saw. We only took about 20 cm off on one side. You’ll have to decide for yourself what dimensions will look best in your room and with the size of bed you have. If you are not sure how to figure that out I suggest taping some brown paper to the wall as a mock-up, that will help see it.
I then gave all the boards a proper sanding with my orbital sander. I made sure they were as smooth as I could get them. Most importantly I ensured that there were no splinters anymore. Who wants to get splinters in their hands in the bedroom. Not me.
Next up was deciding on the finishing of the boards.
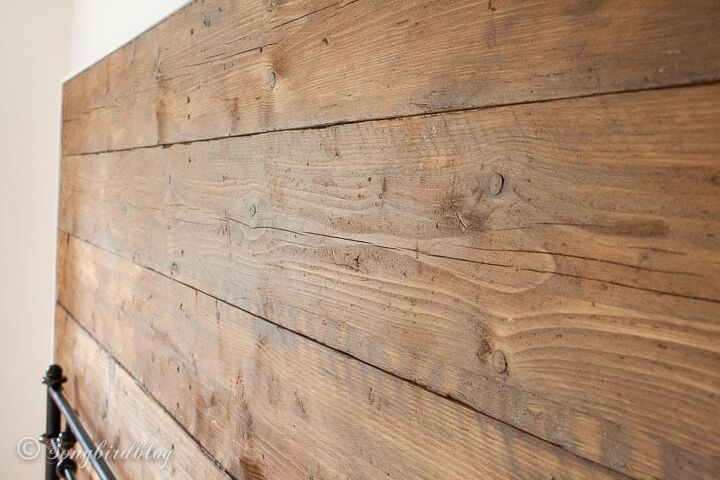
At first, I couldn’t make up my mind if I wanted to go the whitewash route or not. As you can see I decided not to go for white for a change. There will be a lot of white in the bedroom anyway (my wardrobe makeover is one of those new white elements in there), and I wanted to emphasize the wood. So I opted for a stain instead.
I choose a medium-dark stain I had left from a previous project. I think it is a dark walnut color, but I am not sure. I put on two coats, lightly sanding in between the coats. When you stain bare wood, remember to always work with the natural wood grain.
Don’t you just love the knots in that wood and all the rich variation in the color?!
The third step in the DIY headboard project was actually to start building this old wood headboard.
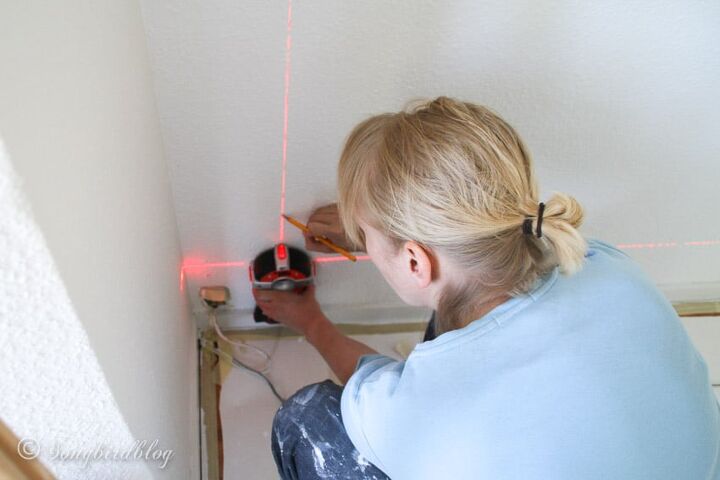
The first thing was to mark the places where we had to screw supports to the wall.
In our European home, there are brick walls that are old and brittle and not fun to drill into at all. If you have an American-style home, you can probably skip this step and attach the boards directly to the studs.
With my laser tool, I marked the spots where the supports had to go.
We secured three supports onto the wall and then screwed the planks onto them.
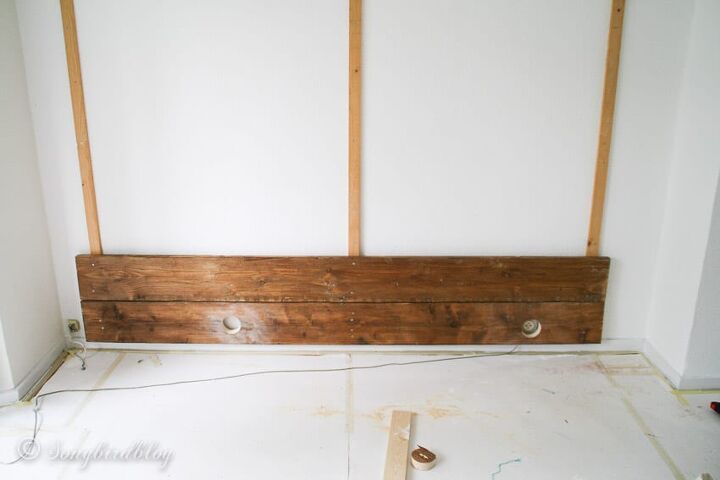
We secured three supports onto the wall and then screwed the planks onto them.
As you can see we drilled some holes for the power outlets in the bottom plank.
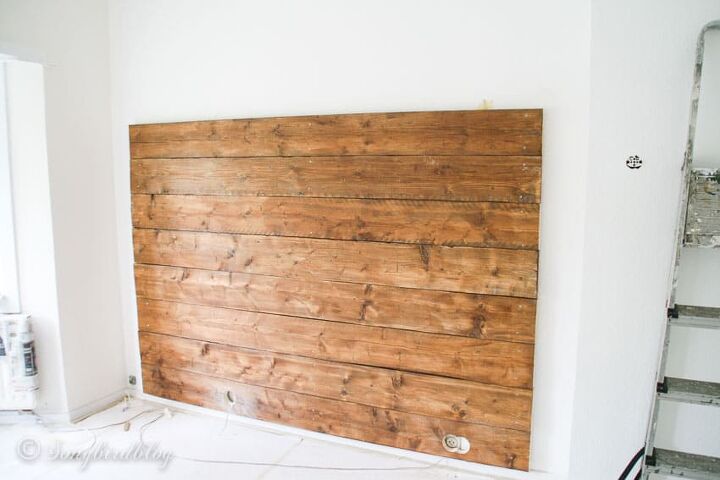
I used 8 planks and created a headboard that was almost as tall as I am.
Even without anything else, and all the building mess still in the room I am already smitten with my new planked wall.
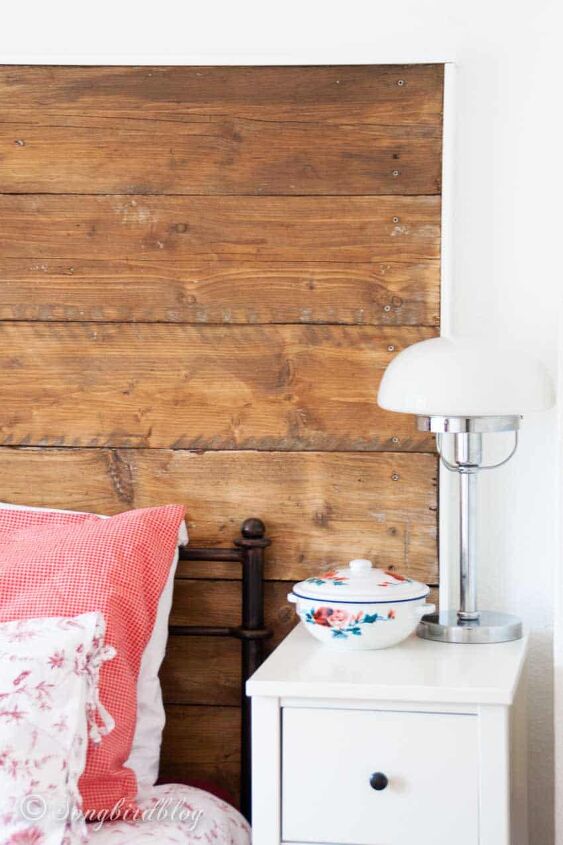
To finish the headboard we added some white-painted trim on the edges. We simply nailed it in with very small nails and a nail gun.
There she is, in all her reclaimed glory, my new wood headboard.
This turned out so much better than I anticipated and exactly as I had hoped.
My rather romantic metal bedframe and the modern chrome table lamps from the man are married very nicely together by my rustic and touch wooden headboard.
Styling a reclaimed wood headboard
Let the fun begin. Let’s see how we can dress up this repurposed headboard in different styles and in different seasons.
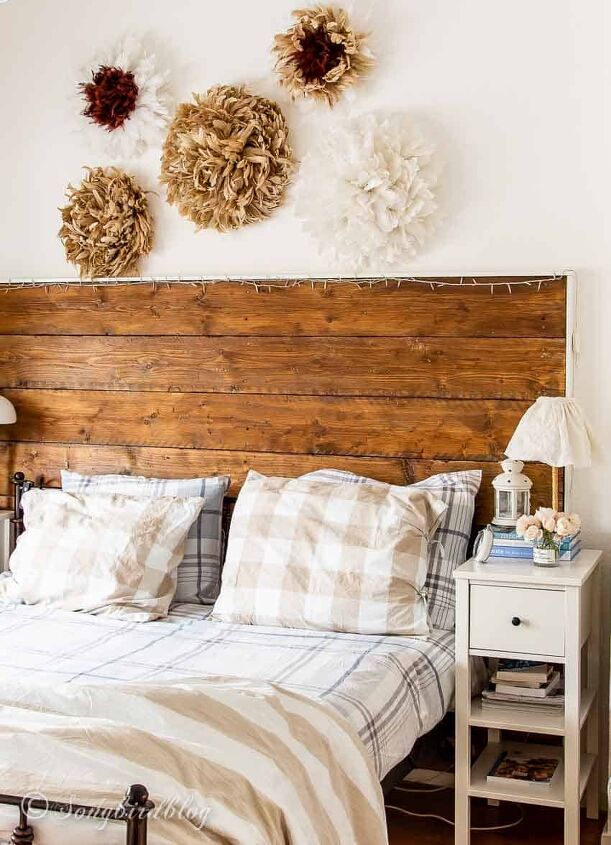
Because of our high ceiling, there was plenty of room left to hang things over the headboard even though that was quite tall by itself. My DIY juju hats feather wreaths felt right at home for one.
This headboard moves right with me through the seasons. I love decorating it for Christmas with starry Christmas lights or with festive banners and ornaments.
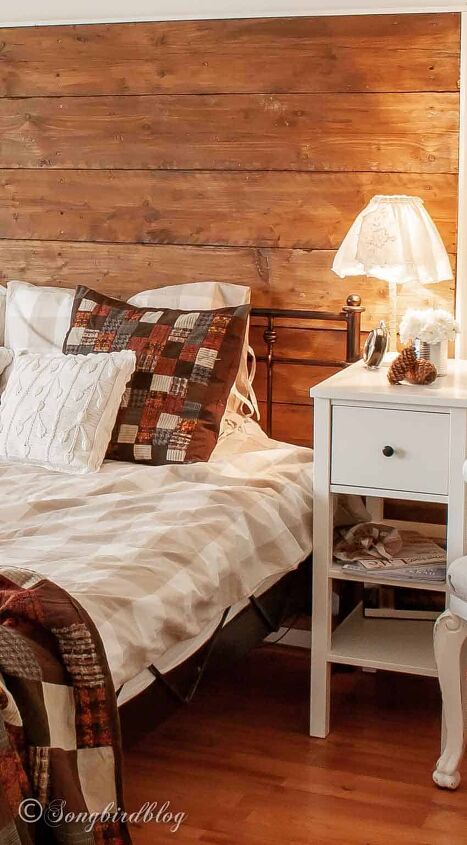
It also works especially well in fall with its rustic cabin vibe. And heck it is perfect in summer too.

The above bedroom styling with a white and blue summer vibe also shows just how well this rustic headboard works with vintage styling. I love the contrast and the companionship between the styling.
I love the end result. It gives instant character and warmth to the room.
I am so pleased with how this project turned out and I already know it will be one of my favorites for years to come.

Comments
Join the conversation
-
That is a beautiful headboard. The white trim completes the look. No rough end grain edges. A lot of people make headboards and wonder how to hang them on the wall. French cleats, hooks, etc. Yours is a great and simple option. Great share.


Frequently asked questions
Have a question about this project?