


DIY Pottery Barn Inspired Photo Ledge Shelves
DIY Pottery Barn Inspired Photo Ledge Shelves
Build Pottery Barn inspired photo ledges for a third of the price with this easy tutorial
A question I get asked a lot is if gallery walls are out of style now…

That’s a tough one to answer because it is both a yes & a no.
Yes, I think the clustered throw everything at the wall including the BLESSED wall signs are in fact out (don’t hate me please). 😅
But I think there are still some amazing ways to display family photos & artwork that don’t look so…cluttered.
There are however two ways in particular that are my absolute favorite ways to display all the photos:
If you like photos & art to hang directly onto the wall the first option is for you!
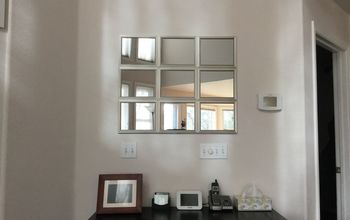
I simplified the method so you don’t even have to do any crazy measuring, you can find out how here!
The second option, the photo ledge shelves, are perfect if you prefer something a little less structured & want the option to swap out photos & artwork easily.
The best part is the photo ledge shelves are super simple & cheap to make.
Plus they only cost a third of the price of their Pottery Barn counterparts!
Supplies:
- (1) 1×3 Pine Board
- (1) 1X4 Pine Board
- (2) Lattice Strips
- Wood Glue
- 1 1/2″ Brad Nails
- Clamps
DIY Pottery Barn Inspired Photo Ledge Shelves
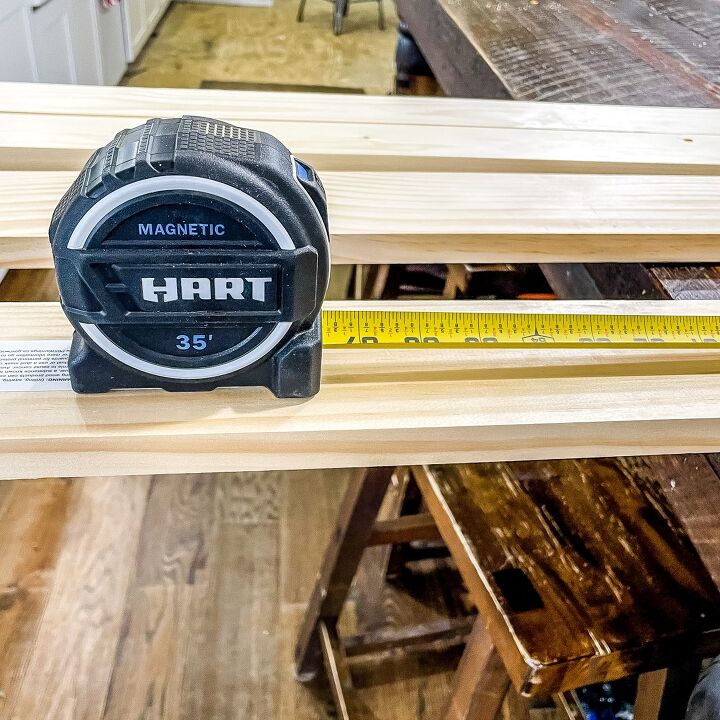
First I cut down all my boards to the length I wanted the ledges to be.
I went with two shelves, both 7′ long.
You can cut them with a miter saw or handsaw.
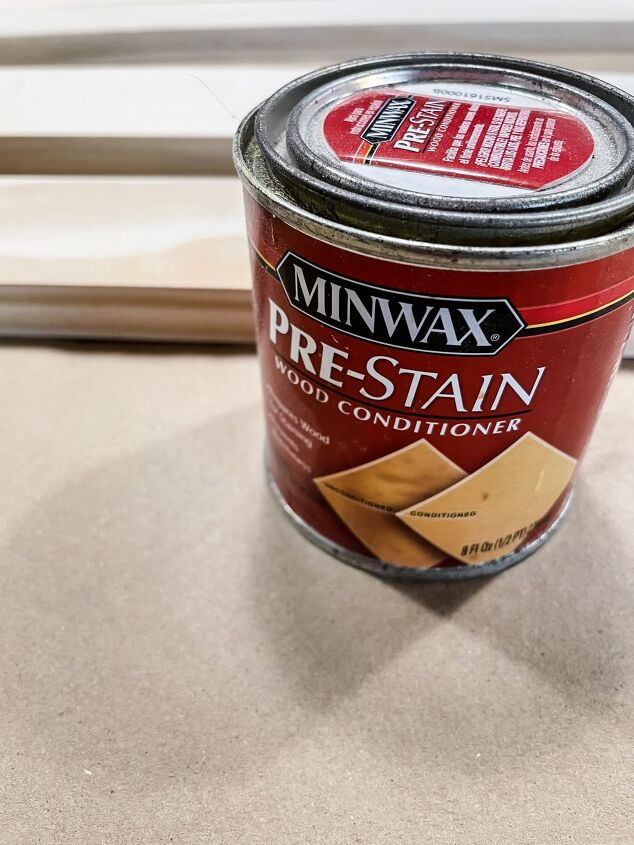
Next I used one coat of Pre-Stain & two coats of Natural stain by Varathane.
Assembly
Now it’s time to assemble the photo ledges!
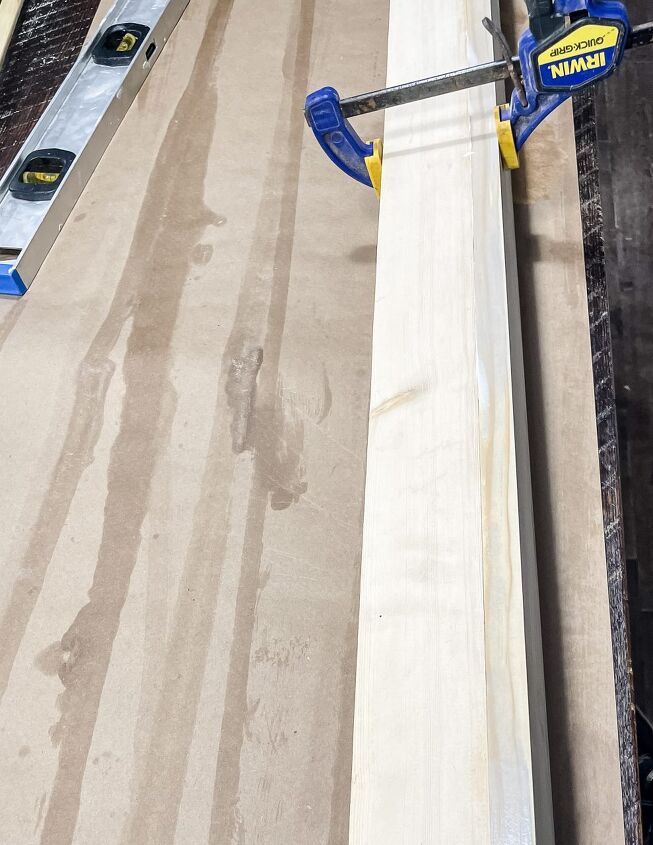
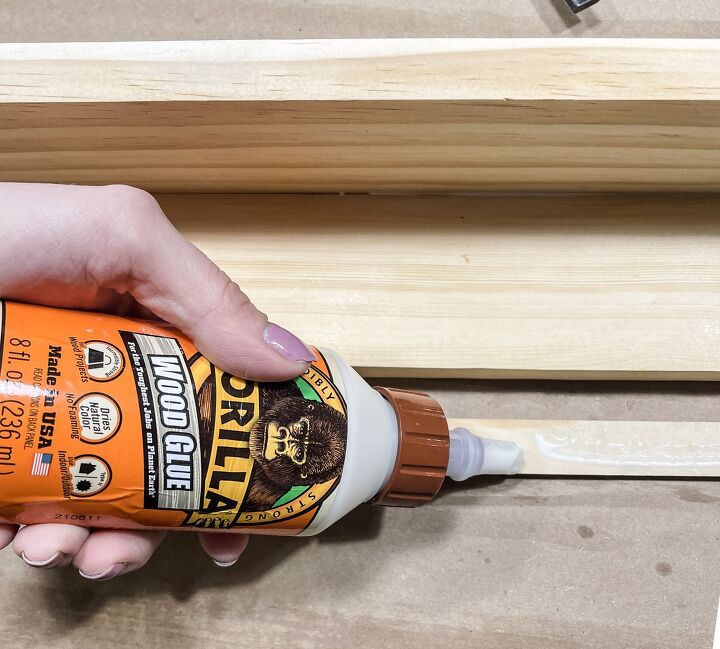
Start by adding wood glue to the edge of the 1×3 & place secure it to the 1×4 with clamps.
They should form a 90 degree angle.
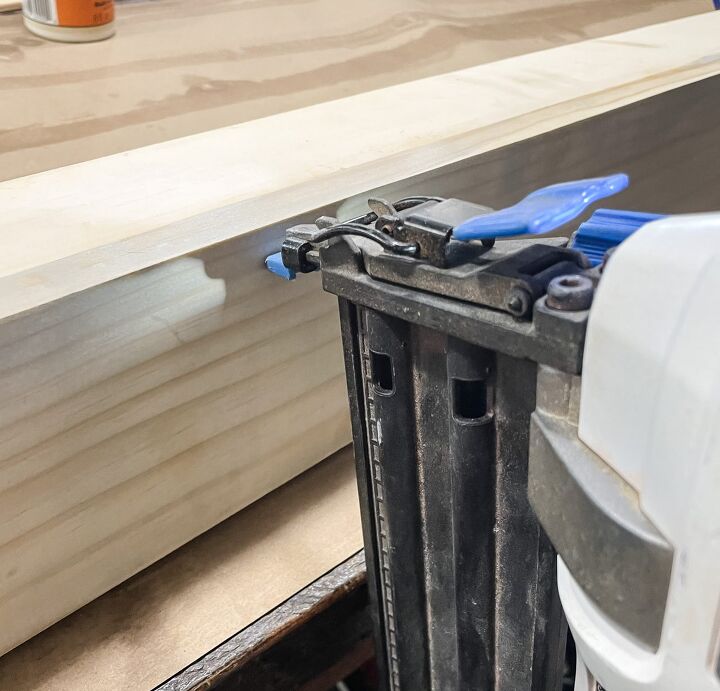
Attach them together using 1-1/2″ brad nails.
Nail them in from the bottom of the 1×4 into the 1×3.
Once the two boards are attached, add the first piece of lattice to the edge of the 1×3.
Use wood glue and clamps to secure it.
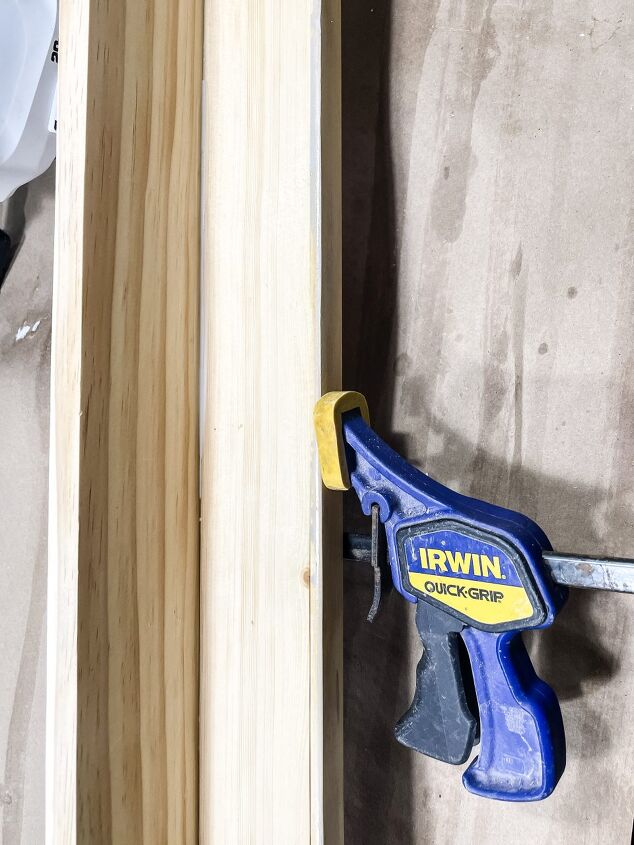
The lattice is kind of thin & I didn’t wanna risk it splitting with nails…
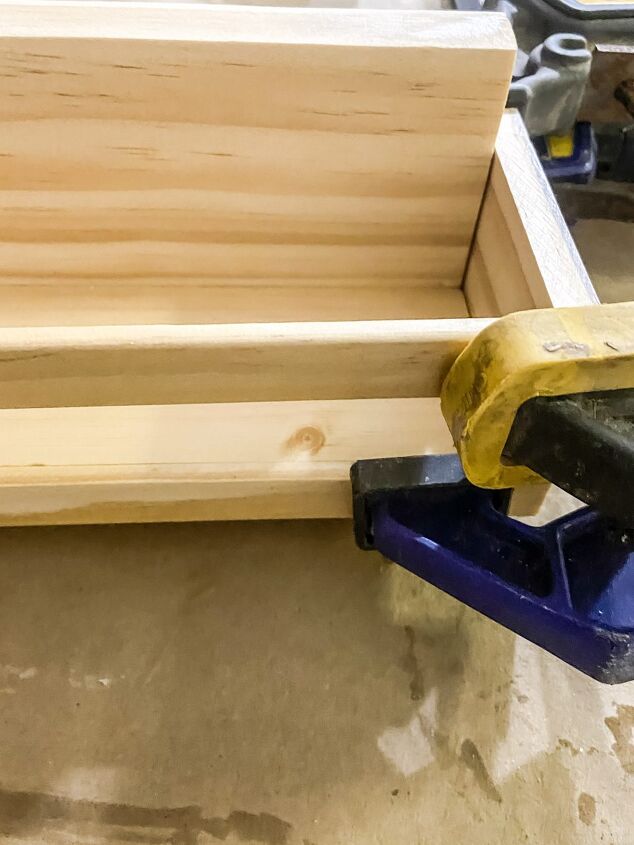
The last pieces that need to be attached are thin scrap wood squares to the sides of the ledge & the last piece of lattice.
The scrap wood sides are necessary to support the final strip of lattice.
Attach the lattice to the top of the scrap wood with wood glue & clamps.
Mounting the Photo Ledges

These are the easiest photo ledges to attach ever!
All you need is a drill, screws, a level, & a stud finder.

Once I found & marked the studs I drilled wood screws into the ledges hitting at least two studs.
This is really a two person job when handling shelves this long, one person hold shelf with the level sitting on top & the other screwing it into the wall.
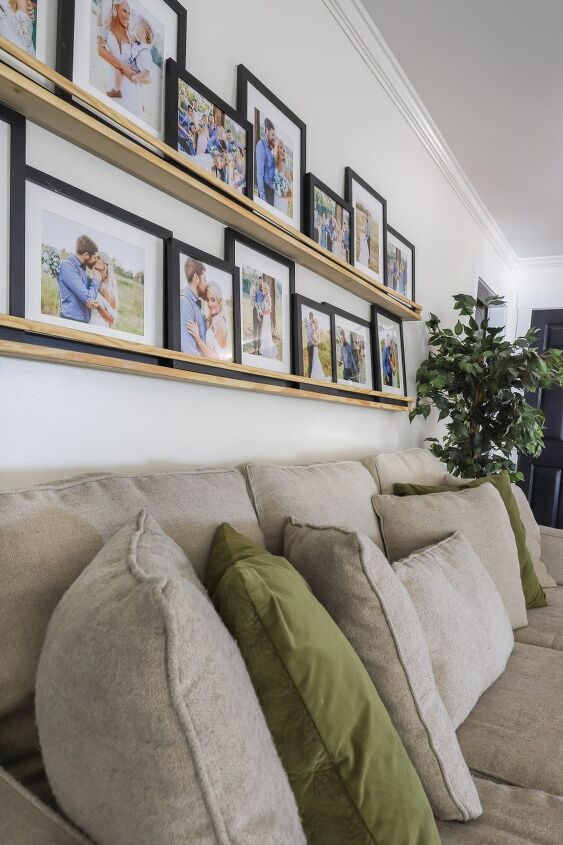
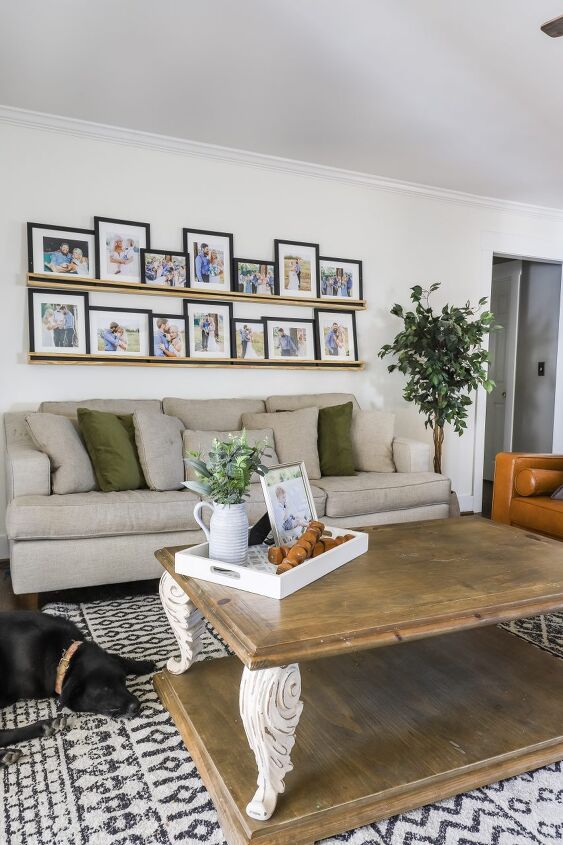
These photo ledges fit the space & style of the living room perfectly!
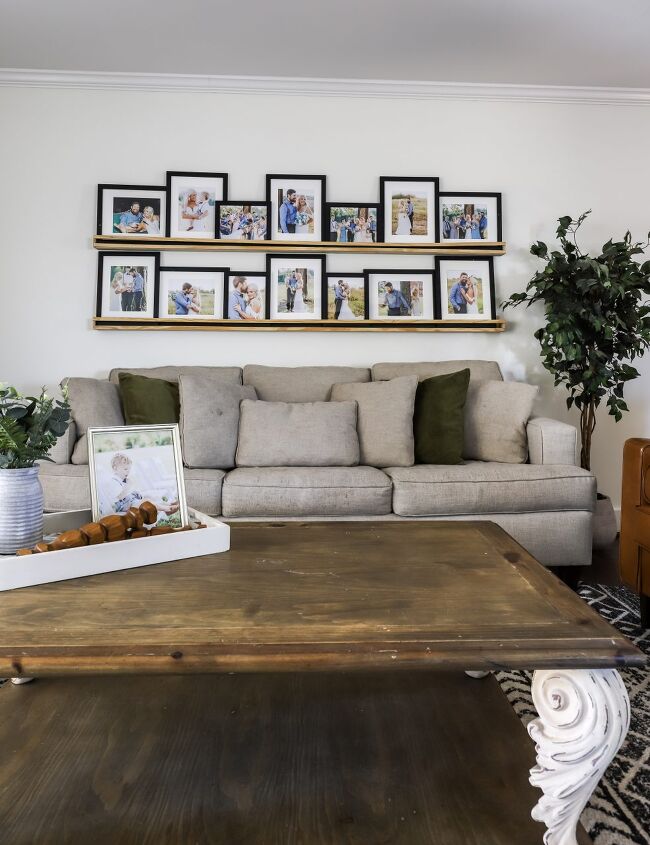
I am digging the contrast of the light stain & black frames too.
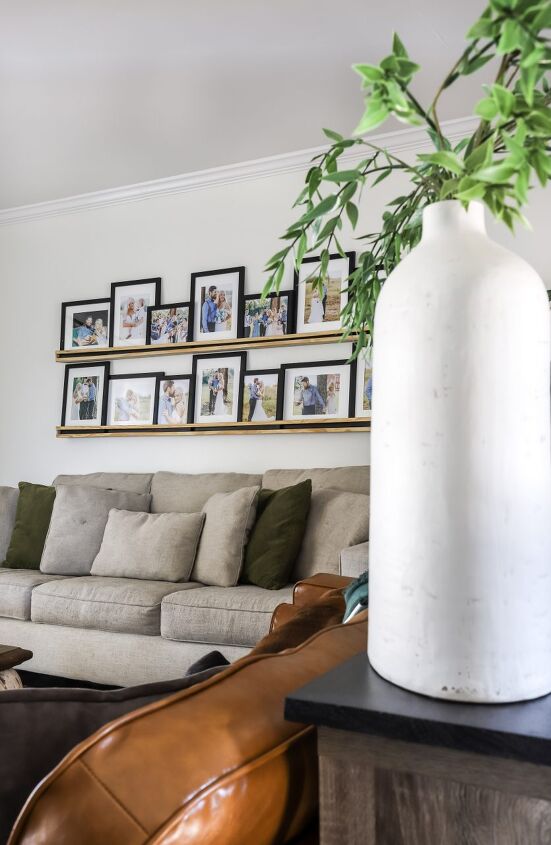
They are large enough to hold all our family photos & balance our new arched bookcases that are on the opposite wall.
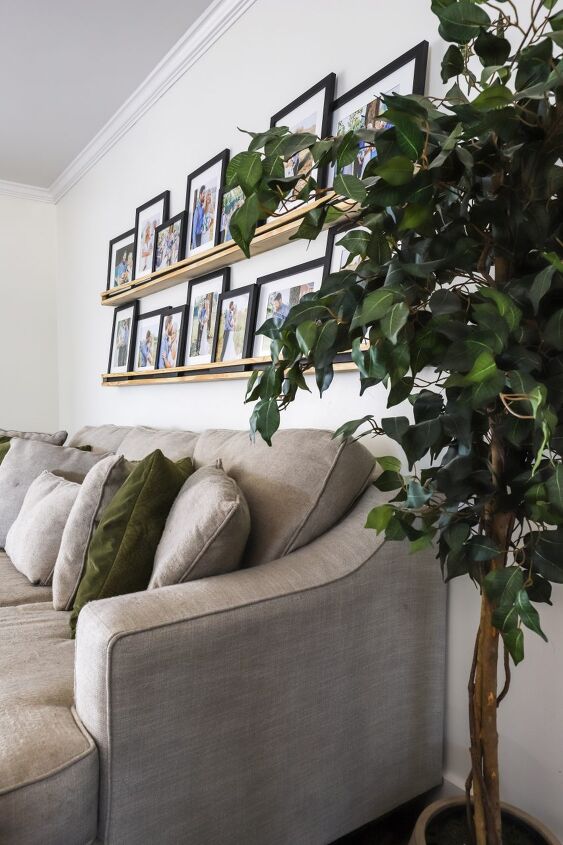
I am a big fan of changing out photos often & these ledges are going to make it super easy!
If you wanna see another way to create photo ledges you can find that tutorial here!


Comments
Join the conversation
-
I absolutely love this idea!
-
To avoid any chance of a frame falling & clobbering a couch sitter, consider using 'museum wax' to lightly adhere each frame to the shelf & maybe a blob behind each to adhere to the wall. Good for tchotchkes on tables that might get knocked into, too. Used in earthquake prone areas, too. Museums use it because it doesn't permanently stick to things, nor does it grease mark them.


Frequently asked questions
Have a question about this project?
And you aren't thinking that 14 pictures of you isn't overkill?