


How to Remove Tarnish Using Something So Safe, You Can Eat it!

I'm sure we all have some tarnished metal lying around. Maybe it's the hinges on a cabinet you're refinishing, or your neglected front porch lights. How do you make them look like new again? And better yet, how do you do it without using any harsh, smelly, dangerous chemical compounds?
By the way, if you love cleaning hacks, you might like some of my other posts:
How to Make a Pot Scrubber out of Produce Bags
DIY Swiffer® Pad Made out of Old Blue Jeans (with free printable PDF pattern!)
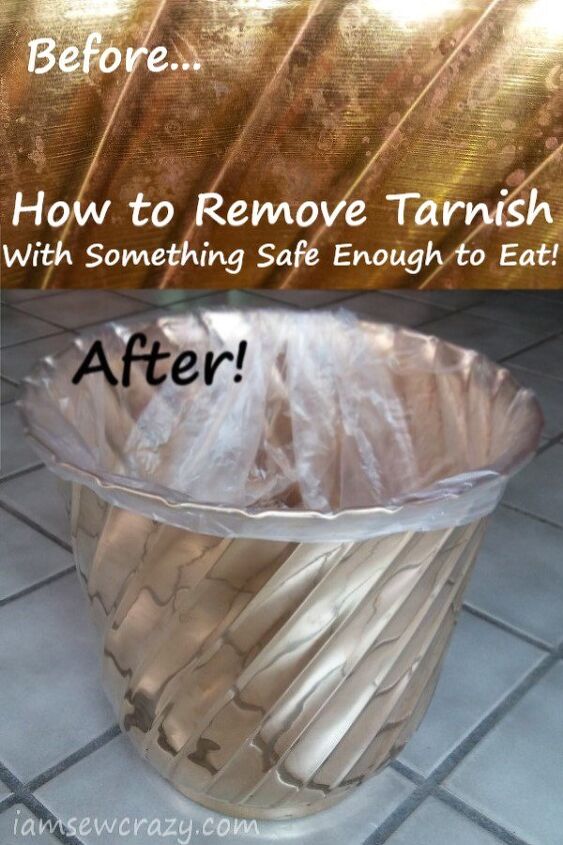
This simple tarnish-removing trick works on more than just belt buckles. It’s removed tarnish from all kinds of metal objects, including jewelry, my house numbers, hinges, and even a large metal planter that I wanted to use as a trash can. It’s ideal for items that are made of solid brass, but I have used it dozens of times on different kinds of metals, and the results have always been impressive.
If you are not sure what kind of metal your item is made out of, you can still try it, but be aware that the color of the metal underneath the tarnish might not be exactly what you were expecting. You may end up with a more copper or silver tone than you originally started out with. And just to be safe, I wouldn’t use it on anything that is special or has sentimental value. I have never had bad results, but since most hardware doesn’t say what kind of metal it is made of, there is a chance that you could end up ruining your metal.
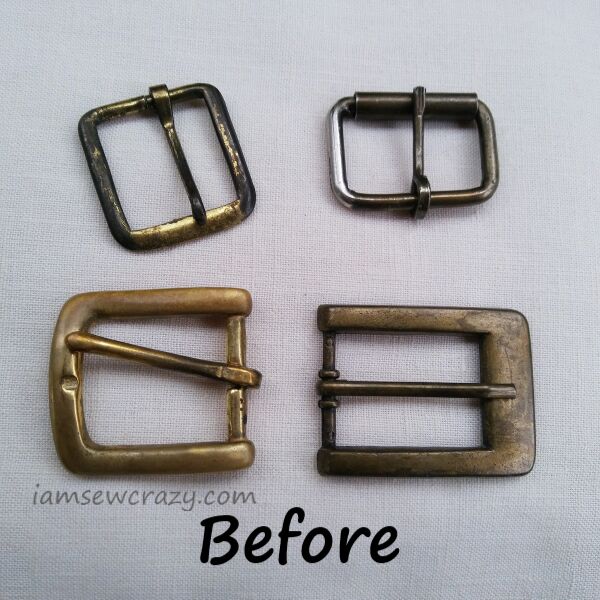
For this tutorial, I am removing tarnish from four random belt buckles that I cut off of old belts.I thought the one on the top left might be a lost cause. It definitely looked the worst to start out with.The one on the top right had one side that already looked silver, and I thought for sure that it would end up silver all over.The one on the bottom left was stamped “solid brass”, and it had the least tarnish of any of them starting out. The others had no writing on them, and I think they are probably a mix of different metals melted together to make an inexpensive alloy – in other words, “pot metal.”The big rectangular one (bottom right) seemed to be plated with a different metal, because it had a few deep scratches, and you can see that the material underneath the plating is silver in color. I didn’t want to remove all of the plating and end up with a silver buckle, but it looked so bad to start out with that I really didn’t have anything to lose.
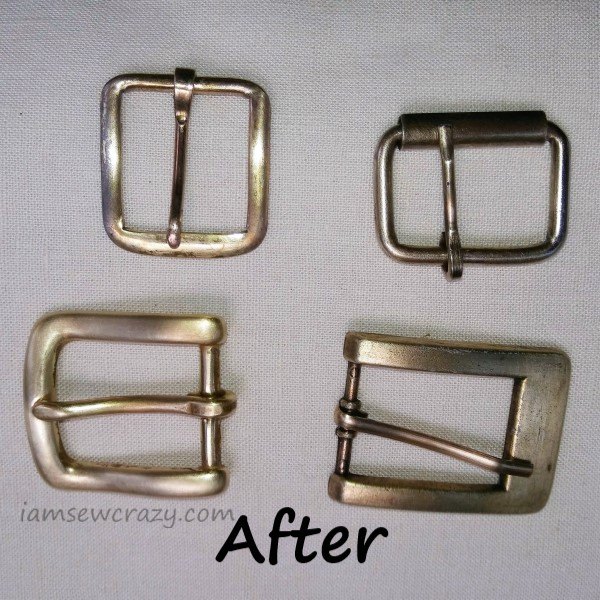
The results are impressive! The big rectangular one actually did great; besides the original deep scratches, the plating is still in good shape and I think it looks a lot better. Even the one I thought might be a lost cause looks amazing now, and I’d use any of them on a new project. So here’s how I did it:
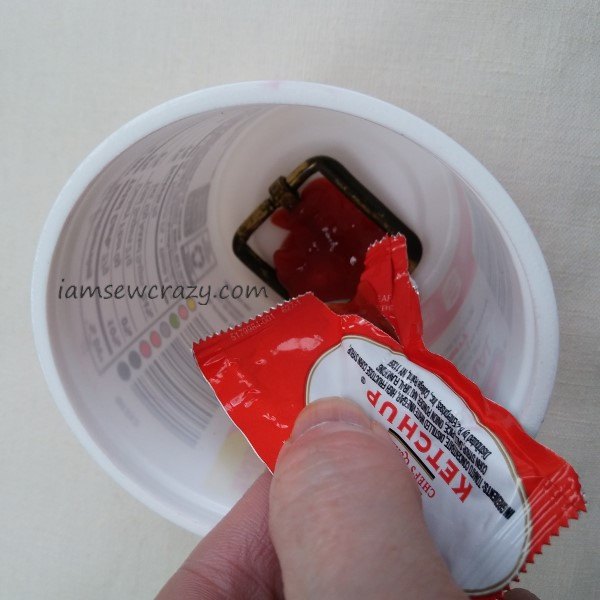
Start by getting a small cup or bowl that is about the same size as the metal object. Place the item inside, and cover it with ketchup. If you have a large metal object that you need to cover, you can brush the ketchup on with a paintbrush. Take care to cover it completely!
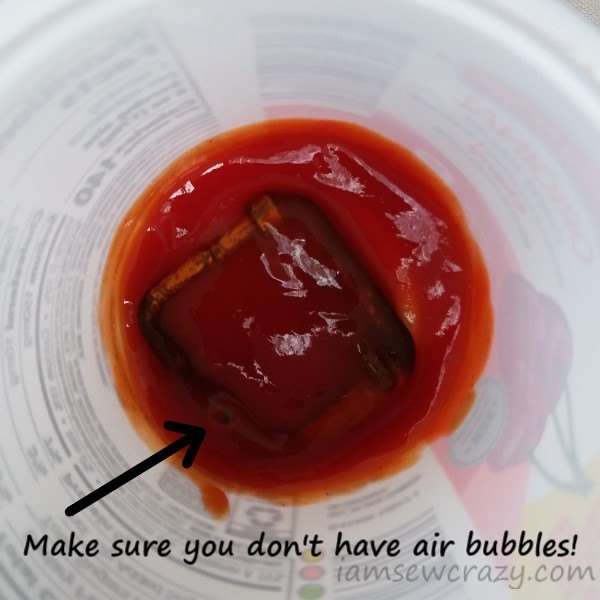
Make sure there are no air bubbles like the one I pointed out in the picture. You can thin the ketchup out with a tiny bit of water if you’re having trouble getting it to cover all of the nooks and crannies.I believe “ketchup” refers to a different food in some countries… for the sake of clarity, I’m talking about tomato ketchup. You probably have some random packets of it from a restaurant (that’s what I’m using).Let the item sit, completely covered in ketchup, for about 10 minutes.
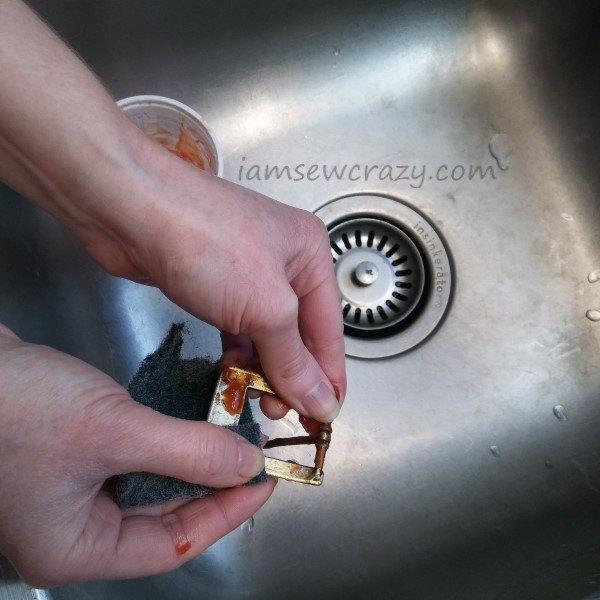
Now take the object and scrub it with a plastic scrub pad that’s safe to use on nonstick cookware. You should notice the tarnish coming off, and the metal shining more and more. Make sure to get in all of the corners and crevices. If there is still some tarnish hanging around, you can put it back in the ketchup for another few minutes and then scrub it again.
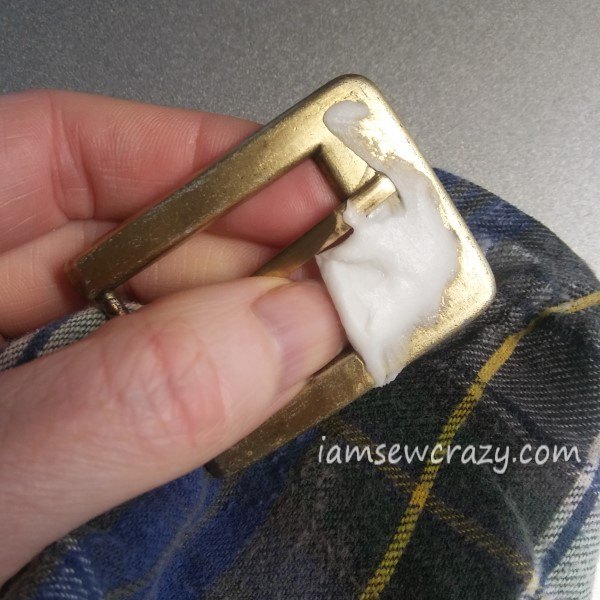
When you’re satisfied, give it a good polish with a wet rag and a dab of toothpaste, then rinse it well and dry it off. Ta-daa!
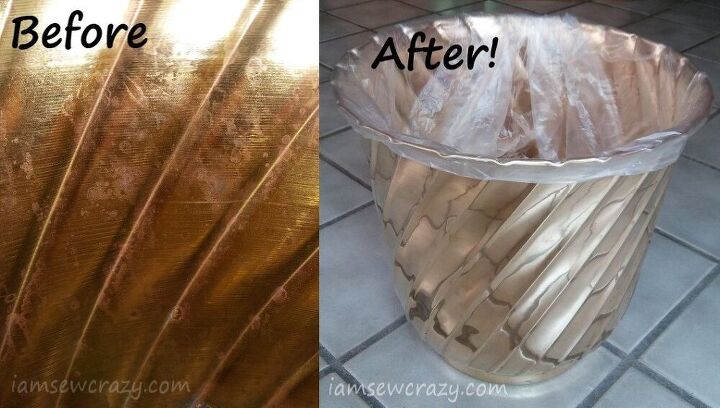
Look how shiny the planter is now! And it's so easy and safe to do, no worrying about getting harsh chemicals all over your hands, or inhaling crazy fumes. Although, you might find yourself craving french fries afterwards! ;-)


Comments
Join the conversation
-
Keep in mind it is the acidity from the tomatoes and vinegar in ketchup. Lemons or any other acidic type fruit (tomatoes are a fruit) can clean brass and silver but can etch and slightly remove a layer. So if it is just a coated layer of brass or silver, etc., use anything with caution.
-
I have used Mayonnaise in the past with different results. I can't wait to try this one.


Frequently asked questions
Have a question about this project?