


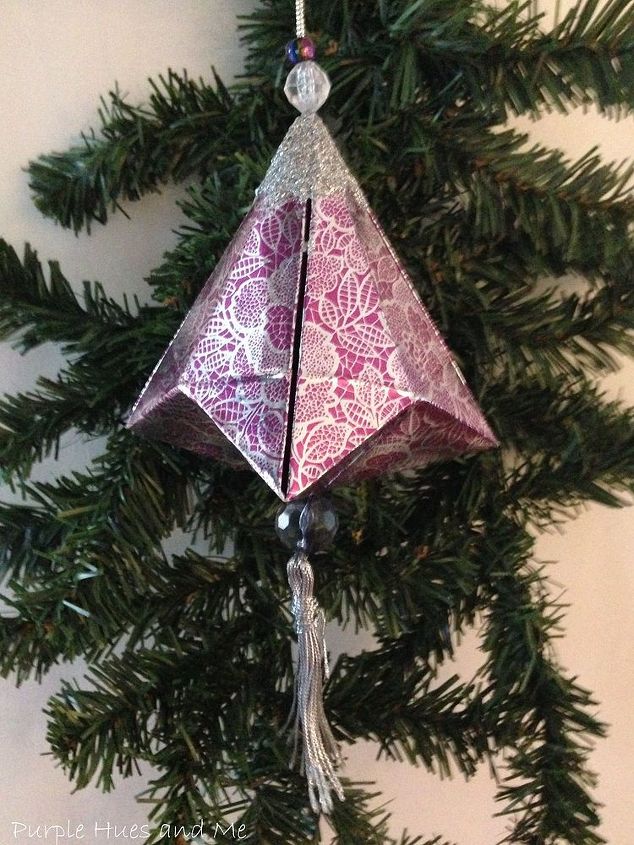
German Bell Christmas Ornament - How To
Want to know how to make an easy but elegant folded German Bell Christmas Ornament? It's so simple, here's how:
1. For the ornament I used wrapping paper glued to 12 inch square cardstock for a decorative design. For a smaller version you can use a six or eight inch square.
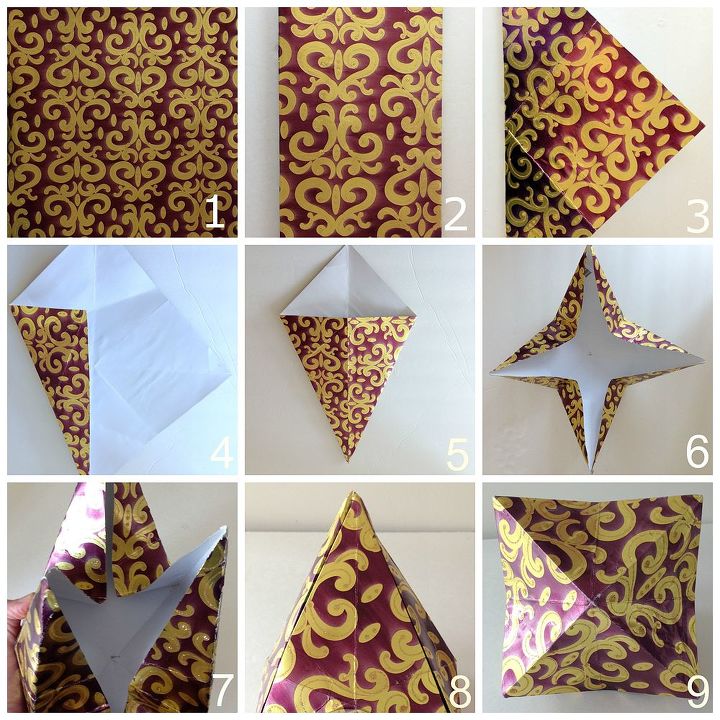
2. Fold the square in half, open and turn in opposite direction (90 degrees) and fold again. Open square. Remember to make all folds crisp!
3. Fold diagonally into a triangle, matching corners. Open and turn in opposite direction (90 degrees) and fold diagonally in half again. Open square.
4. Take a corner edge and meet the center crease line and fold.
5. Take the opposite corner edge and meet the center crease line and fold creating a kite shape.
6. Open and repeat with each corner four times. Check each set of folds (4) to be sure no fold were missed. The paper should take on a star-like shape.
7. Push the middle center inward with your fingers forming four points while cupping the star-like shape together in the palm of your hand.
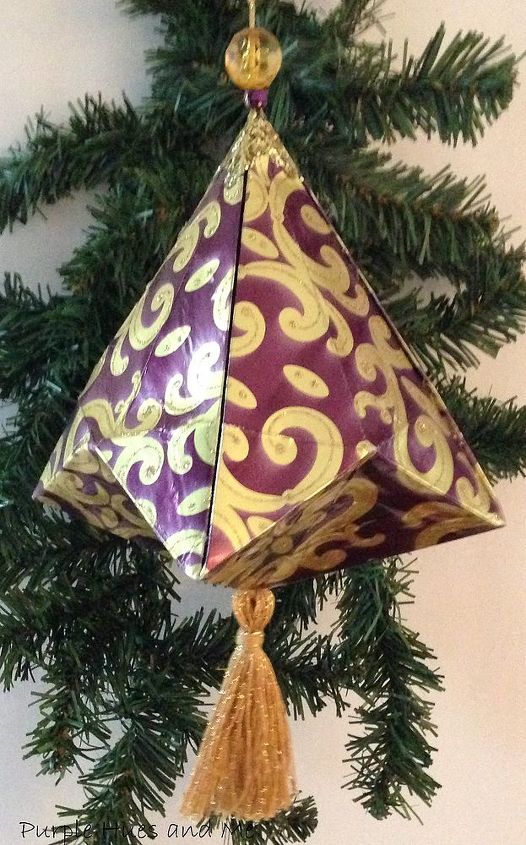
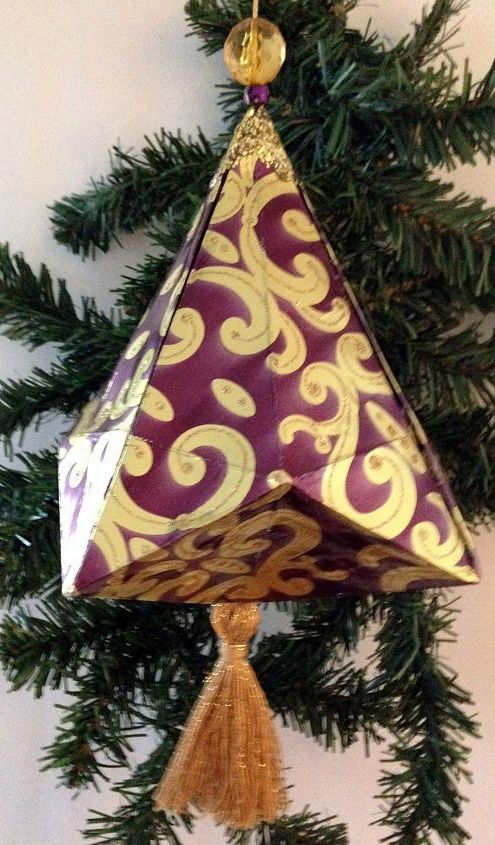
8. The four points come together to form a bell. Glue the top three points together, leaving an opening to run a tassel or hanging cord through the middle.
9. Make a small hole in the bottom center for tassel or hanging cord.
For a complete tutorial and to learn how to make a tassel go to my blog post: http://plumperfectandme.blogspot.com/2014/11/german-bell-christmas-ornament-tassel.html
Smaller versions using eight inch square scrapbook paper . . .
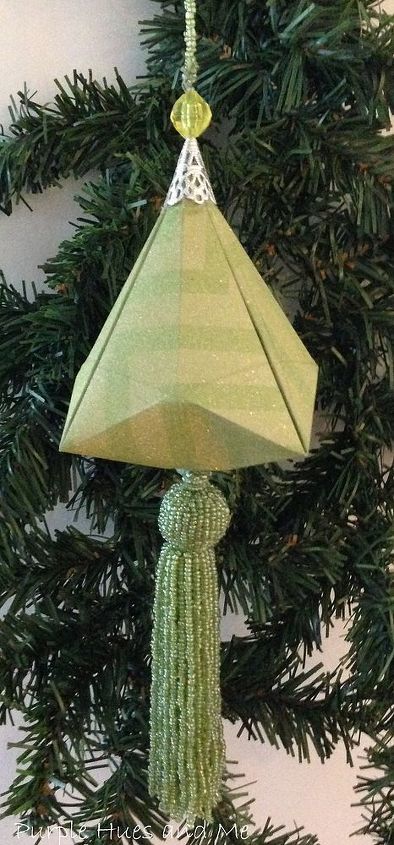
and metallic wrapping paper glued to cardstock.
DIY Christmas Decorations

Comments
Join the conversation
-
Very pretty. I can imagine how a tree decorated with these would look. I think I'll make a few for our tree this year. Thanks.
-
Añadir a este post ...Me encanta la idea de un arbol lleno de adornos de papel!!! Gracias por los patrones!


Frequently asked questions
Have a question about this project?