


How to Make Cute DIY Rain Boot Planters For Fall Decor
In this DIY rainboot planter tutorial, we'll transform your old rainboots into fall-inspired flower displays. Even if you live in a place where it rarely rains, like sunny California, those rainboots shouldn't stay hidden in the closet.
Let's give them a new purpose and turn them into eye-catching planters that you can display inside or outside. In this tutorial, we'll guide you step-by-step through the process of creating these your own rainboot planters.
This post was transcribed by a member of the Hometalk editorial team from the original HometalkTV episode.
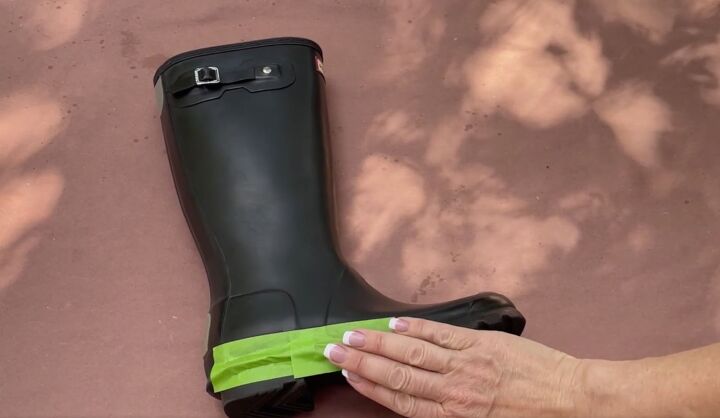
1. Apply tape
First, we're going to use frog tape and mask off the parts of the boot that we do not want to paint. I used small pieces so that I could curve my tape along with the lines of the boot.
I went all the way around, pressing down firmly so that the paint will not bleed.
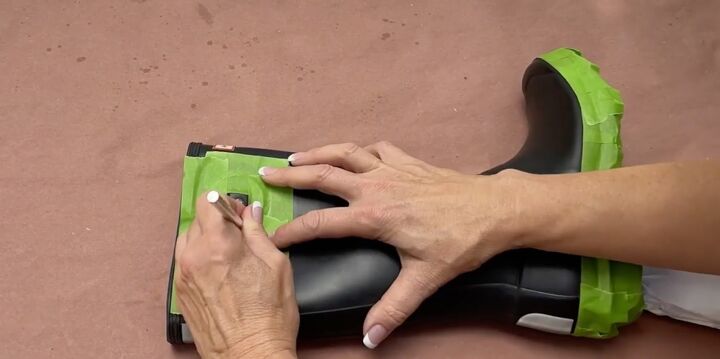
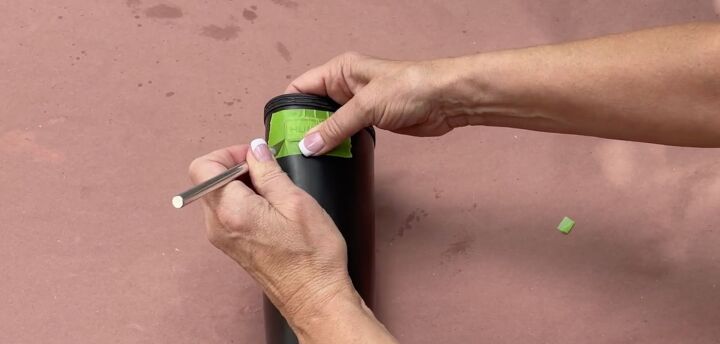
Next, I wanted to mask off the cute buckle on the side. I placed the tape around and then I used an X-ACTO knife to get the exact lines and then peeled off the excess tape so that I had just the buckle and the base covered.
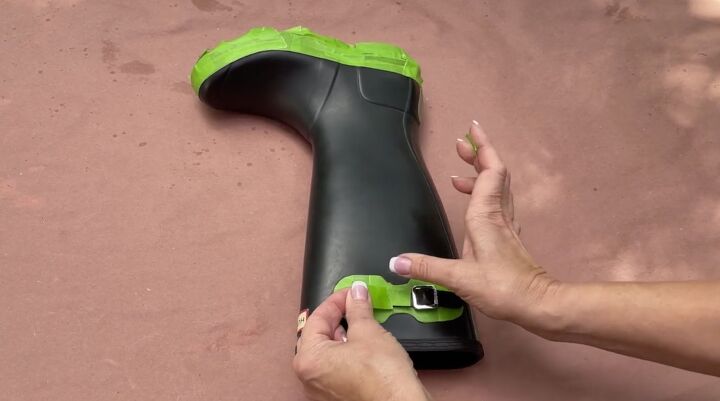
Be sure to add tape to any part that you don't want to have paint on.
I repeated the same process on the label. Since these are so cute and they're Hunter boots, I wanted the label to show. So I placed the piece of tape, used the X-ACTO knife, and then peeled off the excess.
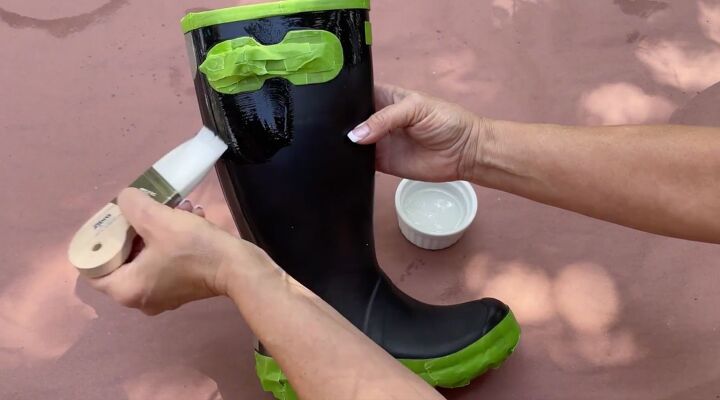
2. Apply crackle medium
Now my boots are all masked off and are ready for painting. I wanted to create a really fun texture on these boots, so I used FolkArt Crackle Medium. If you've never tried this, you're in for a treat.
Using a smooth brush, I painted on a thin layer of the crackle medium. You want to make sure you get in all the crevices and have nice smooth strokes.
You want the coat to be nice and thin as we're going to apply a second coat over top. Make sure that you don't get any drips. Now let them dry for a couple of hours before we paint.
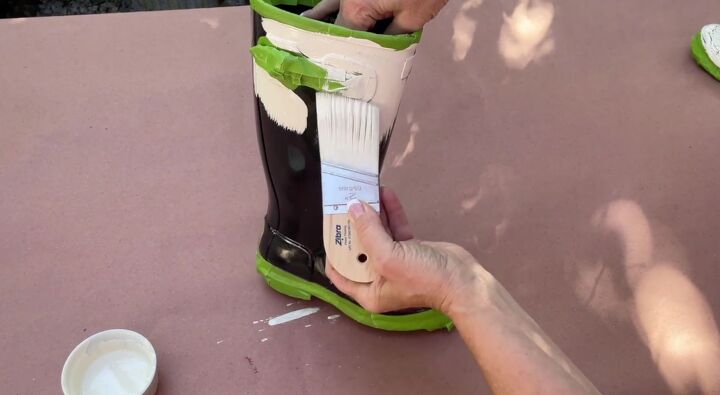
3. Paint
Ready to see some magic? I'm using an off-white mineral paint and you want to put your strokes on and leave them. Do not go back over them. Once you've applied the paint, you want to put a single coat on the entire boot and let it be.
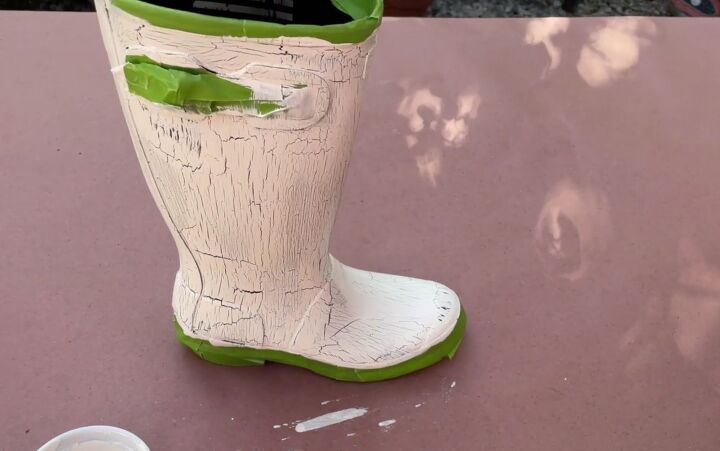
Once you start the backside, you'll notice that the crackling has already started. It's an amazing process and so fun. You can see the crackle right before your eyes.
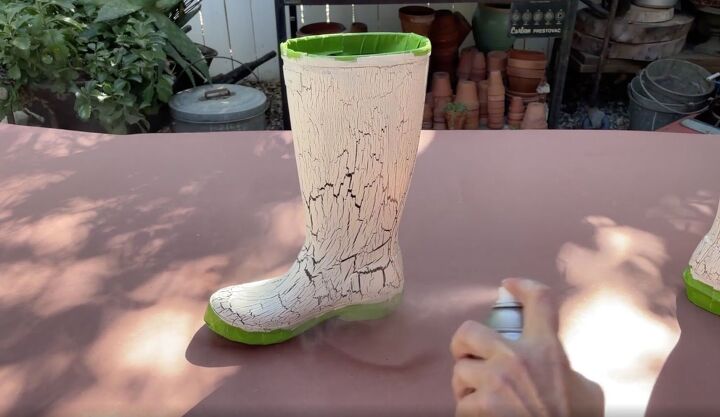
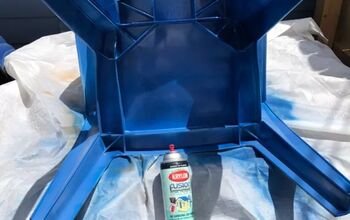
4. Apply a top coat
Now that our painting is finished, we want to put a final coat to protect the paint. I'm using a Rustoleum Matte Clear spray, and I put about two to three coats on and let them dry overnight.
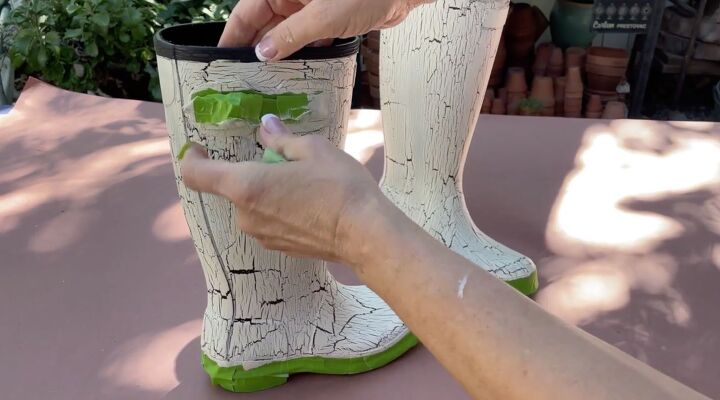
5. Remove the tape
Once everything is dry, remove the frog tape to expose your finished boot. Make sure that you get all of the little pieces off so you don't see any green.
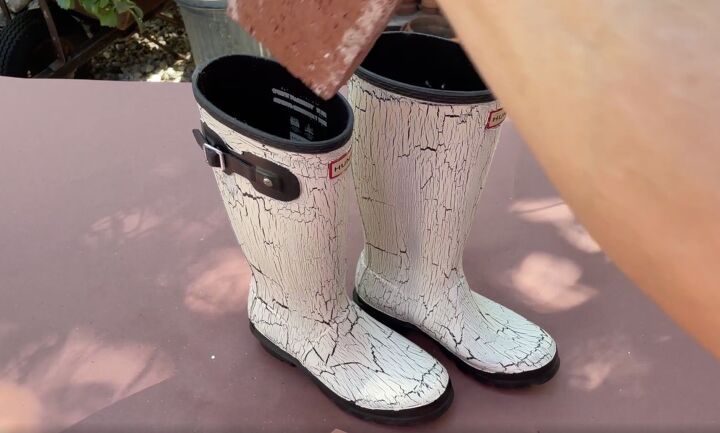
6. Weigh the boots down
I have your curiosity going now and you're wondering what I'm going to do with these boots. First, let's place half a brick in each boot to weigh them down.
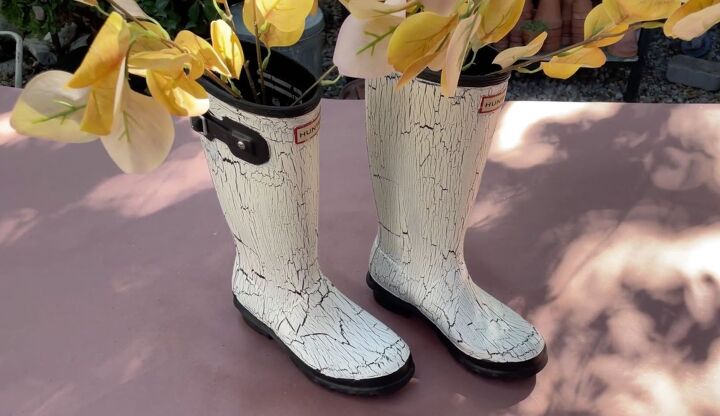
7. Add floral arrangements
I'm going to show you three ways to style these boots. The first is a fun fall arrangement I'm starting with some faux gold eucalyptus.

Then I'm going to add some gold berries.
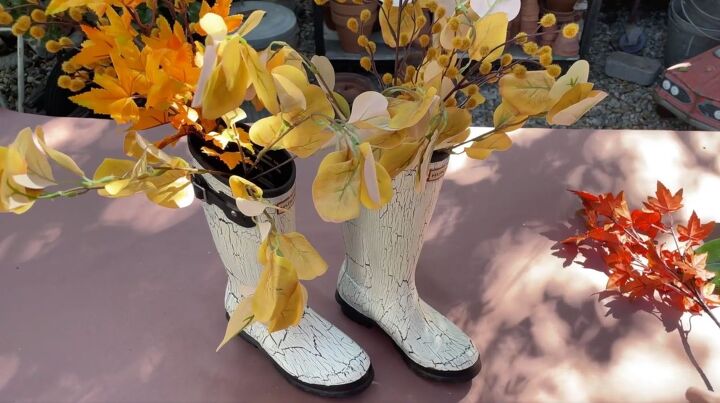
Next, I'm going to add some pretty fall foliage in shades of yellow, orange, and green. You don't have to do each boot identically, but just have fun and use your creativity.
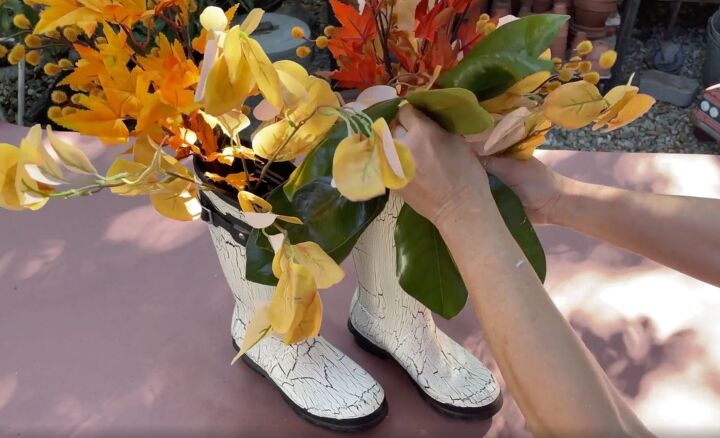
I'm also going to add some green magnolia. I actually trimmed these branches from my tree, cleaned them off, and sprayed them with a little leaf shine. They'll dry beautifully and add the perfect touch to my boots.
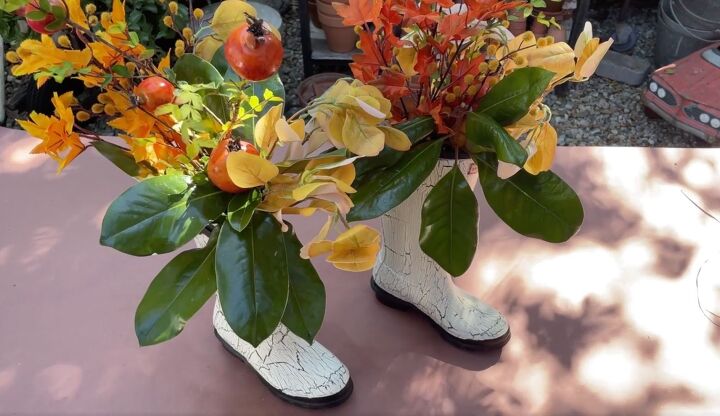
Lastly, I'm going to add a sprig of pomegranates. Aren't these gorgeous? I absolutely love them.
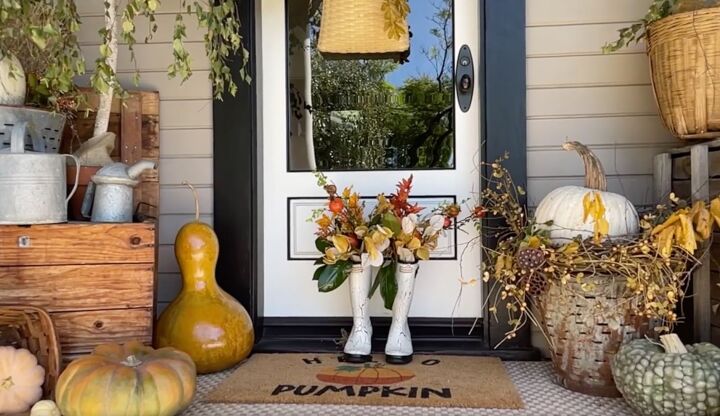
DIY rainboot planters for fall
Here they are on our front porch. What a cute decoration these are on my hello, pumpkin doormat. Wouldn't these be cute on your front porch?
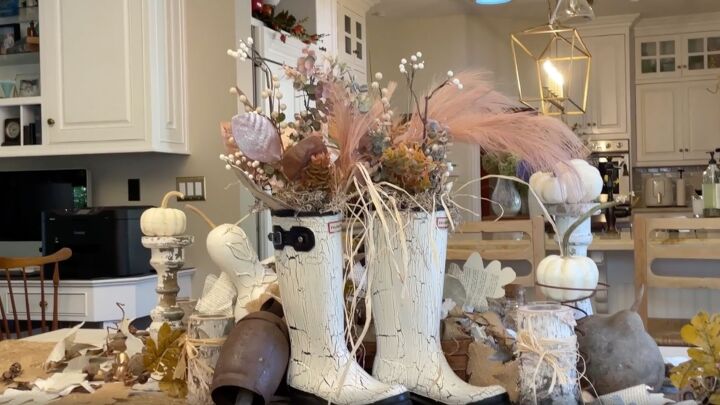
Pink & white arrangement
Let's make our second flower arrangement in our boots. This time I'm using some softer tones of nude pinks and whites.
I started with some natural raffia, added some pink pompous grass, some long-leaf eucalyptus, some white berries, and some leaves that I spray-painted copper and added a little bit of glitter too. I also added some faux eucalyptus.
There you have it, a beautiful centerpiece for your tablescape.
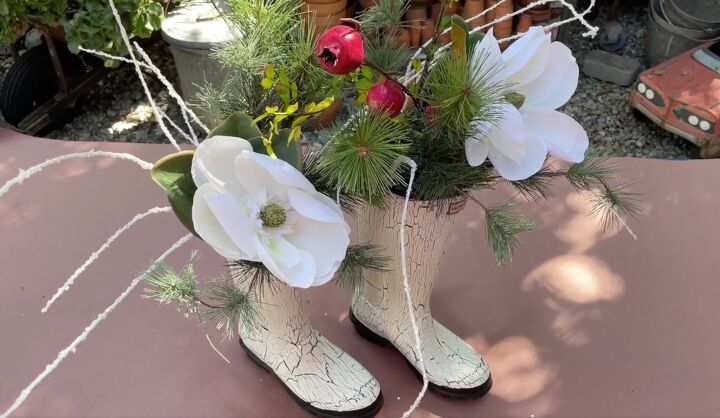
Christmas arrangement
Lastly, let's create an arrangement for Christmas. I started with these fun frosted branches that have a little bit of glitter on them. I then added some faux Christmas greenery and some white magnolias.
I am also using the red pomegranates that I used earlier in the fall arrangement. They're the perfect touch of red in my boots.
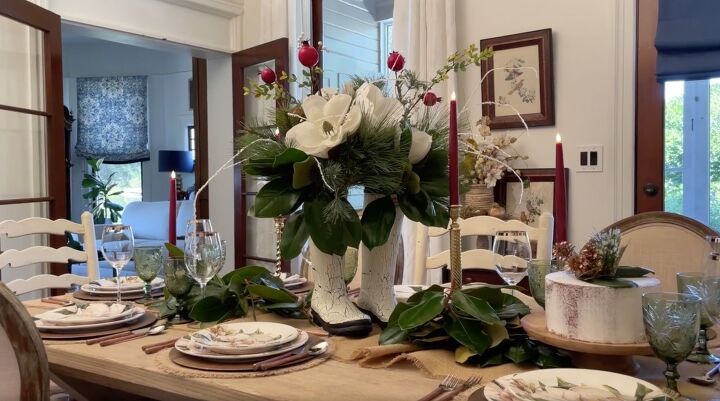
Now I've placed them on my dining room table for Christmas dinner. Note that I tied in the magnolias and the boots with the magnolias on my plate. There you have three different ways to style your boots for the holiday.
DIY fall centerpiece ideas
Resources for this project:
See all materials


Comments
Join the conversation
-
Great idea!
-
Beautiful!!!!


Frequently asked questions
Have a question about this project?