


Spring DIY Craft Time: Darling Little Gnomes
Happy Spring 2022! Woot woot! Are you like me, depending on where you are in the world right now, I think most of us can say we are more than ready for this cheerful time of year.
Bring. It. On.
Want to come along with me and do some ADORABLE DIY gnome crafts?
DIY gnomes have been taking the internet by storm in recent history and you know I HAD to jump on that bandwagon.
What better way to start this season off right than with a fun DIY craft project?
The other day I decided to get my kids and I out of the house and take a fun little trip to Gigi’s house, which is what my kids call my mom. She and I love spending time together doing a fun new project.
I may already have a couple more projects that are still in the works, do you relate?
Trending 6 Reasons Why Your Home Isn’t Cohesive I have a step-by-step tutorial on how to make these cute little friends so you can follow along and create one yourself with just a few handy supplies. Let’s do it!
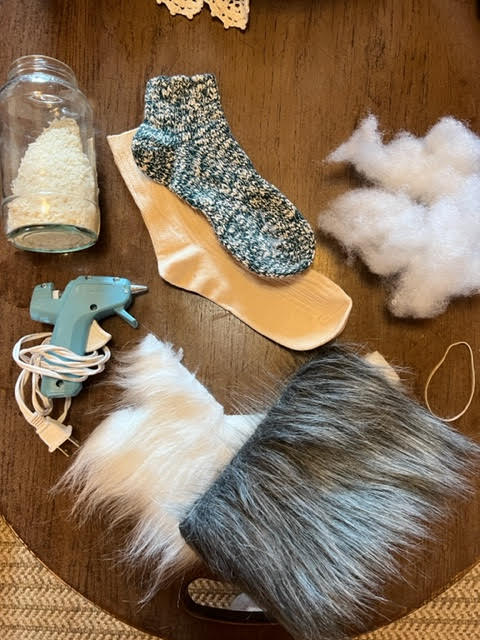
Supplies to have on hand for this DIY craft:
- At least two full socks. You can choose any cute pattern that lights you up!
- A glue gun.
- Some fluffy stuffing
- Rubber bands
- Dry rice and something to hold it in like a cup
- Some faux fur
Okay, now we’ve got the stuff, let’s make some merry and cheerful little gnomes!
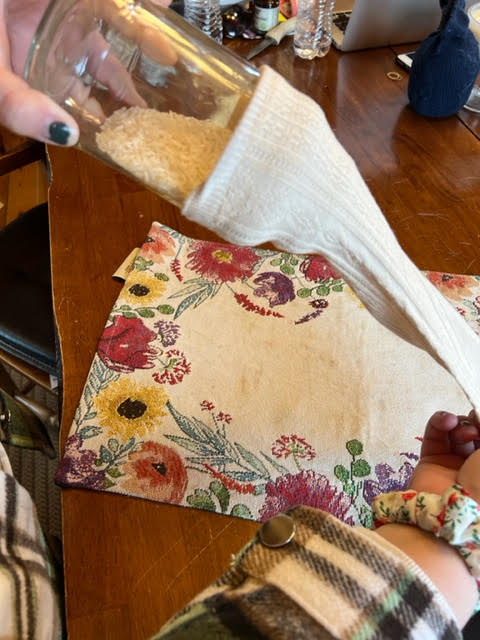
Step One: Start with a Sock
Take one sock and pour some dry rice into it. This will add a bit of weight to your gnome buddy on the bottom. Note: You don’t need all that much dry rice, only enough to add some decent weight.
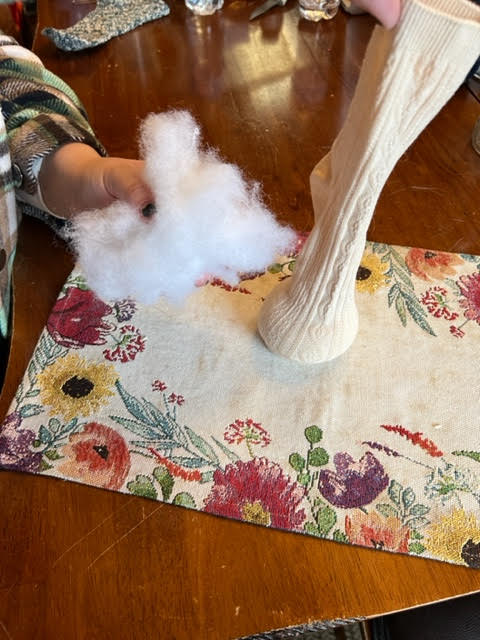
Step Two: Add the Fluff.
Add the stuffing on top of the rice inside your sock. Now the more fluff= how big your gnome will be. So you can add the amount of stuffing you want so your gnome can be as big as you’d like him to be. Note: Just make sure there’s a little room left at the top to tie up your sock in a second.
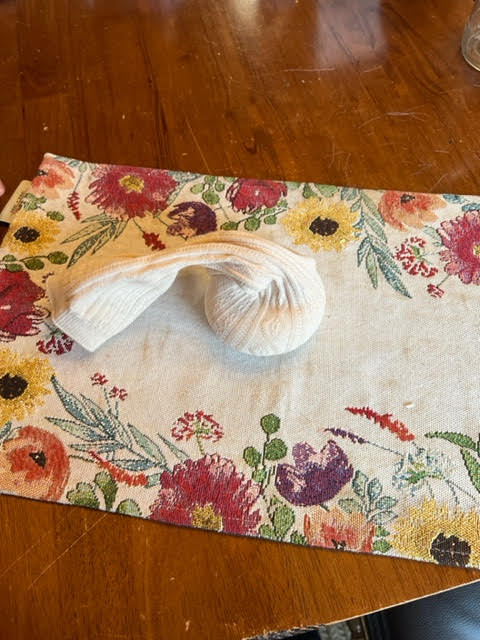
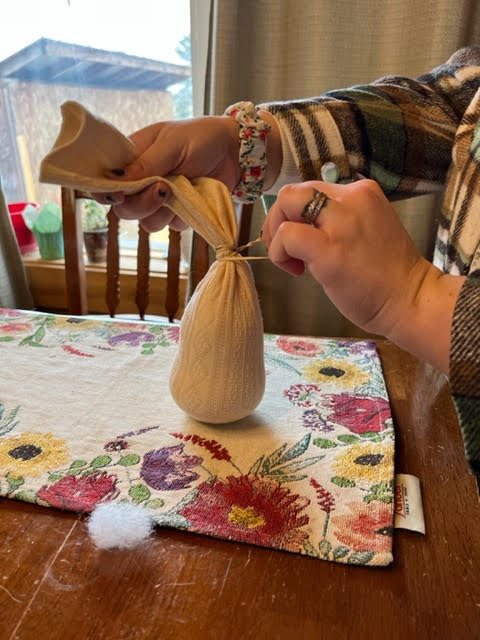
Step Three: Tie
Just take a rubber band and tie up your sock as shown. I would suggest leaving some room and not filling it TOO full. You’ll see why later on.
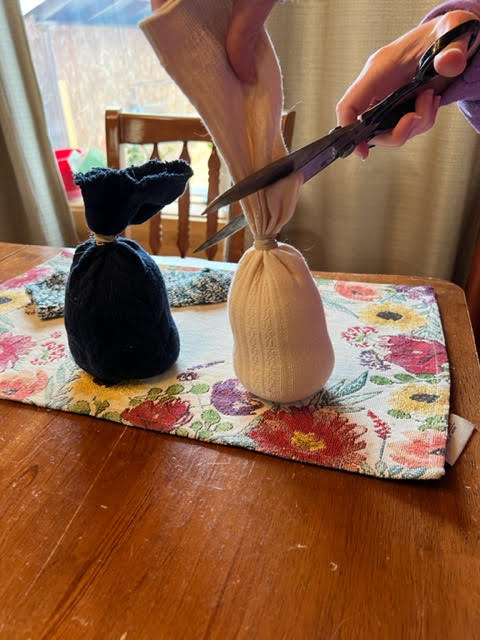
Step Four: Trim
Simply trim excess fabric on your sock so that it’s not too much extra left.
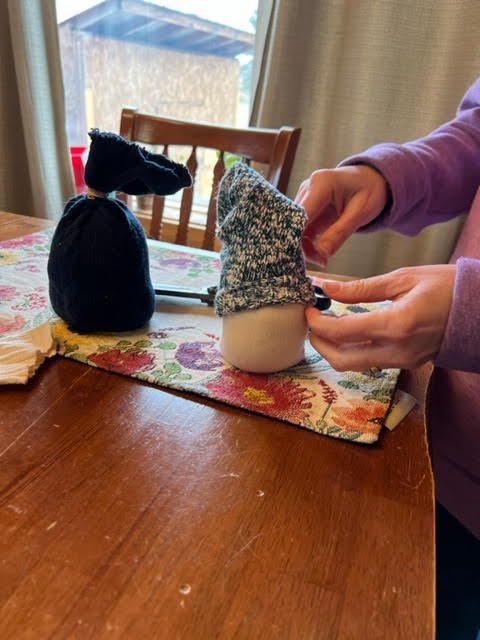
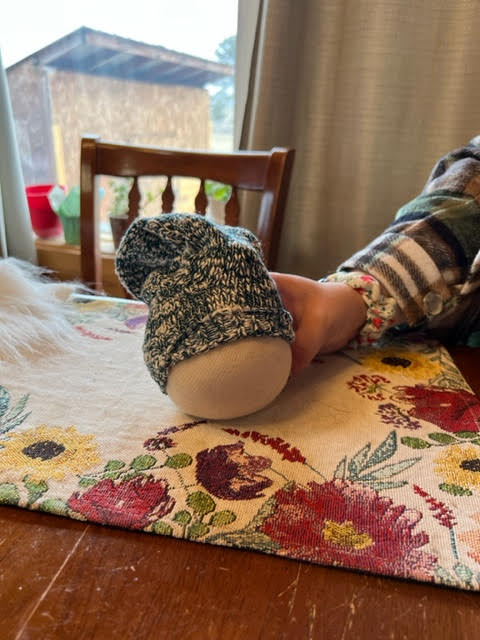
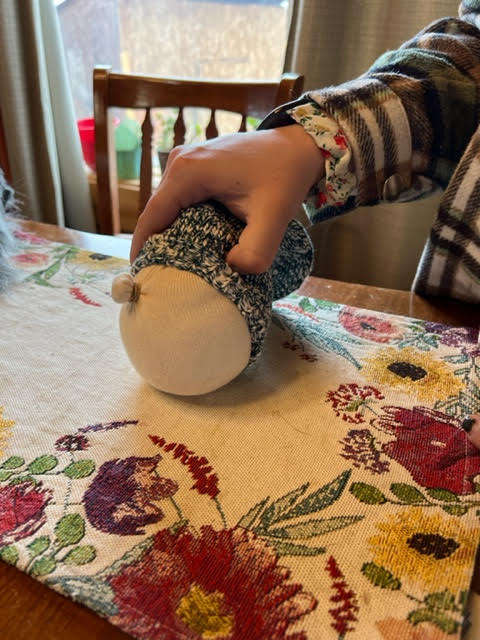
Step Five: Add a Hat
Take your second sock, and fit it over your other sock with the rice and stuffing, making your little guy’s hat. Yippee! I see my friend starting to form!
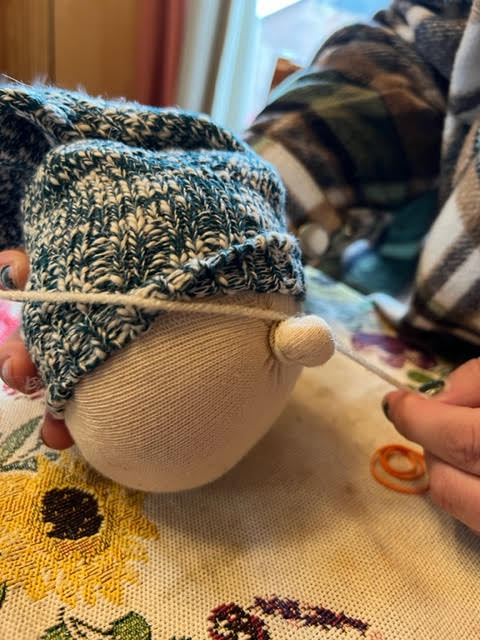
Step Six: The Nose Knows
Let’s add a cute little button nose to our gnome by taking a rubber band, and gently grabbing some rice inside our sock and tying our rubber band around it.
Awww, I bet your gnome’s nose is as cute as a button! You can do like we did and tie a little bit of yarn around the rubber band to make it look a bit nicer too.
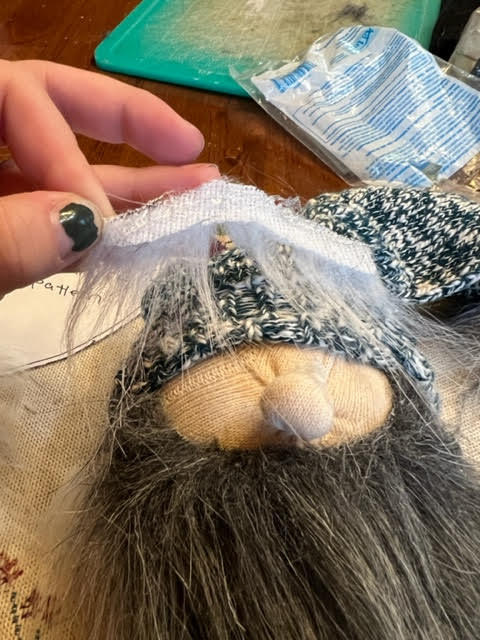
Step Seven: Give Him a Beard
Time for his classic gnome beard to make him look like an adorable but wise old soul.
Decide how long you want his beard to be first. You can make a quick beard cutout on paper so you can trace it on your faux fur and cut it out.

To add some interest, I ended up adding a mustache that was white and a beard that was gray. I think it added some great texture and contrast to my tiny companion.
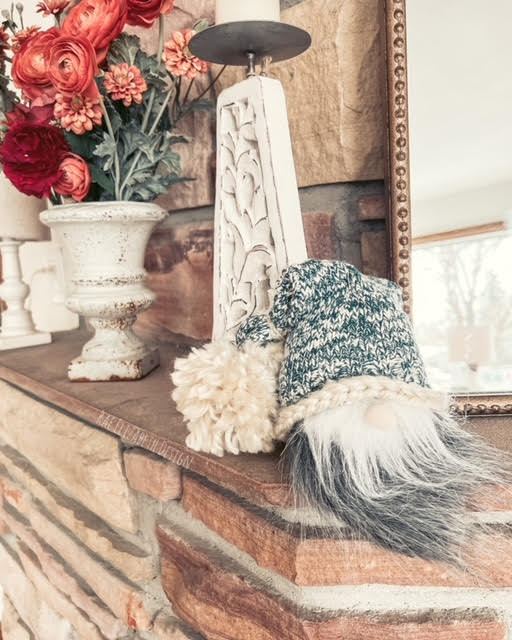
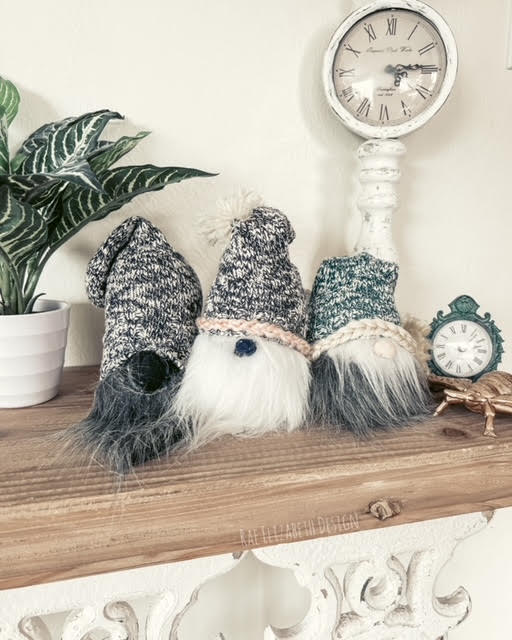
AND IT’S DONE!
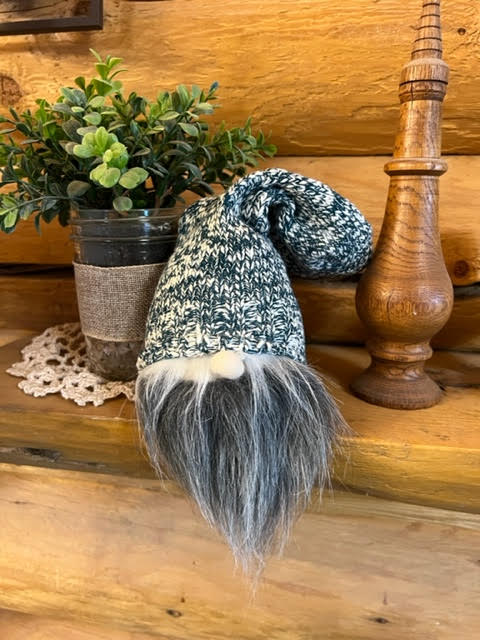
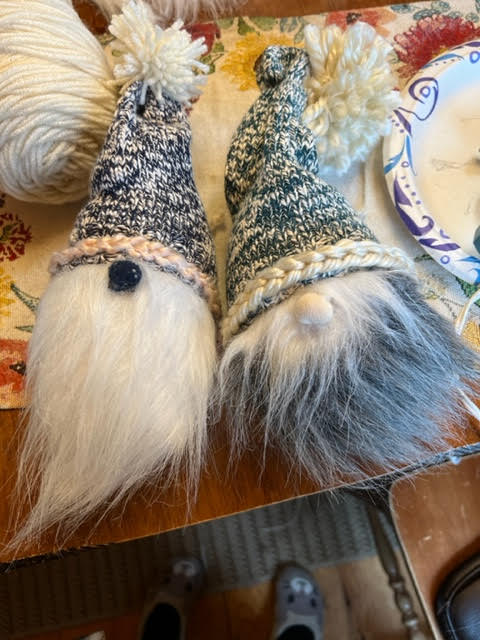
We ended up adding a few little “embellishments” to our little guy such as the pom pom on his hat and then crocheted a quick line of yarn to go across the base.
Look at your sweet gnome creation you just made! I’ll bet your own DIY gnome is SO charming that I’m going to ask you to send me a picture of your finished product!
I adore seeing your projects and creations, your before and after journeys, so please send me a quick email or comment below showing off your own spin on this DIY gnome craft!
I hope you enjoyed this little DIY craft for spring. One of the things I love most about spring is seeing new creations such as new garden growth and the new baby birds learning to fly. Crafting this time of year is no different, making a creation that is unique is as fun as it is an accomplishment!
Don’t forget to pin on Pinterest!

See ya next time!


Comments
Join the conversation
-
Too cute! The best is your use of the sock for the nose! Wood beads are ridiculously expenses and a pain to glue. Very creative. Thanks so much for sharing.
-
I love it! This one is so quick and adorable! And less expensive to make! Mahalo!🌺


Frequently asked questions
Have a question about this project?