


DIY Wood Slice Wreath
Wood is one of my favorite elements to use in decorating. It is natural and it adds warmth to your decor. Natural wood slices with bark is an added bonus with texture and deeper wood tones. Unfortunately, we had a mature tree fall during a storm. My husband was piling up beautiful logs and live edge wood slices for firewood, but they were just too gorgeous to burn. Then it hits me to use them for decorating as hairpin leg tables, decor risers, coasters, and wood slice wreaths.
This post may contain affiliate links. This means that if you purchase from one of these links I will make a small commission, but rest assured you will not pay more for any products.
This project was part of our Craft With Us series. My daughter, Olivia, and I started the event in hopes of finding relief from For more information
How to Make a Wreath With Wood Slices
Making a wood slice wreath takes about 5 minutes. You are going to love this wreath. So let’s learn how to make a wooden wreath. I made a video while making this wreath and bow (you can watch it HERE.)
Supplies
- Wood Slices
- Wreath Form
- Wire Cutters
- Wire
- Scissors
- Greenery
- Ribbon
- Hot Glue
- Hot Glue Pad
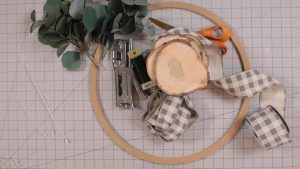
Gather supplies
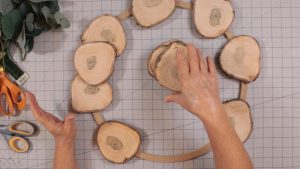
Before assembling the wreath I like to plan the placement of the elements. I started by planning where I would place the wood slices.
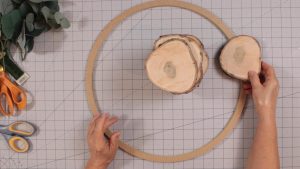
Start arranging wood slices on the form.
Once I had the first row of wood slices placed where I like them I added the second row.
Adjust the spacing of the slices
Deciding on the placement of wood slices.
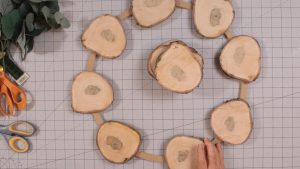
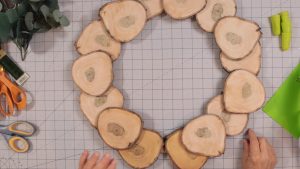
Start adding the second row of wood slices
Deciding on the second row of wood slices.
Start gluing the wood slices
Both layers of wood slices placement. To start gluing the first row of wood slices in place I removed the top row and glued the first row onto the form.
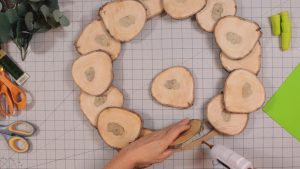
Continue gluing down the wood slices
Gluing the wood slicesThen I glued the second row onto the slices on the first row. After all the slices are hot glued you are ready to move to the greenery.
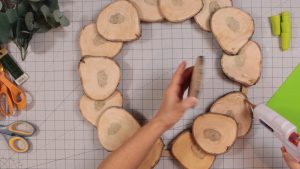
Glue the second row onto the first
Gluing the second layer of wood For the next step, I combined two types of eucalyptus and bundled them together with a small zip tie. I made a second bundle for the other side
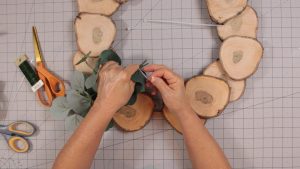
Bundle your greenery
Bundling greenery then add a zip tie.
Make a second bundle
Zip tie the second greenery bundle.
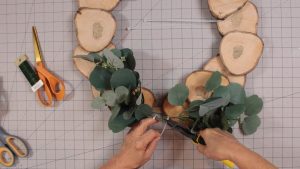
Trim Zip Ties
At this point, you can decide if you want to add pumpkins or other decor items. I have been working on some easy gorgeous fall decorating projects you are going to love so if you don’t want to miss any inspiration join The Fall Inspiration Newsletter and get it delivered to your inbox.
How to Make a Bow.
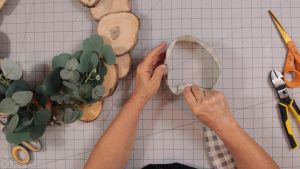
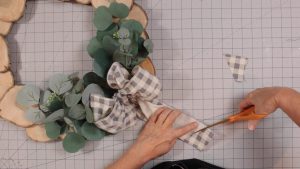
I am going to admit I adore making bows. In fact, I have never met a bow I didn’t like. This easy bow making technique is perfect when making a bow with a one-sided ribbon. Making loops to make a wreath bow.
Start by making a circle with the ribbon (right side out) the size of the finished bow. Then continue to make three circles (loops) of ribbon. If you would like streamers or tails cut a piece of ribbon long enough to fold in half for your streamers.
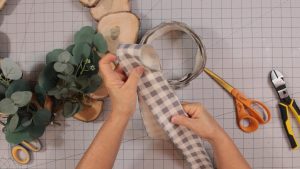
Cut a Piece of ribbon for the streamer tails
Cut Bow streamersFor the center of the bow tie a knot in another piece of ribbon about 8″ long or longer. To form the bow gather the center of the circles of ribbon and use a zip tie to hold it together.
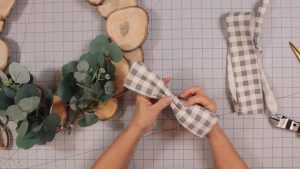
Pinch the center together
Zip tie the center of the bow Fold the tail in half and hold it against the back of the bow loops.
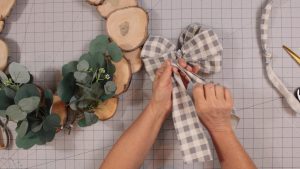
Add the center of the bow
Add the Streamer tailsNext, using the knotted piece of ribbon place the knot in the center front of your bow while holding the tail on the wrong side of the bow then flip the bow over. Tie the knotted ribbon around the bow loops and tail.
Tie the streamer tie to the back of the bow
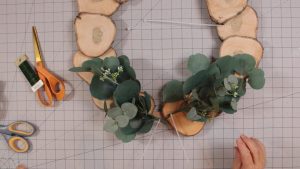
Tie the ribbon knot around the loops and streamer tailsRustic Wood Slices Wreath AssemblyThe area at the bottom of the wreath is where I will be wiring the greenery bundles and the bow to the flat wooden wreath form.
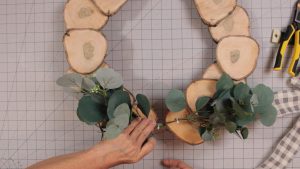
Add the Greenery
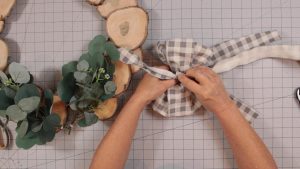
Deciding on greenery placement Once the wreath is assembled I trim the streamer ties. Now it ready for either home decor or your front door.
Attach the bow
Trimming the bow streamers

Finished Easy Bow
Easy Buffalo check bow
Buffalo Check bow on wood slice wreath
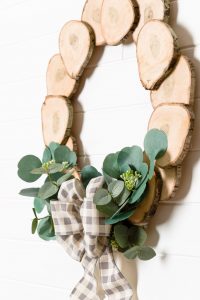
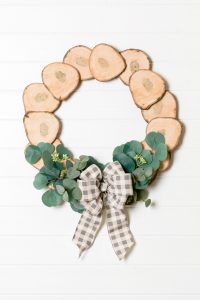
Wood Slices Wreath

Seeded eucalyptus
Natural live edge wood slice wreath. Now your gorgeous log slice wreath is finished. The bow can be replaced each season and holiday. I am already planning how to make a wood slices Christmas wreath.

Comments
Join the conversation
-
This is beautiful! I love the wood slices.
-
Your bows are always on point!! Fabulous wreath!


Frequently asked questions
Have a question about this project?