


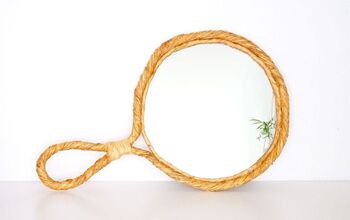
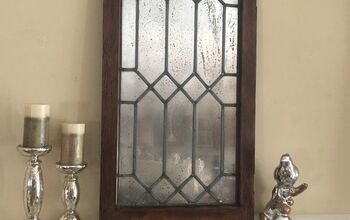
Re-purposing a Oval Mirror and Old Frame to an Antique Mirror

by
Kaye
5 Materials
$10
2 Weeks
Medium
Hello everyone! About a year ago I saw a mirror re-purposed into a frame with tin surround and was inspired to create my own version. Of course, my finished product doesn't remotely look like the version I saw but I like it and I was able to find most of the materials I needed from my "don't throw that out storage".
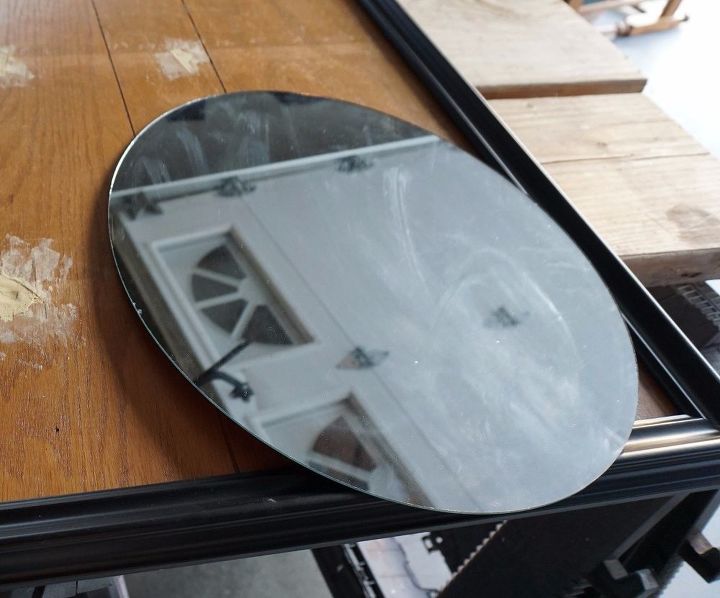
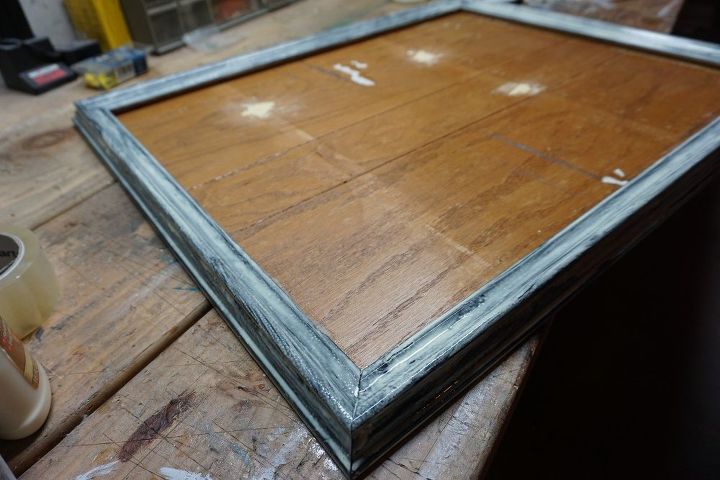
I salvaged the mirror from a repainted plastic frame mirror. I didn't like how it turned out and decided to pitch the plastic frame. I found a piece of old paneling torn off the back of a shelving unit and patched the holes with wood putty. The frame was purchased for $1.00 from a garage sale.
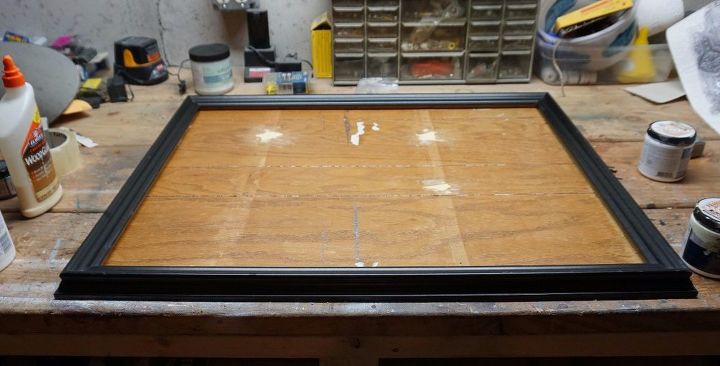
After cutting down the paneling to fit the frame, I used sandpaper to sand down the wood putty to smooth. I didn't putty the lines of the paneling as I knew I would be using heavy "fake tin" wallpaper.
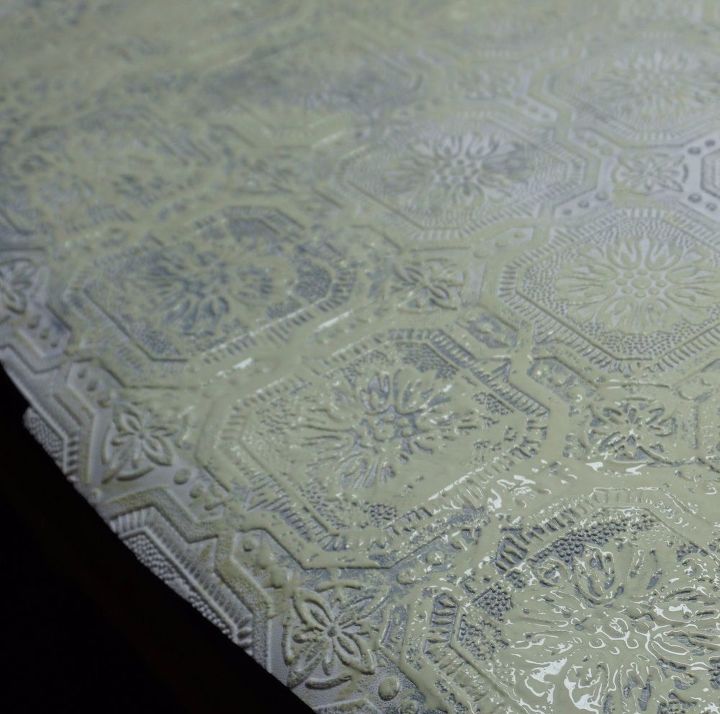
Using a chip brush and gray paint, I painted spots and streaks all over the wallpaper. A layer of crackle medium went on after the paper dried covered with celery green paint. I like the old look of the green over the gray on sample pieces and I had it already!
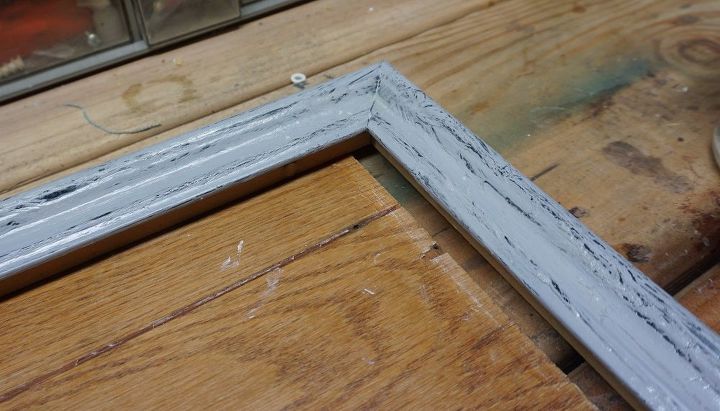
The frame was a challenge. I followed the instructions and it didn't work. (I never read instructions but then......)
When I found that the crackle had dried firm, with no crackling, I grabbed the green brush and slopped on more paint mixed with crackle. This method should not have worked but it did.
The next step was to adhere the fake tin wall paper onto the paneling. I used Elmer glue instead of wallpaper glue to make sure it would penetrate the paneling and keep a good hold on the vinyl wallpaper.
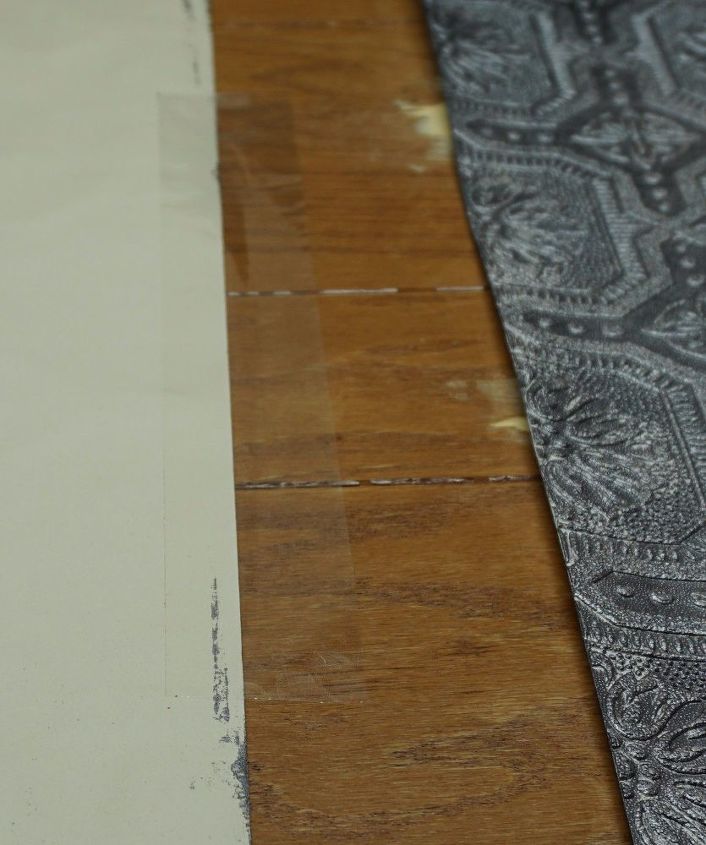
Luckily, before gluing I realized the seam would have to be matched as the width of the paper was slightly less than the frame. After debating where to put the seam, I decided directly in the middle would be the best as that would be the wide part of the mirror.
After many flips and flops, I grabbed clear packing tape and ran it along one reverse side, this allowed me to turn the taped side over and gingerly match the pattern. It also kept it together during the gluing process.
I cut a oval hole with a craft knife directly in the center of the wallpaper so the mirror could be glued to the wood. I left about a 2" undercut so the mirror edges would be on top of the wallpaper.
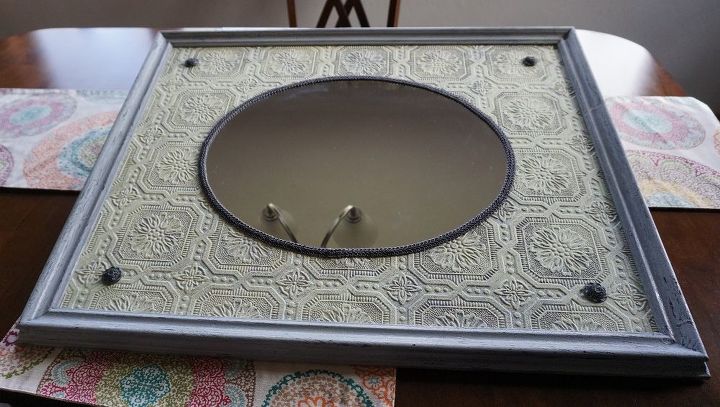
The edge of the mirror showing did not look right and I knew finding wood molding that would cover and fit would be impossible.
I ran to the fabric store hoping to find a ribbon that might look okay around the mirror. While at the fabric store, I found inexpensive black buttons that had a pattern embossed on the top. I brushed the pattern with with silver and gray paint to "antique" them .
After carefully gluing the trim and buttons on, I let everything dry for a week.
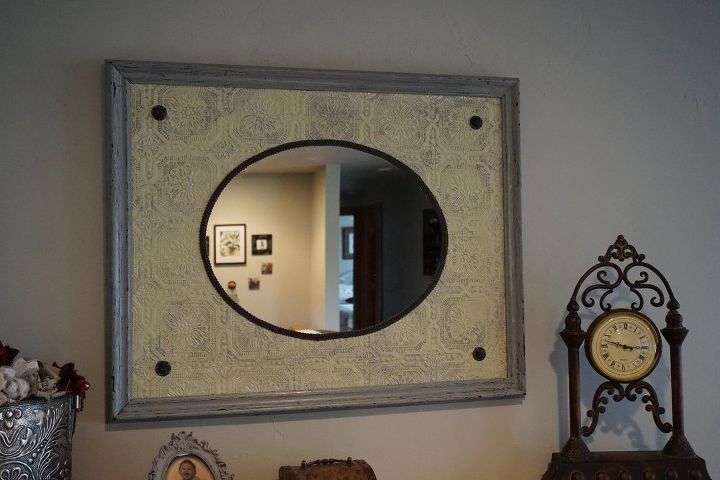
Using Velcro strips to hang the mirror was an EPIC fail. Luckily, the entire piece survived the fall and it is now firmly nailed wired and nailed up.
Thank you!
Comments
Join the conversation
4 of 37 comments
-
Very elegant!
-
Beautiful job, it really does look fabulous and store bought! HUZZAH!


Frequently asked questions
Have a question about this project?
Very nice looking mirror. Did I understand correctly that you glued the mirror to the wood? What glue did you use. You said you used Elmer's for the wallpaper, but would that hold a mirror to wood? I am working on a project and wondered about gluing a piece of glass to wood but wasn't sure what type of glue would hold it, especially to hang it. Also, does the glue you used dry clear? I also like your button trim. Can I see the project more clearly on another site?
Thank you
Great job! What are the dimensions of the frame and the dimensions of the mirror?
Stunning! I love the idea! Where did you find that wallpaper? I’ve seen the tin squares that are used for ceilings & wondered what they’d look like framed. But that wallpaper is more versatile & forgiving. It accepted the paint ok without flaking off once dry? I, too, have had projects with the crackle medium used that shouldn’t have turned out but did anyway. I love experimenting with the crackle medium & various colors.
I would love to find that wallpaper! The buttons really topped off the look of the piece!