


DIY Mudcloth Pumpkins
The Felt Color Blocked Pumpkins I made a few years ago, are still some of my favorites. I wanted to make some more felt pumpkins this year, but I wanted to change them up a bit. I had a few ideas in mind, but ended up with these DIY Felt Mudcloth Pumpkins. These pumpkins are a little time consuming, but totally worth it in the end.
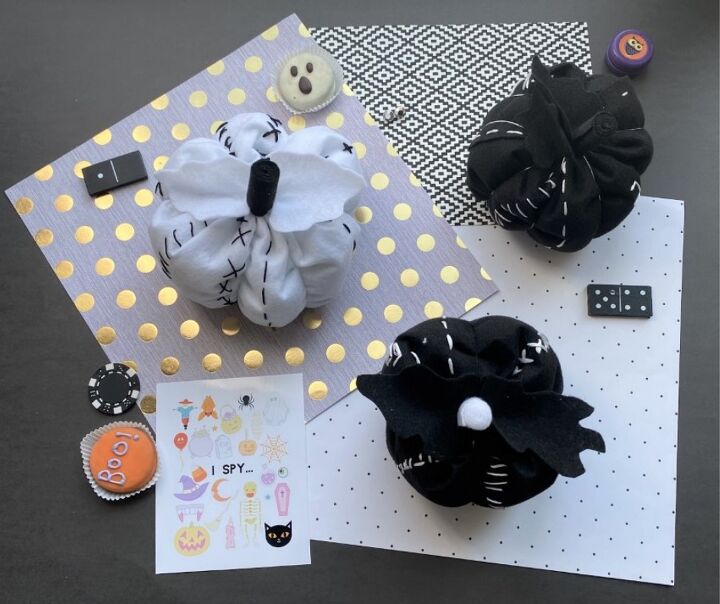

I started with black and white felt and embroidery floss.
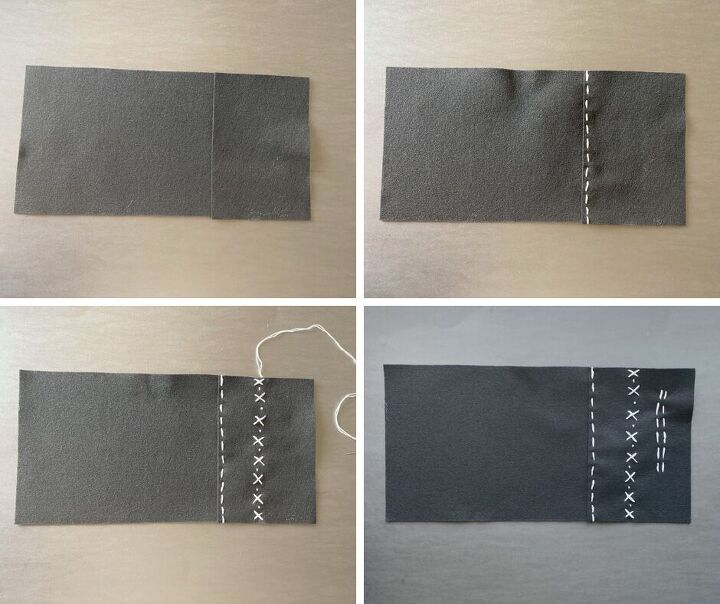
I used 1 1/2 pieces of felt for each one of my pumpkins. You can use more or less depending on the size you want to make. Start by stitching the two pieces of felt together. Once together, start stitching random Mudcloth designs.
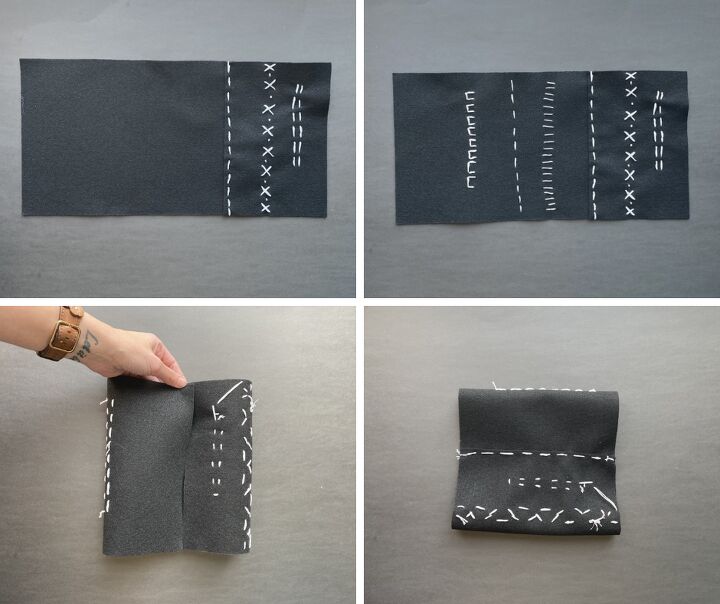
Once you’ve added your patterns, overlap the two ends and stitch together.
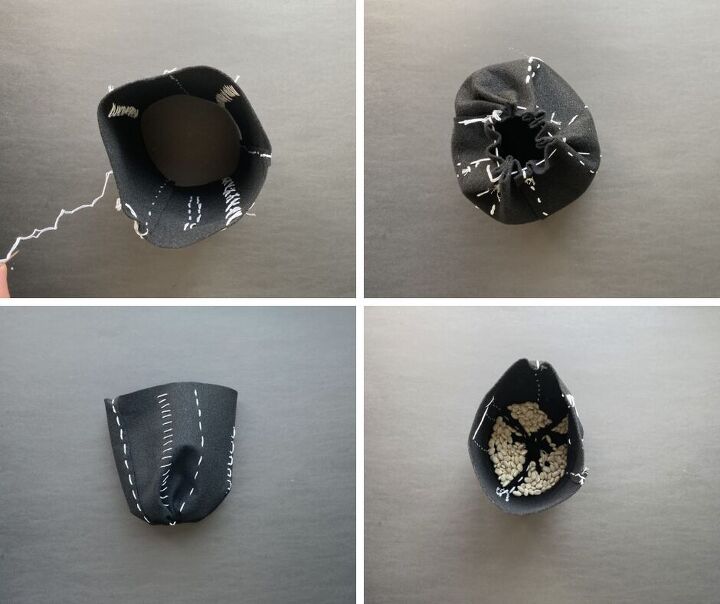
Turn your felt, right side in and stitch all the way around the bottom of the pumpkin. Pull the embroidery floss tight to close the bottom, and tie with a double knot. Turn the felt, right side out and add some beans to add some weight to your pumpkin.
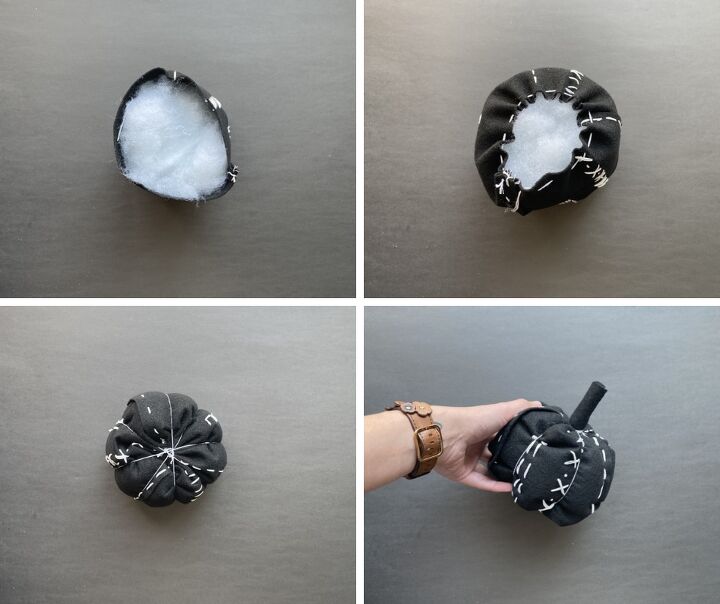
Fill the pumpkin with stuffing and stitch the top closed, the same way you stitched the bottom. Take some embroidery floss and tie around the pumpkin to create the ribs. Use a rolled piece of felt for the stem.
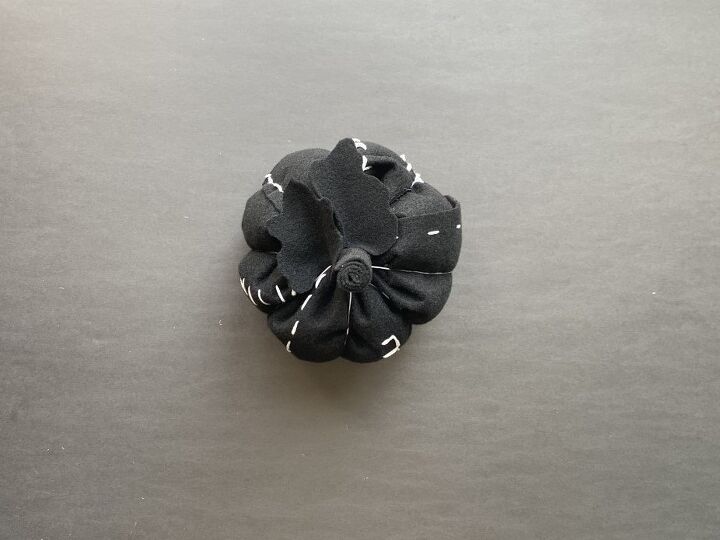
Cut out a couple leaves and glue them to your pumpkin.
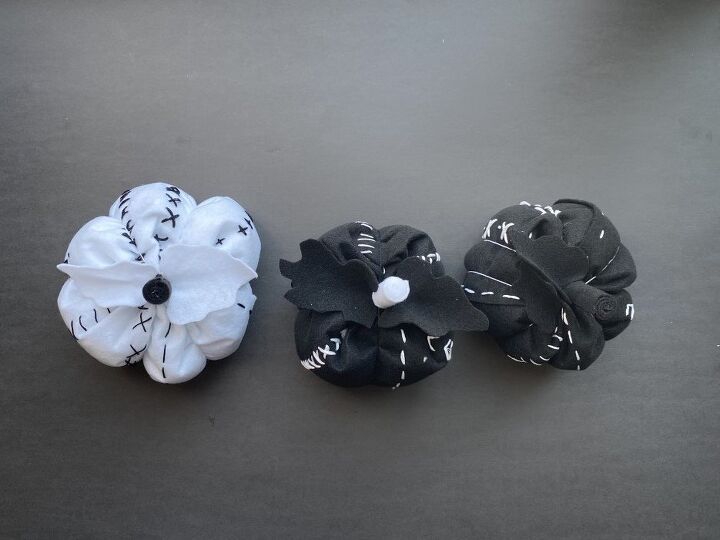
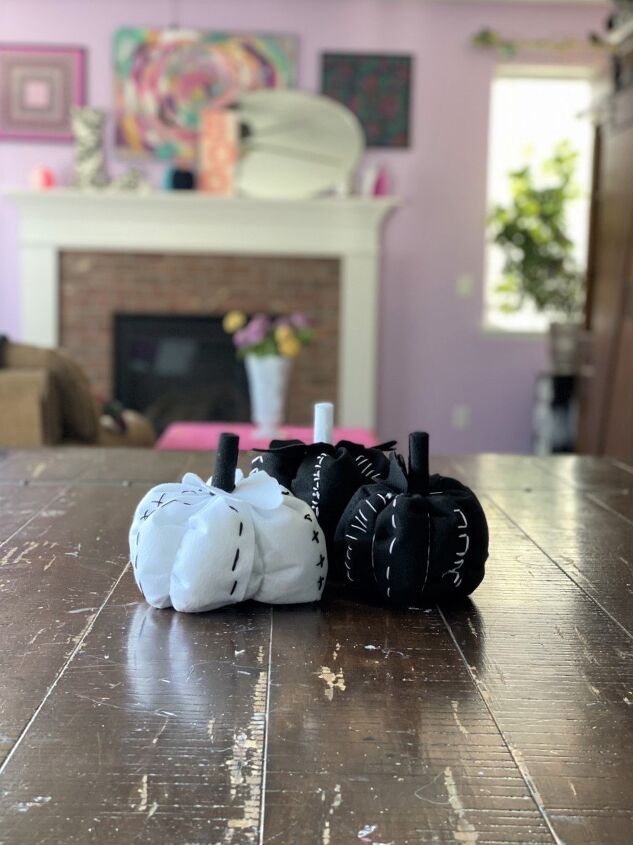
I love how these pumpkins turned out. I started out by making three, but I will definitely be making more because I think they are just adorable.
Resources for this project:
See all materials


Frequently asked questions
Have a question about this project?