How to Make a Grout-less Glass Gem Mosaic With an Old Window

I've tried my hand at making a true mosaic window before--you know, with the little tiles, the glue, and the messy grout.
I wasn't a huge fan as I found it difficult to get the tiles to break into the perfect size pieces and the grout was aggravating to me.
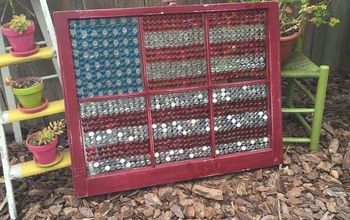
I found a new way to get a mosaic look without the messiness of crushing tiles and dealing with the grout... what's even better is that this glass gem mosaic only cost me $25! This would make for a great gift to someone special!
Tools and materials:
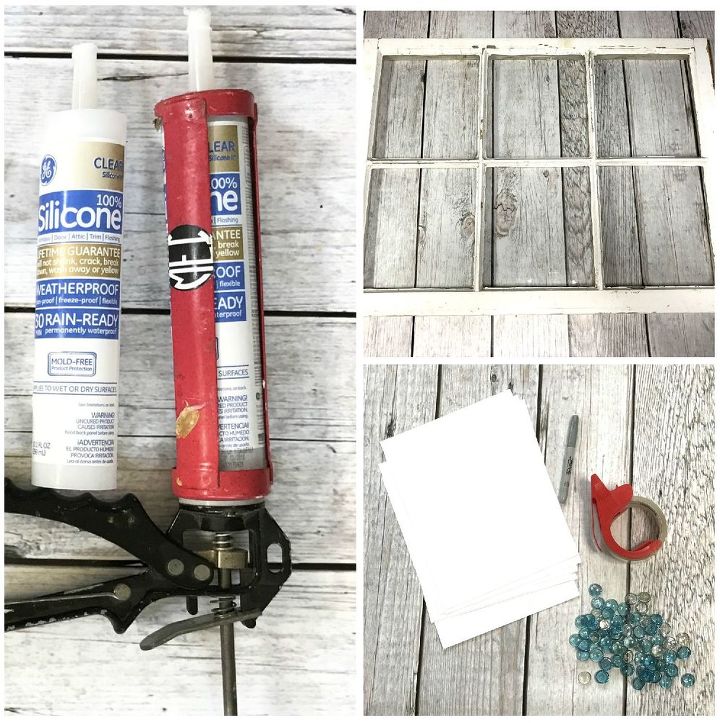
- window
- clear silicone
- silicone/caulk gun
- marbles or gems (I used 3 bags of blue and 7 bags of clear.)
- printer paper
- tape
- pen
STEP 1: Clean window
Before I started putting on gems (flat marbles), I cleaned the window I was going to use. If you have a window that doesn't have a nice frame, you can sand it down and paint it. I was ok with how my window frame looked--there were definitely some imperfections but I didn't mind them.
STEP 2: Make stencil
More power to ya if you can freehand a mosaic but I decided to make a stencil so my window wasn't a complete hot mess. I measured the total glass area of my window which was 27x19. Then, I took eight (8) pieces of printer paper and made a big rectangle with them.
Then, I took packing tape (because funny enough, I never have Scotch tape  ) and taped the pieces of paper together at the seams. I taped the front and back.
I wanted to do a mosaic monogram so I drew out an 'M' with a Sharpie. I use the MonogramIt app when I create monogram art so I utilized it for this project as a reference guide.
Next, I slid the monogram under the window and aligned it was as close to center as possible with the window.
*Note: I realize that the monogram isn't perfectly center and that is because if I had completely centered it, almost the entire left side of the 'M' would have been nothing but window pane.
STEP 3: Trace stencil with silicone
In small sections, I applied silicone to my window, using the stencil underneath as a guide to follow.
Then, I carefully laid the gems on the silicone, pressing down so that the gem was flat on the glass.
I continued adding on the blue gems, essentially tracing the monogram.
Once all of the monogram was finished, I repeated my method and added clear gems to complete the window. I started at the edge of the monogram and worked my way out to the edges of each window pane.
DIY glass gem mosaic art
Because I don't have a lot of wall space, I decided to prop it on a surface rather than hang it.
If you have a nice sunny window where you can display your mosaic window, you can screw two (2) eye hooks to the top edge or add D-rings to the back to hang it on the wall.
This mosaic window was pretty heavy when it was complete so just be mindful of the hardware you decide to hang it with.
Enjoyed the project?
Suggested materials:
- Window (on hand)
- GE clear silicone (Home Depot)
- Silicone/caulk gun (on hand)
- Marbles or gems (Dollar Store)
- Printer paper (on hand)
- Tape (on hand)
- Pen (Sharpie) (on hand)
Comments
Join the conversation
-
 Tammy Lynn McIver
on Jan 22, 2022
Love this idea!!
-
-
 Sharron Christie
on May 02, 2023
This is beautiful. I’m inspired to create one for our patio. Thanks so much for sharing.
-











Frequently asked questions
Have a question about this project?
I ALSO think outside displaying it would REALLY be the place. On your front door??? Maybe NOT, since it is glass. Slamming a door would be Shatter trash...... I totally love the projects you two do together.....they are always so nice.!!!!!!
Do you use ‘clear’ silicone?
Doesn't this monogrammed frame weigh a lot? Any idea on how much it does weigh? It could be very difficult to hang.