


How to Make a Barrel Topper!
Barrel toppers are very on trend right now. These arrangements are a perfect way to add captivating florals to any wedding or special event. Today, I’ll walk you through my process for creating a barrel topper. And don’t worry – it might start off looking like a UFO, but by the time it is finished, you’ll have an eye-catching statement piece for your event!
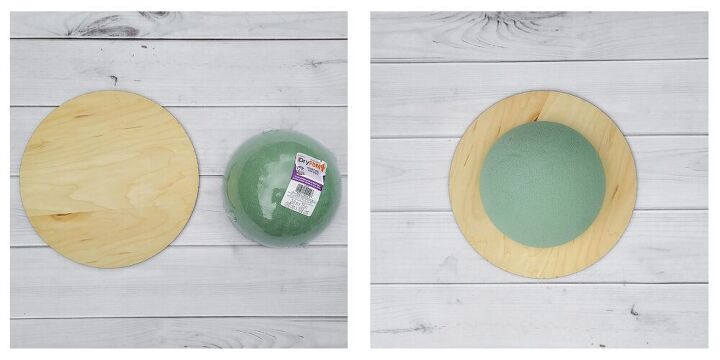
When building a barrel topper, having a sturdy base is key. To create a base that will evenly distribute the weight of the flowers and greenery, that can easily be placed on top of any barrel type and that can travel easily, I hot glued a 6"-8" foam half sphere to a 12"-14" thin wood round.
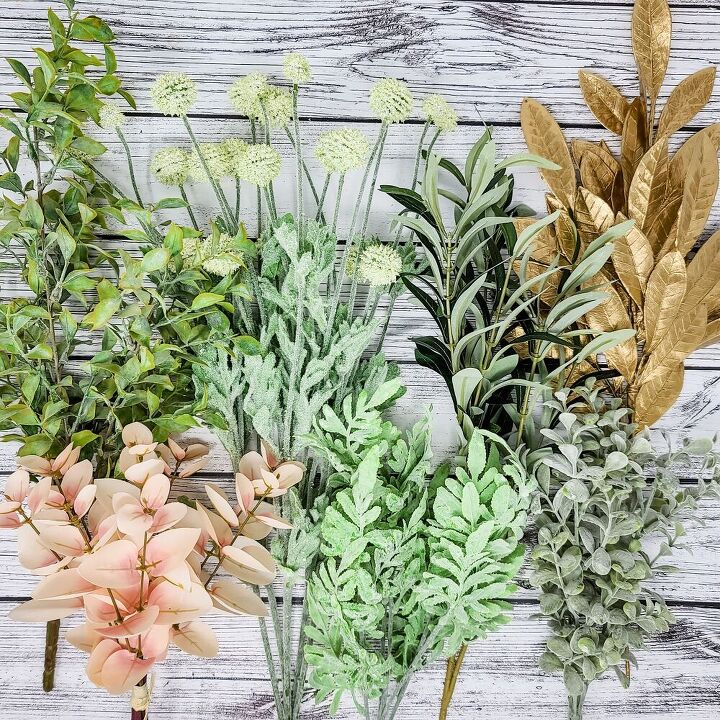
Whenever I am creating an arrangement that will require a lot of greenery, I start to select it by "shopping" my stash. To do this, I pull everything that looks good together and fits the vibe I am going for. Sometimes, I don't use everything (as with the white billy balls and gold bay leaves above) but they all do work together.
One thing to note - you will need a LOT of greenery for a project like this. I used smaller leaf greenery and fillers and it was a total of about 20-25 bunches.
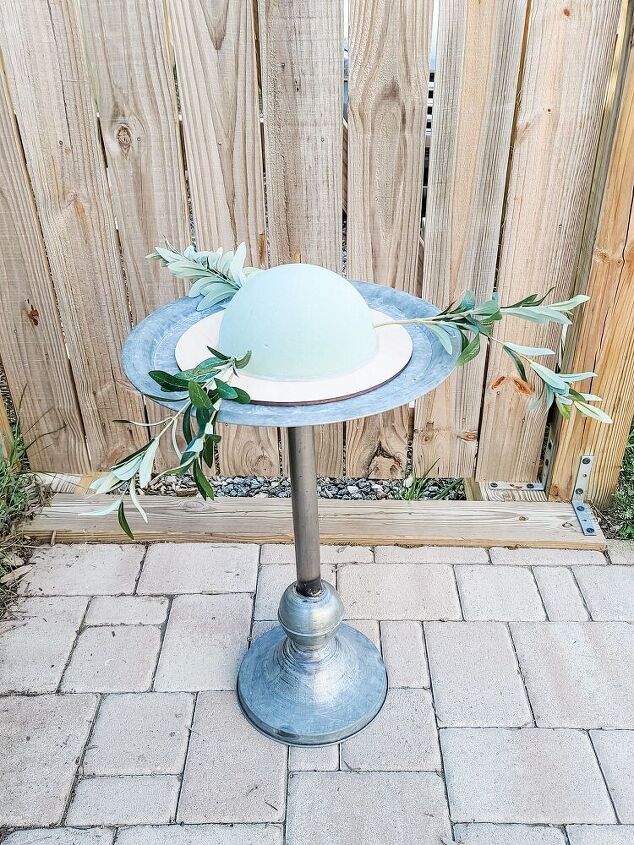
I found this metal pedestal table at a thrift store and it is my go to table to use when making barrel toppers! It is around 24" across which does a good job of mimicking the way your greenery pieces will fall when placed onto an actual barrel.
If you do not have a pedestal table or a barrel, you can place your wood round on a large bowl to see how the greenery and fillers will fall/cascade when on a barrel.
Rather than using a ton of hot glue to add my greenery and filler, I employ the grid pattern technique used by many florists. If you add your greenery in from the bottom sides, top and top sides in an alternating pattern, your stems will interlock inside the foam piece. They will hold steady and you do not have to worry about them falling out during your event or in your home decor.
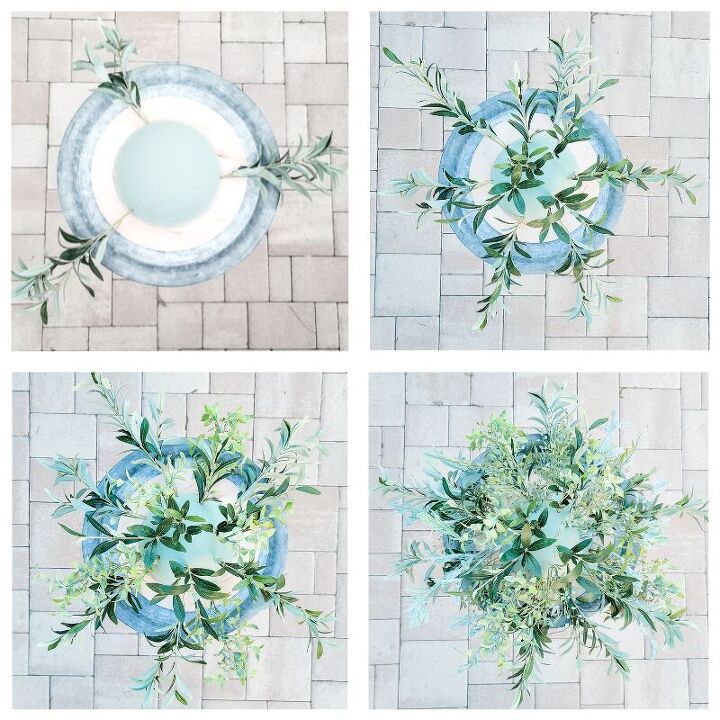
Top Left: To start, cut down your longest greenery/filler into sections. Add this to a few points on the bottom sides to help set the boundaries for your arrangement. You can determine how wide you want to make the piece in this step.
Top Right: Start working on the grid pattern. If you have large leafy greenery, begin adding those into your foam. You want your stems to start criss crossing inside the foam so insert from the top, top sides and bottom sides.
Bottom Left: Continue this pattern but using a different greenery for texture.
Bottom Right: Keep changing up your base greenery and fillers to ensure they are evenly distributed throughout the arrangement.
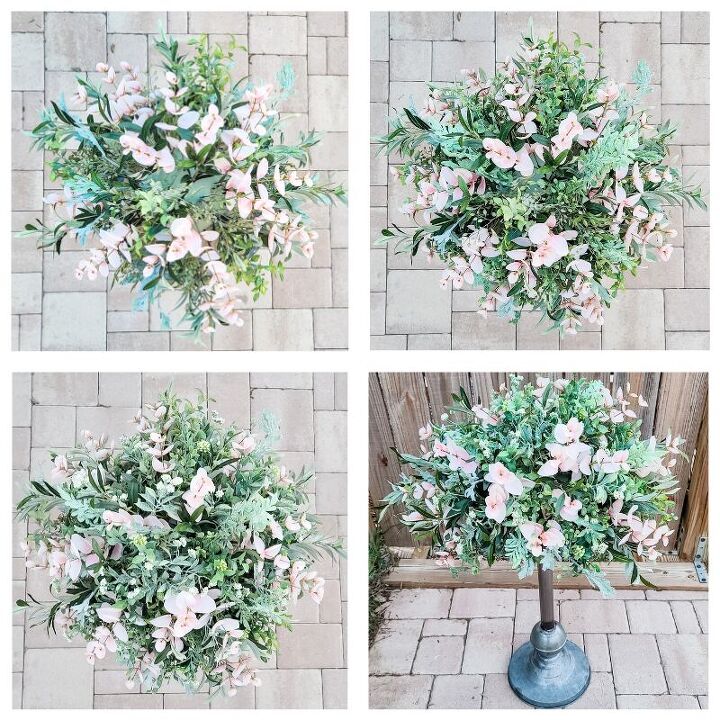
Top Left: Once your base has started to fill out, now is the time to add in any colorful or high contrast leaves.
Top Right, Bottom Left, Bottom Right: Go back to the original greeneries and keep adding them until you can no longer see a lot of foam peaking through.
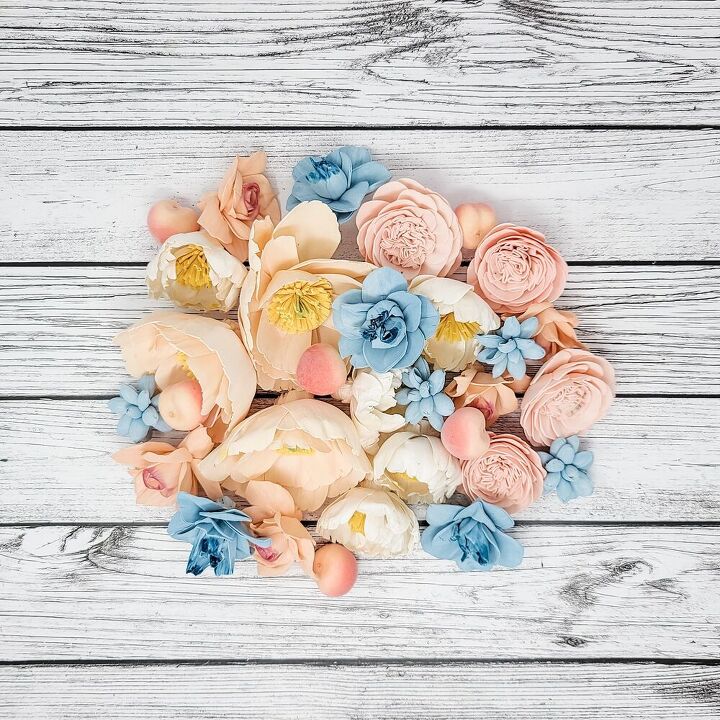
This is where you can be even more creative! Our sola wood flowers are easily dyeable (check out our blogs on the dip dye method and hand painting 101) and there are so many styles to choose from.
We do offer seasonal dyed assortments and this set was a favorite of ours - Peaches and Cream. It even came with mini peaches!
Once you have your flowers dyed and they are fully dry, stem them onto 18 gauge floral wire.

As the flowers are on a thinner and smoother wire, these do get hot glued into the foam. Simply cut the wire down to size (you want the wire to go all the way through to the wood round if possible), add hot glue to the bottom of the stem, insert into the foam and repeat!
Top Left: I started by adding in my largest flowers (Charlestons and Cabbage Roses) in triangle formations at varying heights. Since this is a 360 degree piece (meaning it will be viewed from all sides), you want to be sure the flowers are spread out.
Top Right: Next I added in my Belles. These are the next largest flower in the assortment and have a brighter yellow center which makes them visually intriguing.
Bottom Left: At this stage of arranging, I am looking to bring some more contrast to the piece and to start filling in any holes. The blue flowers provide a great pop of color while the peachy pink La Fleurs complement the color story perfectly (and close the gaps).
Bottom Right: The mini peaches were the smallest addition and so were placed last into the barrel topper. Fun fact - I almost always add in any spherical elements at the very end of the project!
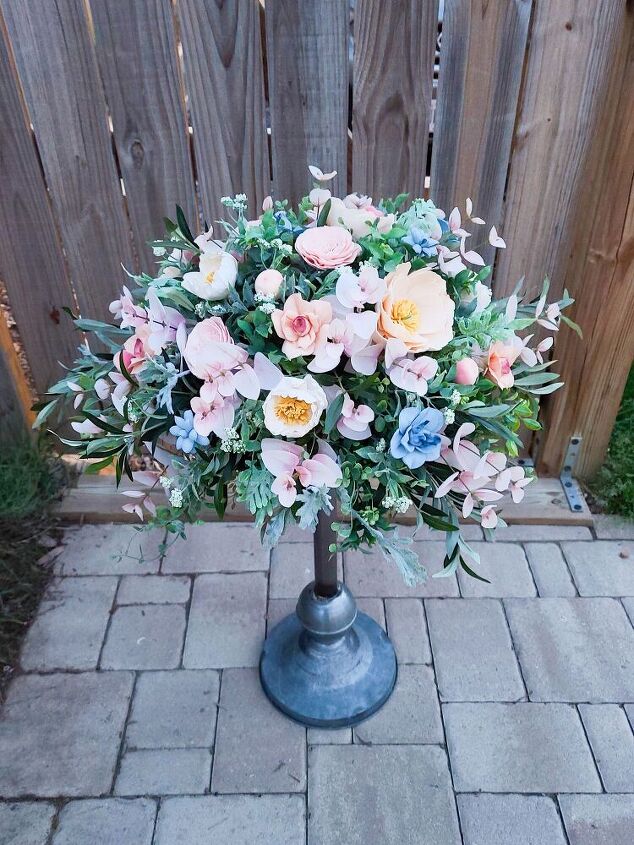
And there you have it! A beautiful arrangement that is ready to be displayed on a barrel for a wedding or on a pedestal table for your home decor.
Resources for this project:
See all materials


Comments
Join the conversation
-
I’ve never heard of a barrel topper but it’s pretty for sure


Frequently asked questions
Have a question about this project?