


Photo Transfer on Wood and Acrylic (Repurposing PLAQUES)

by
Marie guzon
2 Materials
$4
4 Days
Medium
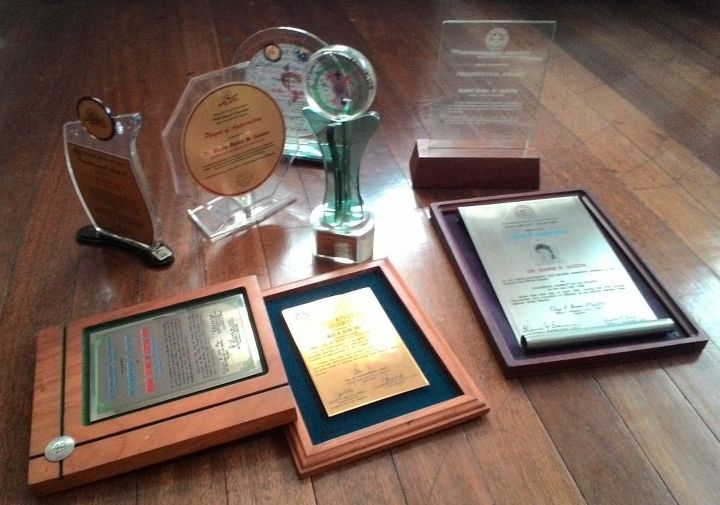
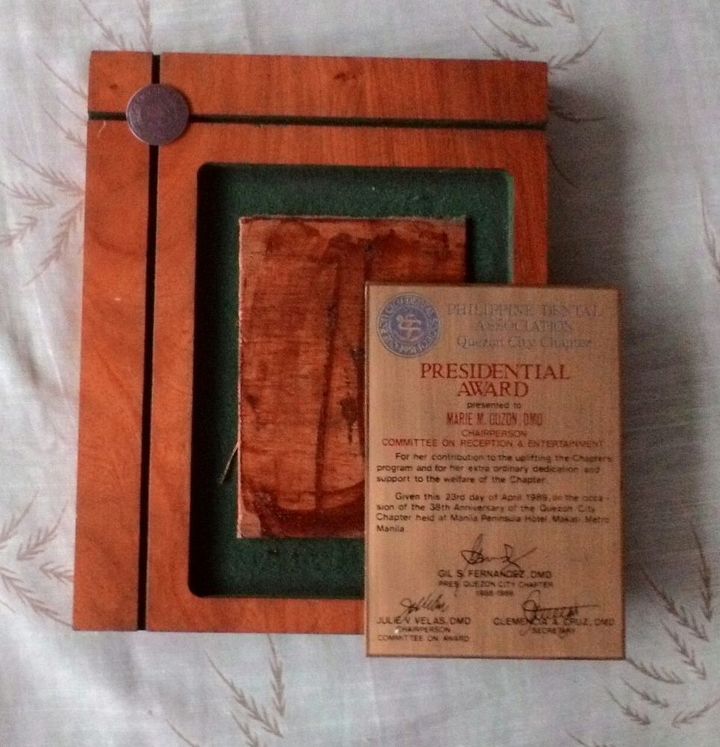
Who has these stored somewhere for years? I have these trophies and plaques and I was wondering how to repurpose them.
Thanks to suggestions received, I decided to try my hand on photo transfer.
1. Preparing the wood and acrylic plaques. I removed the metallic parts of the plaques and kept these as souvenirs. I scraped off the glue and sanded the wood.
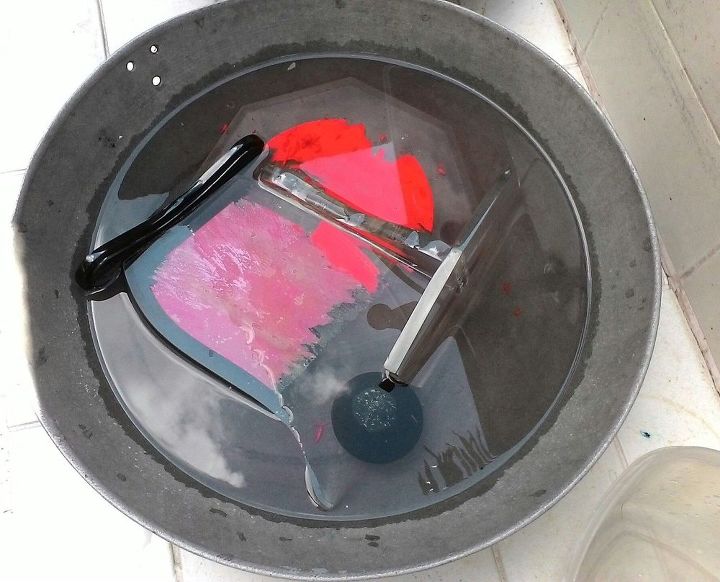
For the acrylic plaques, I soaked these overnight in water to remove the felt paper backing. I also used rubbing alcohol to remove the glue.
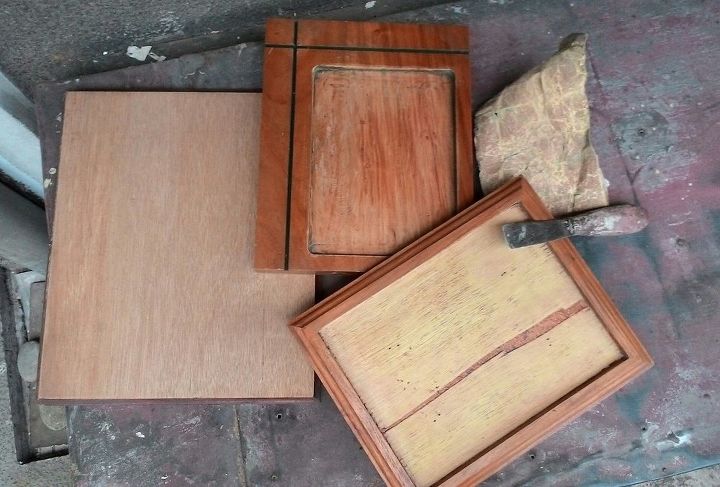
The plaques are smooth.
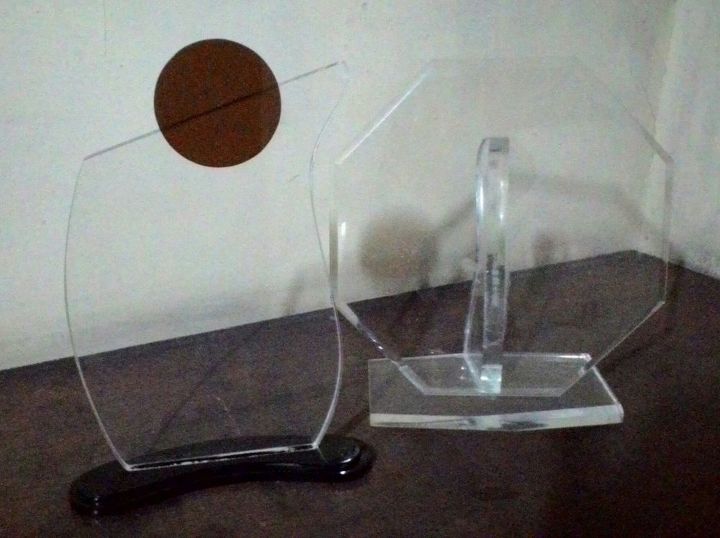
and ready.
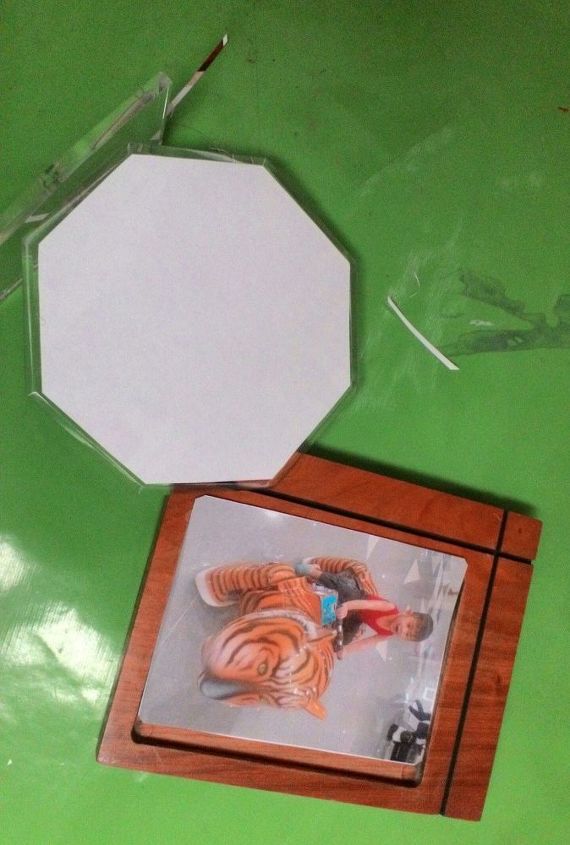
2. Preparing the pictures. I decided to transfer a picture each to wood and acrylic to test if I would be successful in this new experiment. I chose pictures and had these laser printed on ordinary white bond paper. I trimmed the pictures to fit the wood and acrylic plaque surfaces.
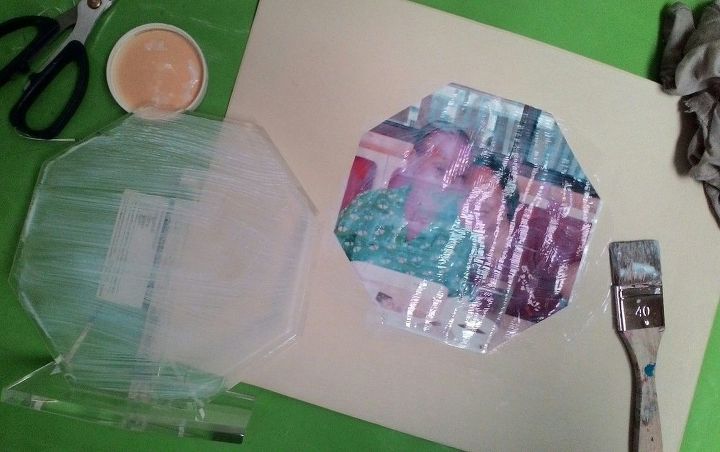
3. Previously, I consulted a Fine Arts College student on how to do photo transfer. She suggested to use Mod Podge which is not readily available and quite expensive in our locality. Another option, she said was to use acrylic emulsion, which fortunately, I use in my piñata making for glossy paint jobs. This is available in our local hardware stores.
After doing more research in the internet on the various procedures blogged by crafters, I was ready. I made sure the surfaces were free of dust.
Procedure. I applied a generous amount of the emulsion on the face of the picture and brushed the same to cover the entire picture face. Next, I also brushed a thin amount on the wood surface. I then positioned the picture on the wood surface, making sure the former rested perfectly on the latter.
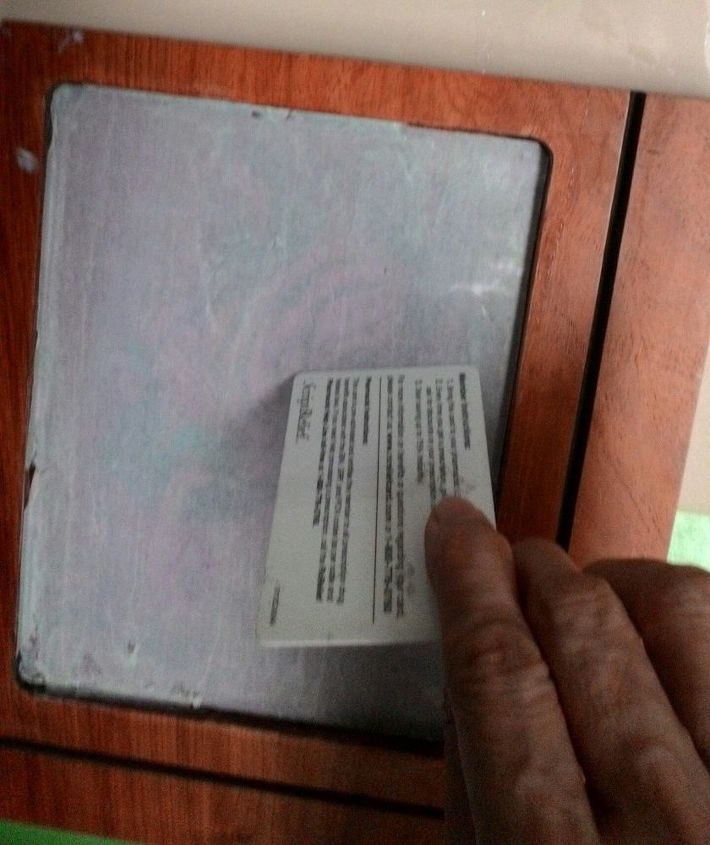
4. With a plastic card, I burnished the picture to the wood surface gently. It was touch and go as the paper was wet and easy to tear (it tore in some parts, fortunately, at the edges and not on the focus of the picture). I wiped off the excess emulsion that oozed out. I made sure there was no trapped air underneath the paper (picture).
5. I left the project to dry for about 2 days. (Some crafters said 24 hours will do but I wanted to make sure it was really dry.) I even exposed it under sunlight.
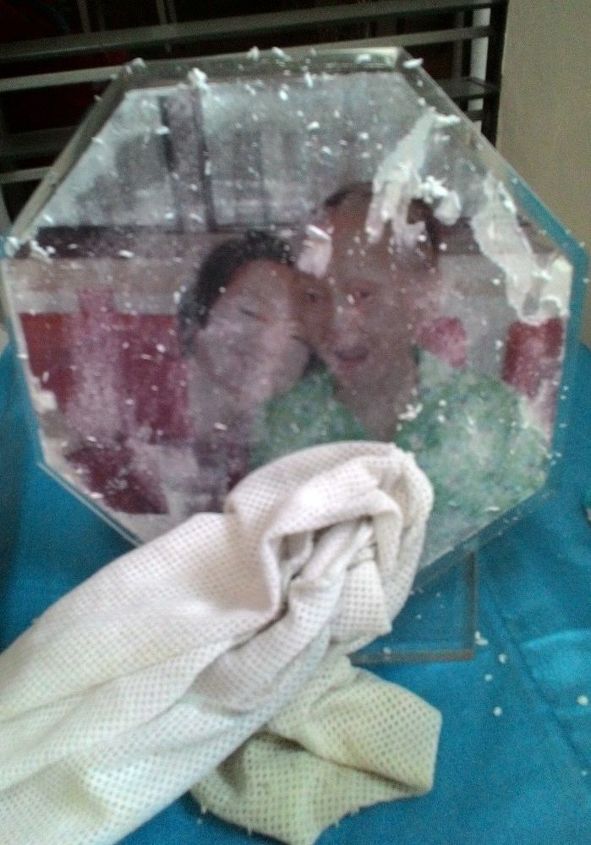
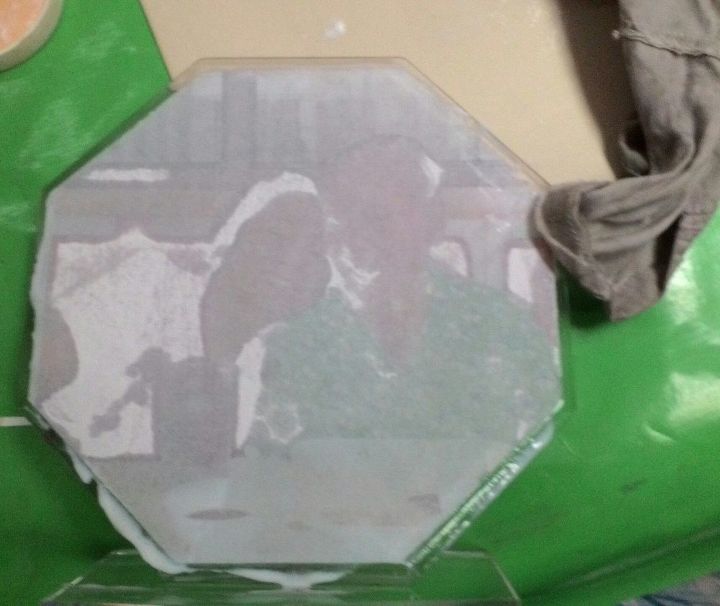
6. With a damp cloth, I gently and slowly rubbed off the paper backing of the picture. I used circular, lateral, up and down strokes. I continued rubbing off the paper until the picture was exposed. When I was satisfied I rubbed all the paper backing, I dried the wooden plaque.
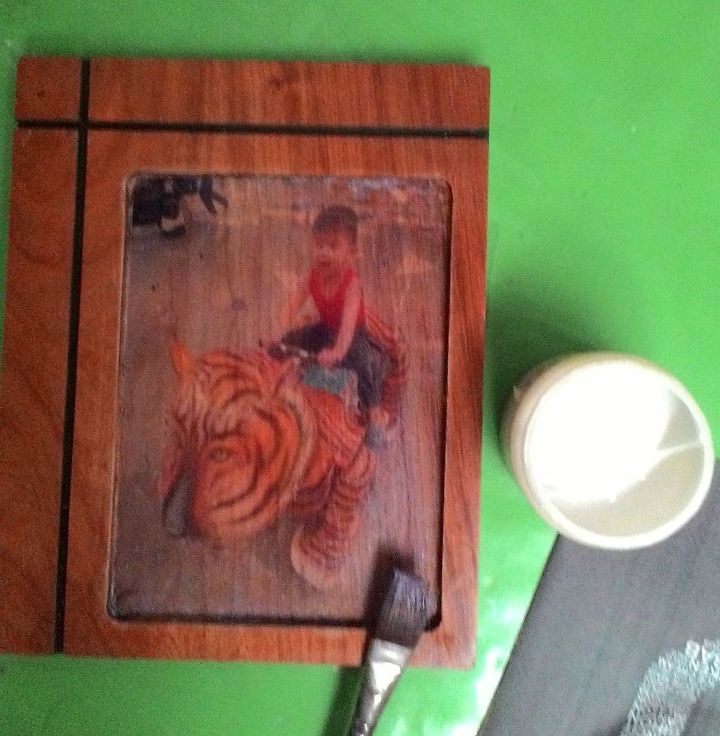
7. After about 30 minutes, I painted the picture with the same emulsion I used to seal and make the picture glossy.
The same procedure was simultaneously done with the acrylic plaque.
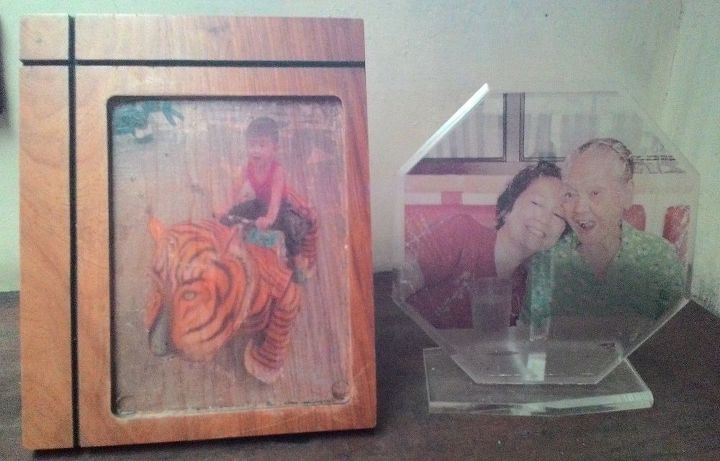
My first wood and acrylic photo transfers. I still have a few more plaques to work on.
Now, you can repurpose your plaques, too.


Any price and availability information displayed on [relevant Amazon Site(s), as applicable] at the time of purchase will apply to the purchase of this product.
Hometalk may collect a small share of sales from the links on this page.More info
Comments
Join the conversation
2 of 3 comments
-
I will try
-
They came out great!


Frequently asked questions
Have a question about this project?