Scrap Wood Porch Lanterns

I bet that if you went into your garage and found a few pieces of wood, you could make yourself a wooden lantern! These make great decor pieces for the porch or inside the home and can be made into whatever style or size you want!
Hometalk Recommends!
Materials & Tools
Materials for this project:
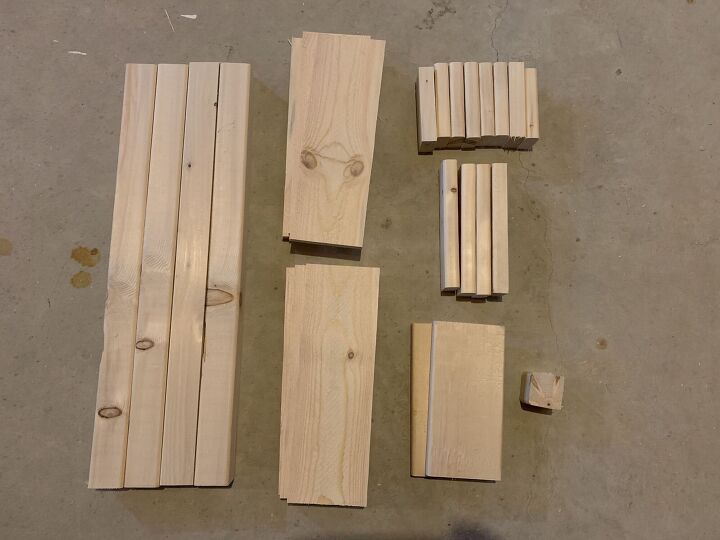
- 2x2 lumber cut @ 18" (x4)
- 1x4 lumber cut @ 10.5" (x6)
- 1x4 lumber cut @ 7" (x2)
- 1x2 lumber cut @ 3" (x8)
- 1x2 lumber cut @ 5" (x4)
- 1/4" jute rope
- Paint or stain
Tools for this project:
- Mitre saw or skill saw
- Brad nailer
- Drill bit
- Kreg jig
Lay out your lantern design & nail together
Lay out your lantern design to see that you want each side to look like.
The 2x2's are used as the corners and the 1x2's are used for the inside design. I put a piece of wood along the top to make sure they were straight, then nailed it all together using my brad nailer.
Repeat X 4
Repeat the previous step to make the 4 sides and nail them all together!
Lantern base & top
The base and top are made of the 1x4's to make a square.
Put these together by making a few pocket holes with your Kreg jig and screw together. You can also use wood glue here too if you'd like.
Attach base & top
Attach the base and top to the 2x2's with a brad nailer.
Making the top decorative
My plan was to add a few extra pieces of wood on the top and to make a spot to put the rope for a handle. As you can see in the next photo, it doesn't look proportionate.
Lantern top
Not loving this look! The block looks too small on top of this big lantern, so I had to come up with another idea.
Lantern top
I cut 4 pieces of 1x3's to make a square on top top of the lantern. I'm hoping this will look a bit better.
Drill holes for the rope handles
Drill 2 holes of either side of the top square to thread the rope handles through.
Assemble the top
Much better! Brad nail together the top pieces to the lantern.
Almost done!
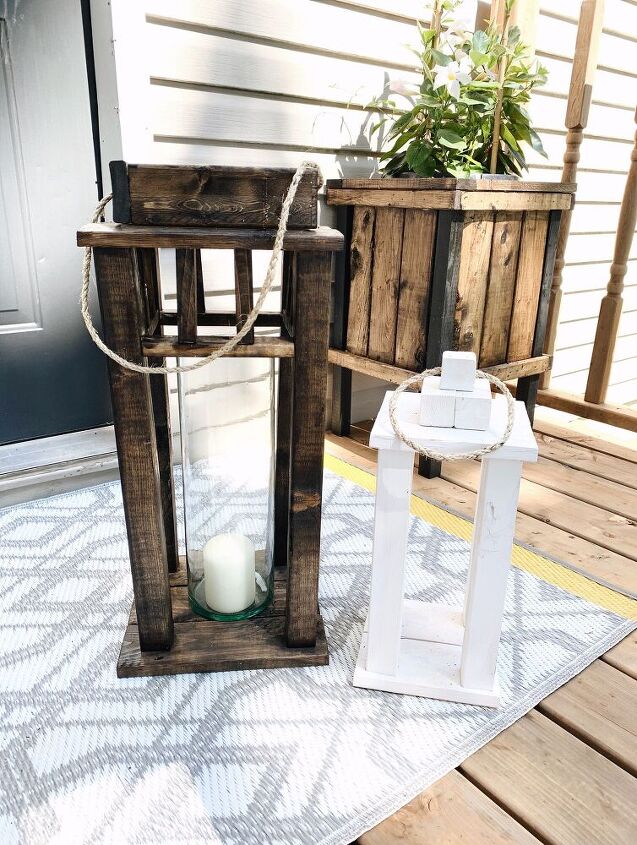
Here's what my lanterns look like before paint or stain. I also made a smaller lantern for this one to have a buddy out on the porch.
Paint/stain & enjoy!
Paint or stain in a colour of your choice, add the rope handle, and set out on your porch to enjoy!
.
.
.
For more ideas and ongoing projects, follow along on Instagram and Facebook!
Insta: @farmhouse.ongunnshill
Facebook: Lauren Ann Design
~Lauren 
Discover More Front Yard Projects
Enjoyed the project?
Resources for this project:
See all materialsComments
Join the conversation
-
 Ron39784895
on Jun 15, 2022
This is the perfect type of project cull wood. I am always looking over the cull pile at my local HD. Lots of great wood for 70% off! Love the idea! Beach theme, Christmas time, even a nice bottle of wine in one for a gift and they get to keep the lantern! Awesome!
-
-
 Cal176284507
on Aug 11, 2025
I think I would want to leave the top open on both of those. There is something about an open flame under a flat piece of dried wood that seems a little dangerous to me. Otherwise, I really like the ideas.
-









Frequently asked questions
Have a question about this project?
What are the detentions?
Ellen,
You need to get your facts correct, $700 for Kreg jig? They can be found anywhere beginning at around $30 (Amazon, Rockler, Home Depot) and a mini kit is available at Home Depot for $23 for the pocket hole jig. As for the compressor? Battery operated Brad nailers are available anywhere as well. Mitre saw, well those are available as a plastic box mitre saw for around $12 (Harbor Freight). So, if you don't have these tools on hand, it certainly wouldn't cost anywhere near your exaggerated $700 just for the Kreg jig! My husband made me 2 of these with scrap lumber and the only cost was buying wooden finials for the top because that's what I wanted. There was no baiting people. It absolutely can be done, real life!
At the risk of sounding really dumb, what makes it a lantern? There are no instructions/suggestions stating how or what to put into it that makes it light up. I apologize if I missed that part. Thank you!