


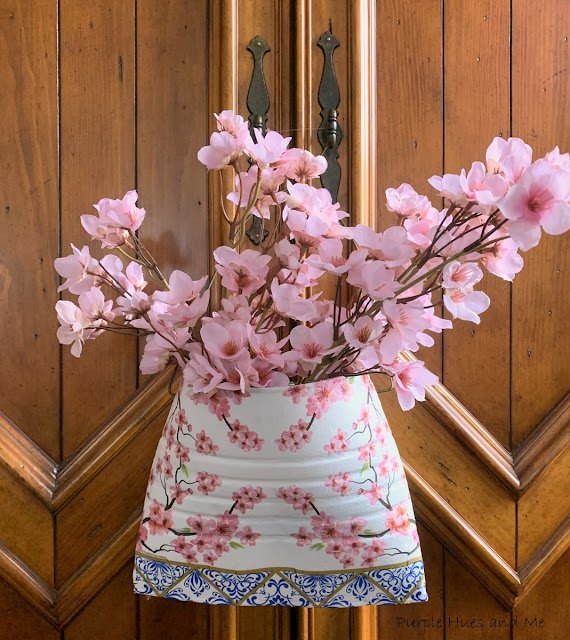
Upcycled Coffee Can Wall Pocket
I grew up in Washington DC and now live about twenty-seven miles from there. This time of year it's all about the Cherry Blossom Festival! Nothing signifies the arrival of spring in the nation's capital quite like the blooming of the cherry blossom trees and to honor American and Japanese cultures.
And then, recently on a Mod Podge Face Book group I belong to, it seemed like everyone was on a smashed tin can decoupage project rage and kept sharing their creations. So naturally I decided to jump on the bandwagon for smashing and decoupaging my cherry blossom napkins on a tin can.
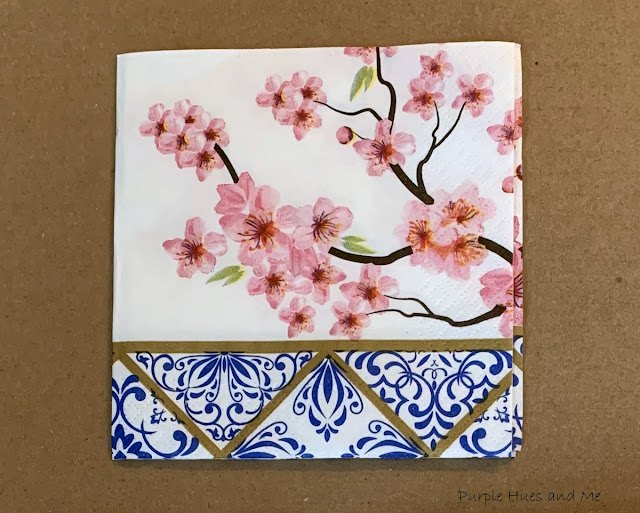
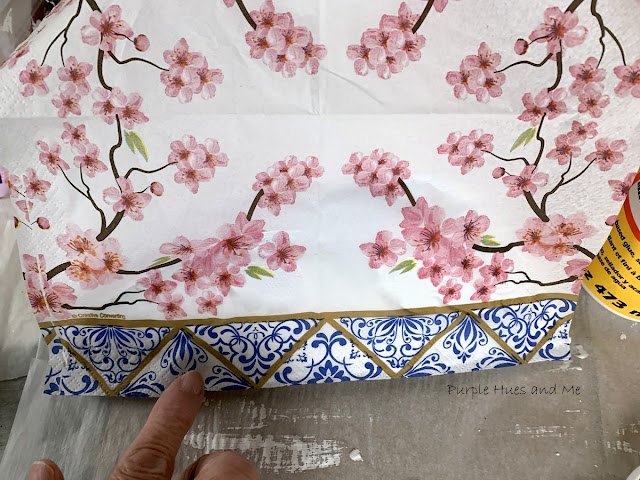
Several months ago, I found cocktail napkins with a cherry blossom design at a Wegmans store. I couldn't resist the pretty cherry blossoms pattern with a chinoiserie border
Here's how to make a upcycled Coffee Can Wall Pocket:
Supplies Needed:
- Coffee can
- Can opener
- Quick Hold adhesive glue
- Chalk paint/paint brush
- Mod Podge (Matt)
- Napkin
- Drill
- Clothes hanger
- Wire Cutters
- Needle nose pliers
- Cherry Blossom faux florals
Luckily, I already had everything I needed on hand - making this project at no cost!
How to:
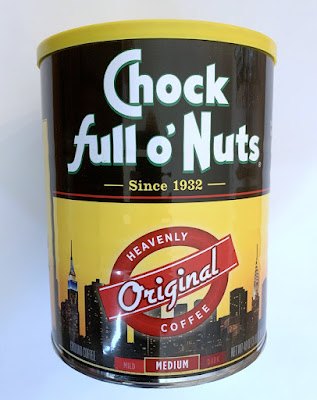
I started with a clean, empty 48 oz. coffee can and . . .
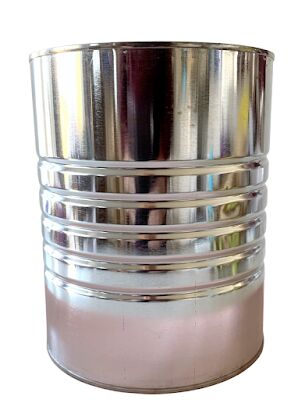
removed the bottom and label which came off very easily.
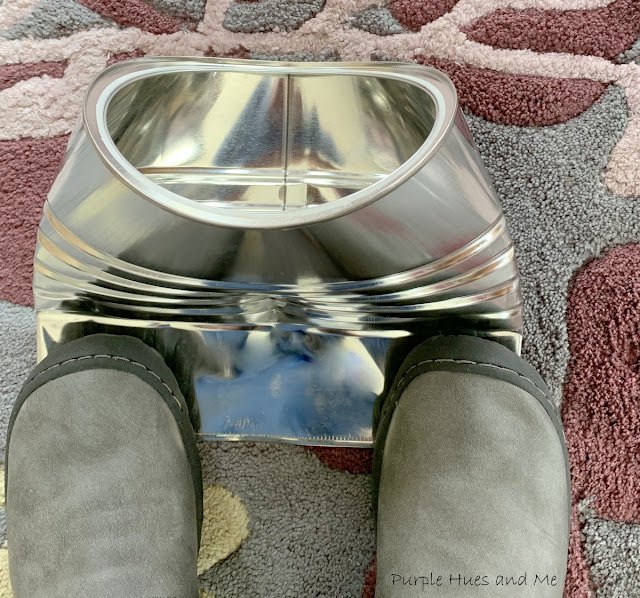
Then, I placed the can on my rug and stood on the bottom edge to press or smash it together.

Next, I added Quick Hold adhesive between the bottom edges to keep the edges together, creating a pocket. Fyi, hot glue doesn't hold the bottom edges together.
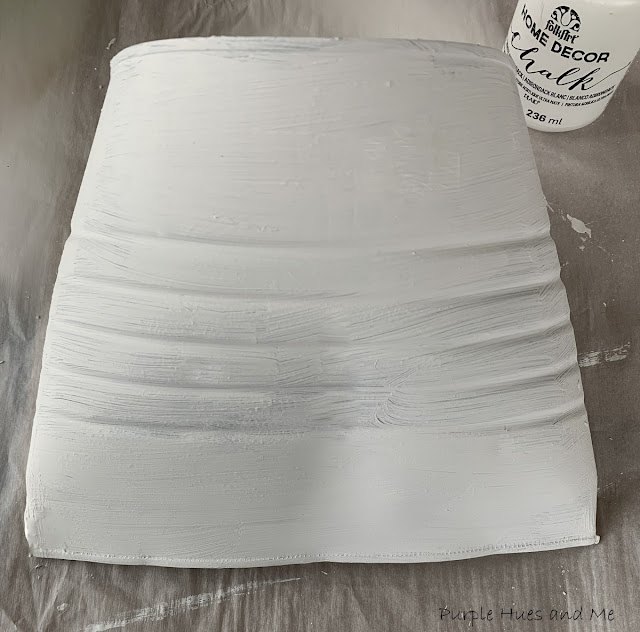
Then, I painted a couple of coats of white chalk paint on the pocket, and let dry between coats.
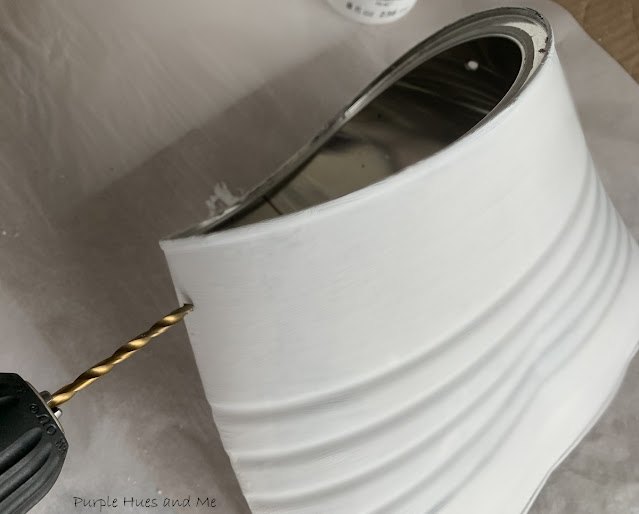
Next, drilled holes on each side of the pocket for hanging.
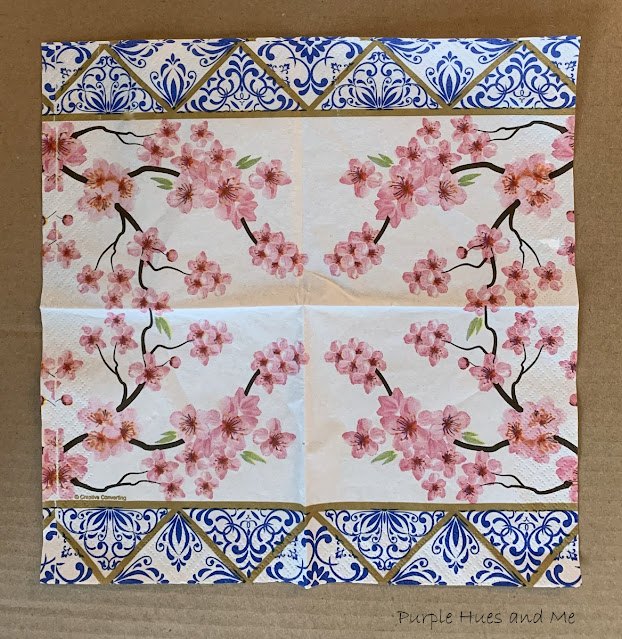
To decoupage the napkin on the pocket, I opened the napkin and removed the plain ply layer from the printed one. To do this, lightly touch a bit of Mod Podge with forefinger and thumb. Then gently tap the edge of the napkin to separate the layers.
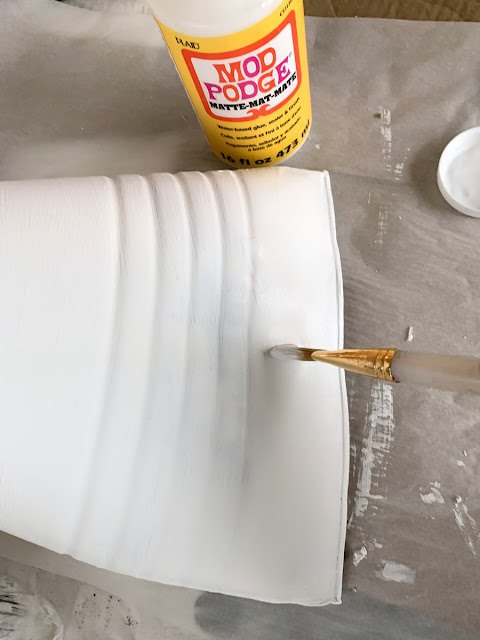
Next, lightly coat the pocket with Mod Podge in sections, starting at the bottom
and applying the border and portion of the napkin to the mod podged pocket.
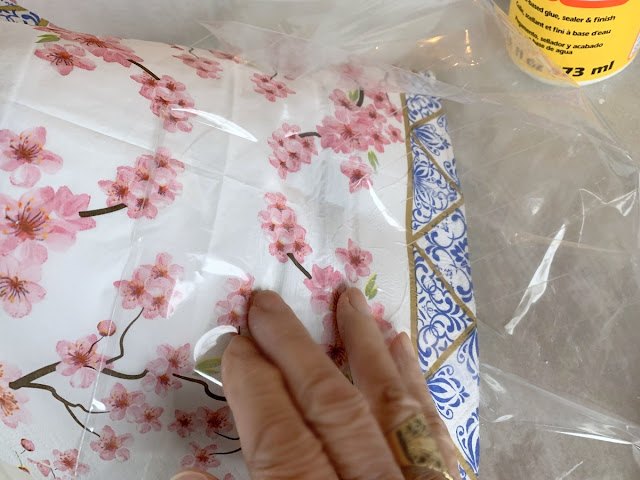
Use clear plastic (I cut up plastic baggies) to help smooth out any wrinkles being careful not to lift the napkin. Paper napkin patterns are very delicate once the white backing layers are removed. Using clear plastic helps with the adherence and is less messy than the usual technique of applying mod podge first, and smoothing out the material with a brush. Continue applying mod podge and the rest of the napkin - smoothing out with plastic until the entire pocket is covered. Let dry.
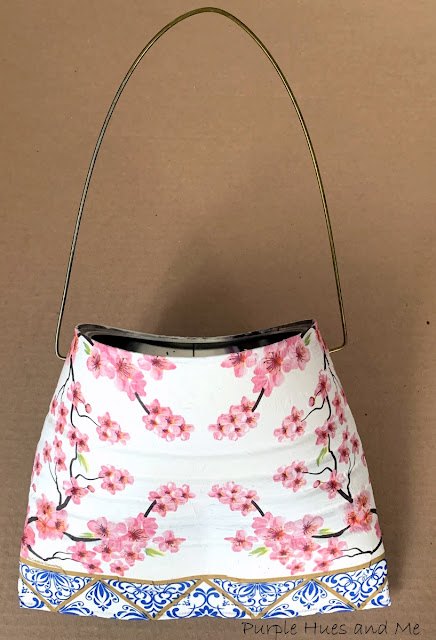
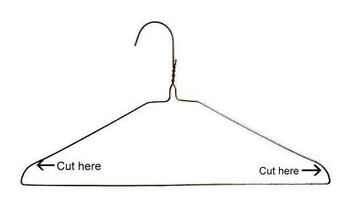
Once completely dry, add another layer of Mod Podge to seal. Then cut off the straight wire bottom of a wire clothes hanger leaving a one inch portion of curve at the hanger sides for the handle. Attach to the pocket. Use needle nose pliers to curve the wire inside to keep from pulling out. A layer of varnish can also be applied to seal the finish.
How adorable is this!
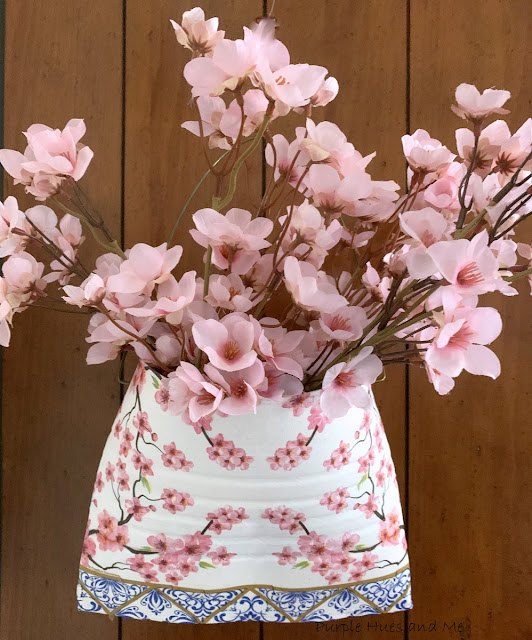
Place cherry blossom florals in the pocket to complete the look!

DIY home decor using repurposed tin cans
Resources for this project:
See all materials


Comments
Join the conversation
-
So the part used is the bottom straight wire which you have to bend slightly in order to hang
-
Thanks now I’m all set to start the project


Frequently asked questions
Have a question about this project?
What is Mod podge?
What type of glue did you use? I love, love cherry blossoms. They are so beautiful. A must TRY project for me. Thank you
How could I make these for outdoors?