


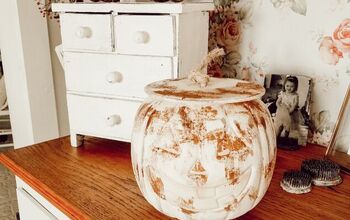
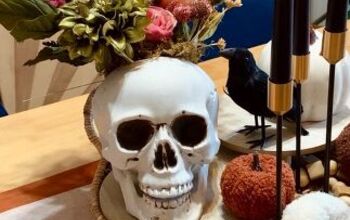
Mixed Media Cow Skull Wall Hanging
I was given this skull by a friend who farms cattle. Skulls have become really popular at the moment for home decor. They are decorated in many ways as wall hangings. I chose to give this one a mixed media makeover using items I had laying around at home. If you don't want to decorate a real skull resin skulls are available to buy on Amazon and other websites.
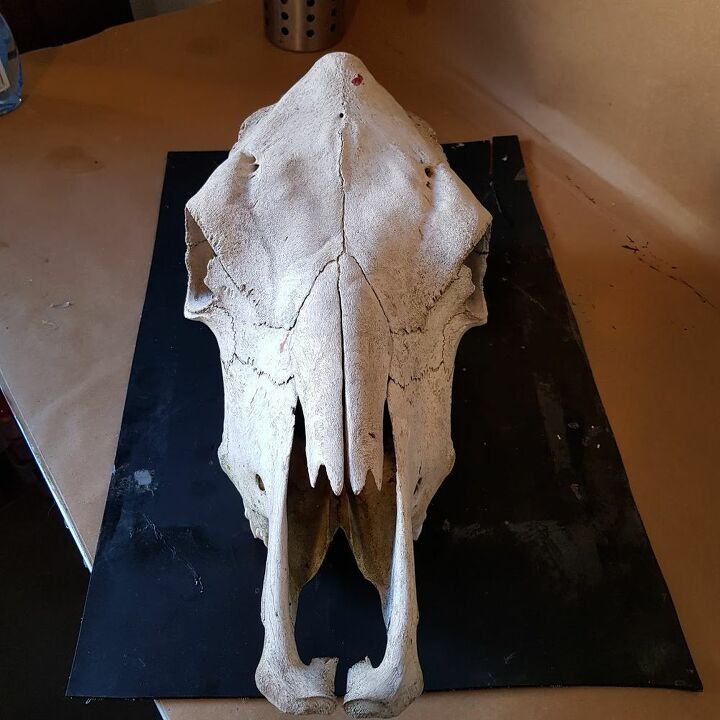
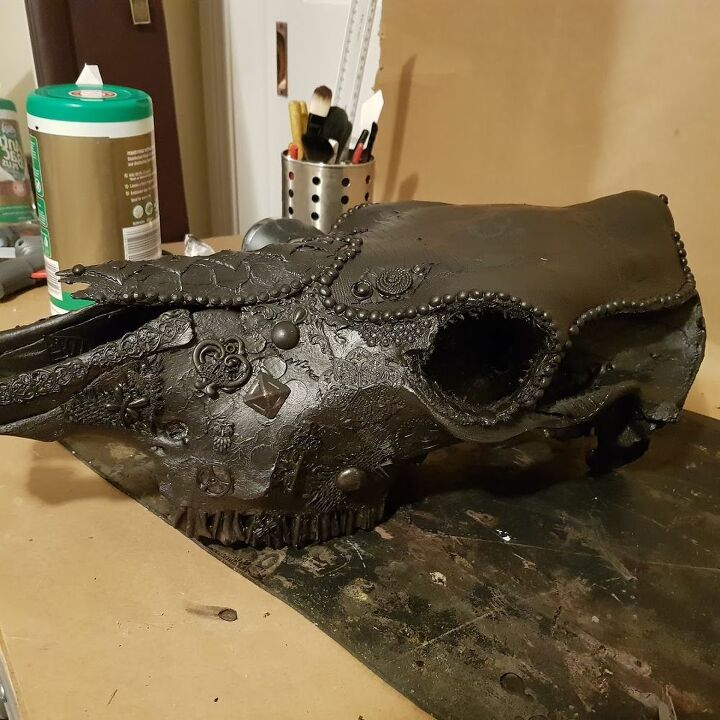
My skull has sat outside in the sun for years and was dirty. I soaked it in a bath with bleach for a few hours and scrubbed all the dirt off with a brush. I used epoxy and super glue to glue the loose teeth back into the skull. I also removed all the loose cavities inside the skull, I think they could be the sinus cavities.
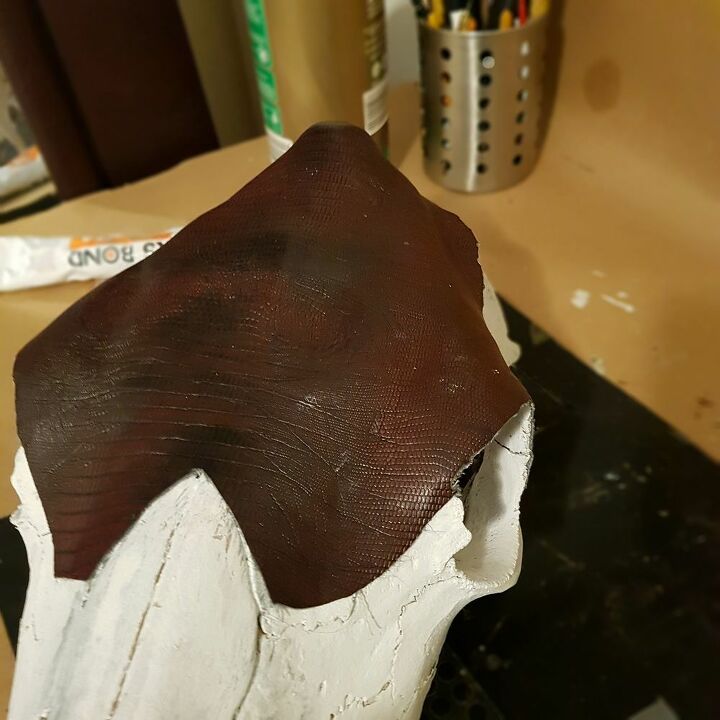
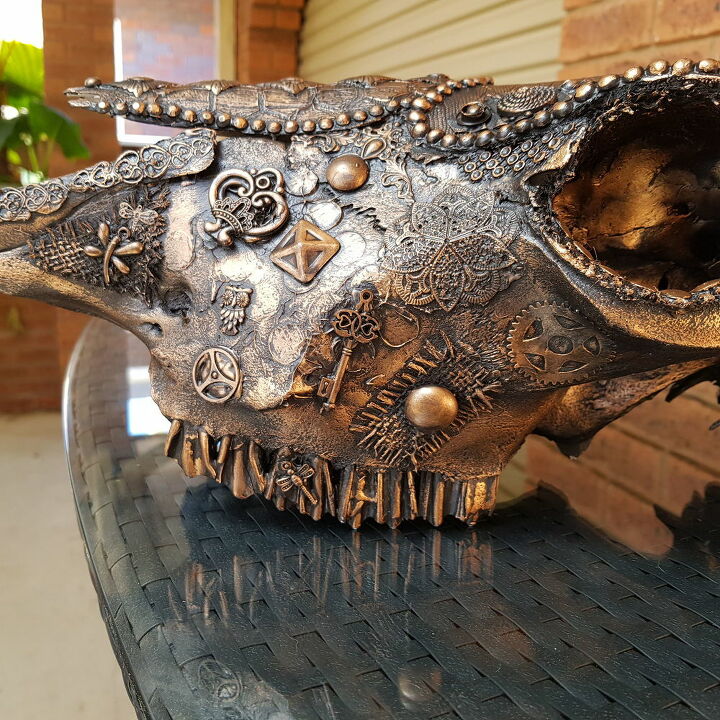
Mixed media is all about adding texture and layers to your project. I used an offcut of leather to cover the top of the skull, this will give the skull a nice texture. Glue the leather using a multi-purpose glue.
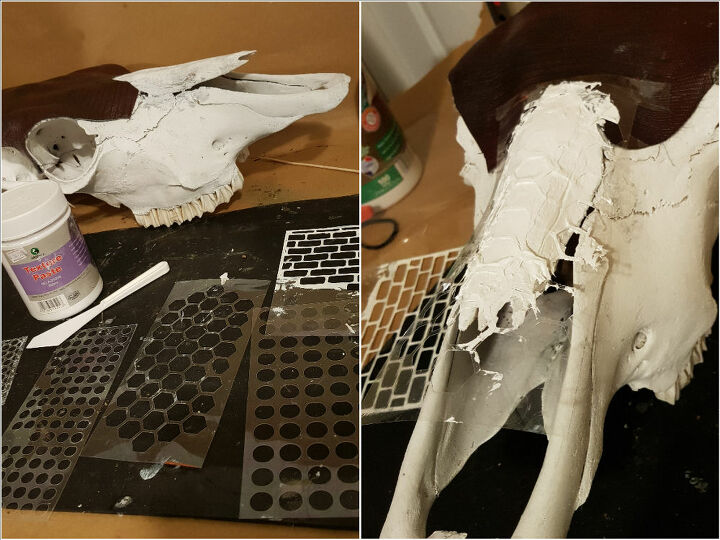
I made some stencils using a Cricut vinyl cutter in different designs. Using the stencil place it on the skull and add a layer of texture paste, then remove the stencil. This step does not need to be perfect, the imperfections make it look better in the end.
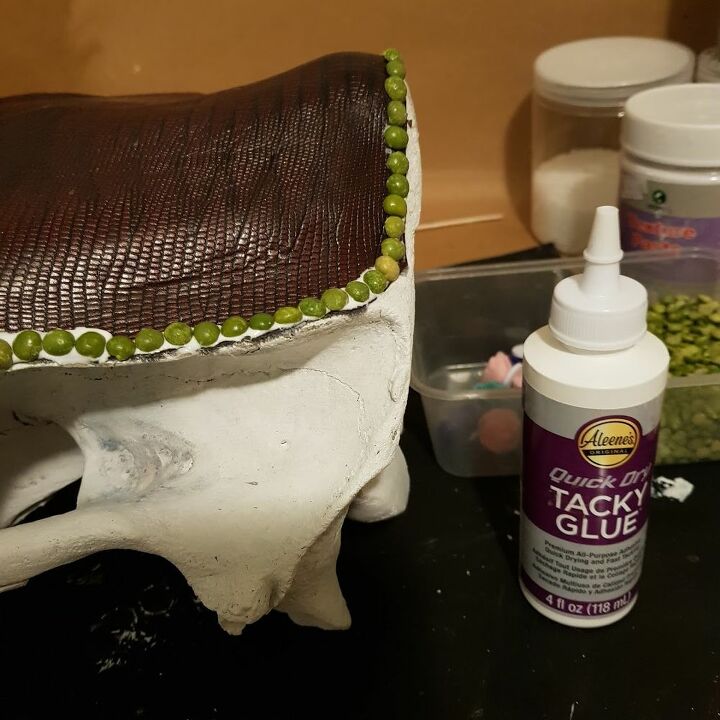
To hide the edges on the leather, I glued some split peas around the edges with tacky glue.
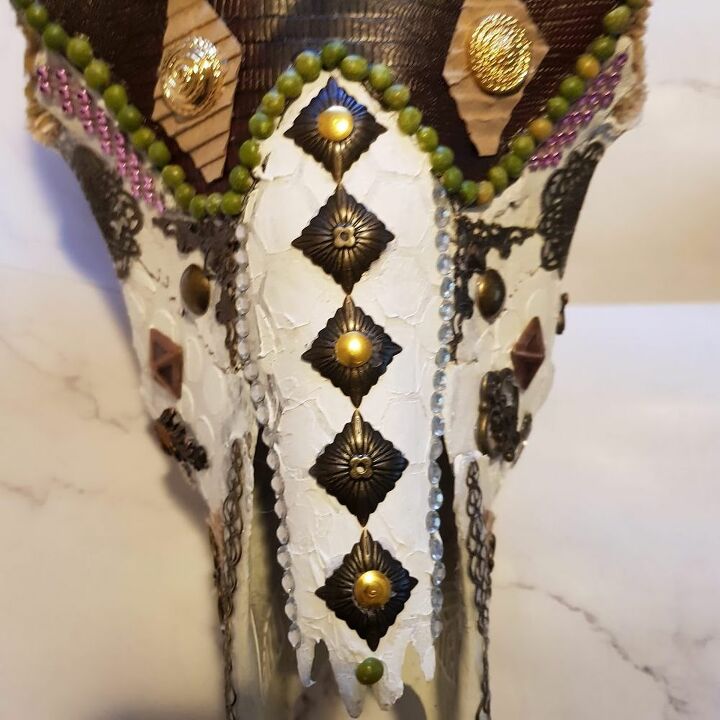
Next, I used scraps of cardboard, studs, thumbtacks, burlap, buttons, keys and charms to name a few for the rest.
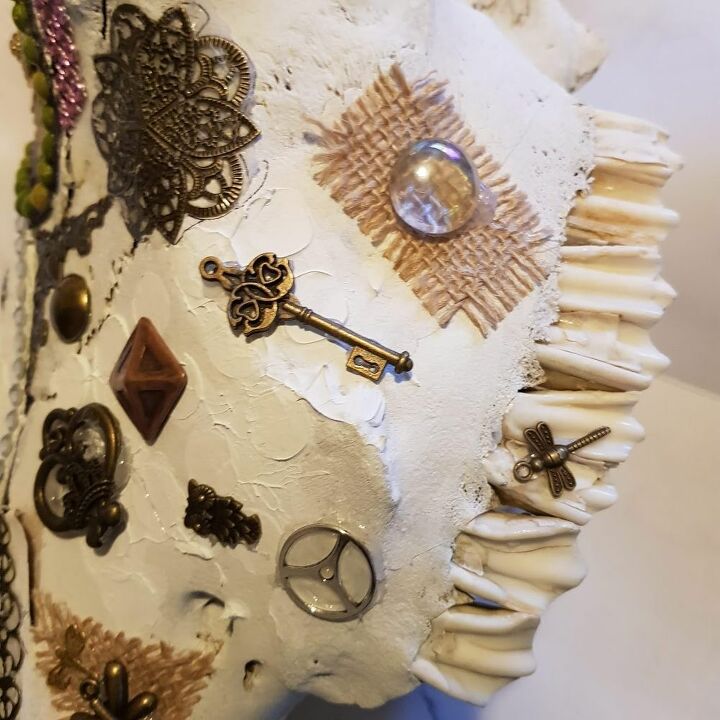
On closer inspection, you will see lots of common items.
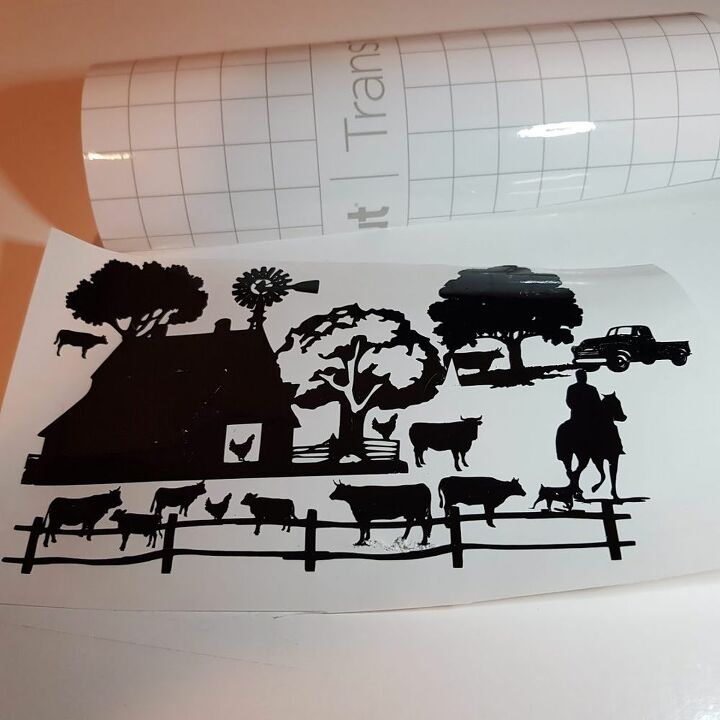
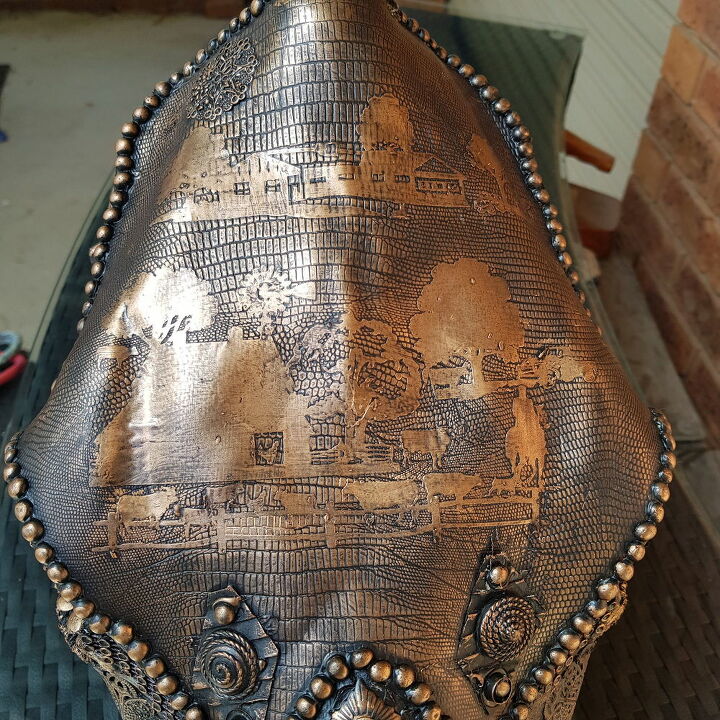
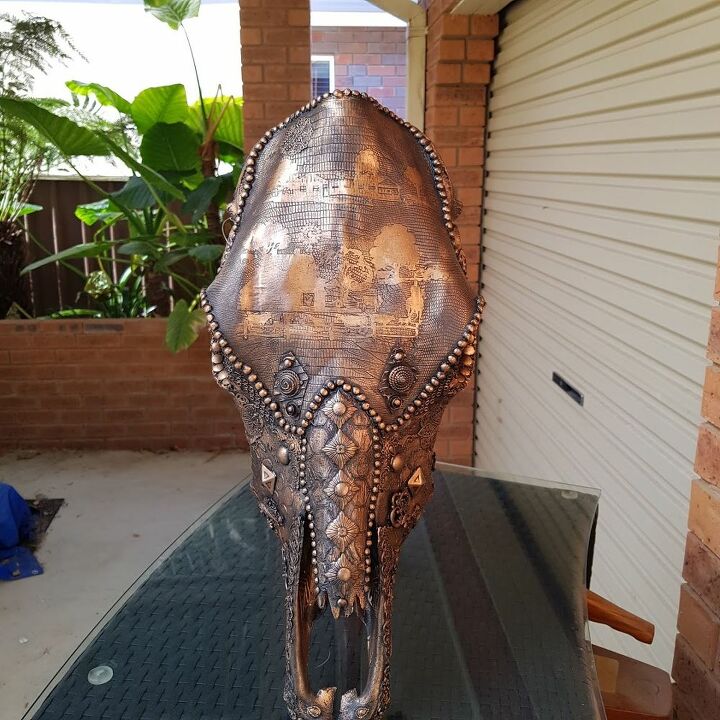
I came up with this unique idea after it worked so well on my Halloween bottles. I downloaded free clipart graphics and added them to design space which is Cricuts software. You just build up the design by adding more images then grouping them as one graphic before you cut the vinyl. I cut the farm scene design out using a Cricut explore air 2 onto permanent vinyl.
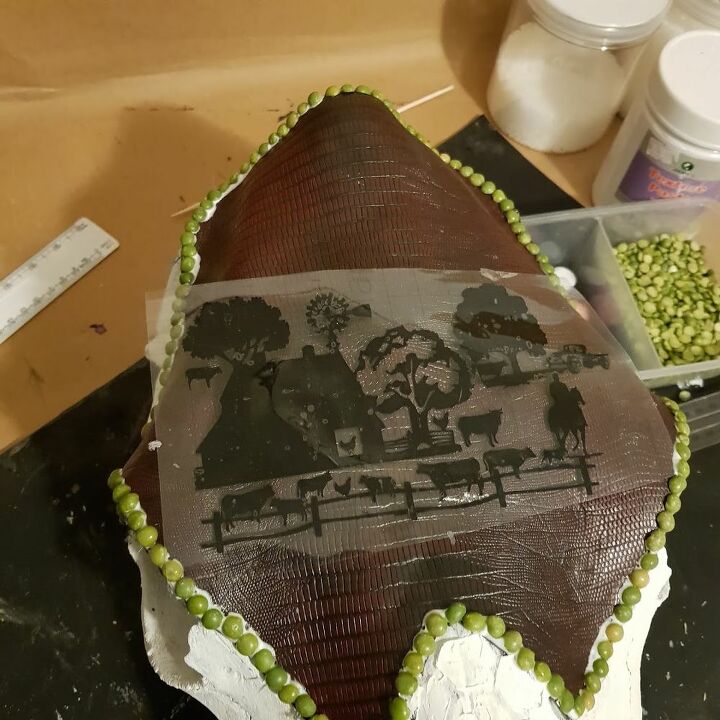
The design was transferred onto transfer tape and put onto the leather. Rub the design with a scraper until it sticks to the leather. I created 2 scenes, the farm scene in the front and the farm house in the background.
Once I was happy with all the items that were glued onto the skull I painted it all with black Gesso. You can always go back and add more items at any time.
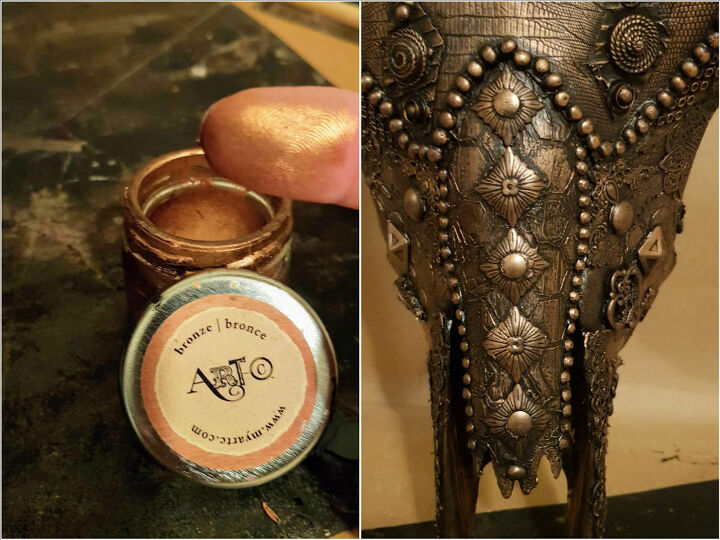
Next, is where the magic happens this step take minutes to do. Dip your finger into the bronze wax paste and rub your finger across the surface. This will make all the textures pop, don't fill in all the nooks and crannies with the bronze paste or the effect will be lost. When rubbing the vinyl decal, add 2 layers of the bronze paste. This will make the design stick out like embossed metal.
The skull I had did not have horns so I made some as best I could. Instructions available on my website.
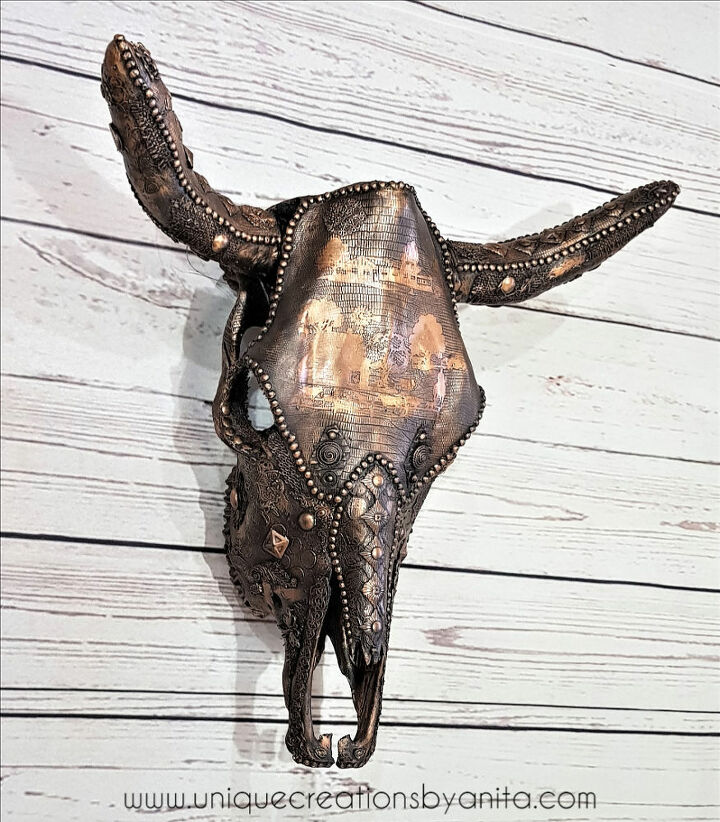
I know this is not everyone's taste having skulls in their home, I just wanted to show that they could still look good.
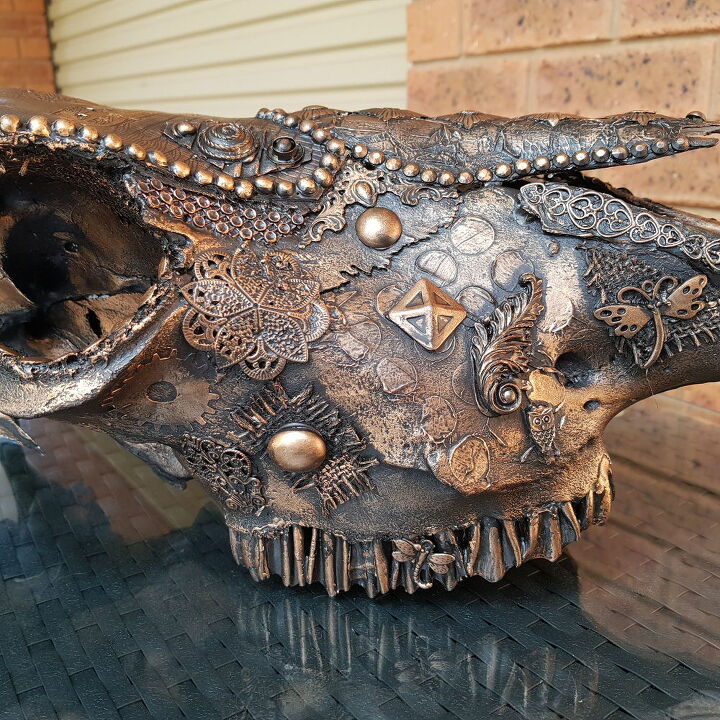
Close up view on the detail in the skull. You can keep looking and you will find something new each time you look.
I have used this technique on a few projects and they all turn out stunning. You may like this Media Media Canvas I themed around my daughters wedding as a keepsake of her special day.
This skull took me about 5 hours in total to make excluding drying times which can be speed ed up using a hairdryer. This project may look hard but when you have a close look at what I have used you will see it is easy.
Resources for this project:
See all materials


Comments
Join the conversation
-
Not my cup of tea but a very original project. And it came together very nicely.
-
Love love love! So many ranches would love this on their wall!


Frequently asked questions
Have a question about this project?