


Practical Wall Art

by
Clök Concept
8 Materials
$17
1 Day
Medium
It's been a while since I posted. I've been really busy with some big family issues. Everyone is okay, thank God, but it kept my mind pretty preoccupied!
I am back now for this challenge : wall art!
I received an order few weeks ago for a rustic black board, made from barn wood. I really enjoyed this project and I wanted to do something similar for my home. Also, I bought an art canvas on Wish before Christmas and it was way smaller than what I was expecting!! I decided to combine the black board and the art canvas together for this challenge...
Funny, or sad thing about this picture... Is that I personally know and love this artist. I already bought an original and a numbered signed print from her. When I ordered this on Wish, I had no idea it was her work, until I recognize her signature! Her name is Élise Genest and she's a great artist! Funny, because I'm a fan and didn't know it was her work, sad because I'm not sure she knows her work is being selled by Chinese company. Some of her painting are now selling around $15K!!!
This being said, I made a frame from scrap wood for my soon to be practical wall art.

My canvas was around 22 x 15 inches, so I decided to make my board 24 x 30 inches. I cut some scrap wood with those measurements, angled, and glued (wood glue) them together.I installed a small shelf at the bottom of the board.
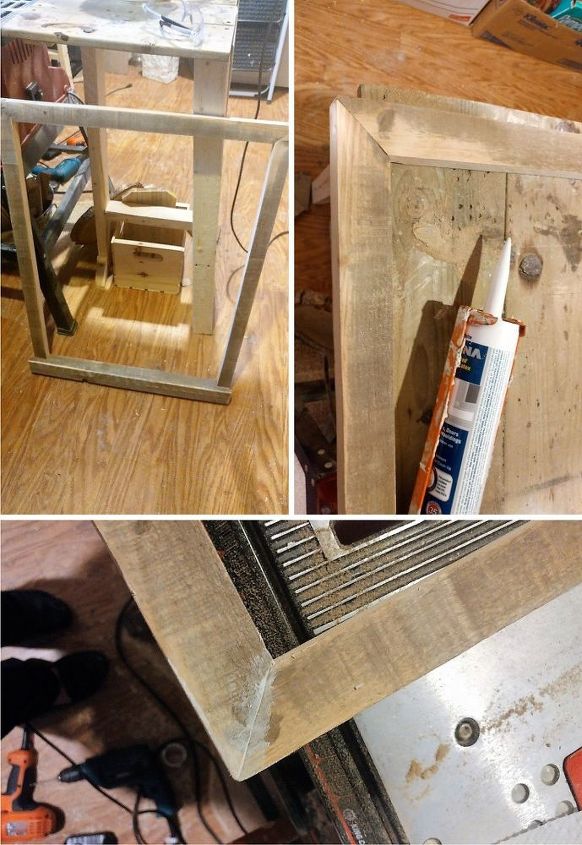
Once the glue had dried, I used silicone to fill the gaps.
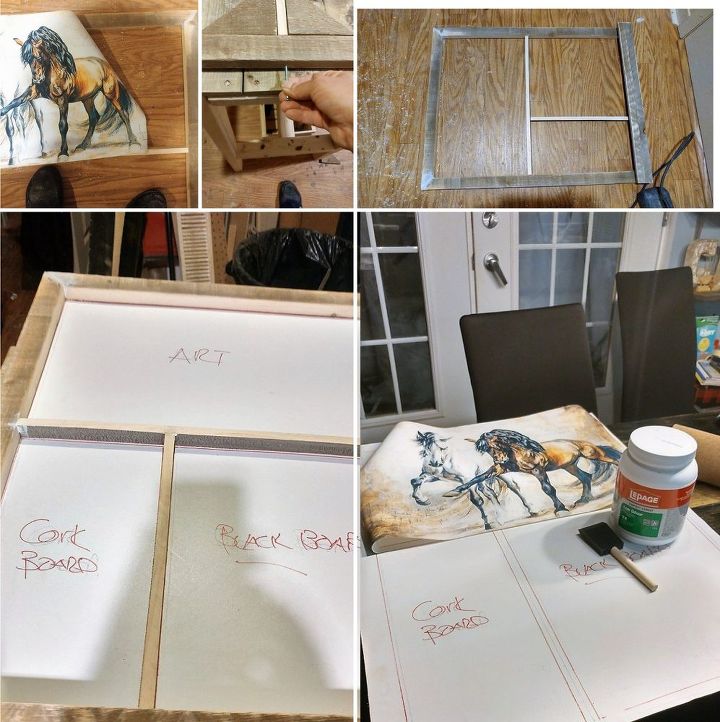
Making a dry fit and marking the edges of all the section on the bottom board.
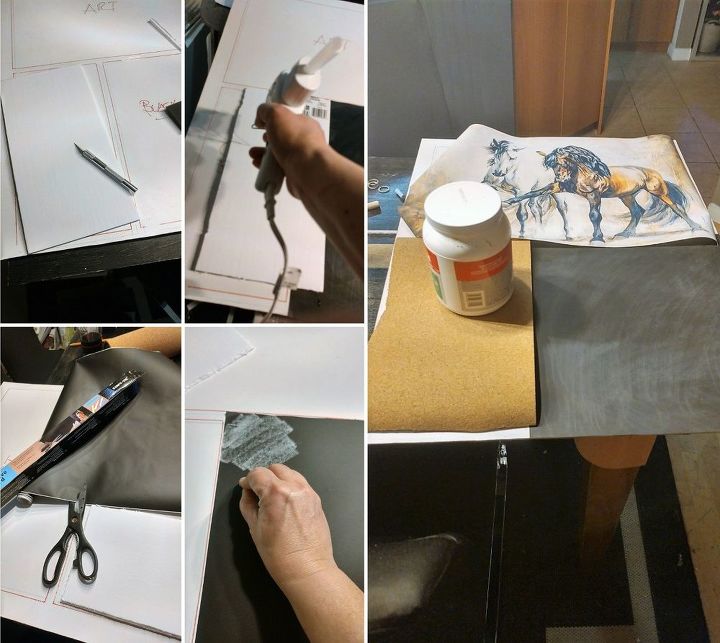
Once the edges of all the sections were marked, I could start to glue with cement glue, the black board film, the cork and the art at their right places.
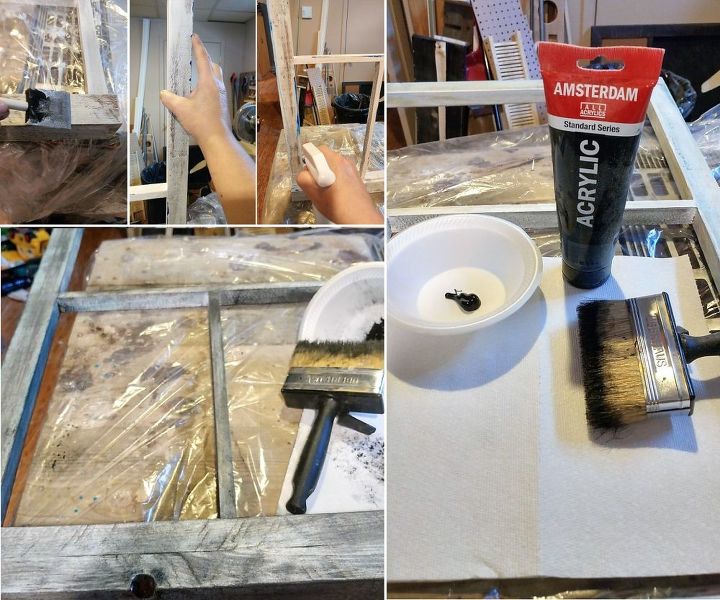
Painting the frame!! I gave a first (almost dry) coat of metallic white. Then, with my finger, I had some acrylic dark blue and mustard... Washed it away with spayed water, then softened with a paper towel. Finally used dried brush with black acrylic paint and applied dark wax.
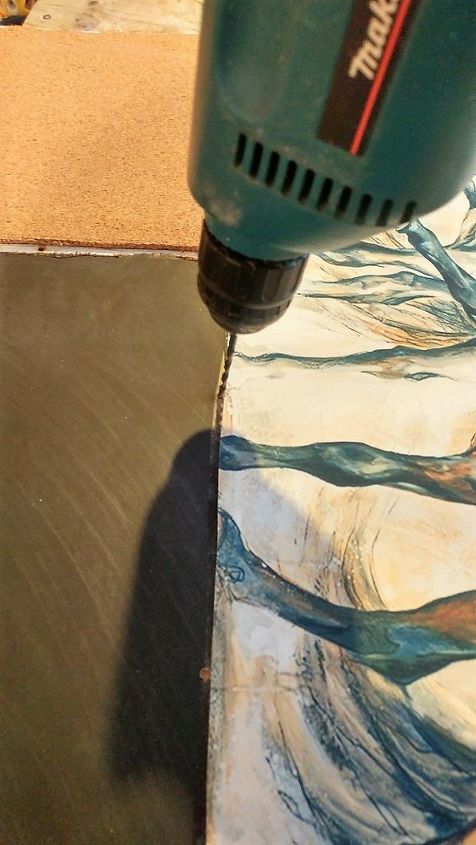
In order to screw the board to the frame, I made pre-holes on the right side of the board. I then knew exactly where to screw. You don't want the screws to show on your art or cork board!
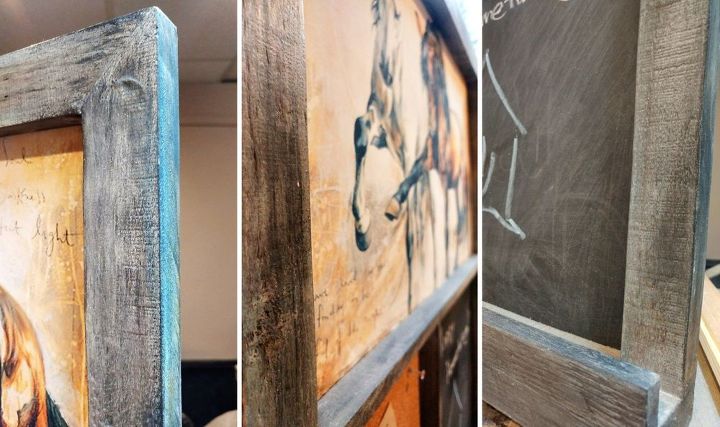
Here is a closer look of the final result!
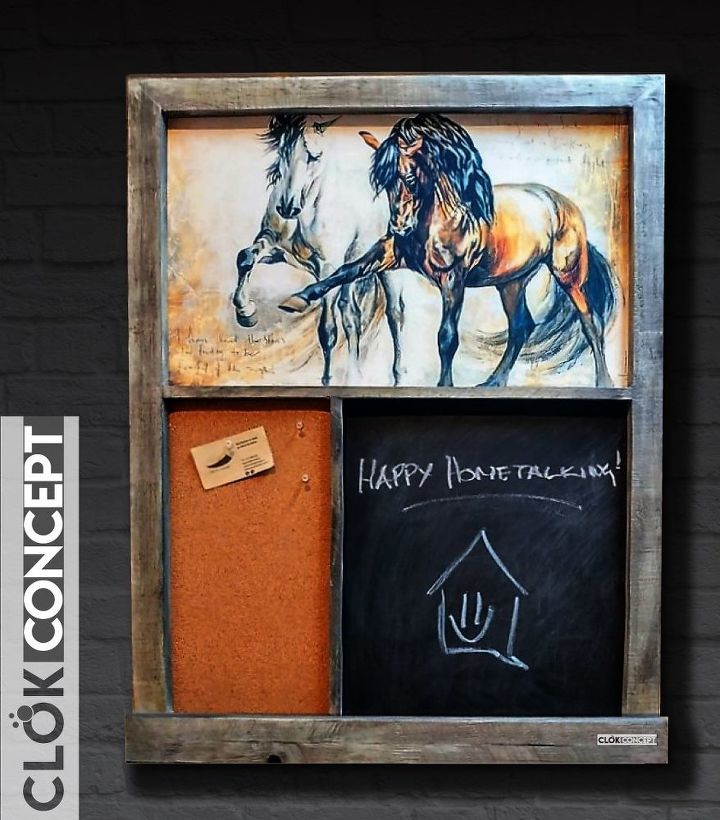
And there it is!
Truly hope you enjoyed this project and that it will inspire you to do one of your own!
Happy Hometalking! :)
Resources for this project:
See all materials


Any price and availability information displayed on [relevant Amazon Site(s), as applicable] at the time of purchase will apply to the purchase of this product.
Hometalk may collect a small share of sales from the links on this page.More info


Frequently asked questions
Have a question about this project?