


DIY Concrete Floor Remodel With Acid Stain

3 Materials
$300
2 Days
Easy
Transform your Concrete floor into a brand new and practical look using Direct Colors Concrete Acid Stain! While the process is a little technical, it's not as difficult as you might think and it will make a huge visual impact on the space.
Let's take a look at our 2017 End of Summer Facebook Photo Contest winner Robb & Mona's bathroom floor project!
Beware, once you successfully stain one room, any area of plain concrete will become a new target!
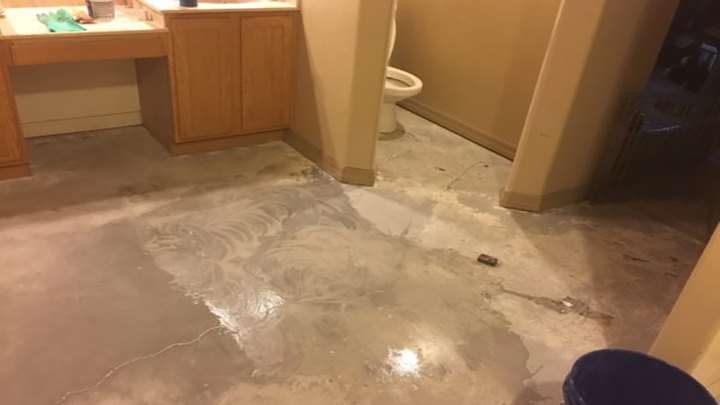
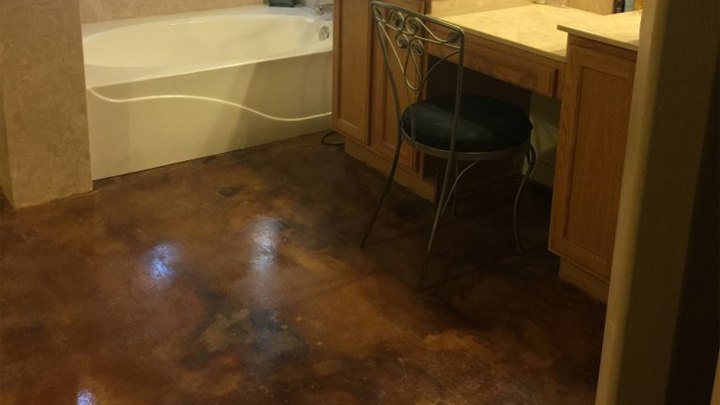
Pick a Room: Robb & Mona picked their master bathroom floor to start their acid stain project.
"We picked a room (our master bathroom floor which was previously carpet, GROSS!!!) that if our project was a complete failure we could use other options as a backup."
Floor Prep: Surface preparation is everything folks!!!
- Removed carpet, carpet padding, and all the filth that came with it. Yuck!
- Removed tack strips, after research we found out prying is not the way to go here, merely tapping away gently until it releases on its own, this seemed to do the trick.
- Start cleaning the bathroom floor…
We Found:
- Glue residue (not actual carpet glue) – To remove we sprayed with water, let soak for about 10 minutes and used a sanding block to remove.
- Paint- Scraped thick paint off with razor blade. We found that a belt sander with 80 grit sand paper was the quickest way to remove thin or over spray paint, however it was very messy.
- Carpet glue -We also used the belt sander on carpet glue as well.
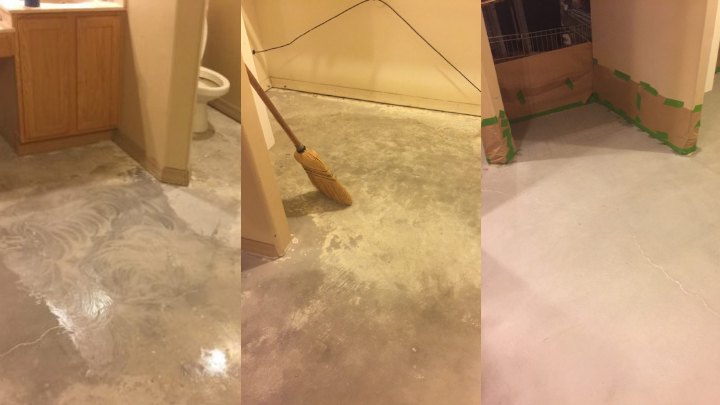
After all the contaminants were removed from the surface, we wiped down the entire bathroom floor with an organic degreaser and water solution to remove any remaining residues. We protected the walls from acid stain over spray with contractor’s paper and painter’s tape.
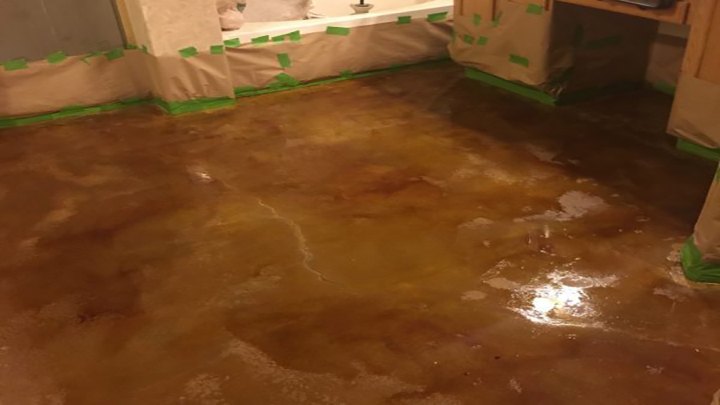
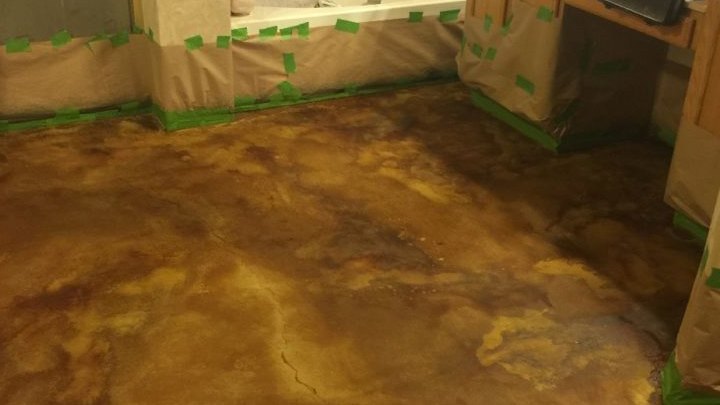
Now for the FUN part: Acid Staining the Floors
"After inspecting several pieces of granite, we decided on an application pattern that we wanted to try and replicate with Concrete Acid Stain."
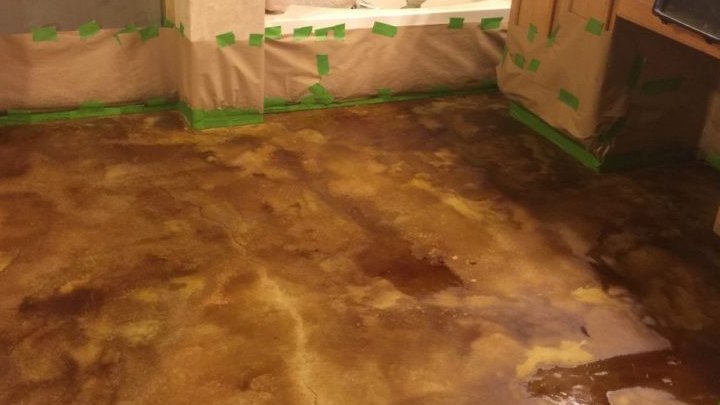
Applying the Acid Stain: Use an All Plastic Garden Sprayer!!
- Coffee Brown was used first to produce rich dark areas
- We used Cola around the edges of the Coffee Brown to create that granite look we were after
- Cola was used again this time diluting the stain with equal parts water to fan around the edges of the fully concentrated Cola stain
- Lastly a 1 to 2 ratio of Cola was used to fill in the remaining concrete areas and was allowed to dry completely
"By using this process, we were able to navigate throughout the room stepping on the untouched concrete areas."
Neutralizing the Acid Stain and Removing the Residue
Once the Acid Stain has dried and has been given at least the recommended minimum time to React, the surface should be Neutralized and all debris or excess stain removed in the following manner
- Prepare a baking soda and water solution using 1-2 tablespoons of baking soda per gallon of water
- Thoroughly spread the solution across the surface, scrubbing with a soft nylon bristle scrub brush where needed to remove residue
- Mop the surface carefully using clean water until nothing but clear water is wrung out. All residue and excess color must be removed* from the floor BEFORE leaving to dry
- After the surface has completely dried,** the floor should be ready to seal
* A shop vacuum can be used for picking up excess water and residue.
**The clean, wet surface will be close to the color of the sealed surface.
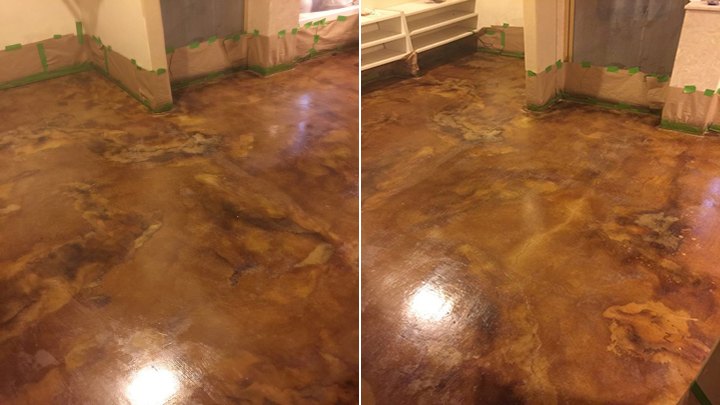
Seal with a High Quality Acrylic or Polyurethane Sealer!
Robb & Mona chose our 550 Glossy Water Based Polyurethane Sealer for their floor. Not only for its shine but also for its lasting protection.
You will need:
- Non-shedding 3/8” nap roller with an extension pole
- Chip brush or trim pad to cut in edges
- Plastic paint tray
How to Apply 550 Water Based Polyurethane Sealer:
- Pour mixed material into a plastic paint tray
- Saturate the roller in sealer and roll off excess in paint tray
- Apply an even, light coat allowing the weight of the roller to do the work
- Do not bear down on the roller to release more sealer as this can cause bleeding resulting in lap lines
- Maintain a wet edge during application and carefully blend out any roller lines without overworking the sealer
- Allow 15 to 18 hours of cure time for the first coat of sealer
And there you have it, first time applying and it turned out beautifully
"The prep work is the most challenging part but well worth it in the end, we were so excited after finishing the master bathroom floor, that we have since completed our master bedroom, with plans to finish the entire house. Thank you to Direct Colors for providing the tools and resources for us to complete a project we would have never dreamed possible with amazing results."
Thank you,
Robb & Mona
{
"id": "5078632",
"alt": "",
"title": "",
"video_link": "https://www.youtube.com/embed/TJGH9UBwpOw",
"youtube_video_id": "TJGH9UBwpOw"
}
{
"width": 634,
"height": 357,
"showRelated": true
}


Frequently asked questions
Have a question about this project?