


Save Your Sofa: Here's How to Repair a Tear in a Leather Couch

By Judy Schumer
A leather couch is not only beautiful, but it’s also durable. Leather is one of the best materials for couches because it can hold up to constant use while retaining its beauty. With the proper care, a leather couch can last years longer than a fabric counterpart. A downside to leather: Without the right care or precaution, it can tear.
If you have a tear in your leather couch, don’t despair! You can repair and restore your leather couch with a few easy steps. In this guide, you’ll learn how to repair a tear in a leather couch to restore it to its natural beauty, whether you’re dealing with a small rip or a larger hole in your couch.
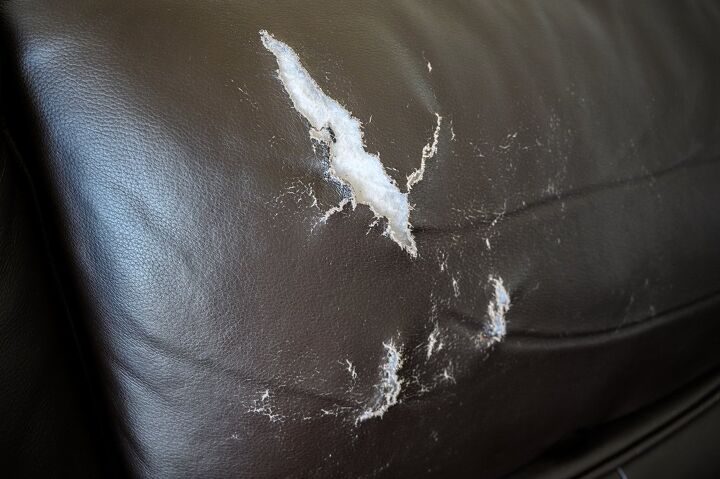
Photo via Shutterstock
Why Leather Tears
Leather, although a durable material, is prone to tears as much as any other couch fabric. Here are some simple reasons why leather tears. a few that happen over time:
- Your pet’s nails can damage a leather couch as soon as they come into contact with it. If your cat uses it as a scratching post, the punctures from their nails can spread and turn into a tear.
- When leather is exposed to sunlight for prolonged periods, it dries out, which causes cracking. The cracks eventually weaken the fabric enough for it to tear.
- Dry, heated air can also cause the leather to crack, then tear. Leather needs moisture through conditioning, but dry heat removes that moisture quickly. Dried-out leather turns into cracked leather over time.
- Sharp objects can cause a tear in leather by creating a puncture that spreads. The sooner you fix the puncture, the less chance you have of a full-blown tear developing.
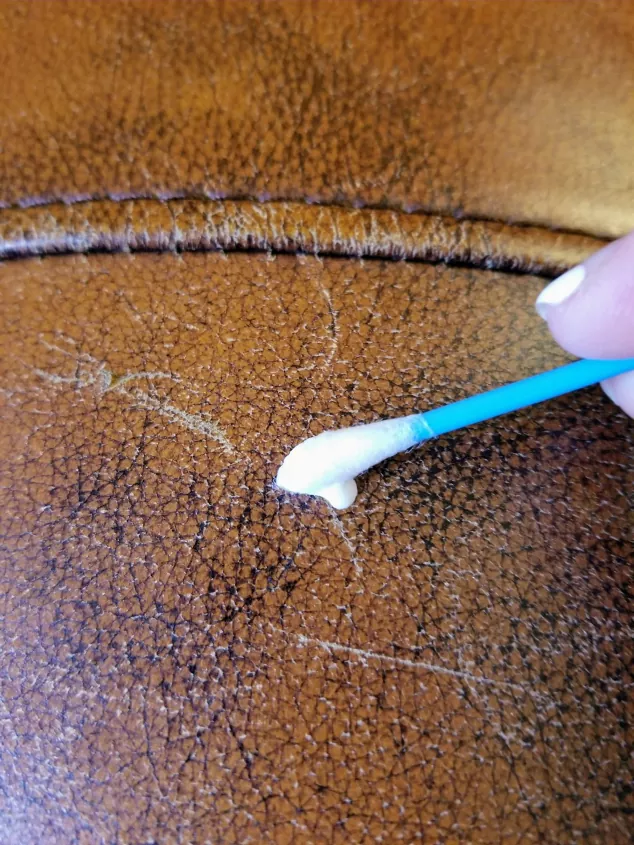
Photo via Ahna Fulmer // Hammers N Hugs
How to Repair Minor Tears in a Leather Couch
Minor tears can become large rips if left to their own devices, so it’s a good idea to fix a minor tear in leather as soon as possible. Here’s how to fix those small scratches and knicks in leather.
Tools and Materials Needed:
- 70-percent rubbing alcohol
- Clean, soft rag
- Leather glue
- Toothpick or cotton swab if needed
- Leather conditioner
- Cotton ball
Step 1: Clean the Leather
Clean your leather couch before attempting a repair to get the best results. To clean it, dampen a rag with rubbing alcohol and use it to gently clean the area around the tear. You want to remove any grease or dirt that may prevent the glue from adhering. Keep the rag close by; you’ll use it in the next step.
Step 2: Glue the Tear
Apply the leather glue with the applicator it came with. If your glue didn't come with an applicator, use a toothpick or a cotton swab to spread a thin film of leather glue around and over the tear.
Push both sides of the tear together so they meet. With one hand, while still holding the split leather together with your other hand, gently wipe away any excess glue on the sides of the tear with the alcohol-dampened rag.
Keep pinching the leather together for about five minutes to give the glue time to set.
Step 3: Let the Glue Dry
Let the glue dry for three or more hours. Ideally, avoid sitting or leaning on or near the repaired area for 24 hours for a strong, pliable repair. Once the glue has fully dried, dab a small amount of leather conditioner onto a cotton ball and condition the repaired area to replace the moisture that was removed.
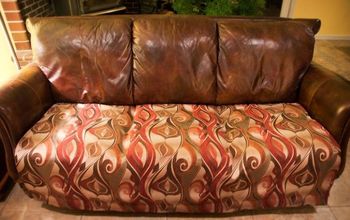
How to Repair a Major Tear in a Leather Couch
If you have a large tear in your leather couch—about the size of a baseball—your repair process will involve more than just glue. You’ll need to reinforce the leather so the adhesive and filler will adhere.
Stay Away from Super Glue
Make sure you do not use super glue to repair a leather couch. Super glue dries very hard and isn’t flexible, which means it will crack as your couch is used and as the leather stretches. Buy leather glue and leather filler for professional-looking results.
Tools and Materials Needed:
- Scissors
- ½ cup distilled vinegar
- ½ cup warm water
- Medium bowl
- Two soft, clean cloths (microfiber works well)
- Iron-on denim patch cut slightly larger than the opening of the tear
- Tweezers
- Leather glue
- Toothpick
- Paper towel, slightly dampened (not wet)
- Heavy book
- 70-percent rubbing alcohol
- Cotton balls
- Soft leather filler
- Palette knife
- Cardboard to spread leather filler onto
- Grain pad for texturing (optional)
- Leather dye to match your couch color
- Damp sponge
- Leather finish
Step 1: Prep the Tear
To fix the tear in your leather couch so the repair isn’t noticeable, you’ll need to use scissors to trim any loose threads around the tear. You don’t want bumps from frayed threads showing through the glue or filler.
Step 2: Clean the Leather
Mix vinegar and water in the bowl. Dip one of your cloths in the solution and wring it out so it's just dampened. Do not soak the cloth; you want just enough solution to clean the leather without saturating it.
Use the dampened cloth to gently clean the leather around the tear to remove dirt and oils so your glue will stick. Using the dry second cloth, dry the newly cleaned leather. Be sure it is thoroughly dried before moving into the repair steps.
Step 3: Place the Denim Sub-Patch
The denim patch you’ve cut to fit behind the tear will become a sub-patch, or a reinforcement hidden behind the new leather surface to give it strength. It can help to cut rounded corners on the patch to make it easier to slide behind the tear.
Denim patches have two sides: The denim side and a shiny adhesive side used for ironing on when patching clothing. Use the tweezers to slide the denim patch behind the tear, shiny side facing up. The tweezers will help you wiggle the patch and flatten it out as needed.
Step 4: Glue the Denim Sub-Patch
Place a dab of leather glue onto the toothpick, then apply the glue to each edge of the tear, making sure to cover all edges evenly. You can use the toothpick to spread the glue.
Press down on the leather to adhere to the patch beneath it. If excess glue squeezes out of the edge, dab it away with a slightly dampened paper towel. If the tear is on a flat surface, place a heavy book over it to apply pressure to the glued area, helping it to adhere to the sub-patch. Leave the book on the tear for about 30 minutes so the glue can dry.
Step 5: Clean the Repair
You’re preparing the area for the filler, so it adheres to the leather without dirt or oils interfering with adhesion. Once the glue has completely dried, dampen a cotton ball with 70-percent isopropyl alcohol and gently wipe around the tear to clean it. Let the repaired area dry completely.
Step 6: Apply the Filler
Place some of the soft leather filler onto your cardboard palette. Using your palette knife, apply a thin layer of the filler to cover the tear and the edges of the tear. Feather the edges out with your fingers. The filler levels out the torn area, making it even with the surrounding leather on the couch.
Let the filler dry according to the manufacturer’s instructions. You can speed up the process by using a hairdryer, set on warm (never hot), holding it about six inches away from the filled area.
Continue adding thin layers as needed (letting each layer dry in between coats) until the filler is level with the surrounding areas around the tear. If your leather has a visible grain to it, use a grain pad to emboss the filler.
Step 7: Let the Filler Dry
Check your product instructions for a suggested drying time, but an hour is usually enough for the filler to dry thoroughly. You should be able to press on the filler without it moving.
Step 8: Apply Leather Dye
Apply the leather dye onto the dampened sponge. Dab a thin coat of the dye onto the repair. Let the dye dry, then repeat as needed to thoroughly blend the repaired area with the leather around it.
Step 9: Apply Leather Finish
If your final dyed area appears duller than the surrounding leather, you’ll need to apply a leather finish to match the luster of the original leather. Use the damp sponge (an end without dye on it) to dab a thin coat of the leather finish over the repaired area. Let the finish dry according to the product instructions, then repeat if necessary to match the leather’s luster.
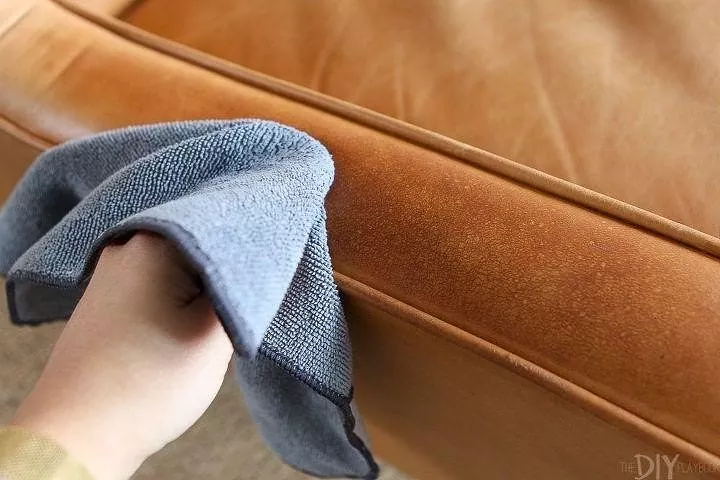
Photo via The DIY Playbook
How to Prevent Leather from Tearing
Besides keeping pets and sharp objects away from your leather couch, there are a few other ways to protect your leather couch from tearing:
- Keep it out of the sun. Sunlight is just as damaging to leather as it is to your skin; it causes drying, which evolves into cracks and rips. If the room your leather couch is in gets direct sunlight, keep the furniture away from the windows. You can also use light-blocking curtains to prevent sunlight from reaching your leather couch.
- Keep it conditioned. Conditioning leather keeps the moisture in the material, preventing dryness and cracking. If you live in a cold climate with dry, winter air indoors, condition your couch with a leather conditioner in the winter and the summer. If you live in a hot climate, you can condition the leather once a year as long as it isn’t exposed to sunlight or heat. In those cases, you’ll need to condition twice a year.
- Clean it with a high-quality leather cleaner. Alcohol-, petroleum-, and silicone-based cleaners can damage or dry out leather.
When to Call a Professional
There are times that leather repairs are best left to professionals. Before you attempt a repair on your own, get advice from a professional if:
- You aren’t sure if your couch is pure leather. Some couches are made with bonded leather, which consists of pieces of leather attached to a fabric back. The methods for repairing bonded leather are more complex than repairing a leather couch, and a professional will identify the type of material you have and what needs to be done to fix it.
- You have a rip or hole larger than a baseball. Large rips or tears require extensive patching and blending of repair materials. Attempting to repair a large hole yourself could result in a lumpy, noticeable repair.
- Your leather is burned. Burned leather requires special care and may need to be cut out entirely. A professional will repair the area correctly and stop the damage from spreading.
- Your furniture is a high-end leather piece. When you’ve spent a substantial amount of money on a couch made with high-quality leather, a professional is your best option for protecting your investment. Professional leather repair services use different materials for different types of leather, and a reputable provider will guarantee their work—ensuring your couch looks as luxurious after the repair as it did before it was damaged.
Have you had to make any repairs on leather? Let us know in the comments, we’d love to hear from you!
Comments
Join the conversation
-
Such helpful information!!! Thanks!!!
-
Thank you for the info.


Frequently asked questions
Have a question about this project?
How do you repair discoloration?
Hi, can a leather love seat be died another color?