


Penny Backsplash

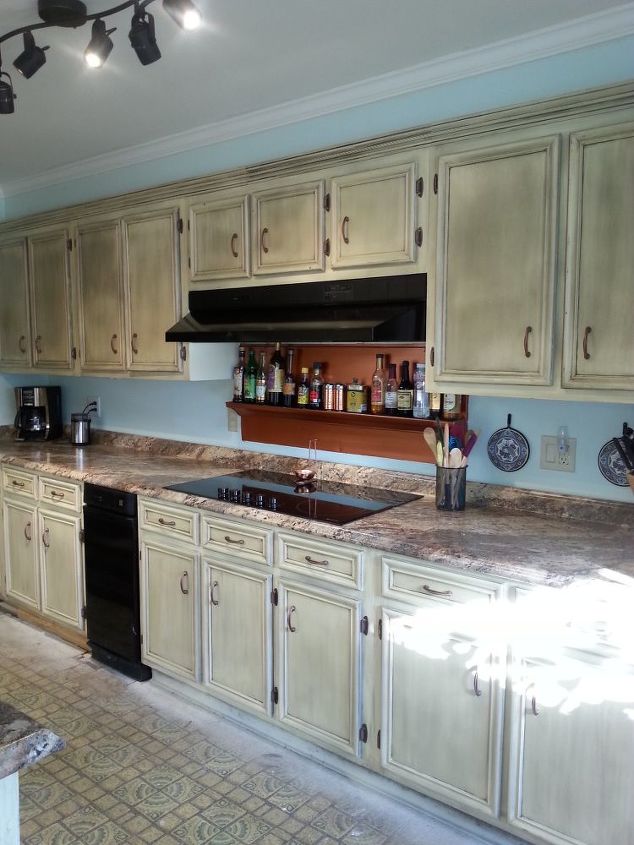
We bought an old home and remodeled. I had painted mahogany cabinets cream colored and antiqued them and the next project was the back splash.I wanted a copper colored back splash and when browsing through the internet, pennies came up. After researching, trying different patterns, and learning from my own mistakes, we completed our project.
the walls weren't exactly flat so I cut 1/4 inch backer board (Luan) to panel sizes, obtained uncirculated pennies for the bright part of the design and sorted pennies for dark brown lines.
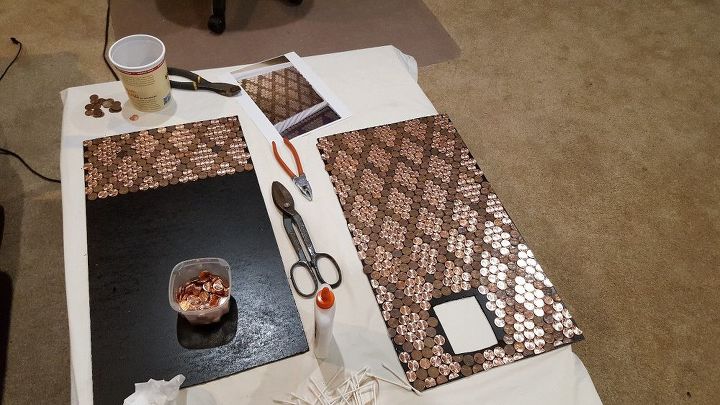
To know how large to cut the boards, I divided the area by the number of panels I thought would be easy to manipulate. I used brown construction paper to cut to the size of the wall opening as a template, using an exacto knife to cut out the areas for outlets or switches. Then cut up the boards and spray painted them black. I could finish a board in 2 to 3 evenings after work watching TV 

I wanted a 'featured' design over the sink and designed a layout slightly different from the rest. I learned the hard way that you couldn't let the glue flow from beneath the penny, it would be opaque under lighting once coated with bar top epoxy. I used q-tips and elmers to glue the pennies.
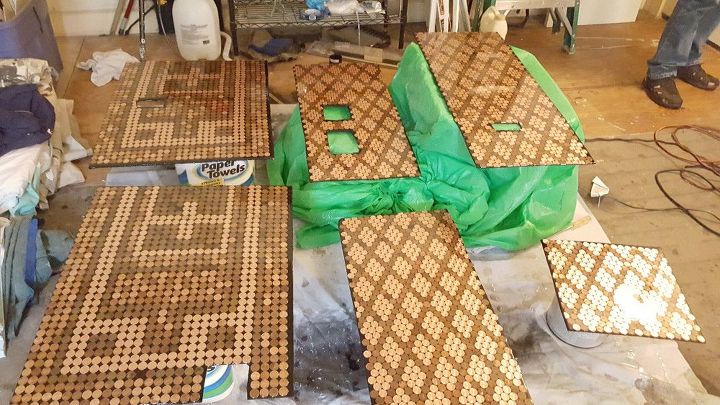
I poured a very thick layer of bar top epoxy over all the sheets (we did 1/2 of the kitchen at a time) and let it cure at 76 degrees for 3 days in a heated room. I actually had finished 1/2 of the kitchen when I realized the glue turned the clear opaque, we had them under the lights and could see huge splotches of creamy opaque. I had to start over.
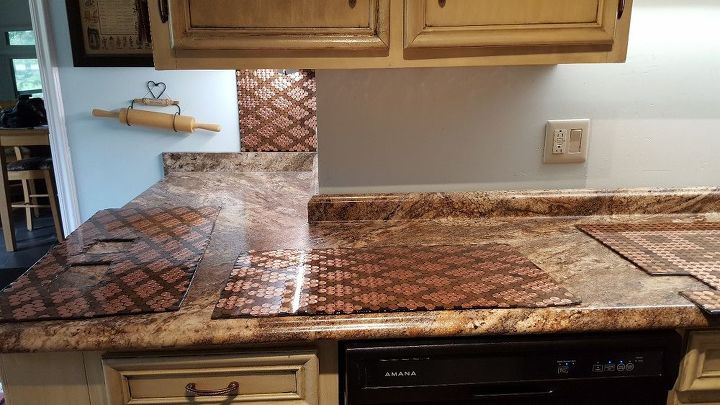
We lined up the panels where they would mount, and used Loc-tight construction adhesive to put behind the boards. I had to use shims to keep the boards above the counter until it dried enough not to slide down the wall.
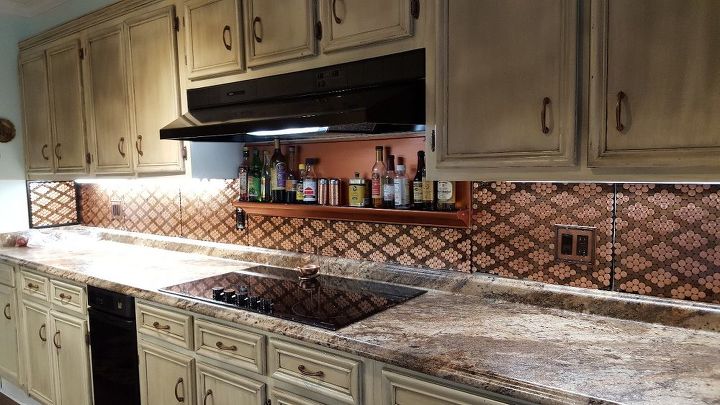
I was very careful to line up the designs so that it look like one line started at the same place on the next board (easier than it looked, this pattern is easy to do).
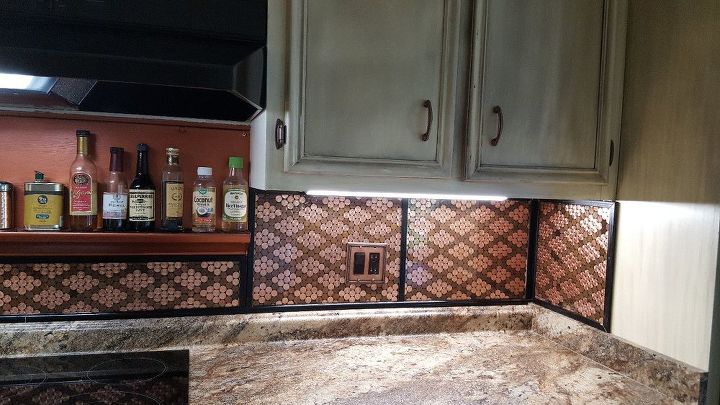
I bought quarter round (only used it on the bottom of the boards and 1 inch trim boards. Both were spray painted black, then cut to size for trimming each panel, I also beveled the edges at 45 degrees to add a finishing touch, and glued the trim boards in place. I bought light switches and added some copper paint to increase the copper color.
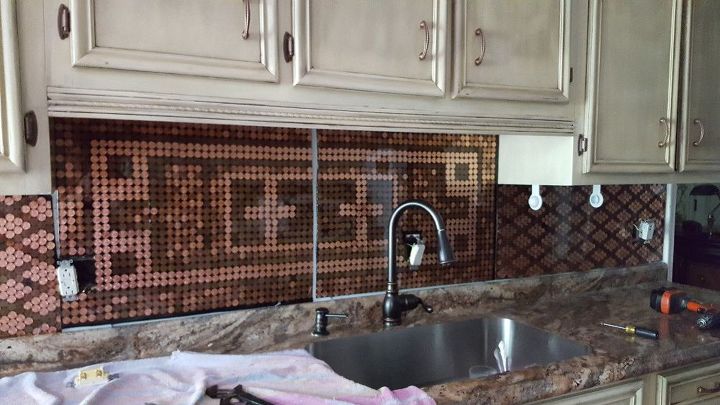
The feature over the sink turned out great, this is before trimming and adding outlet covers.

The finished look was awesome.

I choose a larger trim for the sink feature and added some copper highlights with paint on the roped design.
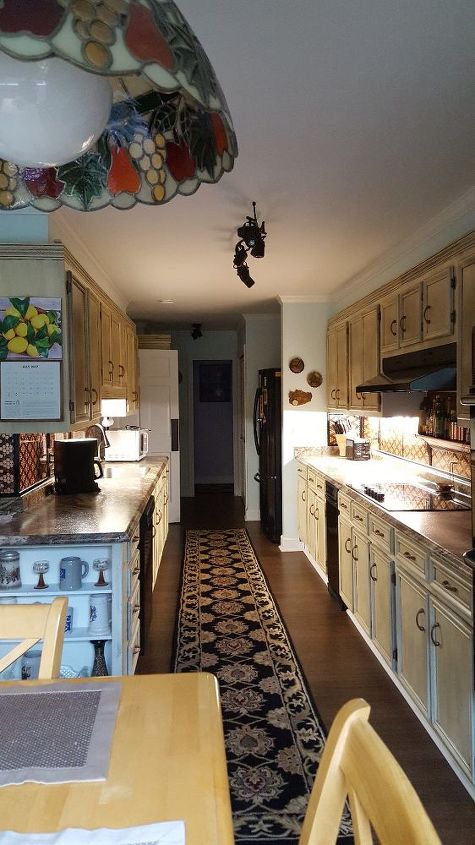
The new plank flooring was a huge change over the retro green and yellow vinyl. Total number of pennies? 10,400 give or take 10 or so. $104.00 worth of pennies, and many hours in front of the TV gluing pennies! Total time, about 2 1/2 months after work and on weekends between other projects. Total cost under $400.
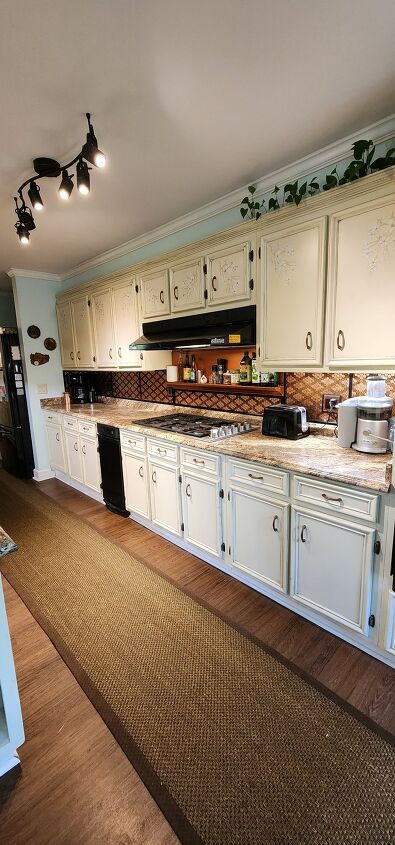
I had to add in the final result after repainting the cabinets and putting on the raised cherry flower designs on the top cabinets. I didn't like the darker version of the cabinets, and you can see that project with how they were made in my other project list, here on HomeTalk.
Resources for this project:
See all materials


Comments
Join the conversation
-
Wow!
-
Amazing and beautiful. Congrats on your patience.


Frequently asked questions
Have a question about this project?
Sandy:
If I decide to hang my copper penny backsplash with luan, will the luan adhere to the grout? I would rather not use bar too epoxy.
What kind of glue did you use to attach pennies to the luan?
Hi Sandy,
I'm getting ready to do a penny backsplash and was wondering what type of border did you use? I've seen pencil liner but uncertain if that is what I should use or not.
How did you keep the resin from running out the sides?