


How To Build A Faux Mantel From Scrap Wood
I want to thank Architectural Depot for sponsoring this How To Build A Faux Mantel post.
If you are like me, you love the look of a mantel and the decorating possibilities mantels bring but our home doesn't have a fireplace. A few years ago, I found a mantel surround and added it to our living room anyway. I love the way it looks and now, Matt and I have created so many faux mantels. We recently finished another one and I am excited to share how we put this one together!
{Affiliate links are used in this post.}
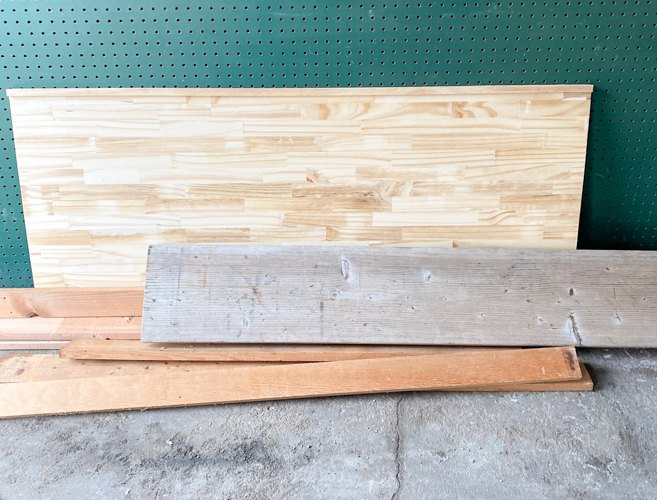
We always keep scrap wood and boards in our garage. We find them at estate sales, yard sales, thrift stores and Restore. We also salvage pieces of wood from every project we do. I always recommend you have a good pile of wood scraps on hand at all times. We have saved so much money because of this. I always have project ideas and being able to go out to the garage and put them together with things we already have on hand saves us so much time and money. (It is also nice for impatient creatives like me who get an idea and want to get started on it right away.)
When we decided to create this faux mantel, we headed to our wood pile and figured out what we had on hand to make the project come together. I am happy to report, we had enough on hand to build the mantel and used decorative pieces from Architectural Depot to make it amazing. Architectural Depot has so many great options for a project like this.
Supplies Used In This Post:
3"W X 3"H X 1/2" P Standard Sedgwick Bullseye Rosette
3"W X 3" H X 1/2" P Standard Sedgwick Rosette With Square Edge
5 1/2" H X 3/4" P X 94 1/2" L Legacy Fluted Panel Moulding
3" H X 3" P X 4 1/4" F X 94 1/2" L Palmetto Smooth Crown Moulding
Scrap Wood & Boards (measurements below)
Steps To Create This Faux Mantel
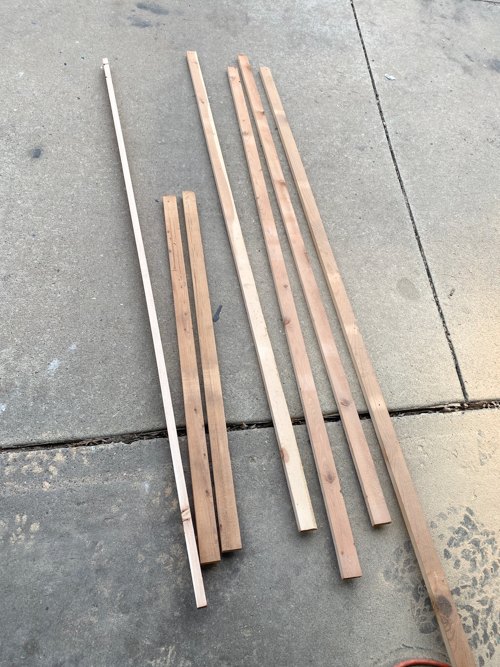
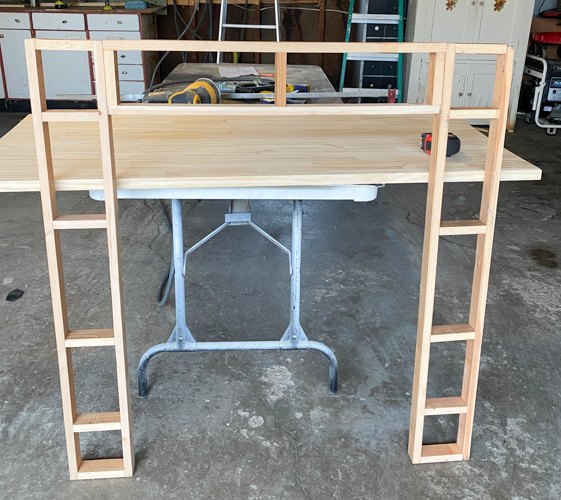
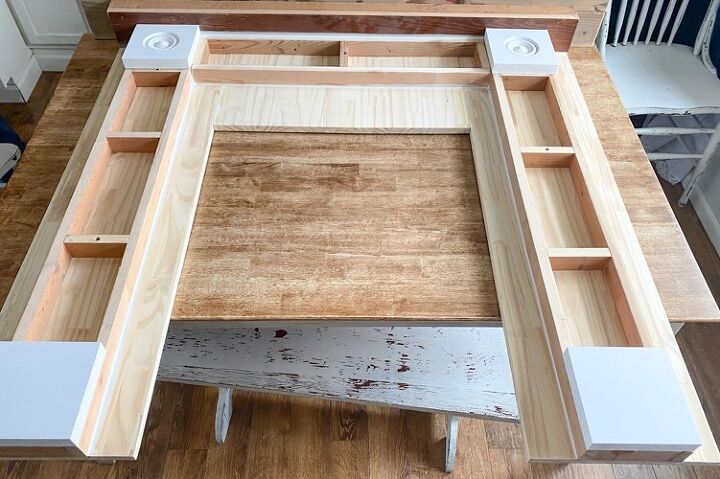
- The first thing we had to do was create the "shell" of the mantel. We based our measurements on the scrap wood we had. We started with the 1x4s we had. We needed 7 of them cut down to 1.5". We used a table saw to cut them down.
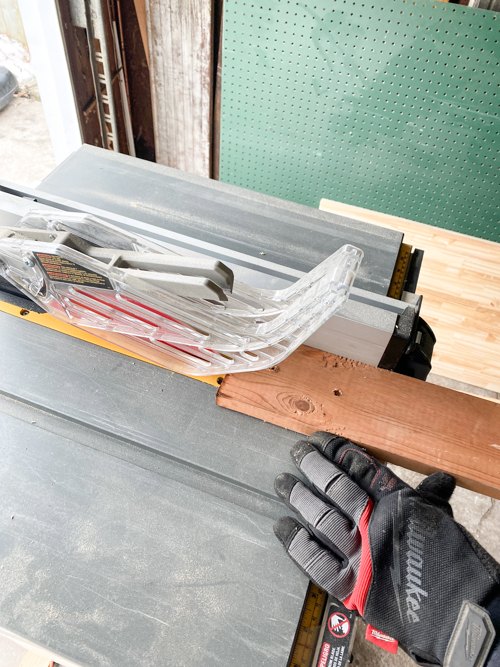
- Once we had 7 pieces cut down to 1.5" pieces, we needed these lengths cut: 4 - 40" pieces, 2 - 28" pieces, and 15 - 4.5" pieces. Throughout this entire build, we sanded every board after we got it cut down to size.
- Once we had all the pieces we needed cut, we used a nail gun to put the "shell" together.
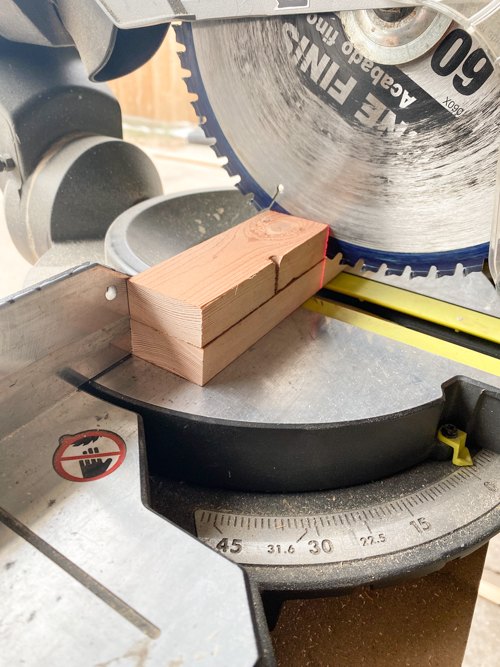
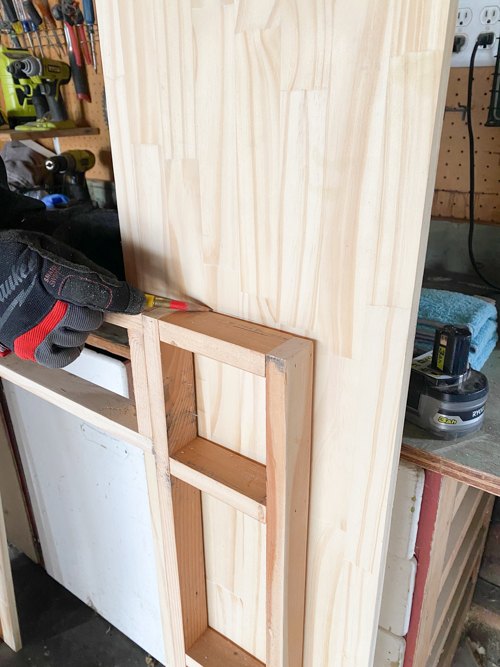
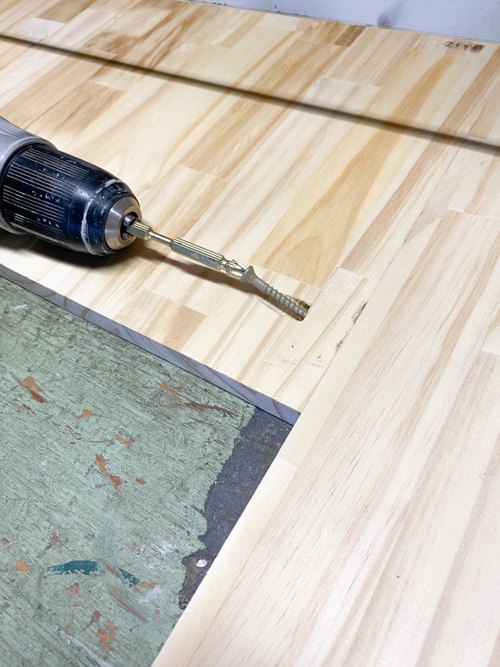
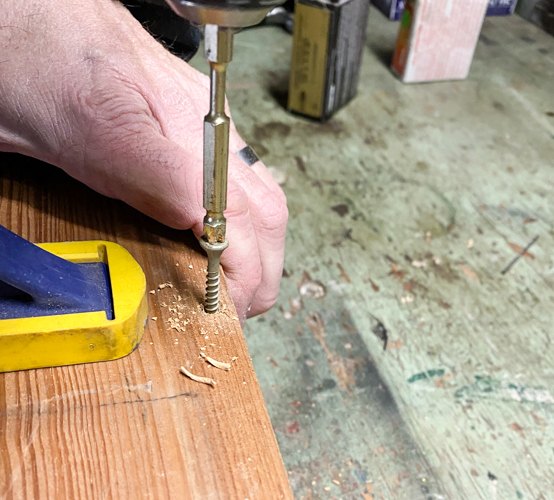
PRO TIP: Since we needed 15 of the 4.5" pieces, Matt cut one piece down to size and then used that one to measure the rest of them. This saves so much time because you aren't having to get your tape measure out to cut 15 pieces the same size. (The photo above shows how he does this).

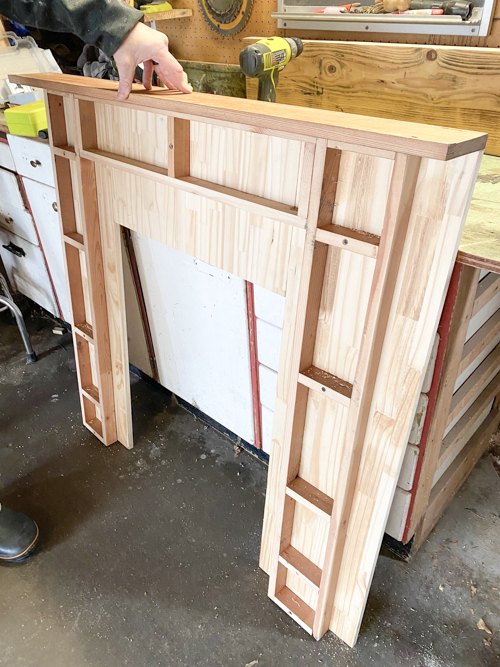
- The "shell" is together.
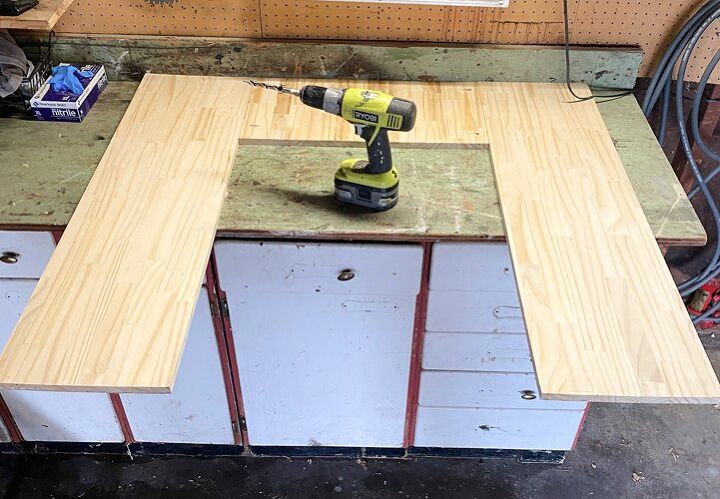
- Once the shell is together, it was time to create the back.

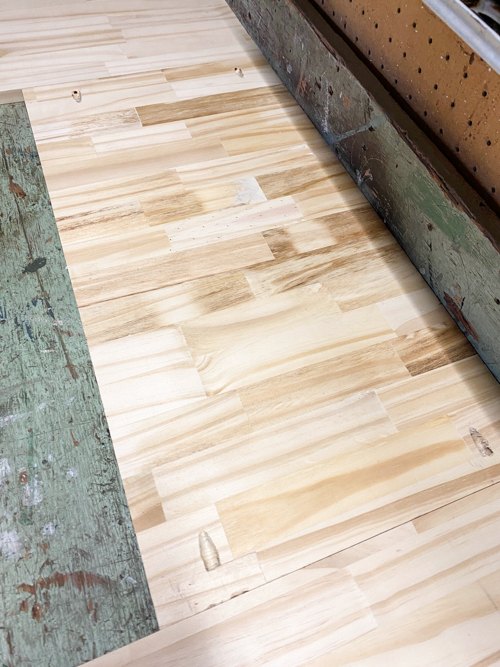
- As you can see, we needed two longer boards for the sides and a shorter board in the middle. We had these boards left over from a shelving project that didn't work.
MONEY-SAVING TIP: ALWAYS KEEP SCRAP BOARDS! YOU NEVER KNOW WHEN A NEW PROJECT WILL NEED THEM.
- We marked the boards to fit the height of the shell.
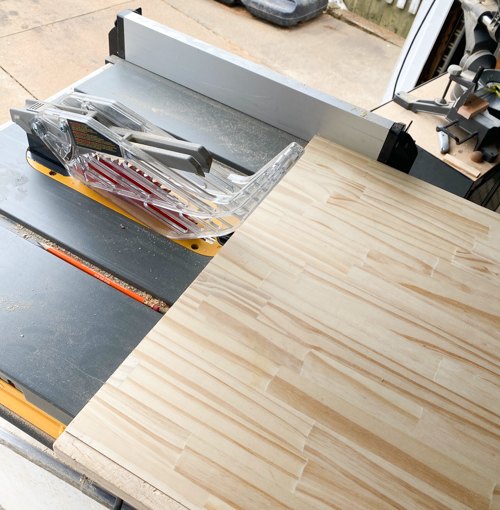
- We used the table saw to cut the boards to size.

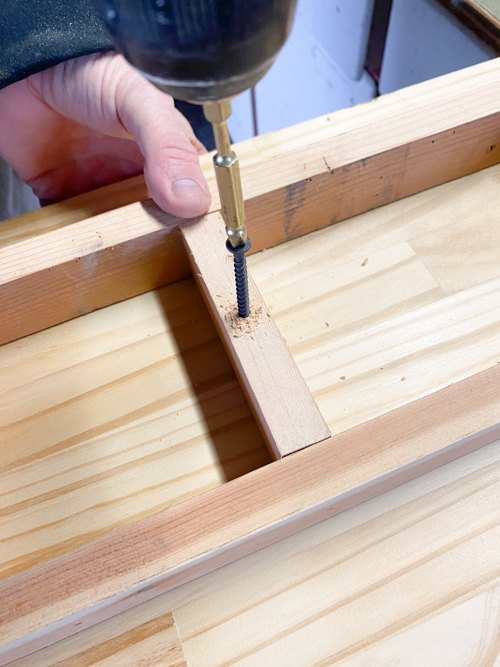
- Once the boards were cut, it was time to put them together. We used our pocket hole kit to create four holes on the middle board.
- We screwed them together and the back was done.
- The measurements for the back panels are: sides - 11.25" wide, 40" tall, and the middle piece is 22.75" wide and 11.75" tall.
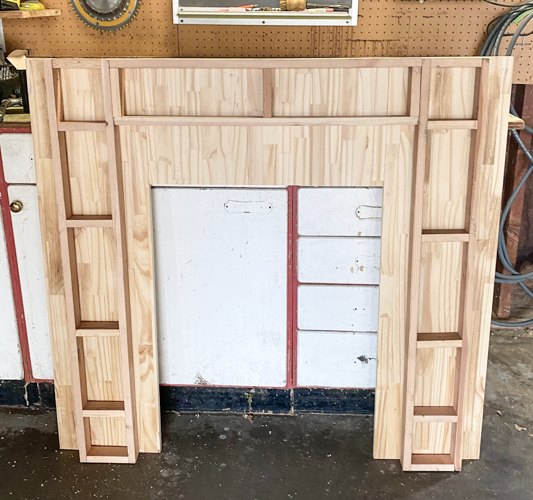
- We screwed the "shell" to the back.
- This is what they looked like together.
- Now, it was time to create the mantel top.
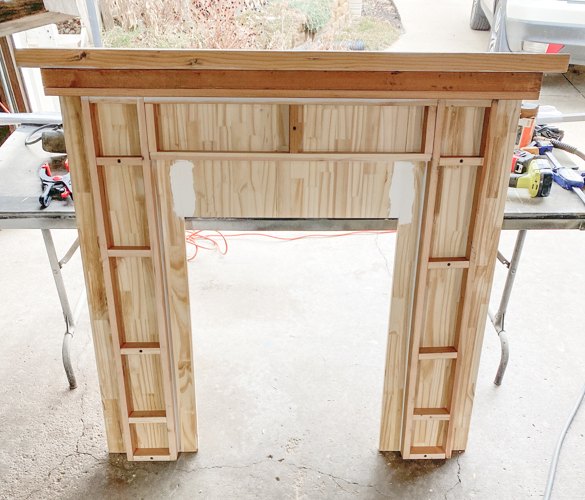
We cut and secured a board to the top.
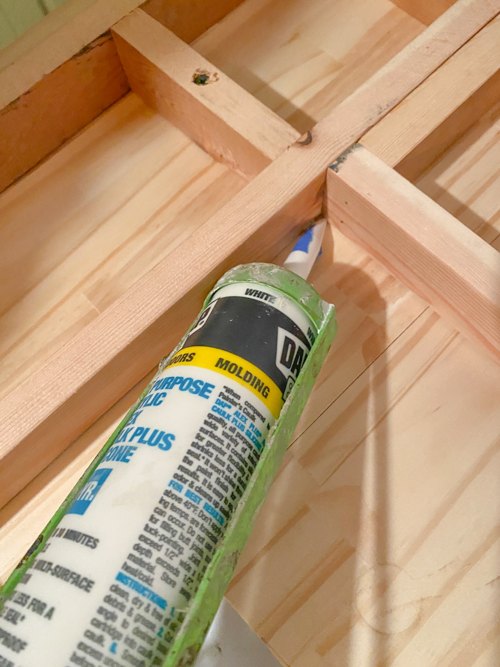
- Once that top board was put on, we used paintable caulk to fill in corners, edges, and between the boards going together to give it all a seamless look.
- Once the caulk was dry, we started working on the top of the mantel.

- We needed to "raise" the top of the mantel to fit the "decorative" pieces we got from Architectural Depot. To do this, we created a "box" and screwed it to the top board we added.
- Then, we were able to reuse a thick board that we had in our daughter's room at one point. This was the perfect board to use as the thicker mantel top. We secured that to the box we made.
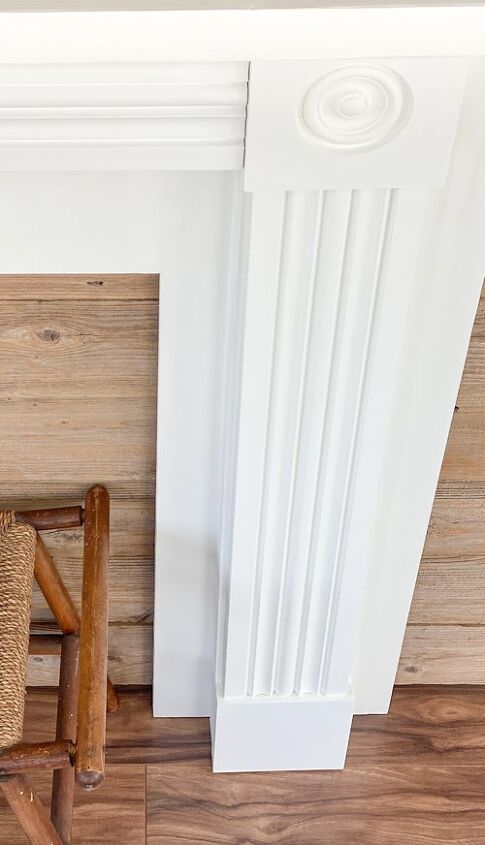
- Now, it was time to add the "decorative" pieces we got from Architectural Depot. Architectural Depot has an incredible selection of products. They offer more architectural millwork products than anyone in the world. Their customer service is industry-leading with a US-based team that knows their products inside and out. They provide incredible insight and help on even the most technical of products. When Matt and I were browsing their site, we were blown away by what they had to offer.
- We knew we wanted to add the rosette pieces to the mantel for sure.
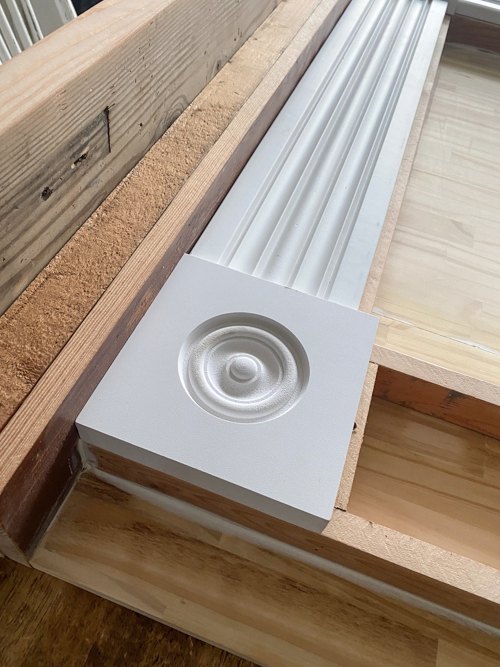
- Then, we added the square pieces to the bottom of the mantel.
- Then, we added trim and moulding to finish it off.
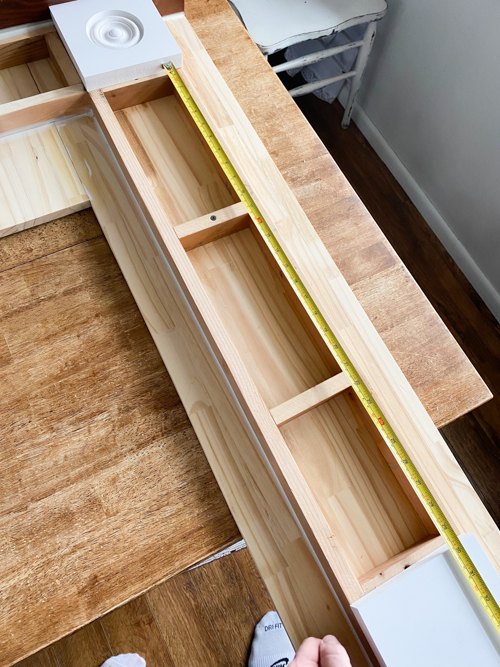
- We added the square pieces first. Then, we measured between them to cut the moulding.
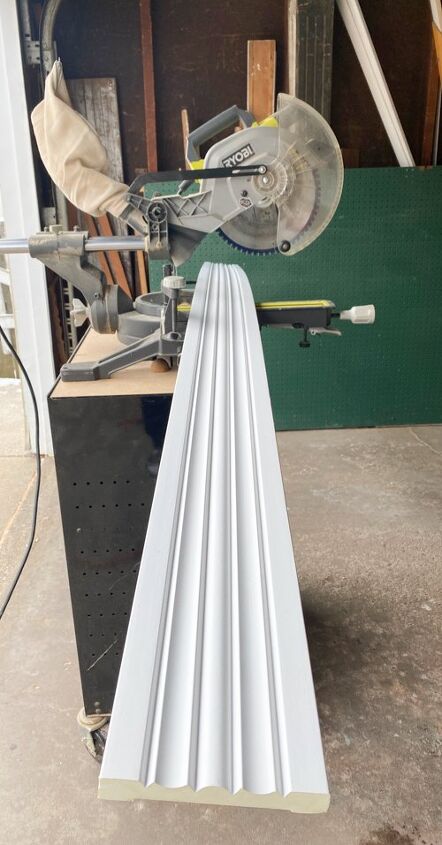
- The moulding was so easy to cut with the miter saw.
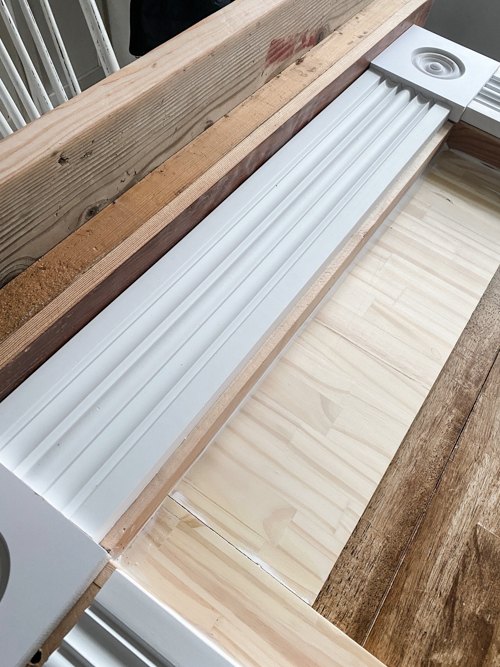
- They are lightweight so they are easy to work with. We used a construction adhesive to attach them to the mantel.
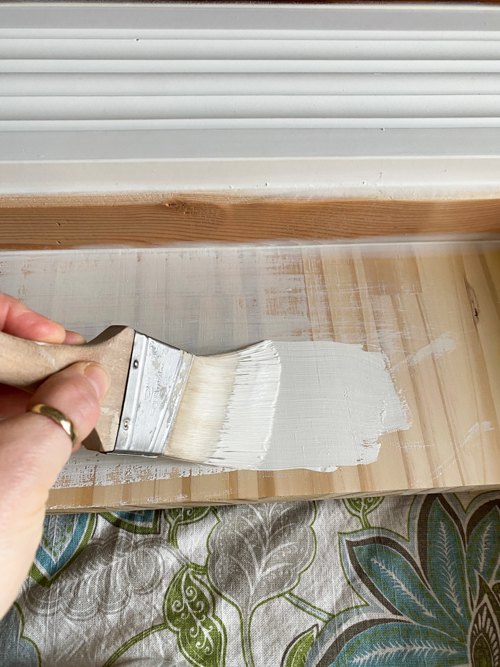
- Once we had the side moulding and the top trim moulding on, I painted everything white.
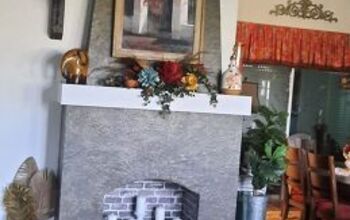
Look at this mantel!
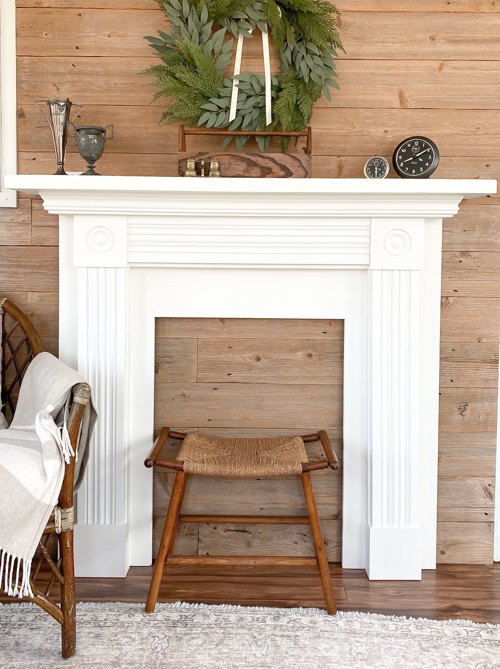
It looks so great!

It is crazy to think that it is made from scrap wood!
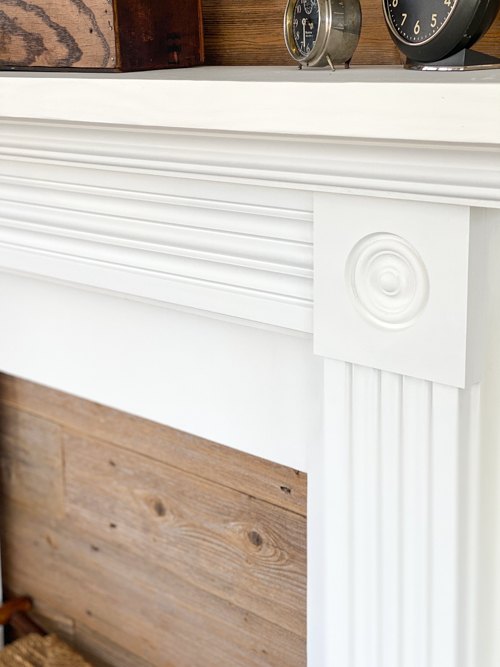
The beautiful mouldings, rosettes, and square pieces from Architectural Depot are really what takes it over the top though.
It is those pieces that make the mantel perfect.
What do you think of this project?
Resources for this project:
See all materials


Comments
Join the conversation
-
You could put fake candles at different heights.
-
We just built one too! But I wanted an arch and built up floor box incase we ever decided to put a electric insert in. Also added a upper part that goes to the ceiling. We drywalled, plastered and I faux painted it!


Frequently asked questions
Have a question about this project?
Beautiful! Question about your wall, what type board and stain did you use? I love it
Amazing. Great job!