


Whitewashed Brick Fireplace

by
Sarah
2 Materials
$10
1 Hour
Easy
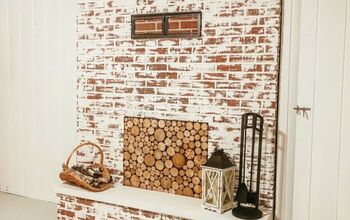
If you are looking for an easy update with a lot of impact, a whitewashed brick fireplace is right up your alley! This update is fast (like 1-2 hours), cheap (free even if you have leftover paint), and crazy transformative! Below I’ll share with you the process I used to whitewash this brick fireplace.
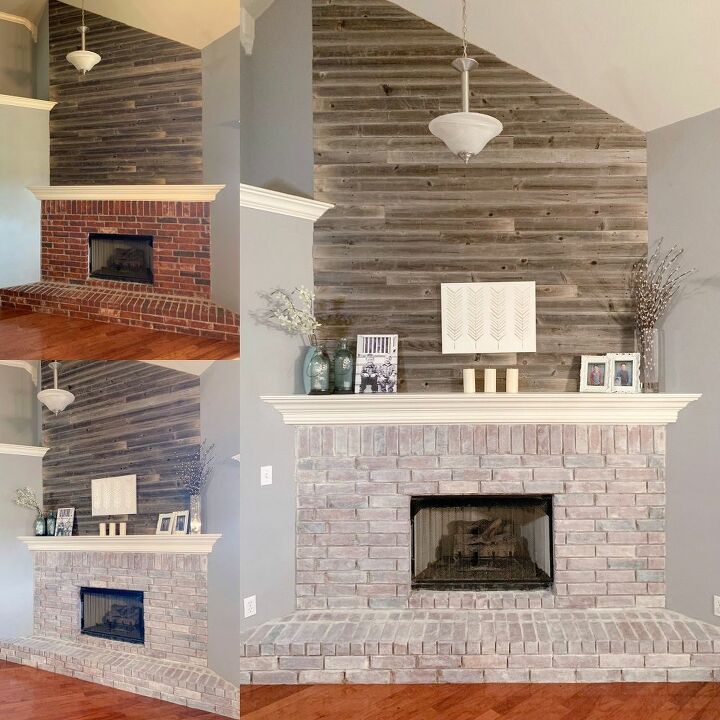
Before and after of whitewashed fireplace! Makes such a huge difference to modernize a space!
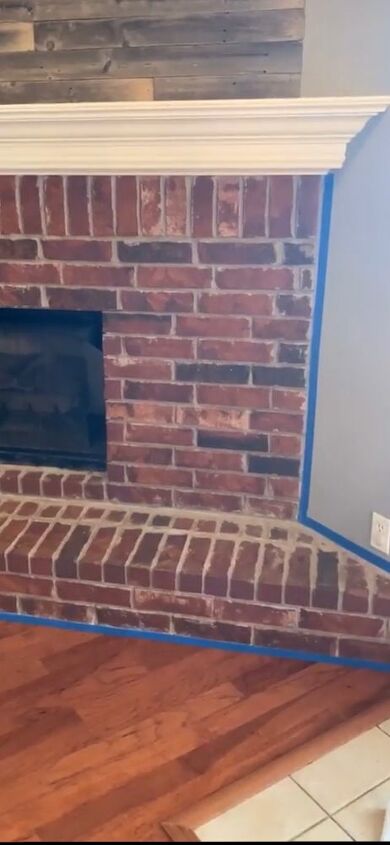
First thing you need to do is prep the surface. With brick, there really isn’t a whole lot of prep. I would recommend just going over the brick with a broom or a vacuum to remove any dust or debris. Then use painters tape to tape off the edges between the brick and the walls and/or floor surface. And that is it for prep! Doesn’t get much better than that!

Next up is making your whitewash solution. I had some leftover white satin acrylic paint on hand and mixed that with a little water. The ratio I use is approximately 75% paint and 25% water. If you want less coverage, use more water and less paint. This isn’t a super strict ratio, so just play with it a little to get the mixture you want. Keep in mind here, a little goes a long way! Like literally a red solo cup worth of whitewash should do your whole fireplace. I mixed in an old Easter bucket here and had way too much and had to find a way to dispose of the extra. Learn from my mistakes people.
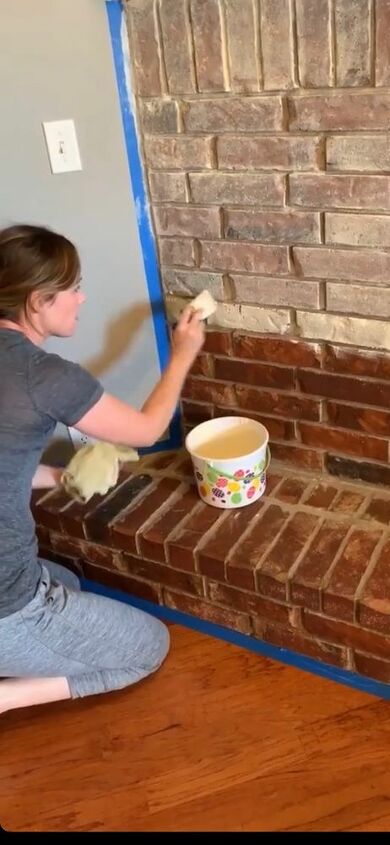
Now it’s time to get started with the application! So so super easy. Just take any paintbrush, dip it in the whitewash, paint it over the bricks and try to get into all the little cracks and crevices. Before it dries, use a clean cloth and dab away any extra paint. This allows some of the base color of the brick to show through which gives a nice color variation. If you want more coverage with your paint then you can either skip this step or go over all of it with a second application of whitewash.
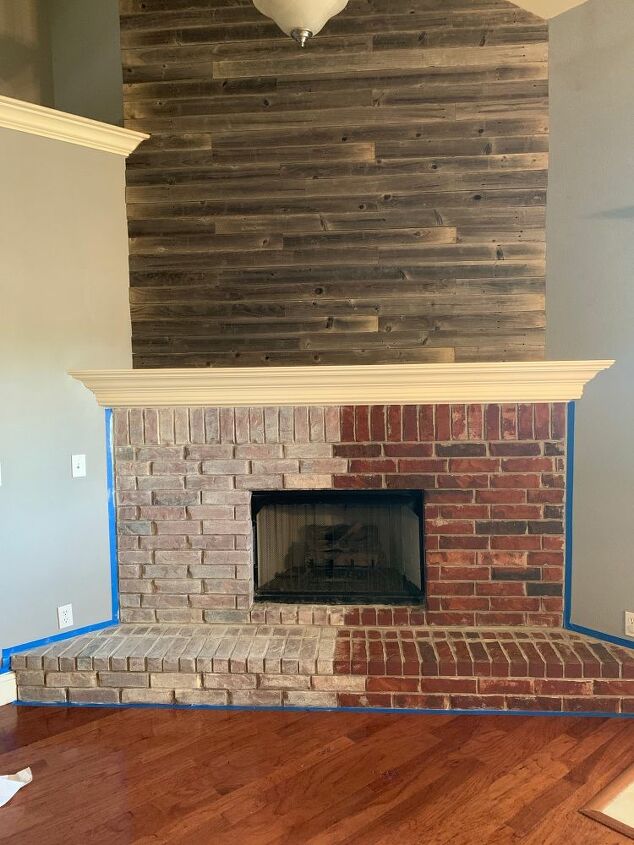
Because you are wiping away the excess paint, work in small sections. That said, this process goes very quickly! Just keep trucking along and you’ll be done before you know it!

That is literally the entire process. It honestly could not get any easier. I did my sister’s large fireplace, start to finish, in about an hour and a half. It cost us zero dollars. And, I must say, I think it completely transformed the way her living room looks! If you’d like a quick video tutorial on the whitewash application, check out my Instagram story highlight s to see the process.


Any price and availability information displayed on [relevant Amazon Site(s), as applicable] at the time of purchase will apply to the purchase of this product.
Hometalk may collect a small share of sales from the links on this page.More info
Want more details about this and other DIY projects? Check out my blog post!
Comments
Join the conversation
3 of 34 comments
-
I hate red brick inside a house. I love what you did to it. Great Job.

-
Oh my goodness it turned out absolutely gorgeous!!! It looks like a whole new fireplace!


Frequently asked questions
Have a question about this project?
Did you whitewash the grout/mortar also?
Don't you have to use high temp. paint because of the heat from the fireplace?
I tried this and it is too dark based on the ratio of paint to water. How can I fix it?