


New Life for a 1980's TV/VCR Stand

5 Materials
$50
2 Days
Easy
Before the invent of flat screens and streaming video we used to have these behemoth televisions and if we were really lucky, a VCR. I remember when my daughter was about 7 (she's 26 now) we stayed in a cabin on the California Delta and it was furnished with a HUUUGE TV and NO REMOTE! How do you change the channels, she said and when I pointed out the dial she was amazed, confused and mesmerized all at the same time.  Anyway, this TV like so many others of that time, sat on one of these bulky wood TV/VCR stands. Today, these obsolete eyesores can be found in thrift stores or at garage sales and even on the side of the road. I say if you find one, snatch it up and disregard the snickers from the unknowing seller, his trash equals the DIY'ers treasure.
Anyway, this TV like so many others of that time, sat on one of these bulky wood TV/VCR stands. Today, these obsolete eyesores can be found in thrift stores or at garage sales and even on the side of the road. I say if you find one, snatch it up and disregard the snickers from the unknowing seller, his trash equals the DIY'ers treasure. 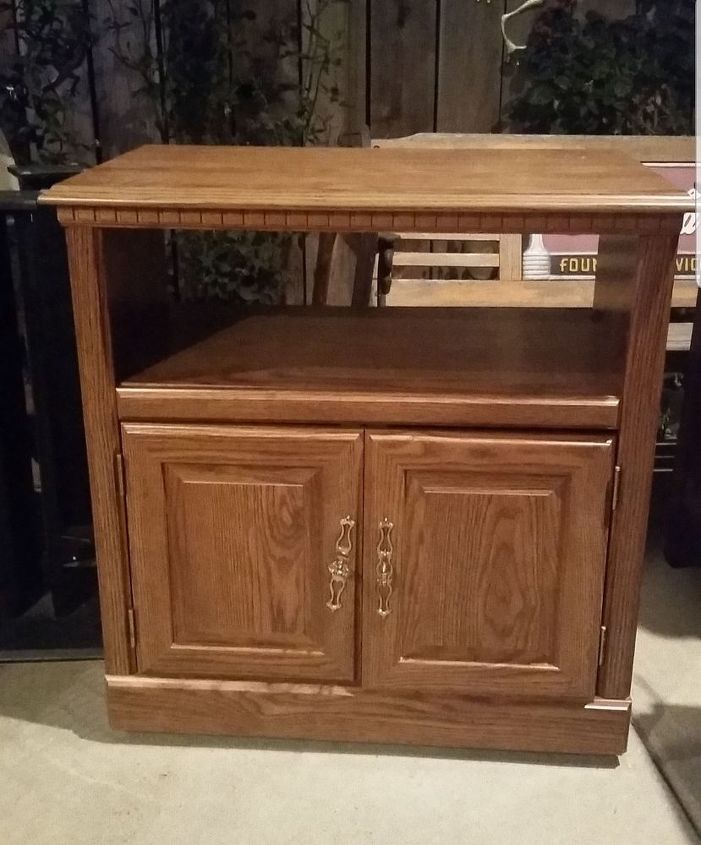
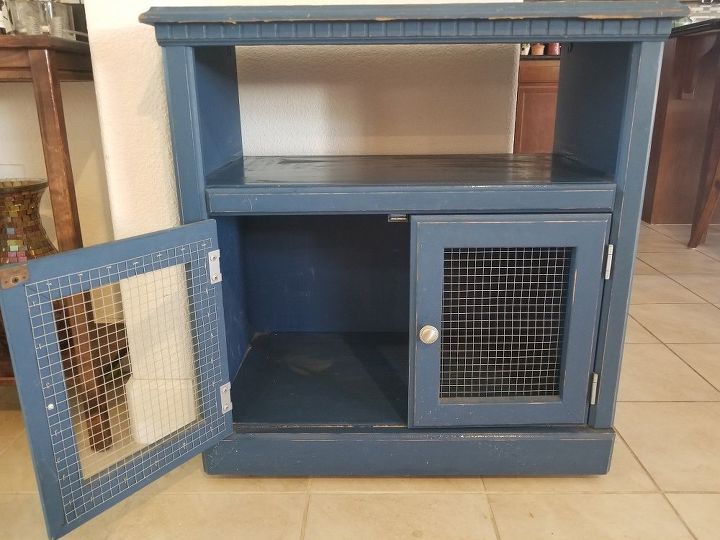
First things first. Anytime I refurb furniture the first thing I do is hit it with a solution of 1/2 c TSP and 2 gal of hot water and a scrub brush. This thing had been passed around since the '80s and has possibly made its way from living room to basement to frat house, so it was definitely no exception and needed cleaning, if not disinfecting.  So, I removed the hardware and the doors and gave this dusty piece a good cleaning.
So, I removed the hardware and the doors and gave this dusty piece a good cleaning.
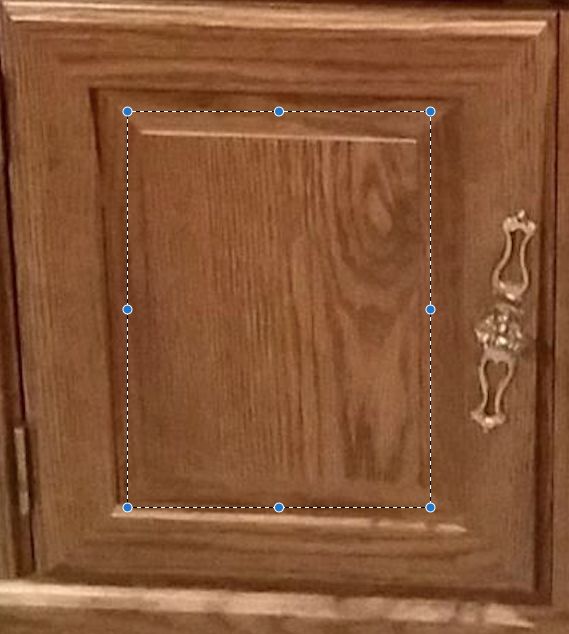
Then I decided that I needed to remove the inside part of the door as outlined below.
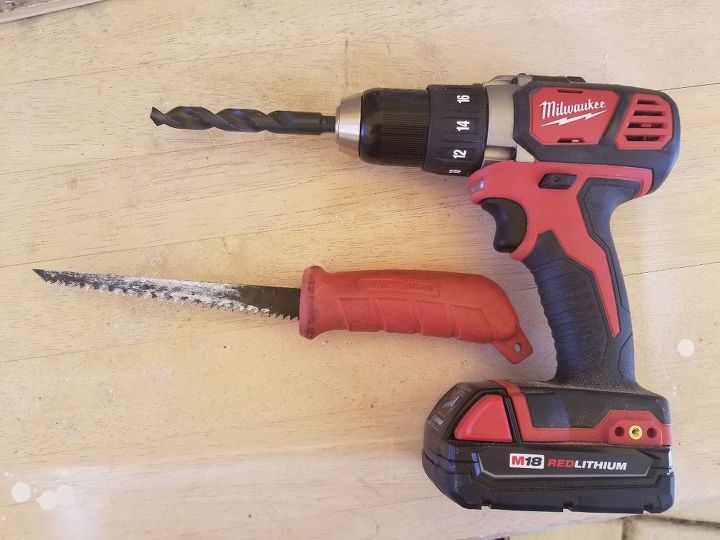
I forgot to get a pic because I struggled a little with the process but I started off trying to plunge through the door with a skill saw but I ended up breaking 3 blades, so I broke out my new gift from the hubs, a Milwaukee drill and using a 1/2" bit I was able to drill a hole big enough to get a dry wall saw through and start sawing away at the inside of the doors, taking care to make even strokes.
Once that was complete, I hand sanded the down the openings as they would be exposed in the finished piece.
I really was not in the mood to break out the sander so I knew this called for chalk paint but I didnt have any on hand.  So, because I am impatient and it was late, I mixed up 1/2c calcium carbonate chalk paint additive, which I have on hand because I am impatient (did I mention that?) with 1/4c hot water and when completely dissolved, I thoroughly mixed it in to an almost full quart of latex blue satin paint that I had on hand, and just like that, its chalk paint!* and painted and lightly distressed the whole thing.
So, because I am impatient and it was late, I mixed up 1/2c calcium carbonate chalk paint additive, which I have on hand because I am impatient (did I mention that?) with 1/4c hot water and when completely dissolved, I thoroughly mixed it in to an almost full quart of latex blue satin paint that I had on hand, and just like that, its chalk paint!* and painted and lightly distressed the whole thing.* IMO, nothing beats Annie Sloan chalk paint, but this works just fine in a pinch and its a lot more affordable in addition to giving you more color options.
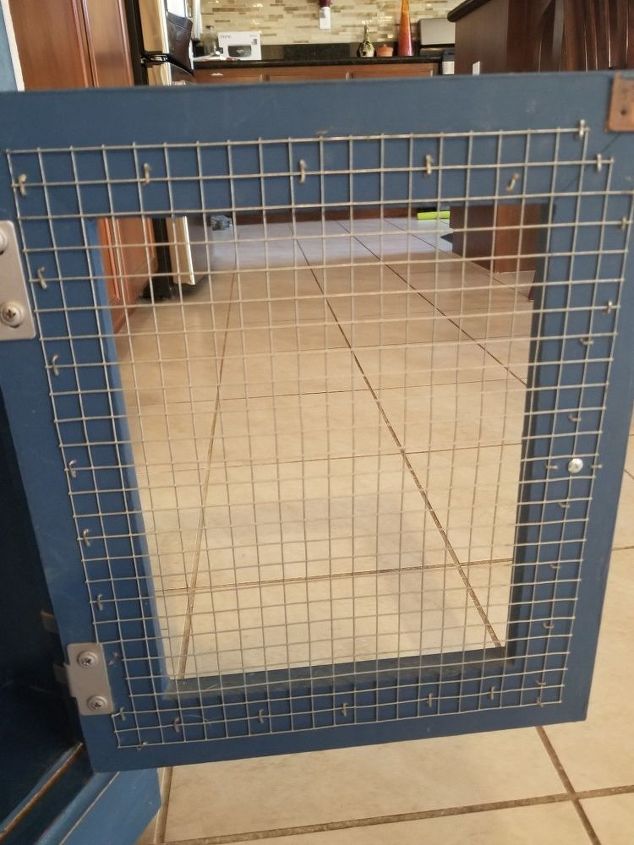
Finally I stapled chicken wire to the inside openings of the doors taking care not to have any sharp edges. Then I added new hardware and reattached the doors
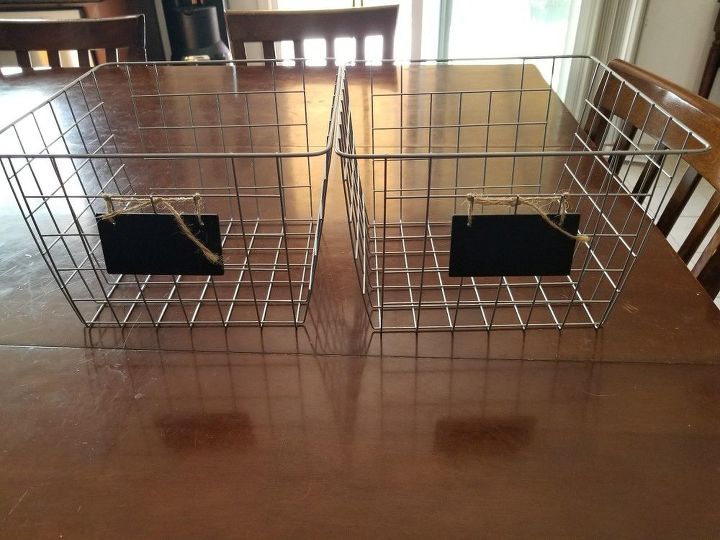
I wanted to add some cute baskets with liners but they were pricey and didn't have the "pop" I was looking for, so I found these wire baskets at Target and would have to make the liners.
OK, I am slightly ashamed to admit it but my sewing machine and I are usually on non-speaking terms. She just expects me to know things about tension and stuff and I expect that she just sews... like she has 1 job, right?!? At that, I went looking for help and inspiration and I found it here: http://yellowmedaisy.blogspot.com/2011/05/simple-basket-liner.html
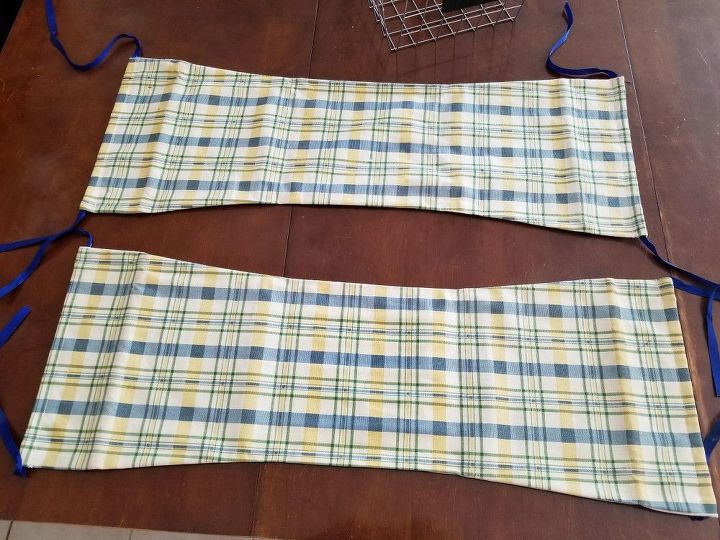
OK in fairness I totally used YellowMeDaisys idea and pattern, but I did make up with my machine long enough to add a muslin backing, finish off the edges and string the ribbon all the way through, but other than that, it's all the girls at http://yellowmedaisy.blogspot.com/.
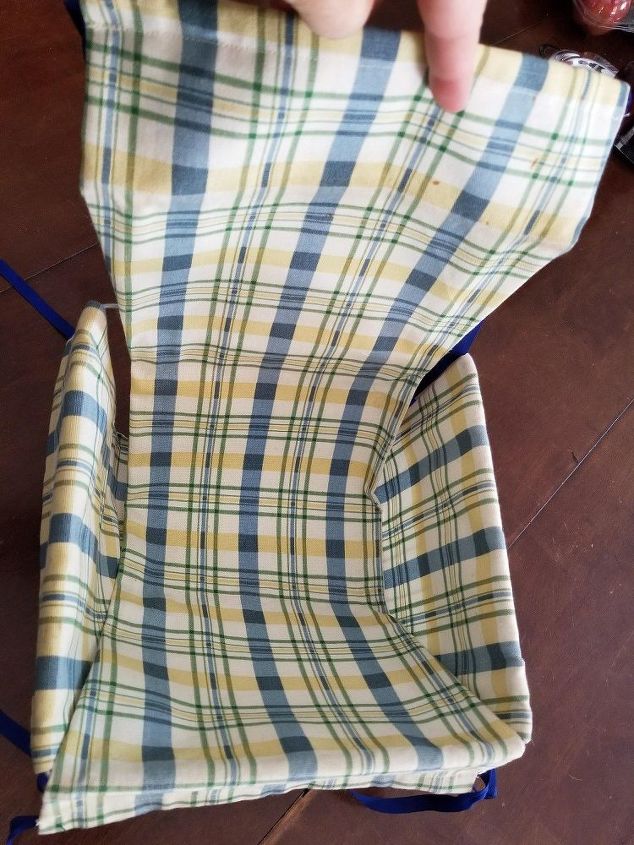
I laid the 2 pieces of fabric in the basket, crossing over each other...
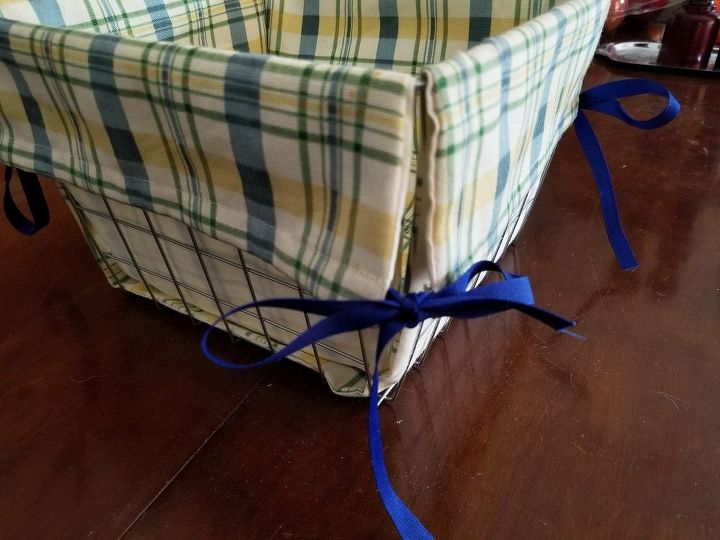
tied off the corners...
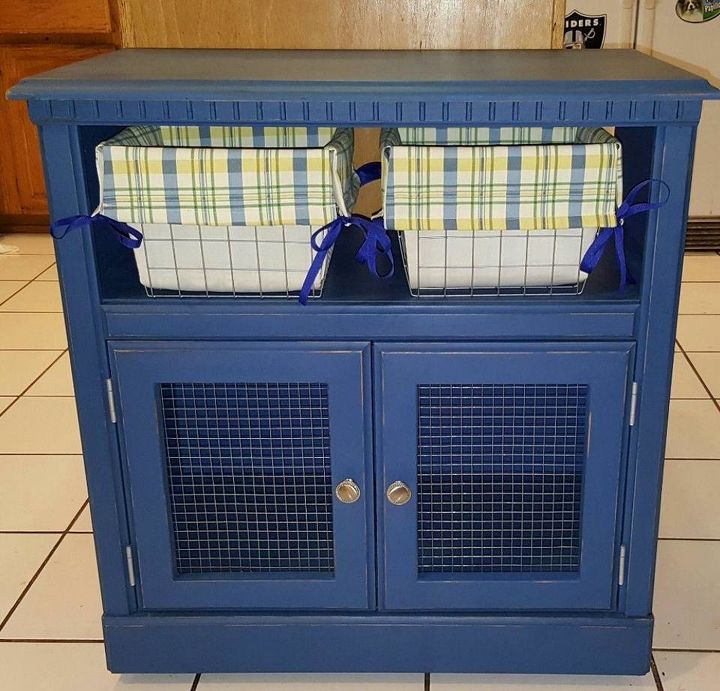
And here is the finished product. Super easy (once you get those doors cut open), super inexpensive but super cute and functional. We throw a lot of parties so we use this for all our paper plates, bowls, napkins, plastic wear, etc. Since it's on wheels it easily goes outside for the BBQs or wherever we need it. Outside or in, we always get a lot of compliments and no one knows that it was once destined for landfill.
Comments
Join the conversation
2 comments
-
How lovely! It looks great!
-
Beautiful job love the color you used it makes it pop out


Frequently asked questions
Have a question about this project?