


Recycling Storage & Extra Counter Space Upcycle

In preparation for painting my cabinets in December, I decided to build a tilt-out cabinet for my recycling.
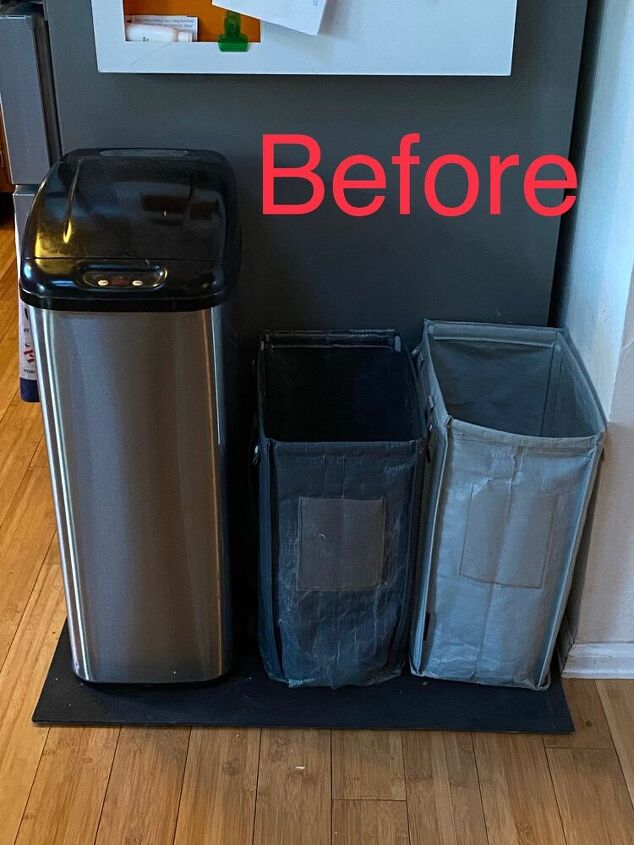
Here is my recycling/trash area before the new cabinet. Two IKEA recycling bags and no counter space!
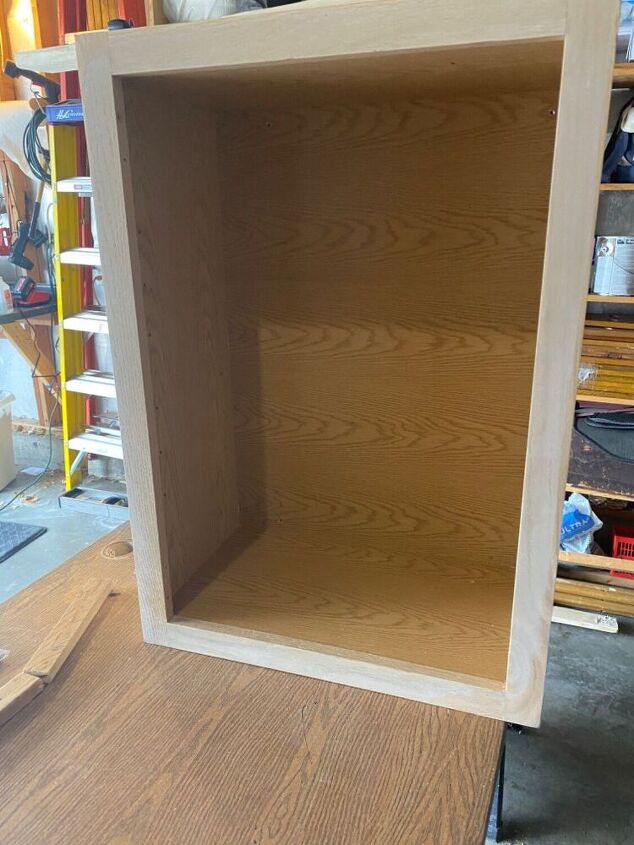
I purchased a used upper cabinet from the local Boulder Resource (building materials recycling nonprofit) for $15. I came prepared with my measurements and hunted until I found the right size. It was just 32" high and my counters are 39". I considered adding cabinet legs, but ended up adding a cubby shelf on top.
Step 1: Remove cabinet door and hinges, fill holes, sand & clean.
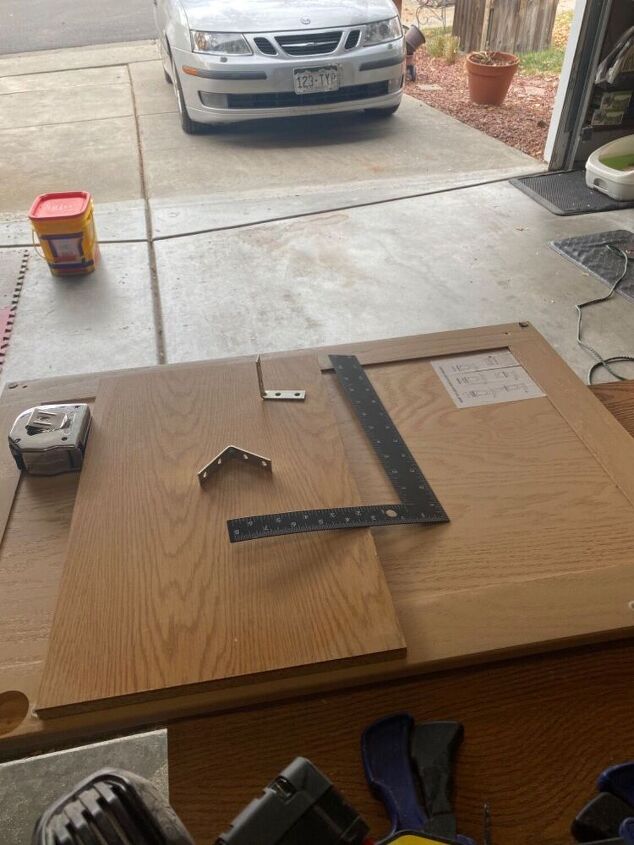
Step 2: To create the tilt out base, I used to L brackets and repurposed the interior shelf from the cabinet.
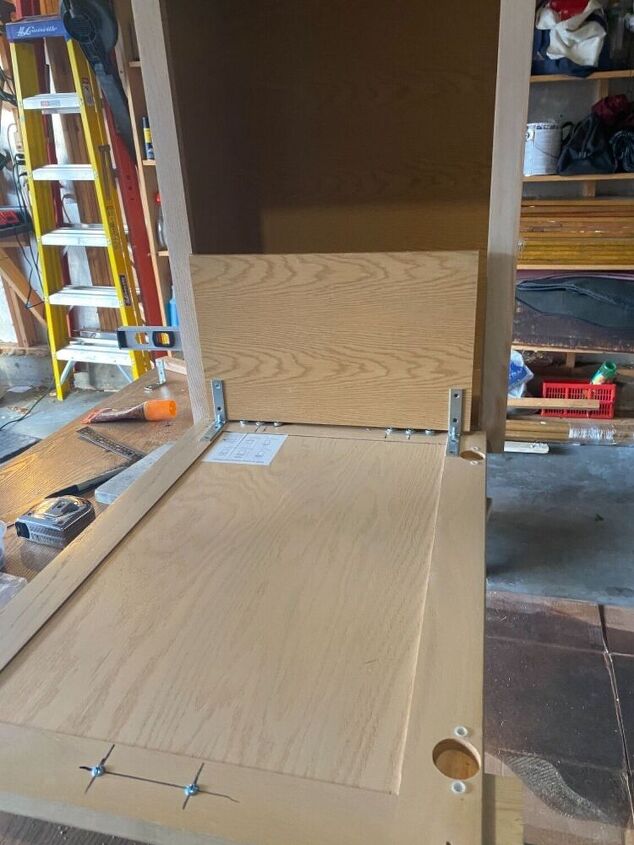
Step 3: I reattached the door using hidden hinges on the bottom, just below the tilt out shelf.
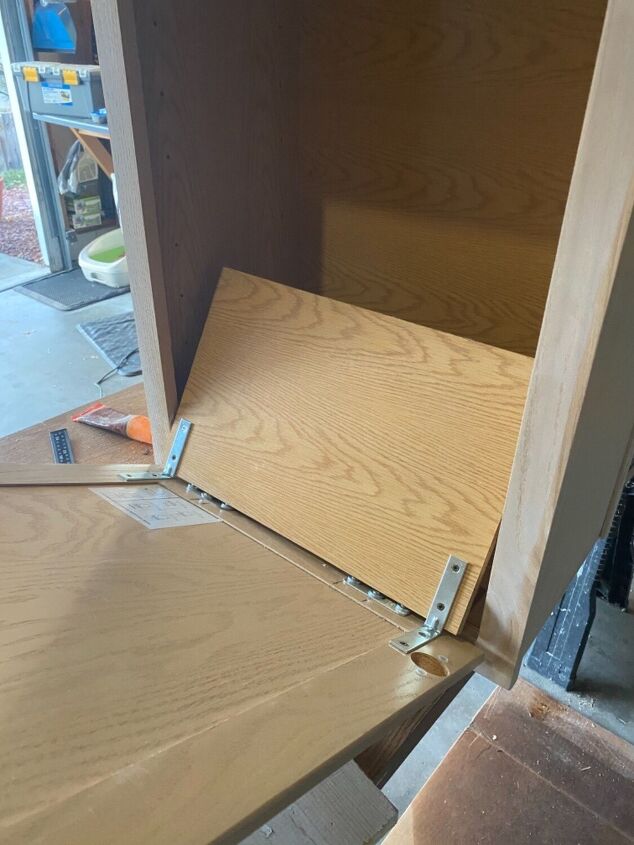
Testing the tilt function.
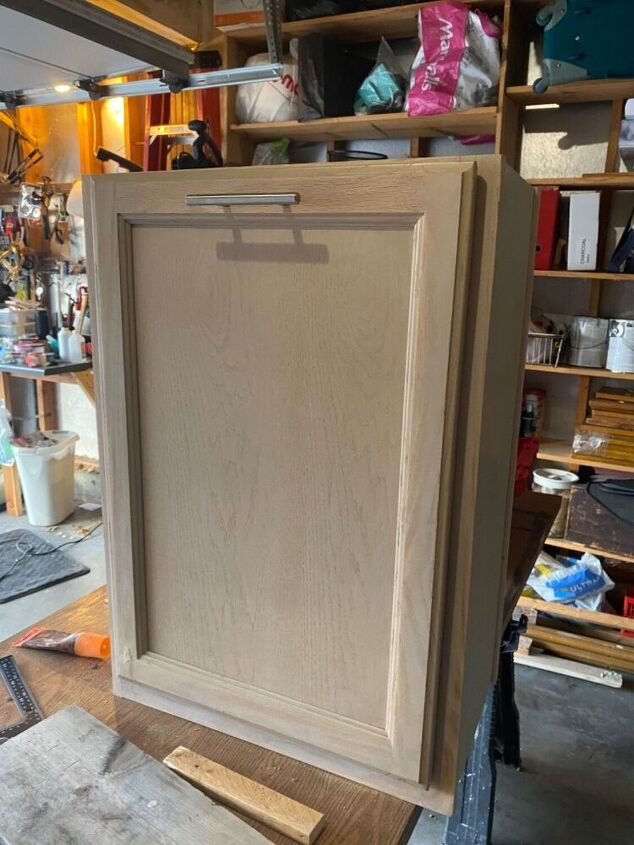
Voila! A working door! I drilled holes and added a top door pull to match my kitchen cabinets.
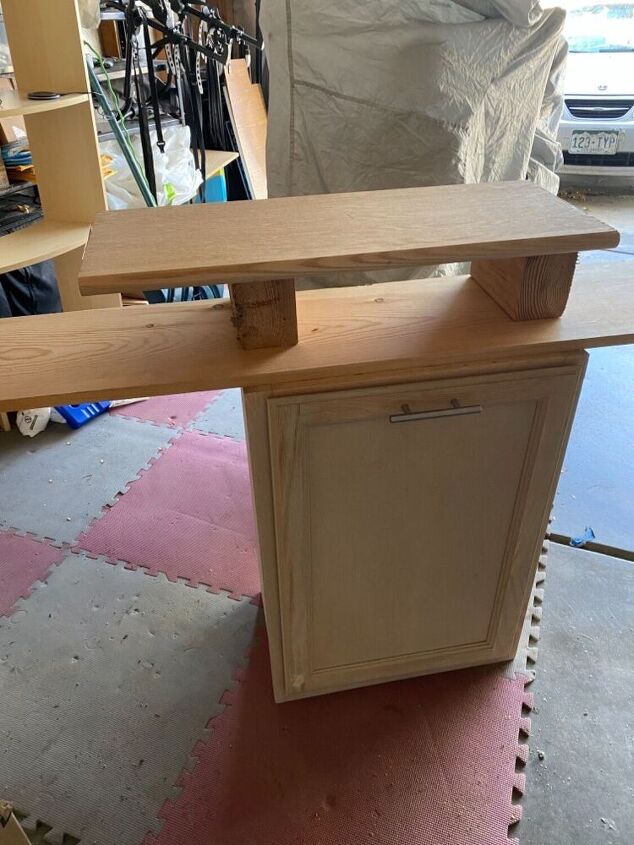
Step 4: I decided to add a storage shelf on top to increase the height to match the other counters and make room for the open/close of my motion sensor garbage can. It took some messing around to figure out the best approach.
I needed to add a top to the cabinet to form the bottom of the cubby shelf, and figure out how to attach the shelf in a way that would be functional and attractive.
To make a butcher block style countertop, I purchased a solid oak stair tread and had it cut to length at Home Depot. The end piece turned out to be the perfect size to create the side supports for the shelf.
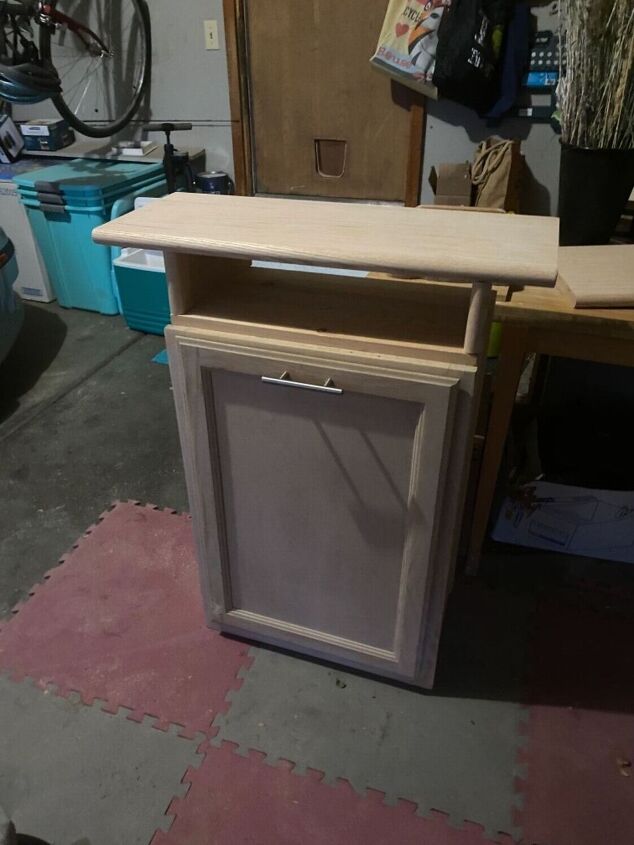
I joined the shelf to the base using pocket holes and a Kreg jig (borrowed from my neighbor), with a liberal amount of wood glue.
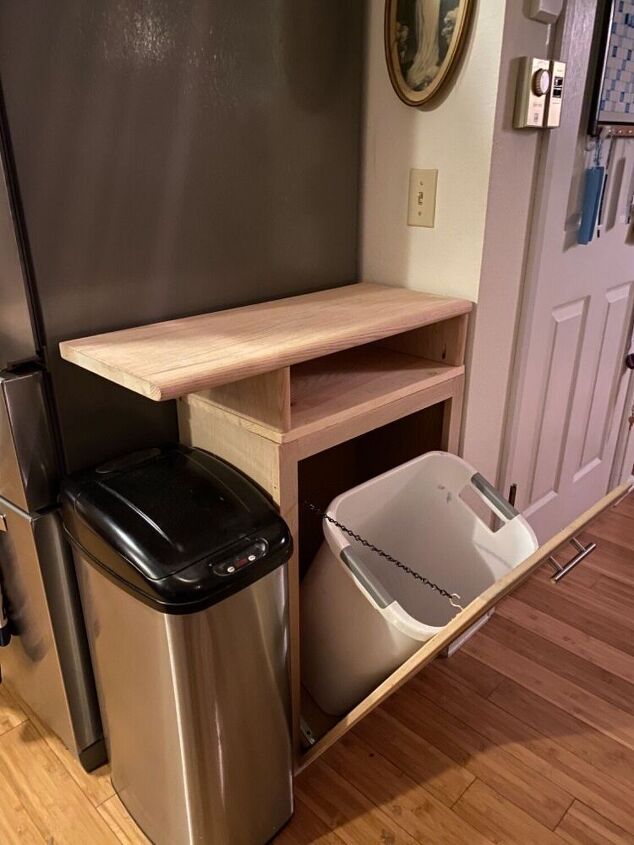
I used a cup hook and 12" of chain to keep the door from falling to the floor when opened, and used an old kitchen garbage can as my recycling can.
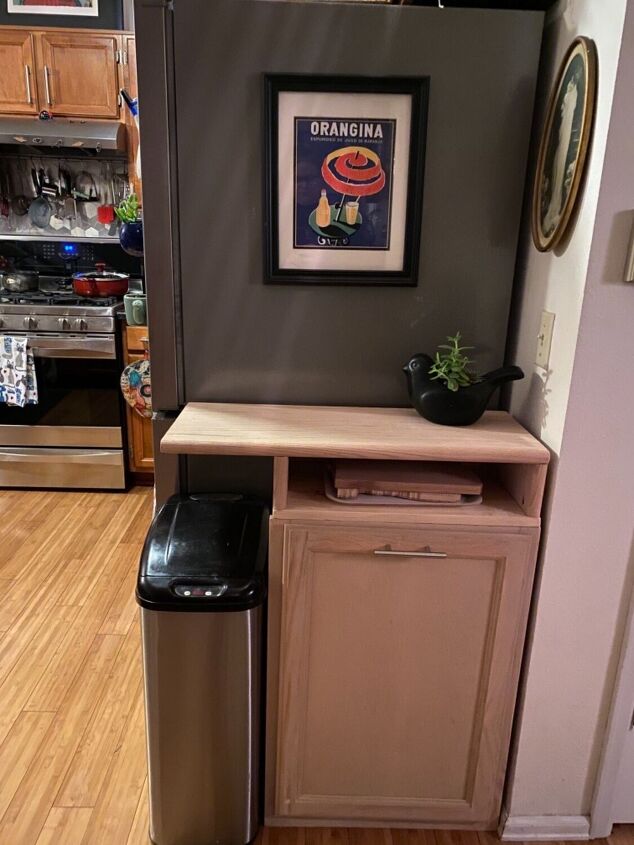
When the cabinets are painted, the base will be painted and the top will remain oiled wood. Pre-painting finished product.
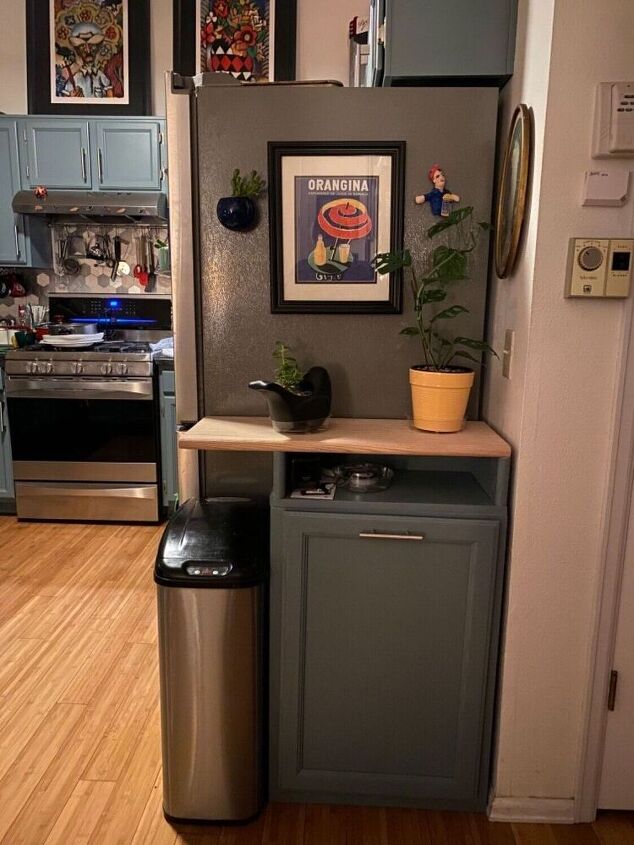
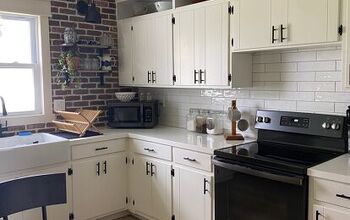
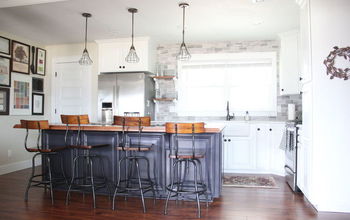
(A few weeks later.) The final product in place in my newly painted kitchen (color is Benjamin Moore Smokestack Gray)!
Additional counter space and no more ugly recycling. I use the cubby shelf for the mail and other temporaries I don't want on the counters.
Resources for this project:
See all materials


Comments
Join the conversation
-
Great project. This gives me the inspiration to create my own version!! Thanks for sharing!
-
Really great idea!!


Frequently asked questions
Have a question about this project?
How did you attach the hidden hinges, so that they didn't show on the outside? The L brackets hid them in the photo. The Hometalk link to expensive hinges are not hidden. What brand are the real ones you used?