


Old Metal Bucket Repurposed Into Charming Farmhouse Decor
6 Materials
$15
2 Hours
Easy
If you have an old metal bucket lying around your home then you too can easily repurpose it into charming farmhouse decor. Do you love to repurpose items around your home and transform them into beautiful and useful decor? If so, this easy to do tutorial will show you how!
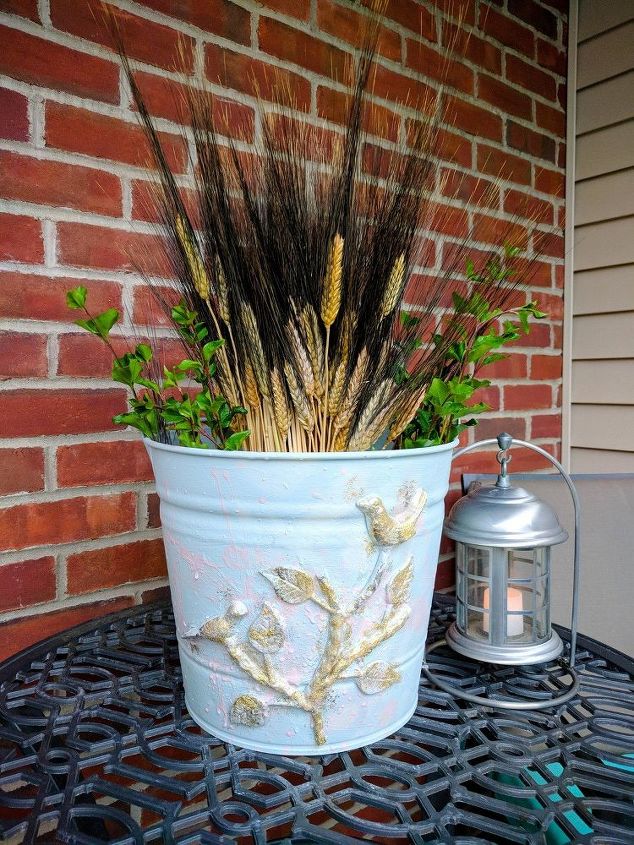
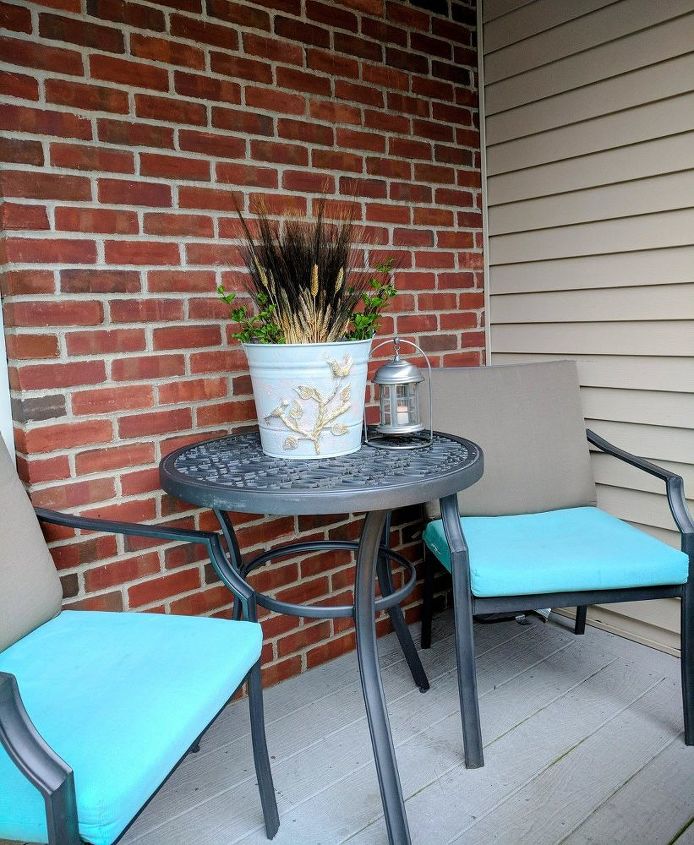
I’ve always been in love with anything that’s paint splattered. This old metal bucket repurpose reminds me of that old bucket you would find in the back of your grandparent’s old barn. Even though we own a sassy little townhouse that’s more traditional in design than farmhouse, I still love to add touches of farmhouse decor to my home.
Let’s get started and, I can show you how I was able to repurpose this old metal bucket into a charming farmhouse decor element.
Old Metal Bucket Repurposed Into Charming Farmhouse Decor
What You Will Need:
- Metal Bucket
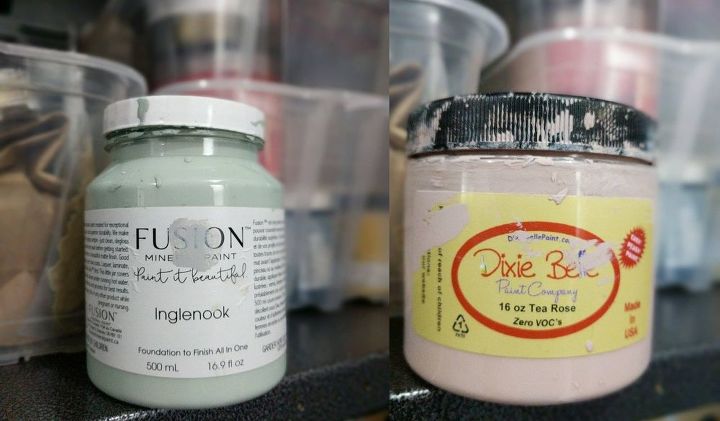
- Paint – I used chalk paint – Fusion in Inglenook & Dixie Bell in Tea Rose
- Efex Embellishment
- Rapid Fuse Glue for Embellishment
- Paint Brushes
- Gold Embellishment Paint
1 – First, find an old metal bucket. It doesn’t have to be an antique bucket either. You can use one you found at a yard sale or one you find on Amazon too.
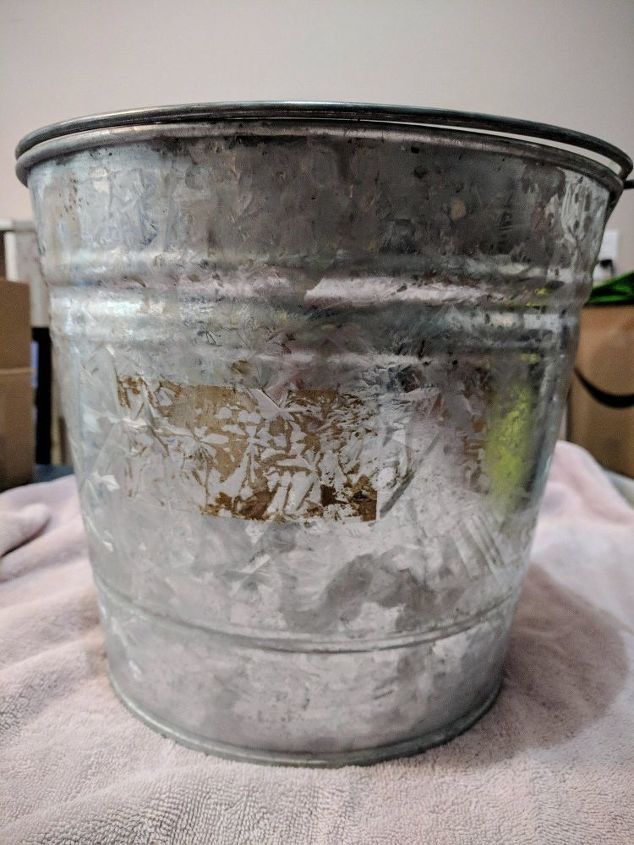
The bucket I used was old so cleaning it first is essential. You don’t want any dirt or debris coming through when you paint it.
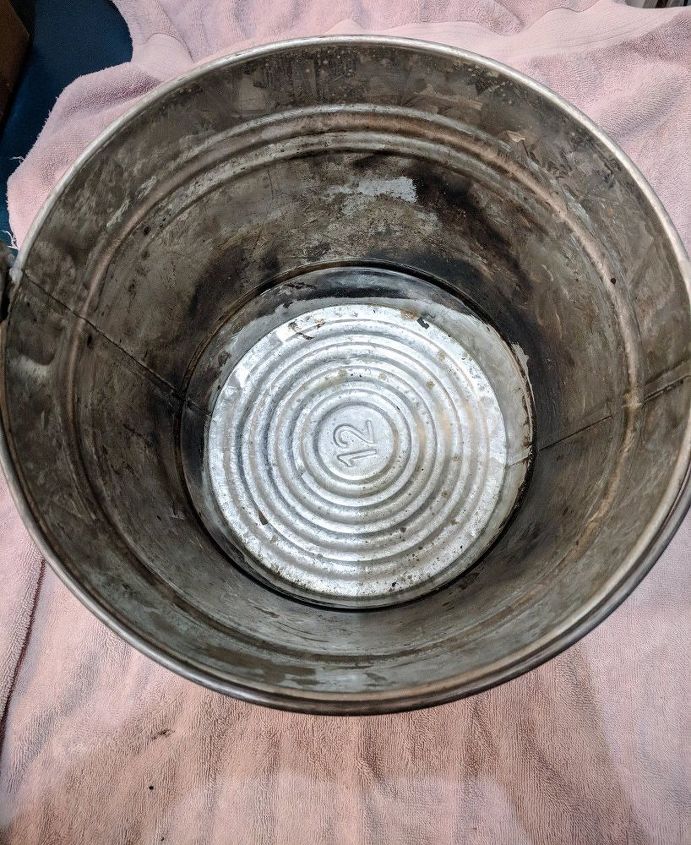
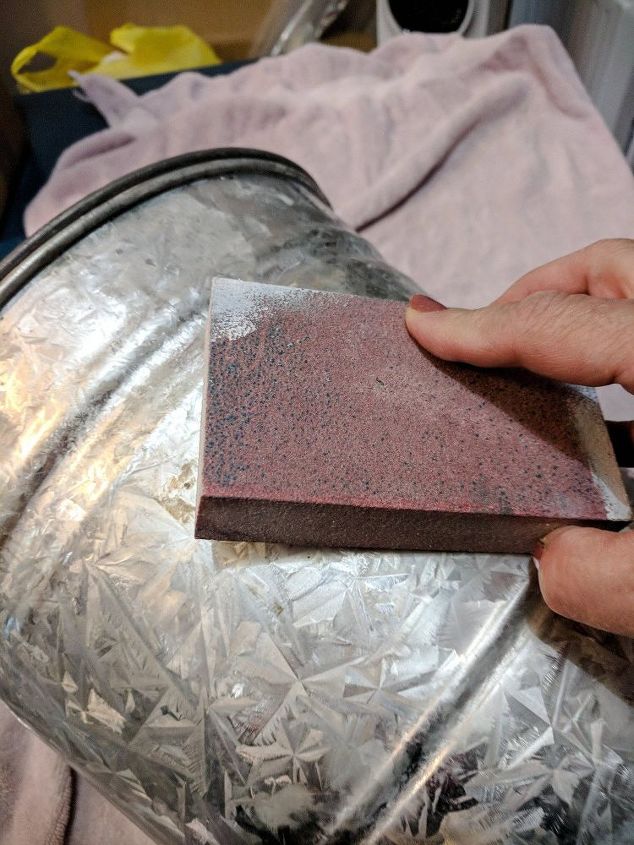
2 – If you have an old metal bucket, be sure to clean it thoroughly first. You will want to lightly sand it down to remove any debris and then wipe it down with a damp rag.
3 – Once it’s clean inside and out, you can begin to paint it. I used some Fusion Chalk Paint I had on hand in the color Inglenook. I love using Fusion Chalk Paint for my crafting projects and my furniture restorations too!
Whatever paint you decide to use, be sure to use two coats as you want good coverage.
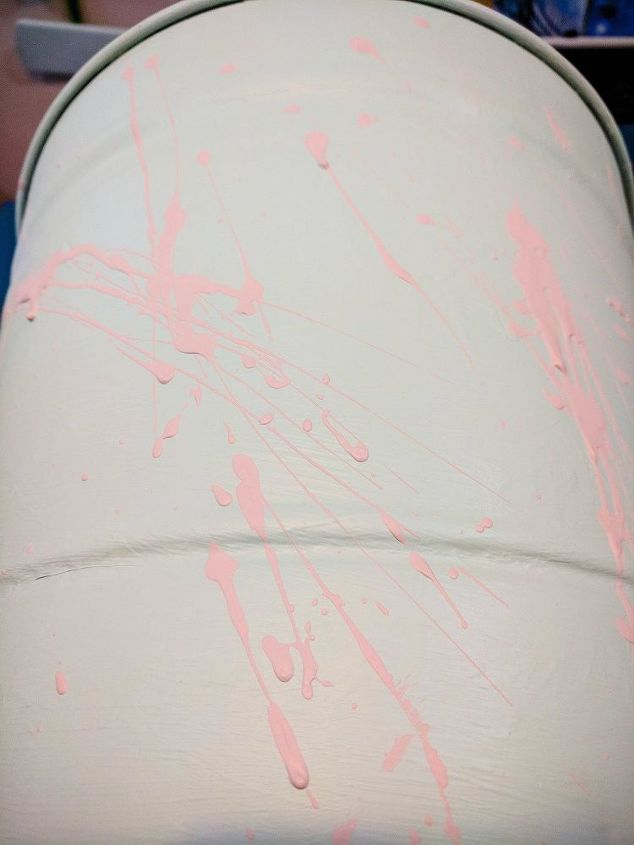
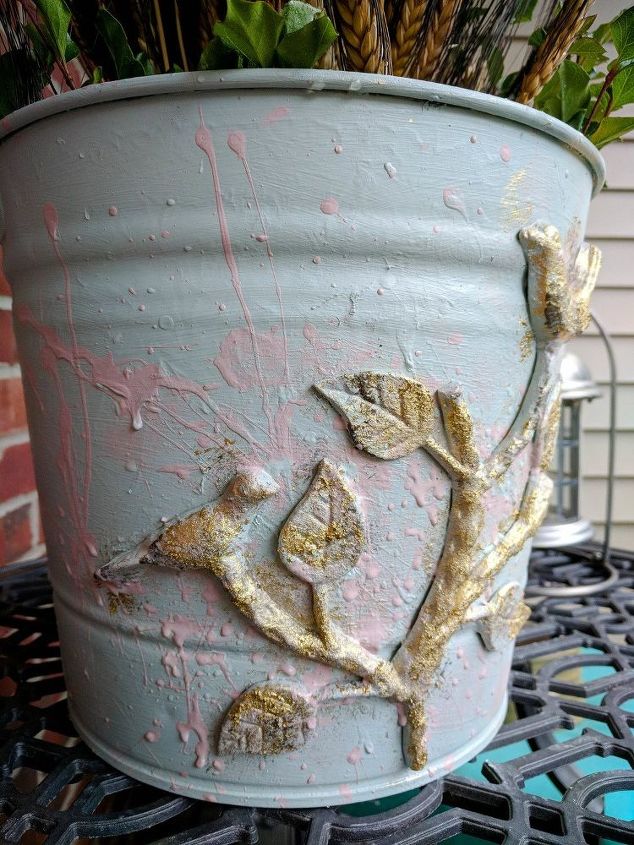
4 – Paint Splatter – For the splatter, I used Dixie Bell Paint in Tea Rose. I love this shade of pink. It’s muted but you still get that Millennial Pink look that’s so popular this year.
I dipped my brush and made sure to have enough paint in the edges of the brush. Then, I whipped the brush with a fast jerking motion over the bucket to create the paint-splattered look. You can do as much or as little paint splatter as you like. Remember, once you complete the next steps, you will be adding more splatter as well.
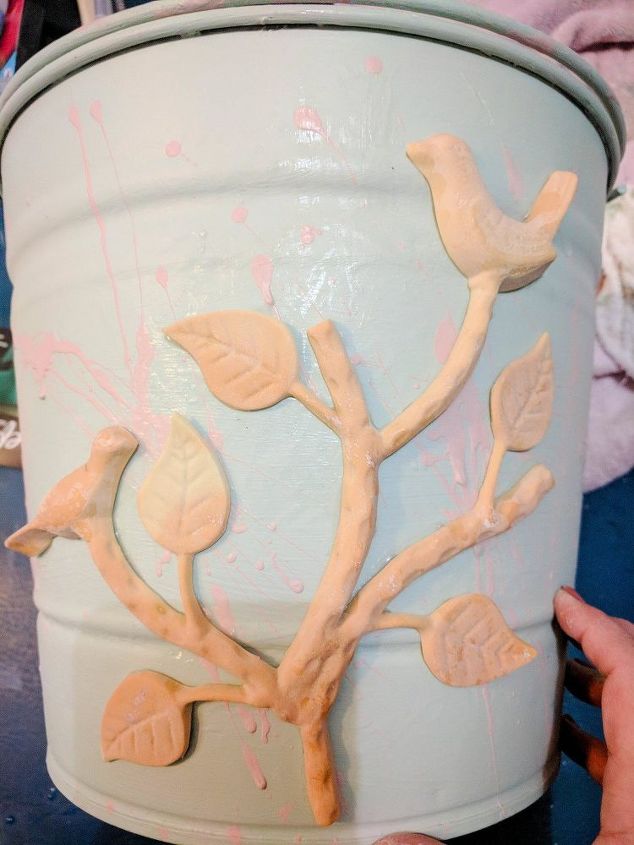
5 – Efex Applique. This is where I added my Efex Birds on Branch applique. I love these appliques and have used them on my crafting projects before (check that link for a tutorial on how to apply them) always with such beautiful results! They are easy to use and create the most stunning crafting projects!
All you do is glue them on and paint over them. Easy as can be!
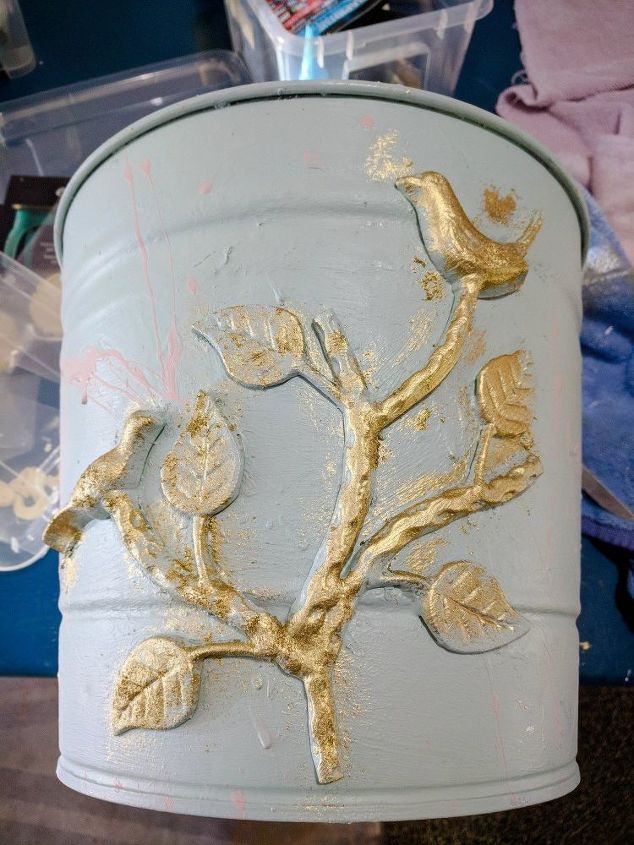
6 – Painting Over The Applique. Once the applique is dry, I used some Pebeo Gedeo Gilding Paper Craft Wax to embellish the applique. I also added some more Tea Rose paint splattering too. You can add any colors you want during this stage. I love this gold Pebeo Gedeo Gilding Paper Craft Wax – it’s great for so many projects and always adds a beautiful touch.

Essentially, you are done! I decided to add more of the pink paint splattered look over the top of the embellishment. I love the messy look of the splatter but you can decide just how much you like!
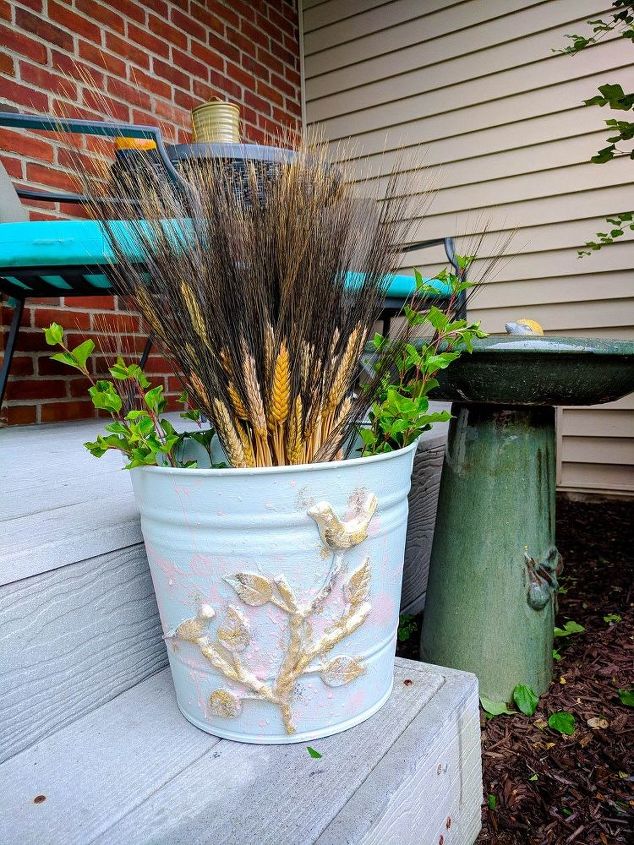
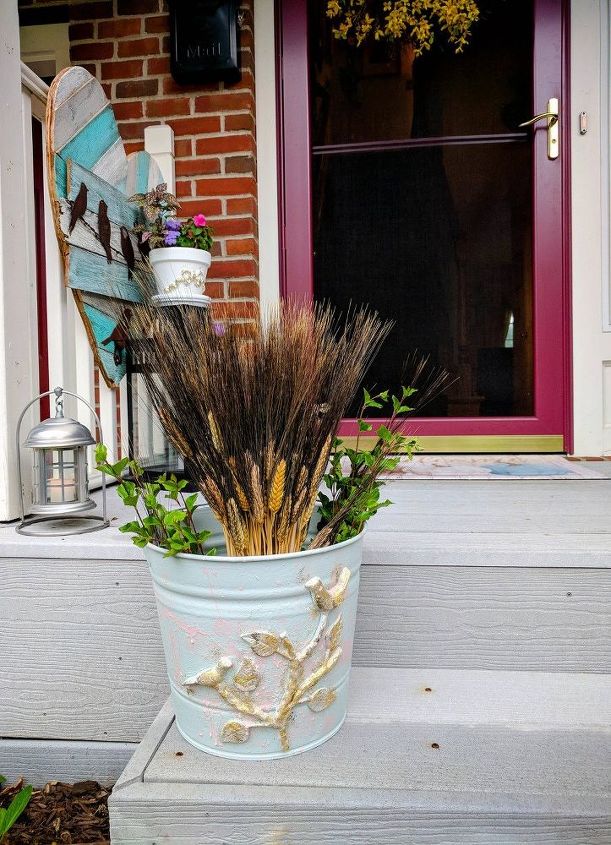
I am thrilled with the way this old metal bucket was repurposed and transformed. I love it outside in my garden or you can use it in your home too. I also added some Wheat Stacks to it too which I think looks truly beautiful. You can add flowers or any decorative item in it you like too.
I love moving it around outdoors too. It’s such a great way to add a touch of farmhouse decor to your space.
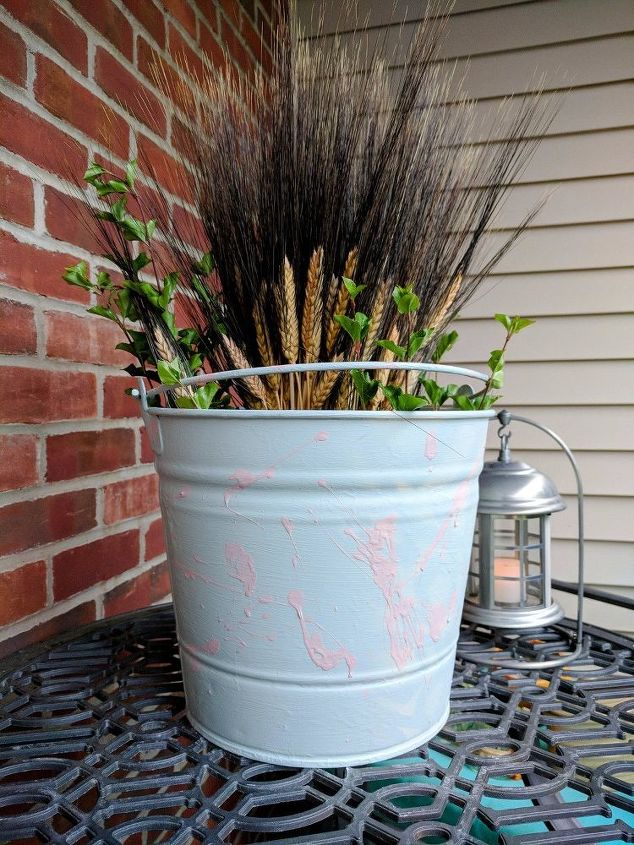
Here’s what the back looks like. You can always turn it around and get an entirely different look too!
I hope you enjoyed this tutorial! Please let me know if you have any questions below. Have fun creating!
Please stop by my blog for more images and product details! I know you will find some inspiration for your projects too. The link to this post can be found below.
I'd love to see you there - please be sure to stop over and say hi!
Also, subscribe to my newsletter for emails featuring giveaways, updates, and much more!
Resources for this project:
See all materials


Any price and availability information displayed on [relevant Amazon Site(s), as applicable] at the time of purchase will apply to the purchase of this product.
Hometalk may collect a small share of sales from the links on this page.More info

Want more details about this and other DIY projects? Check out my blog post!
Comments
Join the conversation
4 of 14 comments
-
Soooo lovely! And it looks perfect with your birds on a wire
-
I love this project!!! Great Idea!!! I thought about using clay and designing flowers and leaves!! Once it's dry..... paint and seal it!


Frequently asked questions
Have a question about this project?
This is so adorable. Do you have a link for where to buy the birds? Thanks!
Really cool!! Is that durum wheat you have in it?
I would love to know where I can buy the bird appliqué, please send me a link, where I could buy this product. Thank you