


I Turned a Sewing Cabinet Into a Tea Cart (What??)
A few months back, I was perusing Hometalk, looking at all of the amazing things creative people had fabricated, when I saw that someone had made a tea cart. At first glance I thought, “OMG. They’ve taken an old sewing machine cabinet and turned it into a tea cart…what a novel idea!” I decided I should read the article to find out exactly how they did this. To my dismay, it was then that I learned they had taken an old tea cart and turned it into a new tea cart. :-\ Although they did a remarkable job on the transformation, there was nothing novel about it. That’s when it occurred to me, “I COULD TURN A SEWING MACHINE CABINET INTO A TEA CART!”
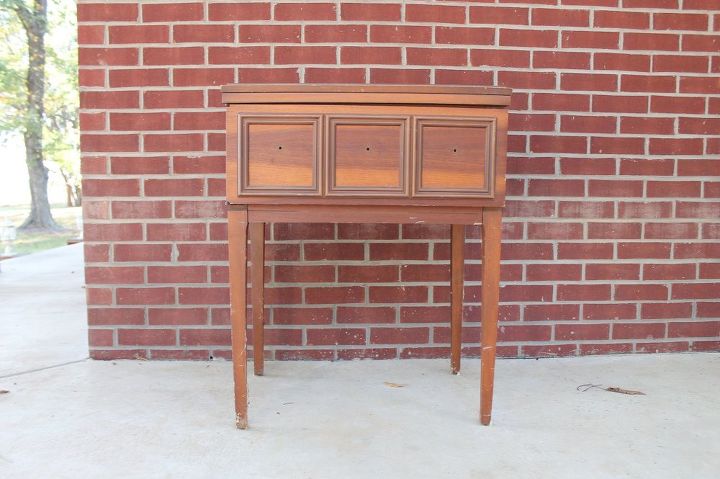
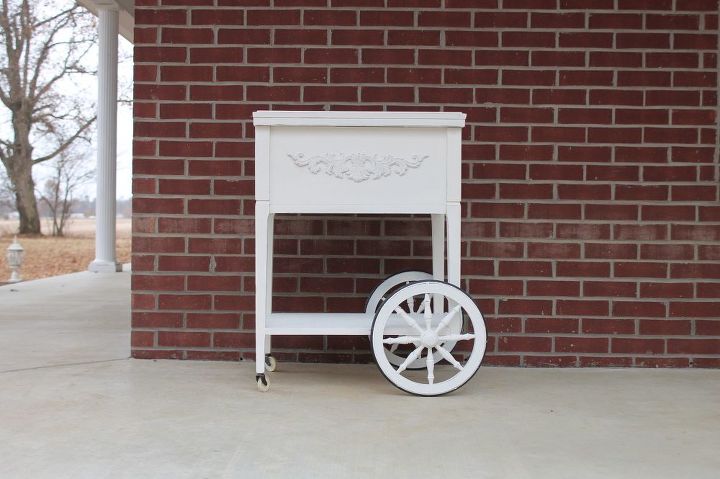
As luck would have it, I had purchased a sewing machine cabinet at the Salvation Army thrift store a while back. I can’t remember exactly how much they were originally asking for it but it was more than I wanted to pay because I had passed it up for a couple of weeks. Eventually, my frugalness paid off because I was able to snag it for less than $8. (Ikr?) I brought it home and there it sat in my husband’s barn for about 6-8 months, patiently waiting for inspiration to strike me. (In all honesty, it was probably closer to a year, but who’s counting?) I knew that I could have just painted it and turned it into an end table or something boring like that, but I knew it had so much more potential. (Like becoming a tea cart!) First thing’s first…I had to clean it. I got out my TSP and gave it a good wipe down. (Of course I had on rubber gloves and safety goggles.)
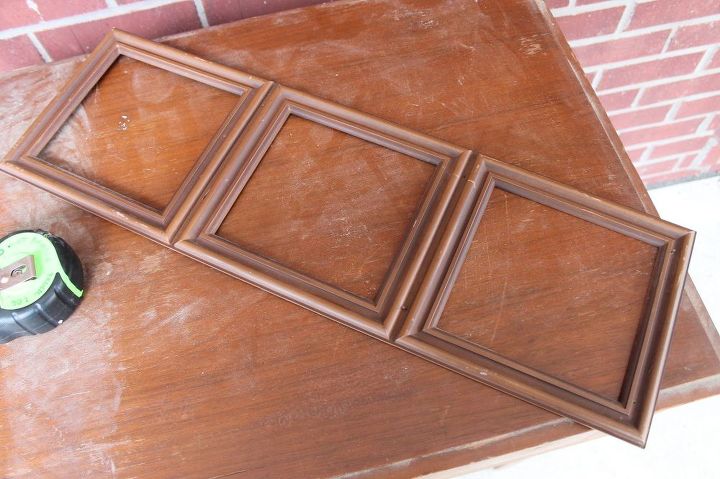
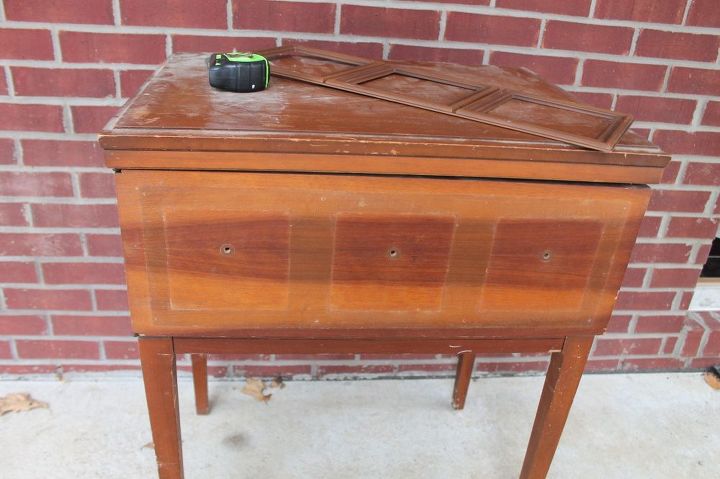
Then I started dissecting it. Lucky for me, it didn’t come with a sewing machine so all I had to do was take off the faux door/drawer on the front.
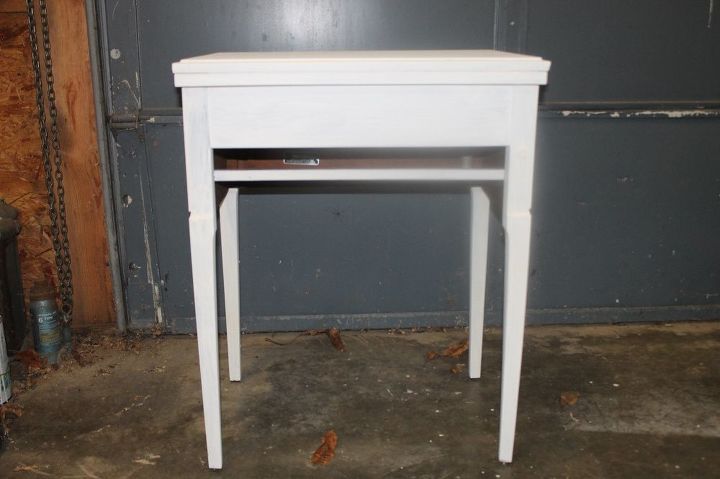
Next, I started painting. Of course, I used the poor man’s version of chalk paint (latex paint, plaster of Paris and water). Looking back, it probably would have been in my best interest to paint it in the last step. Not the first. But, hey, you live and you learn.
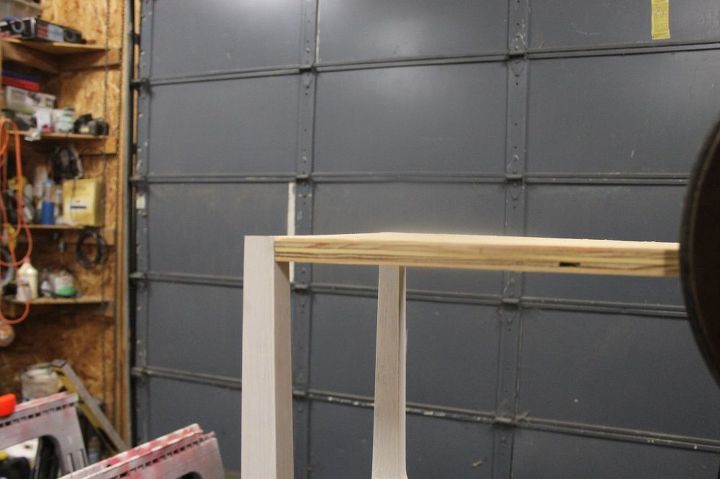
After giving it a few coats of paint, it was time to flip it – literally – so we would have easy access to the legs.
I’m not going to lie, the next step made me a little nervous. After making the necessary measurements, it was time to chop off part of the back legs. So we did. (Not really “we”. It was Jamie. I’m not comfortable with the circular saw yet.)
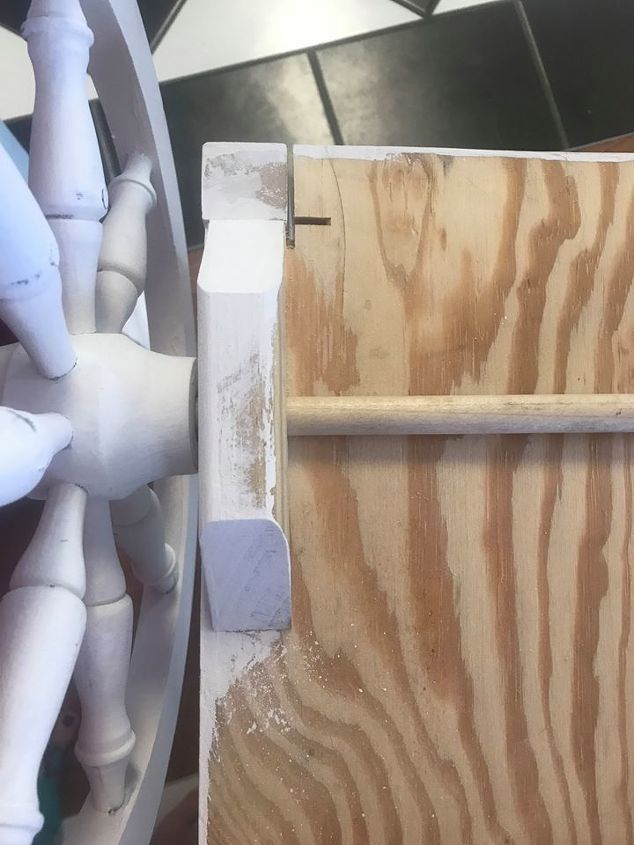
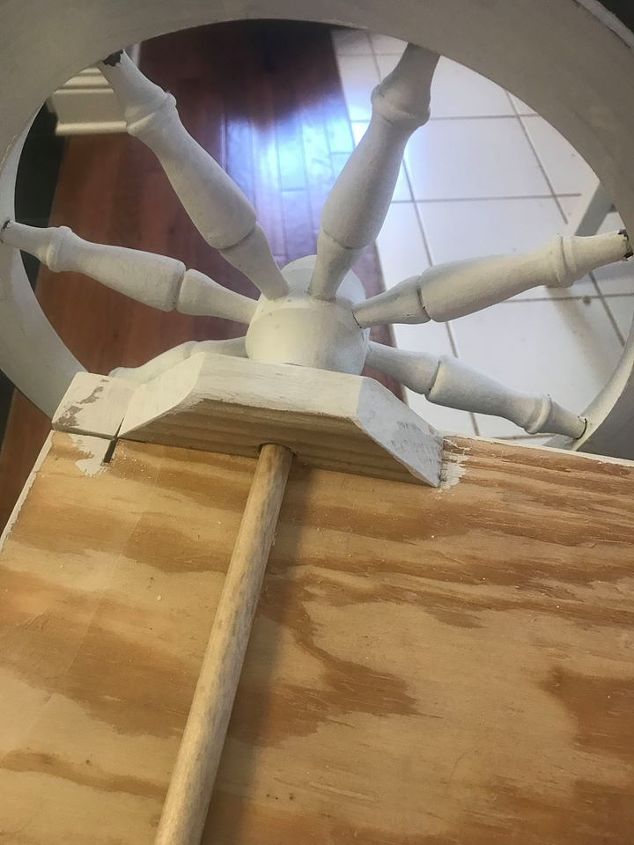
Now we had to figure out how to attach the wooden wheels to it. First I had to decide if I wanted the wheels to be functional or just for looks. We opted for functional; but, if they didn’t work then they’d just be for looks. We joined the two wheels together by using a dowel rod. Then Jamie built me a contraption (for lack of a better term) to attach the “axle” of the wheels to the cart.
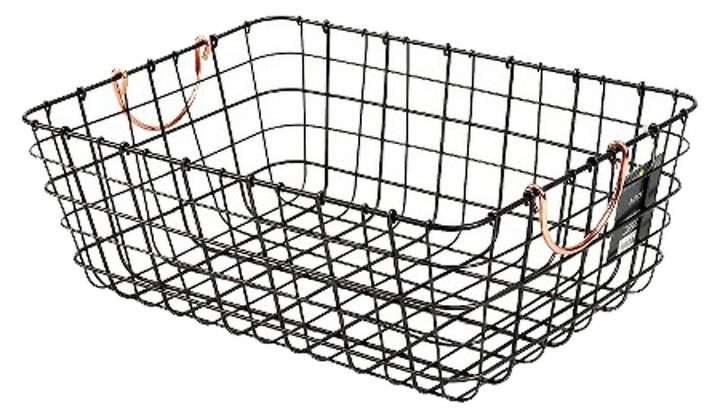
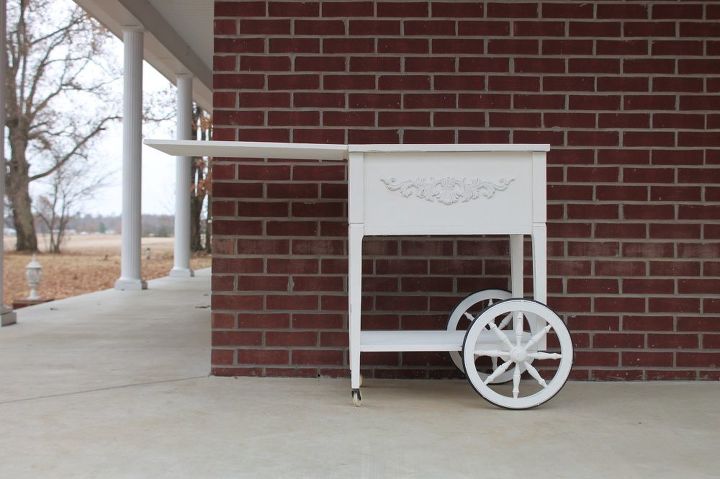
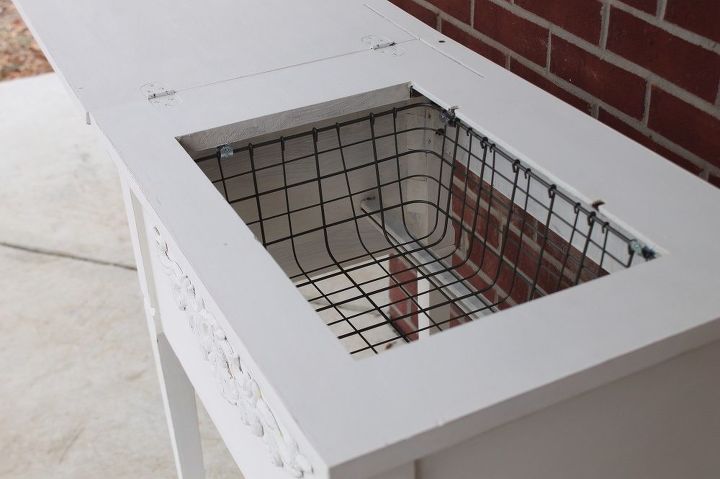
When you unfold the top, the space where the sewing machine was is just an empty hole. I wanted this cart to be useful so I got the dimensions of the “hole” and scoured the internet for baskets that would fit. Finally, I found one at Target. >sigh< Unfortunately, we are one of the only cities in the entire world that doesn’t have a Target. (I might be exaggerating a little.) The closest one is about 45 minutes away. Therefore, I ordered it online and had to wait four long days for it to arrive. (Good news is that it was on sale and it had ‘FREE SHIPPING’…yay!)
Once again, I flipped the cart upside down to attach the basket. First, I took off the copper handles. (I lied. Jamie took them off.) Then grabbed a package of 1/2″ EMT straps and secured it to the cart. Here’s the finished product. Well, not really. I’m still trying to figure out the handle. I’m kind of picky…I don’t want just any handle.
A few months passed and I finally found a handle for my "tea cart." Well not really. I could never find one, so I made one. What do you think of the final result?

Resources for this project:
See all materials


Comments
Join the conversation
-
Very creative! Beverage cart is a great idea!
-
Yes i would love to try this with the one i got 4 months ago.


Frequently asked questions
Have a question about this project?
What size wheels did you use?
Hi love it .i have a old tea cart but i need handles. Could you show how to make them .like you did for yours