


Industrial Farmhouse Entertainment Center From a Old Rolling Cart

8 Materials
$25
5 Hours
Easy
I received this old metal rolling cart from a friend that was going to throw it away but I insisted on taking it off their hands because I knew exactly what I wanted to do with it. My style for my inside of my home as been leaning toward farmhouse/industrial farmhouse. Slowly but surely I have been putting things in a little at a time. And this is what I have been wanting to do for awhile.

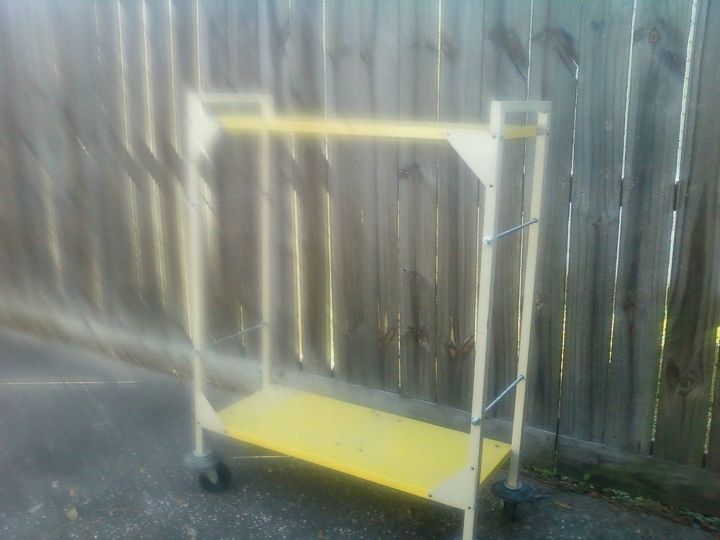
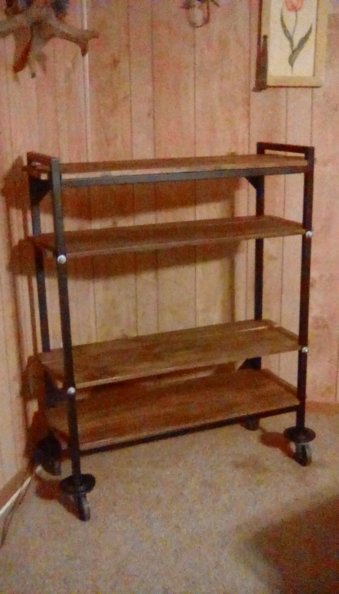
The first thing I did was remove a yellow wrapped all thread type shelving system that was on the inside of rolling cart. Did not get a pic of it before the removal but this is what it looks like now with all that done.
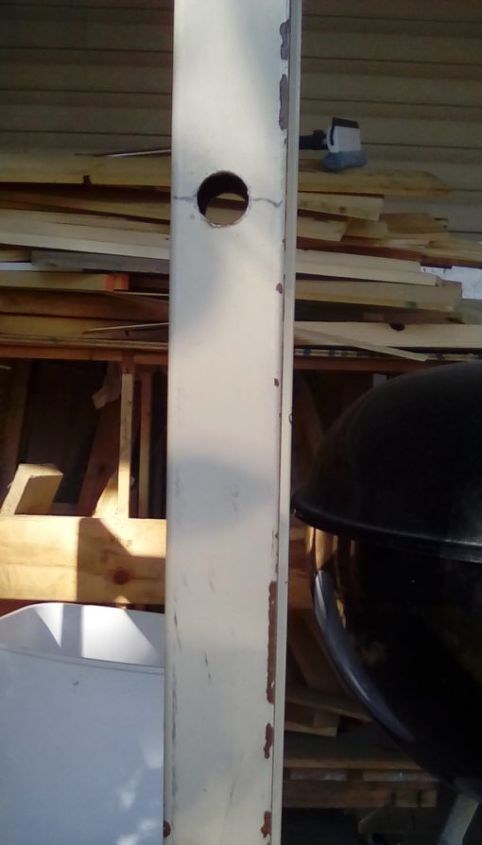
Once I got that done we had to determine the spacing of the additional holes needed to add more shelving to the piece. I was looking to put two more shelves in the middle section. Once we determined that my husband measured the spacing from the bottom of the yellow shelf 10 in down and 10 in up from the top of the bottom one and marked a center. We predrilled a small hole and then a large enough hole for the 3/8in all thread to fit. Wanted room to put a TV in the that space. I also wanted the boards that would be the shelving to hang over the ends about an 1in on both sides.
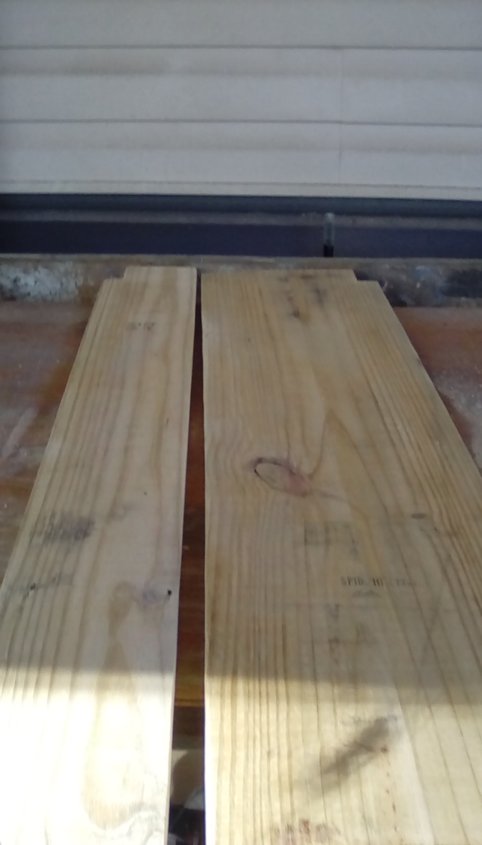
Now was the time to cut the boards and make a notch on both ends so it would fit between the metal frame on the cart so I would have a flat front edge and back edge. We had to use a 1x10 and a 1x6 for each shelf to fit the shelf depth. The dimension of the shelves was 35w x 14 1/2d.
This is a side view of the cart. This is why we had to notch the ends so the edges where the shelf ended would be flush.
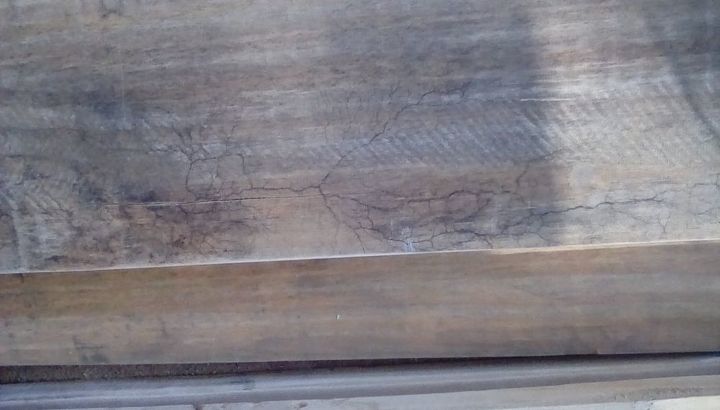
I was not trying to get it perfectly sanded because I liked some of the character of the wood. Even the stamps that are there from the lumber yard looked pretty cool.
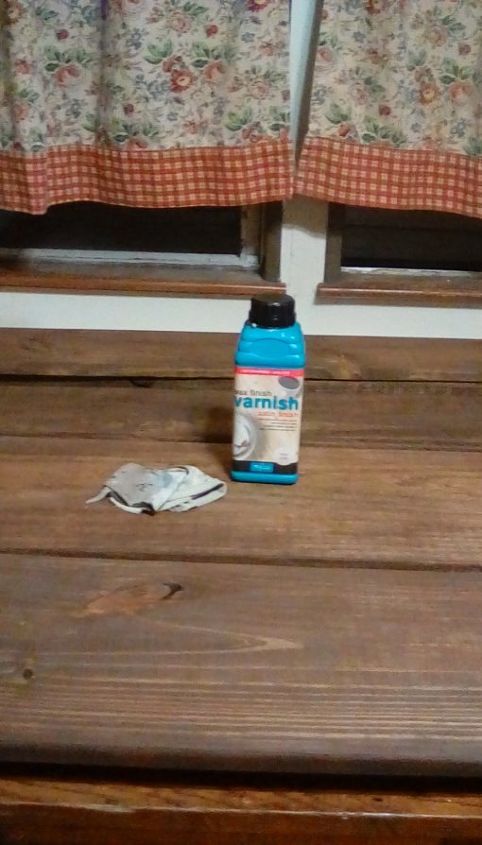
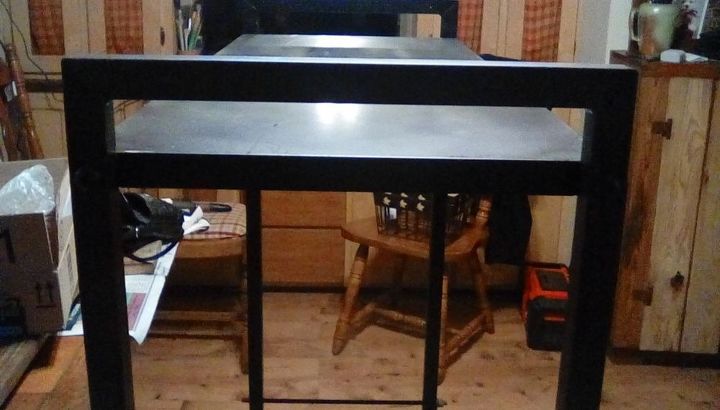
After sanding I stained the boards with miniwax special walnut and then after it dried I applied a water downed espresso glaze applied with a lint free cloth. I wanted the brown to be a little more golden in color. Let it dry and used Polyvine Wax Finish Varnish in satin wiped on with lint free cloth.
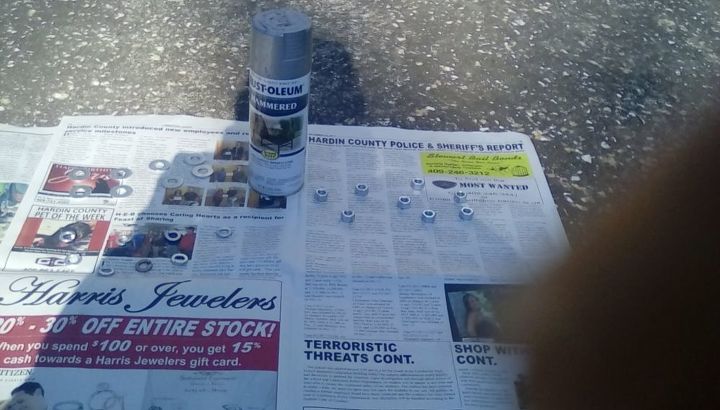
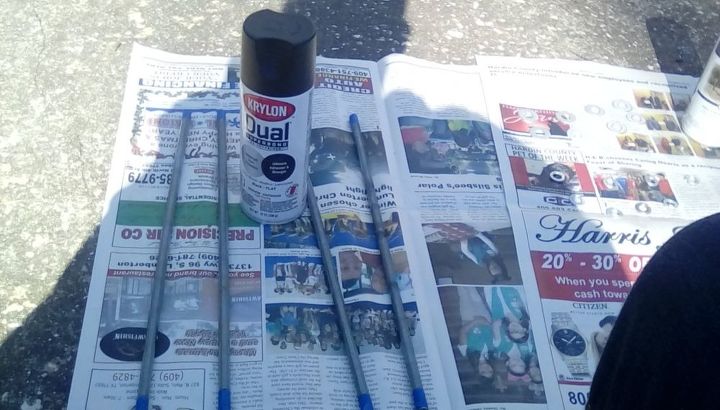
The parts we used for the supports for the other two shelves in the middle were 3/8in all thread, lock washers, flat washers and locking nuts for the additional shelving. I sprayed the all thread in black satin and washers and nuts in silver.
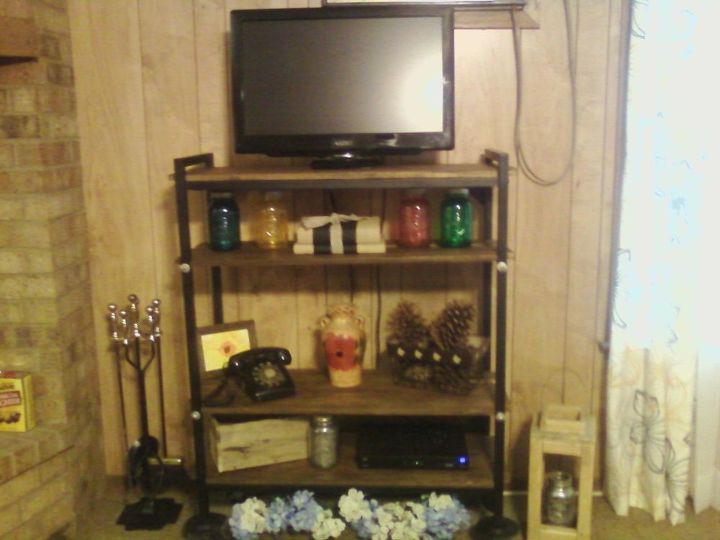
Once the the all thread and nuts and washers were painted and dry installed them in the predrilled holes. Then laid the planks for the shelving. We are going to also attach the planks with a strap on the bottom of the two shelves we added. Seems they don't want to lay as level as I would like. I love it and can't wait to pretty it up. I have the worst camera ever!! My birthday is on the 16th might need to splurge. LOL!! The only things we had to buy for this project were the Miniwax Special Walnut, Krylon Spray Paint in Black and Silver and the Nuts and washers. We had everything else. Love the way it came out.
Resources for this project:
See all materials


Any price and availability information displayed on [relevant Amazon Site(s), as applicable] at the time of purchase will apply to the purchase of this product.
Hometalk may collect a small share of sales from the links on this page.More info
Comments
Join the conversation
3 of 11 comments
-
I like turning old stuff into useful items, great job!
-
I know the feeling. Looking forward to your next pic


Frequently asked questions
Have a question about this project?