


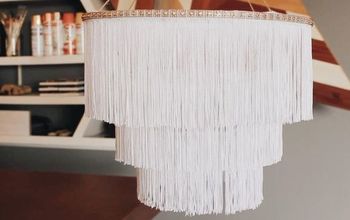
Easy DIY Wooden Woven Veneer Chandelier
Looking for a chandelier but you’re on a strict budget? Make one! Here is an easy DIY wooden woven veneer chandelier for less than $40.
When I decorate, lighting is one of the most important details in design. This is no surprise to you as I write about my lamp and light fixture obsession frequently. But it’s true; lighting is a key element in both interior and exterior design, and I absolutely love mixing and matching different variations of lamps, sconces and hanging light fixtures. And, if I can design and make one myself, then even better.
Hometalk Recommends!
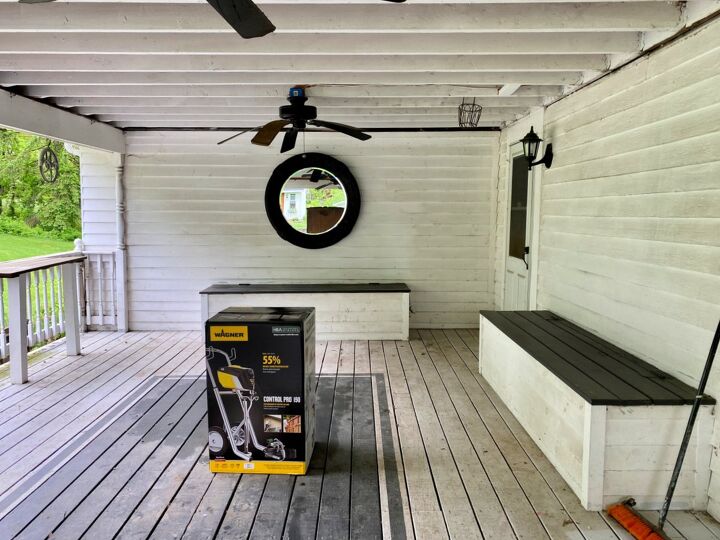
It’s the perfectly imperfect that I like to achieve. When I’m working on a room design, I love getting in to the nitty-gritty details. I put a lot of time and thought into each decision; the paint color, the furniture, the wall decor and yes, the lighting. When I was mulling around lighting for our back porch and how much be needed, I knew I wanted a pair of hanging light fixtures hanging over one of the built in benches, flanking both sides of the mirror. The mirror would reflect a soft cast of light and create a beautiful ambiance at night on our porch.
In my mind’s eye, I wanted something natural looking. I looked around in a few local stores and there wasn’t anything that sparked my interest. And, as time was the essence, I didn’t have time to head to IKEA, or get something shipped. So I decided to try to make a chandelier using materials that I randomly had on hand, and I headed to Pinterest for inspiration.
Easy DIY Wooden Woven Veneer Chandelier
As is the case every single time I go on to Pinterest, I go down design and decor rabbit holes, totally losing track of time. I found some great ideas, but this one caught my eye, especially since I had the materials needed on hand.
Random, I know, but go figure.

The DIY is for woven veneer candle holders, and I took it a step further and created a pair of hanging light fixtures. Remember, perfectly imperfect was what I wanted to achieve, and the low cost of this DIY was an added bonus. Here’s the easy DIY and a list of materials needed:
- One roll of wooden veneer banding
- hot glue gun and glue sticks
- 8″ wooden disc for the base
- hanging lantern cord(s)
- clear spray paint to seal
- cordless drill
- craft scissors
First step is to find the middle of the disc and drill a hole the size of the cord.
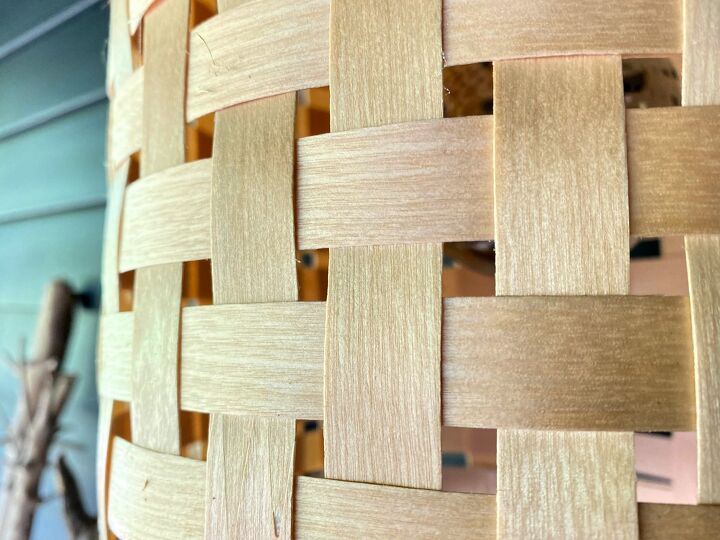
Decide how tall you would like your chandelier to be. I wanted the chandeliers to be 12 inches tall, so I cut the veneer in 15-inch strips for allowance. For this size light fixture, you’ll need 16 strips.
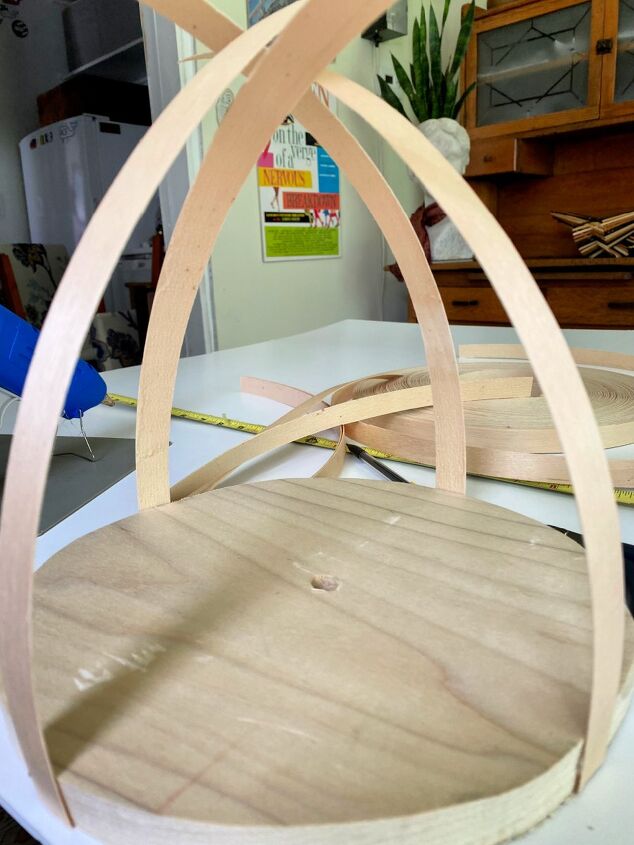
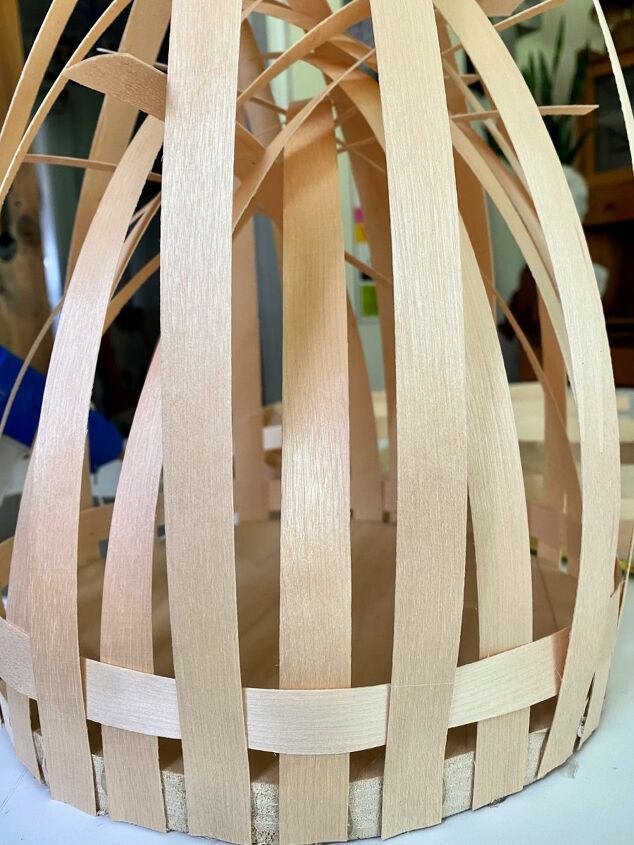
Hot glue one strip to the base, let’s call that at 12 o’clock, then glue another strip directly opposite of the first one at 6 o’clock. Then glue a strip at 3 o’clock and at 9 o’clock.
Then again at 2, 4, 8, and 10 o’clock.
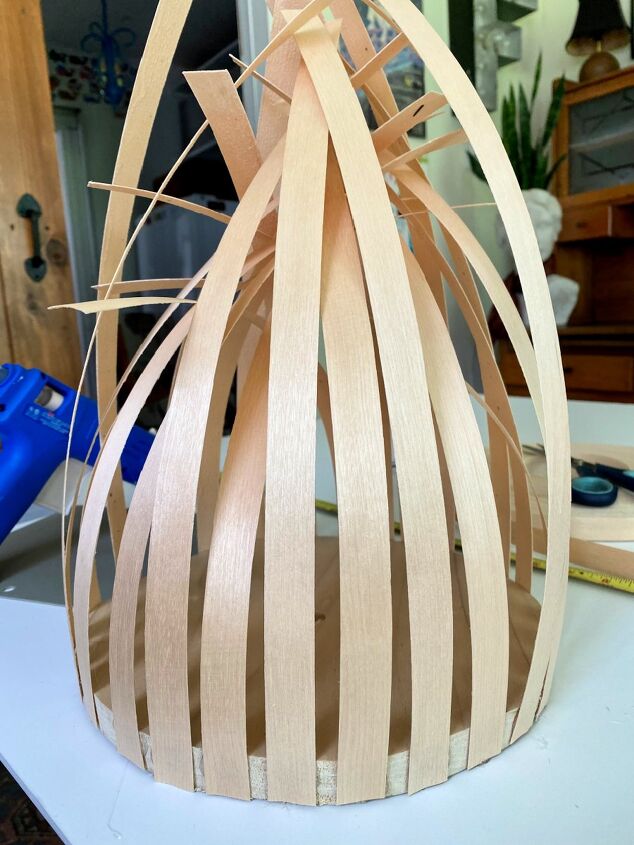
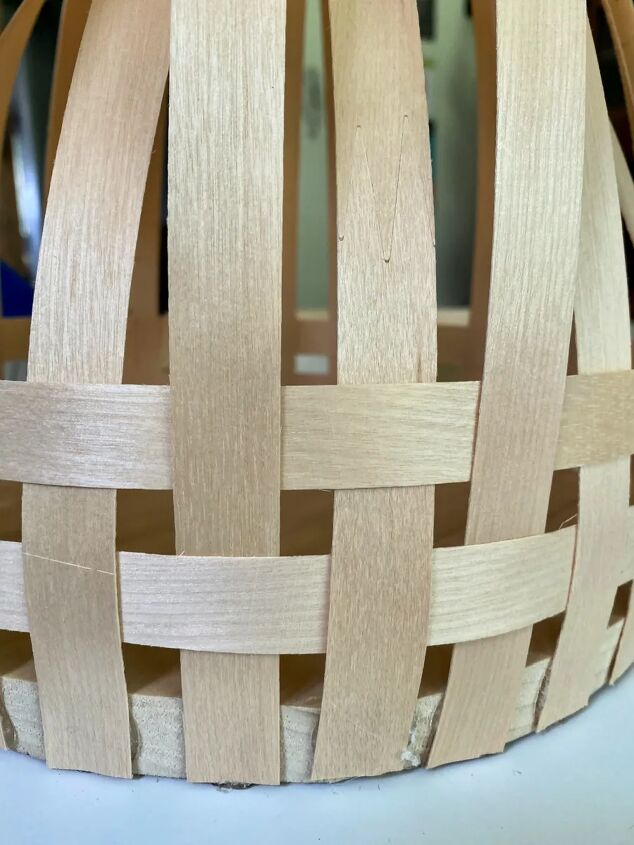
Take the veneer banding and measure the circumference of the disc, and then add an additional half inch. Depending on the height you want, cut strips for the weave. I cut 14 strips.
Start weaving over and under in a basketweave design. Tuck in the ends and hot glue in place.
Follow the basketweave pattern, over under, over under.
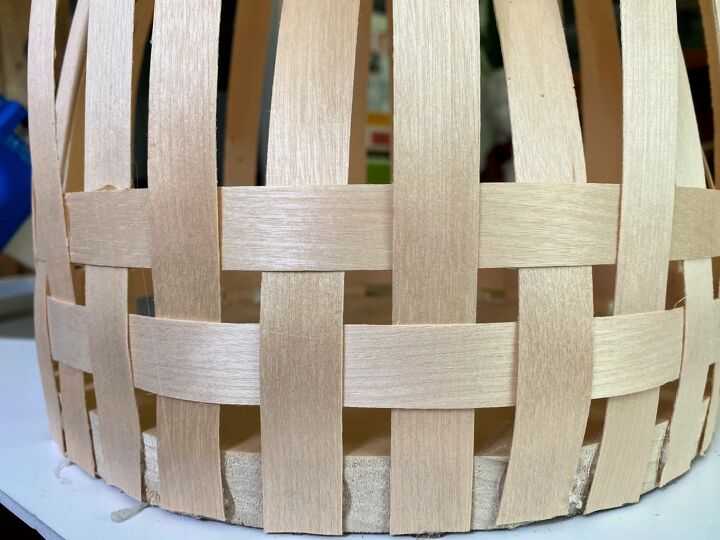
Keep adding strips and weaving until you have reached the height that you want.
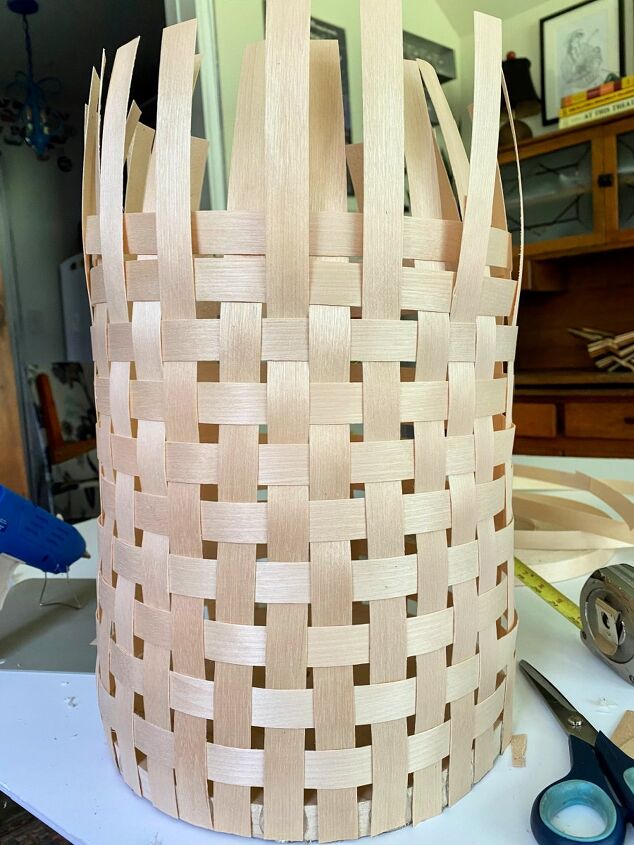
Cut off the extra ends with craft scissors.
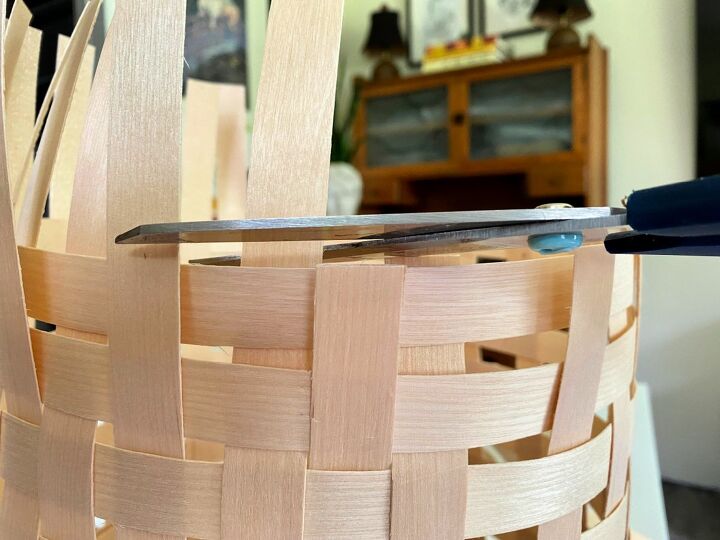
To finish, glue a band around both ends of the light fixture to hide the raw edges.
Pull the lantern cord through the hole, add a lightbulb and hang.
Each light fixture took me about an hour to create. One important thing I learned when making them is to not rush. I did rush a couple times and then I found that my weave was off and I had to put the banding off and start that row over. Not a big hassle, but annoying just the same. So, take your time, and mind the details.
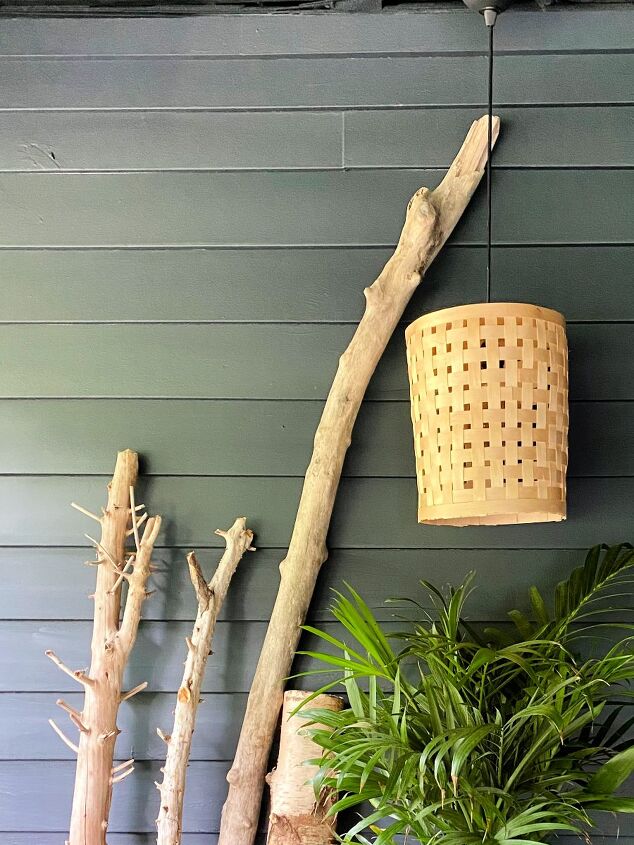
This is just a very small sneak peak at our back porch makeover. These easy DIY wooden woven veneer chandeliers look charming and add character, which is my definition of perfectly imperfect.
Perfect for our back porch design makeover.
This post contains affiliate links.
Resources for this project:
See all materials


Comments
Join the conversation
-
Very cool and nicely done!
-
Wonderful! So creative.


Frequently asked questions
Have a question about this project?
I love your light fixtures but am very intrigued by the bare branches leaning on the wall. Did you paint them or bleach them?