


A Beautiful Reunion: Broken Chairs and The Mis-Matched Table

by
Amy
8 Materials
$250
30 Hours
Medium
This was quite the sad sack of a kitchen chair situation. Sit back (pun intended) and let me show you why it is even worse than it appears here. The consigment store chairs are covered with standard pillow cases. Why? A picture speaks a thousand words. The table was purchased second-hand last year and did not match.

Hiding embarrassing chairs with pillowcases.
Inspired by Monet's home in Giverny and his gallant and unabashed use of color, I went for it.
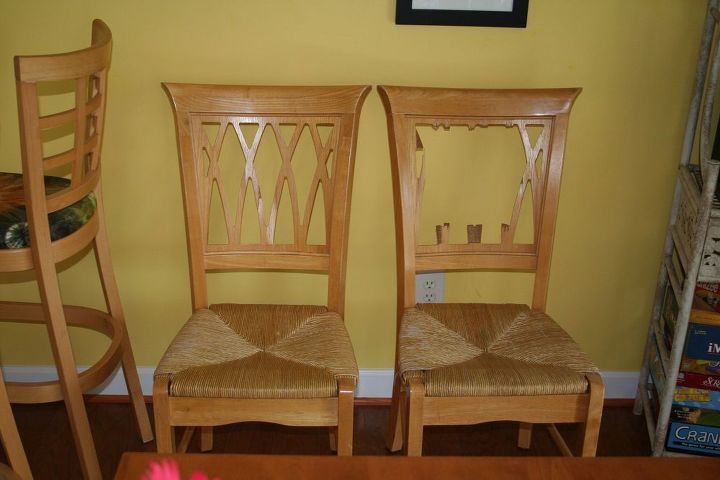
The chairs "before". Broken backs..so sad!
Here's how I started my kitchen furniture makeover. There were many firsts for me here but no time like now to take it on! This makeover was for the March Fab Furniture Flippin' Contest by Fairfield World who so generously provided the foam for this makeover!

Painting outside. Three layers of color.
1. Remove seat and carefully remove the bamboo edges around the chair back, front and back sides.
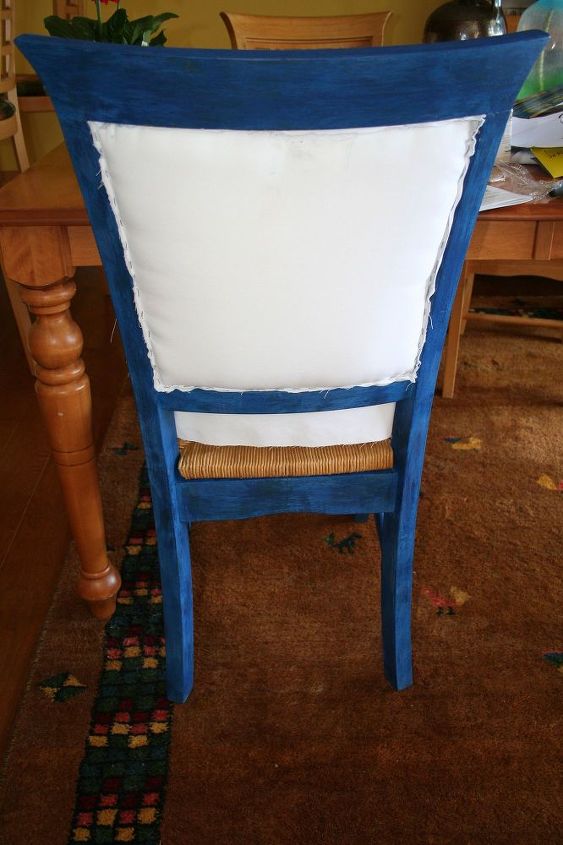
Staple underlying fabric around edges. Trim.
3. Cut foam to size for both front and back. I left the broken back in place. I would have had to take the chair apart to get it out, so I left it alone.The
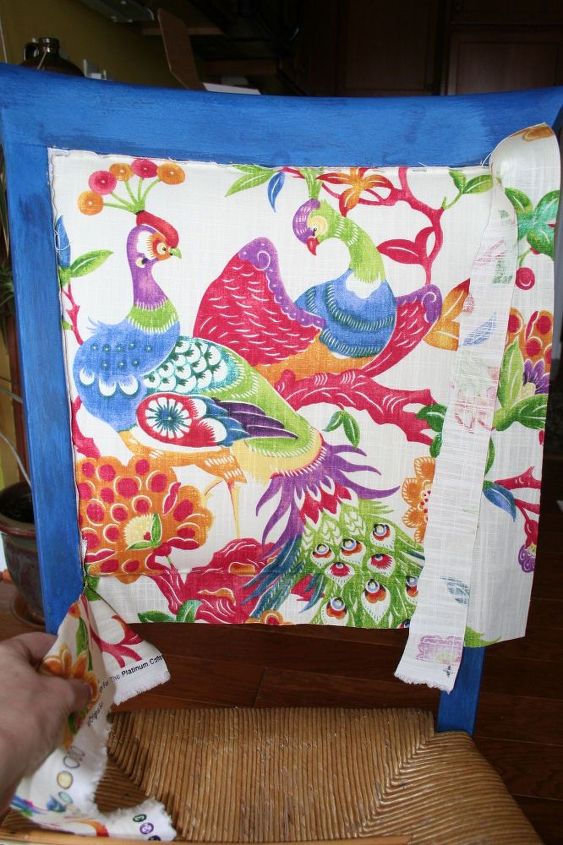
Detail as I trim the decorative fabric.
6. Repeat process with decorative fabric. I used a template because of the pattern and I wanted the image to be specific for the front and the back.

Before and after. What a beautiful change!
Before and after...
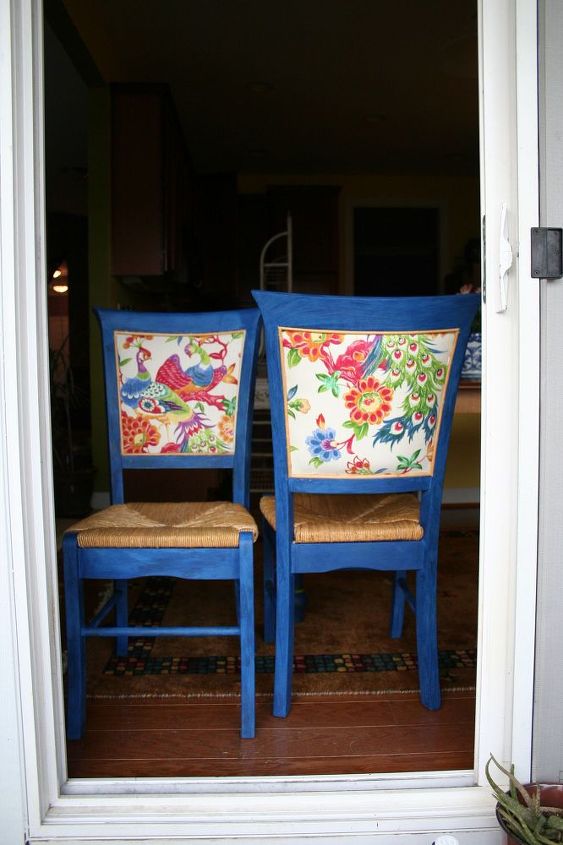
Detail of the front and back of chairs.
The chairs "after" showing the fabric variation and the gorgeous color of the paint. The foam used on the front and back of the chairs feels so comfortable. It's really hard to believe this is the same chair.

Detail of table legs after painting, sealing.
Detail of table legs after they were painted to match the chairs. Details were painted out using a color that I created mixing an acrylic paint in cadmium yellow and the blue milk paint.
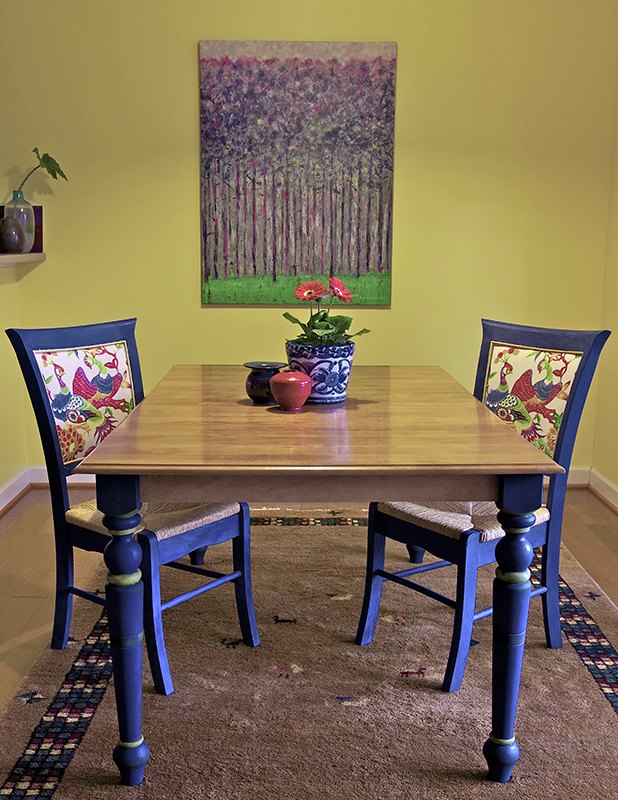
My kitchen area "after" the makeover-LOVE!
The finished products. I couldn't be happier with the results! I hope you like them, too!
Want more details about this and other DIY projects? Check out my blog post!
Comments
Join the conversation
2 of 165 comments
-
GORGEOUS!
-
what a beautiful work of art!!! I love your creative mind. thanks for sharing


Frequently asked questions
Have a question about this project?