


From Goodwill to Gorgeous With Layers
1 Material
$50
6 Hours
Medium
We've all seen these basic vintage pieces at Goodwill and often walk right past them. But I kept coming back to this one. I knew that the details on front would look great painted. And these are a dime a dozen. There is certainly no harm in painting over this dated cabinet. Layers and layers will look great!
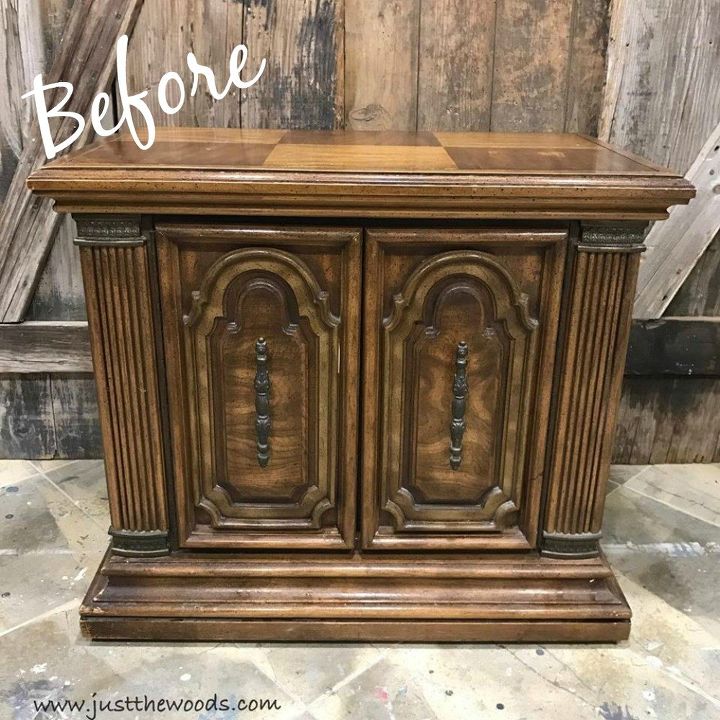
This smaller than a buffet but larger than and end table was sitting alone and ignored at the Goodwill. I didn't need it but I wanted it. So in the truck it goes.
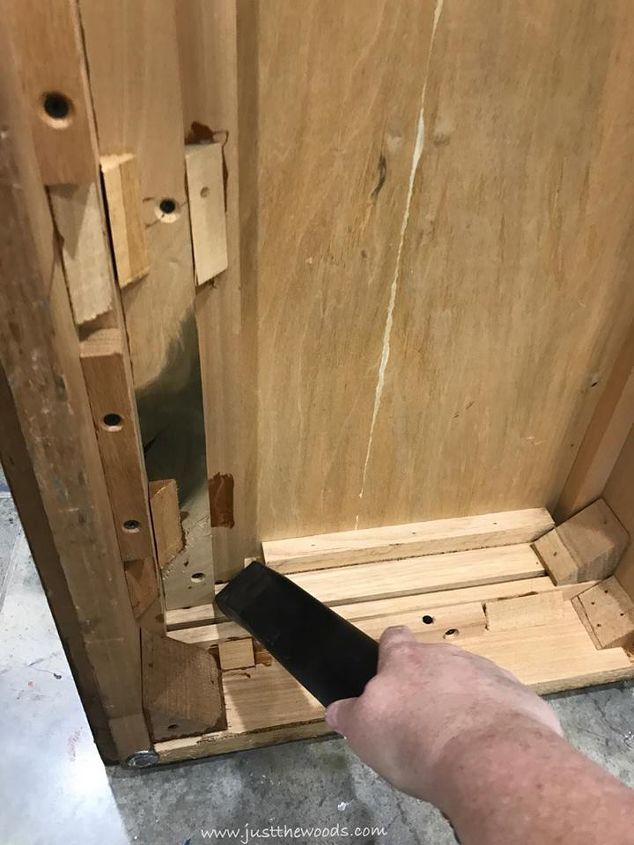
The first step to prep was to flip this piece over and vacuum out any dust bunnies or spider webs from underneath. That's where most of that stuff hides anyway.
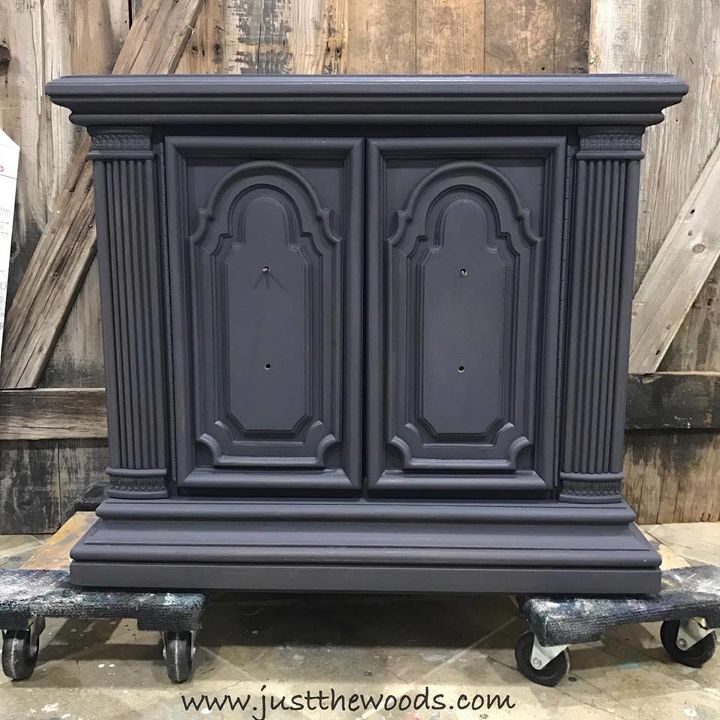
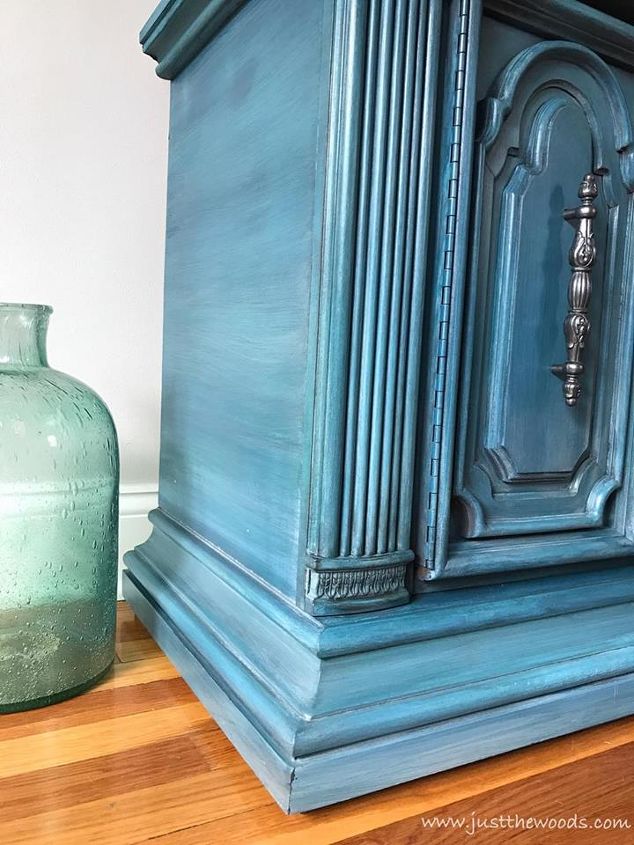
After a thorough cleaning and prep I started with a custom mixed deep purple gray. This color was leftover from my own china cabinet makeover. I hate to waste any paint, so it seemed like a great base color to start the layering process. You can check out the china cabinet makeover here (but if you really don't like painted furniture than you probably shouldn't look.)
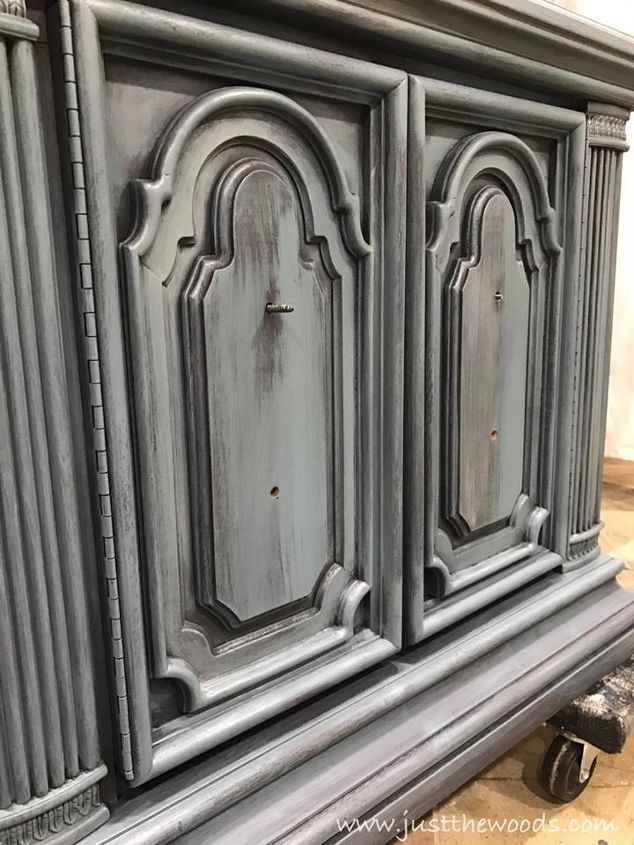
Multiple layers of blues and grays were layered one at a time over the details of the cabinet creating a gorgeous end result. There is a short video on my website that shows each layering step that can be found HERE.
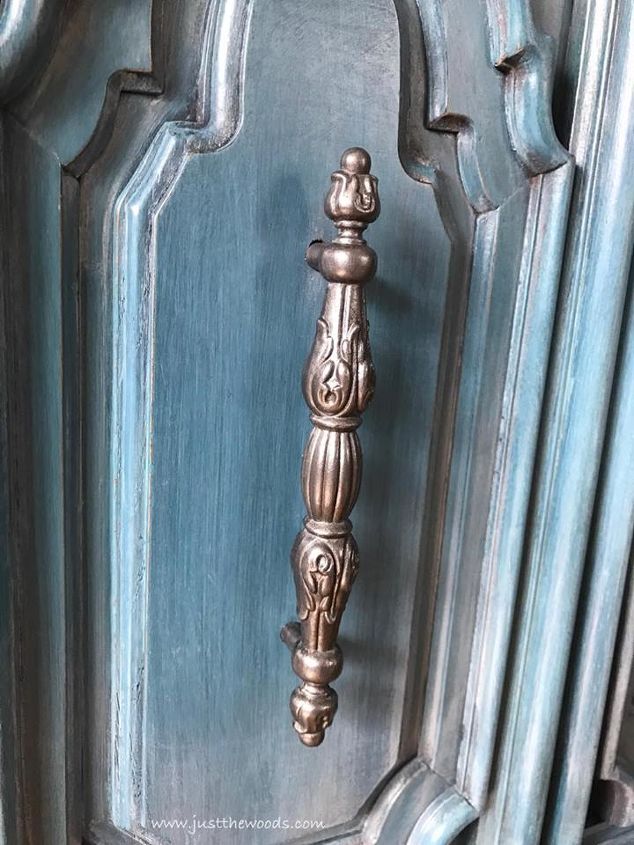
The original hardware was also freshened up in a metallic pewter / silver to compliment the piece.
Hop on over to the blog to see more photos and how to achieve this layered finish.

Want more details about this and other DIY projects? Check out my blog post!


Frequently asked questions
Have a question about this project?