


Steampunk Wood Burned Hat Rack

by
Caroline
Medium
This is going to be my year for organization. It's going to be my family's year for organization too, if I have to drag them kicking and screaming through it. I love them to death, each and every one of them, but they are all a bunch of pack rats. I try to convince them to throw out one item and they act like I suggested throwing a pack of puppies in the dumpster, I swear. And yet I resist the urge to ninja -purge, as my kids are getting older and should have a say in what possessions have value to them. I am slowly succeeding though, with the donation box I keep in a corner to fill. The idea of their unwanted or unneeded possessions becoming beloved treasure to someone else is appealing to them, so we are making progress. S-L-O-W-L-Y.
Lately I have big plans for our bedroom closet. It's a basic closet with sliding doors, typical of cookie-cutter apartments. I am planning a blog post later of how I am getting it organized and maximizing storage without spending a small fortune and / or destroying any chance of getting back a security deposit for renters like us.
One of my problems were Michael's hats. They are everywhere. On the bookcase, on top of the dresser, somehow one ended up in my underwear drawer. I needed a way to keep them organized and a designated spot to keep them without taking up a lot of space since in our three bedroom apartment storage is at a premium, and of course on a budget. I came up with...

I love it. I can hang it on the inside wall of the closet, I can add to it as his hat collection grows, & I had most of the items needed for this project already.
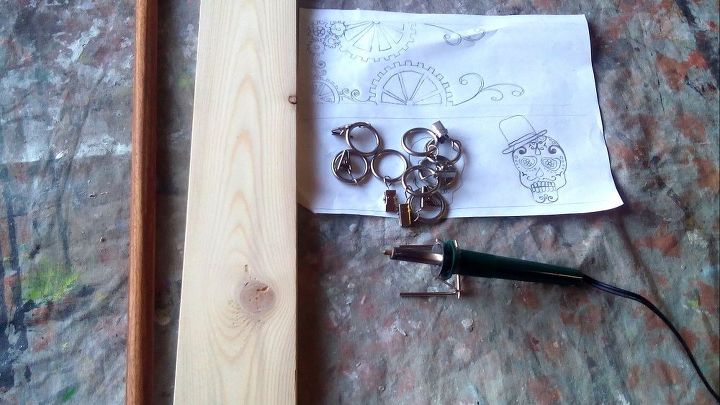
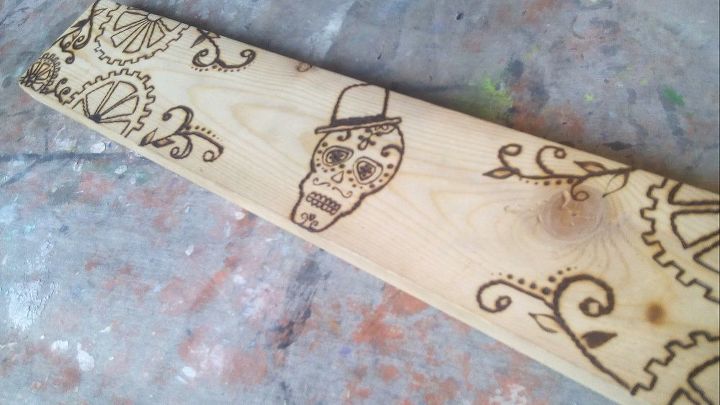
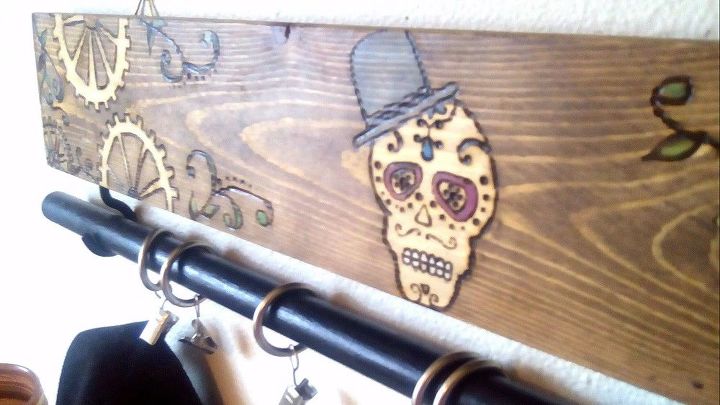
I took yet another plank from my horde of IKEA Malm bed slats (which is really a 1x4) and trimmed it up to 22 inches. I also grabbed this wooden dowel that was from a DVD holder someone gave us that I dismantled for parts. If you don't have something similar a 3/4 inch dowel from the craft store will work great and is pretty affordable. I trimmed up the dowel to the same length, then sanded both pieces down, painted the dowel black with acrylic paint and set it aside to dry. I then transferred my sketch on to the 14 by rubbing a pencil all over the back of my drawing, laying it over the wood, and tracing the lines with a stylus or pencil. If you are new to wood burning (or pyrography) or not very confident in your free hand (like me) I would recommend this. This was my first time wood burning since I was a girl scout, so I thought I would pass along some pointers that I muddled out. The wood burner that I picked up is a basic craft burner that came with 4 different tips. I recommend that before you start on your piece you take a piece of scrap wood and test out each tip and get a feel for it. I was surprised at how much the tips would catch on the wood grain, so this was very helpful to me in figuring out how slow to go, how much pressure to use, and what tip I thought would work best for me. In fact, each time I changed tips or took a break, I would run a couple lines and swirls on my practice block when I came back to reacquaint myself with the feel for it since I was a newbie. Also, don't be afraid to make a mistake. Most of my lines aren't perfect, but that's part of the craft. And if you are really don't like it, you don't have to live with it. I began burning in the upper left corner and after a bit I wasn't happy with it at all, so I hit it with the sander and erased it and started again.
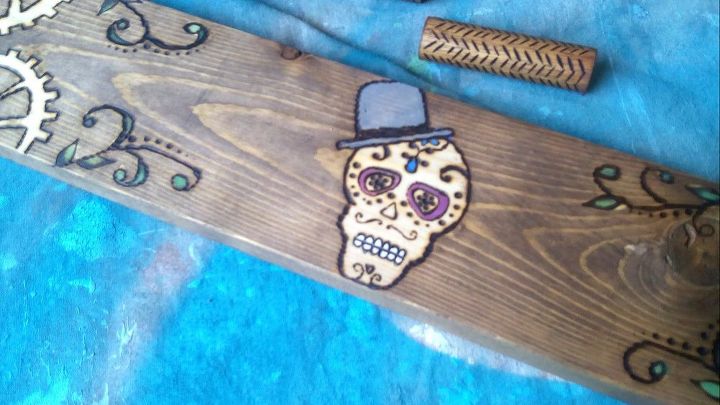
So after I finished burning my design, I decided to stain the plank, but I wanted some parts to stand out. So I decided to apply the stain with a brush, leaving the cogs and skull unstained, then carefully busted out with a rag. The channels made from the wood burner helped keep the stain from spreading where I didn't want it to go.
After everything was dry, I screwed in 2 cup hooks into the bottom, about 3 inches in on each side. I slid on the curtain clips onto the dowel and slid the dowel through the hooks. I lucked out with these curtain clips too. I was going to pick them up at Wal Mart, where they are around $6 - $8 for a set. But first I swung into my local Goodwill to check for any furniture suitable for a makeover, and guess what I found? They had about 10 sets of these curtain clips, each set $1.99. Score! It's something to check in your area if you are collecting supplies for a similar project.
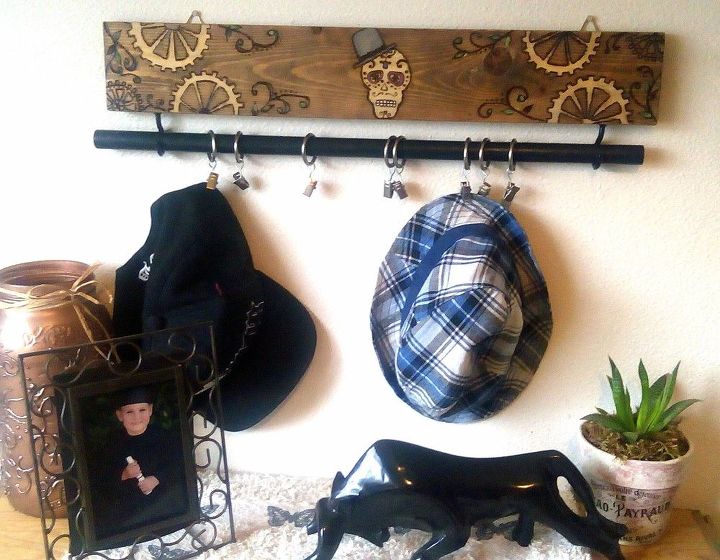
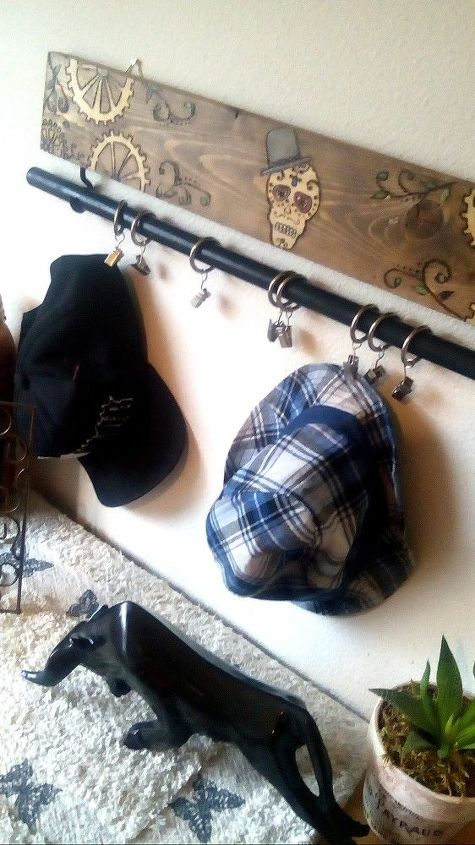
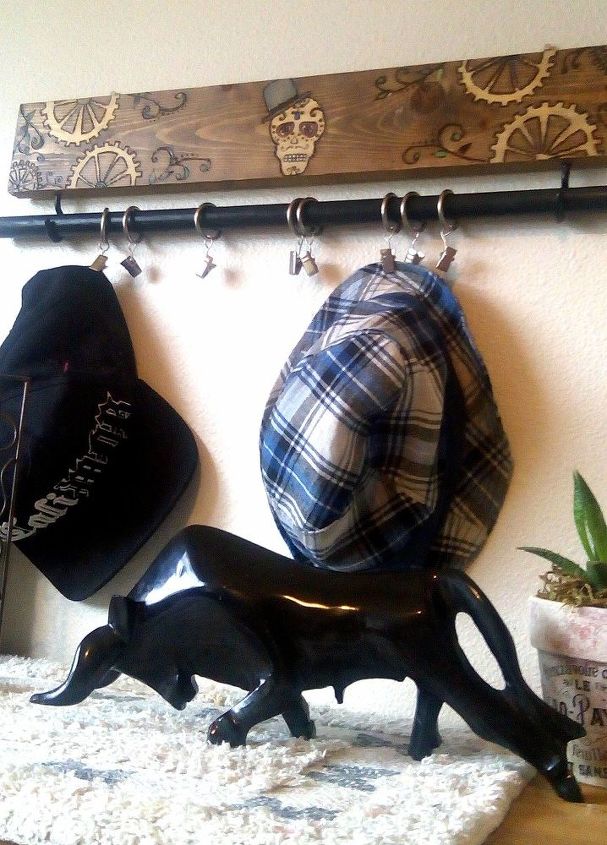
I am super happy with this hat rack. Michael really likes the design- it works for both our style aesthetics, I can hang up all his hats without taking up valuable closet space, I can add hooks to it as needed, and it was a very inexpensive project. A win win win win! My boys each want one of their own now, a pokemon theme in a fishing theme, respectively. And I'm really digging the fact that it's one more small step towards getting us organized. Only 1,247,384 more steps to go!
Want more details about this and other DIY projects? Check out my blog post!
Comments
Join the conversation
4 of 25 comments
-
Love your idea and the outcome. Beautiful work! This would also work well with ever-popular neck scarves, too. I have a question about the wood burner. I got rid of the one I had because it was TOO hot to handle - even though it had a layer of cork around the grip. It that a common problem or was it just the one I had. If so, any work-arounds to help deal with it? Thanks for posting your ideas.
-
This is fantastic! Love It! Will definitely be making one!!😊🖒🖒


Frequently asked questions
Have a question about this project?