


Marbled Easter Eggs Using Nail Polish
Take your Easter egg decorating skills to the next level by using nail polish to create colorful marbled patterns and swirls!
This technique is so much fun and the finish of each is always unique. To make these swirled eggs, you’ll need a handful of your favorite nail polish colors. The brighter, the better!
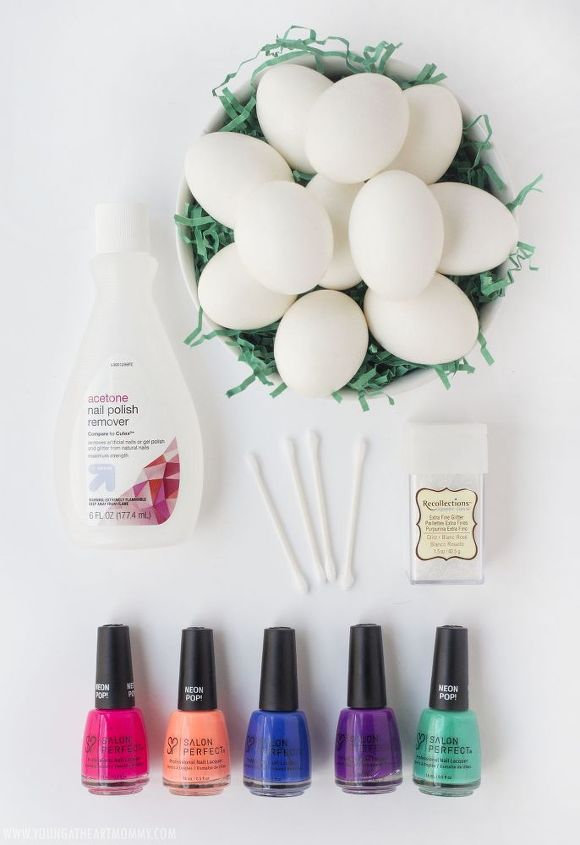
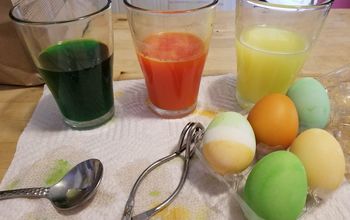
Gather your supplies and protect your work area with newspaper or a plastic tablecloth than can be tossed if need be.
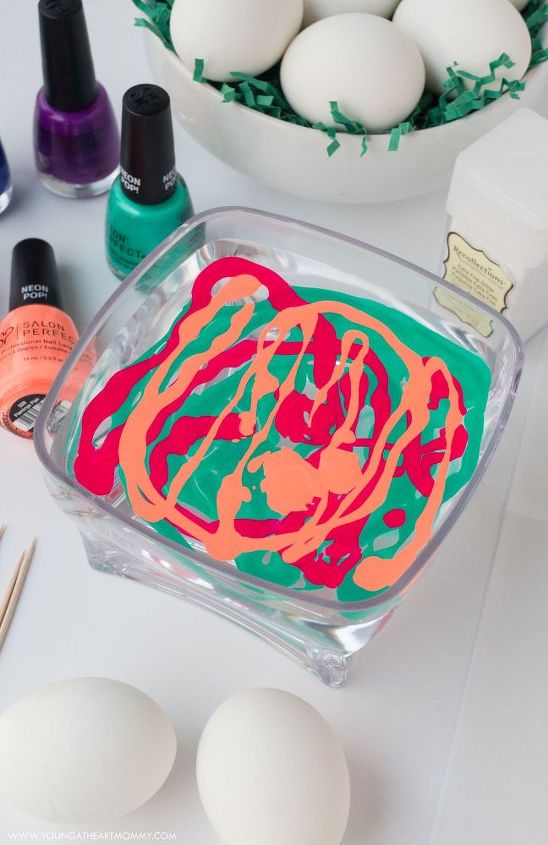
Fill a plastic bowl with room temperature water. If the water is too cold or too hot, the process will not work! Carefully pour or drip nail polish into water. Make sure to add each color individually so they form a layered pattern.
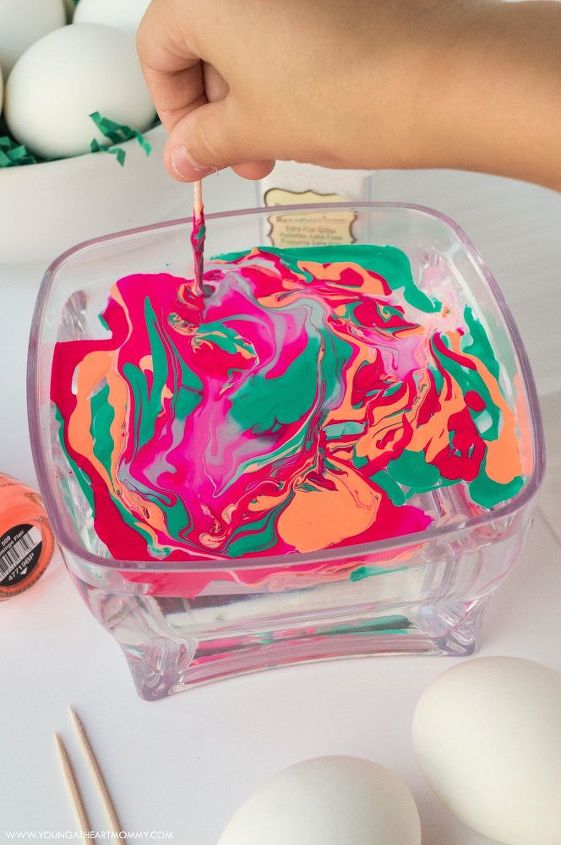
Use a toothpick to swirl the colors together for a marbled design. Bring the majority of the nail polish towards the center of the water to prevent any white patches during dipping. The polish dries quickly so try to do this before it becomes too sticky or stiff.
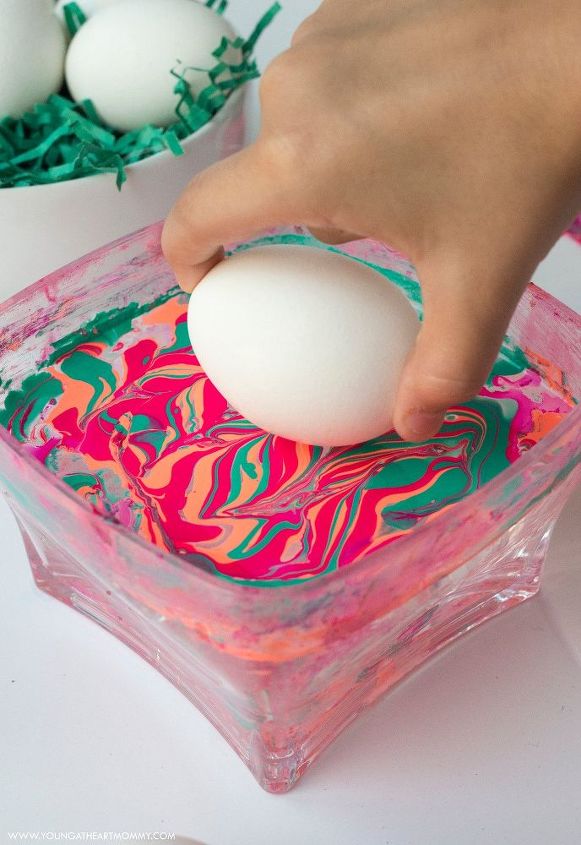
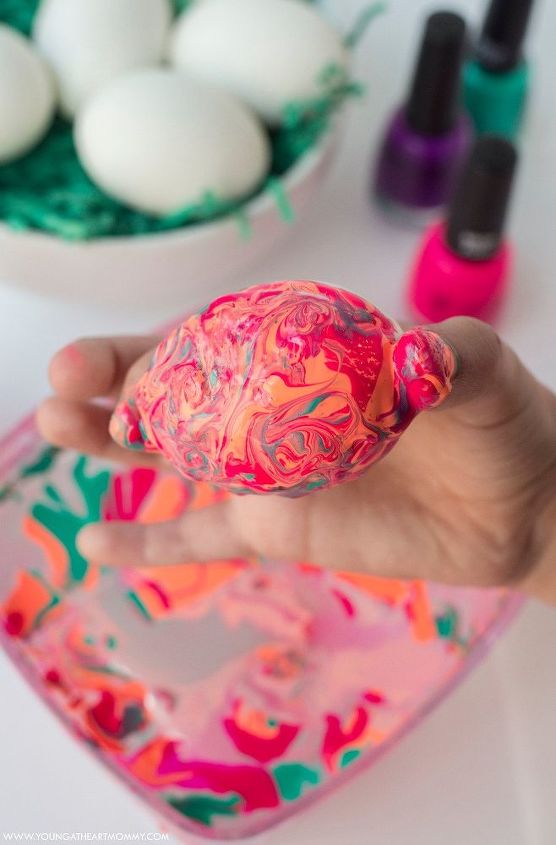
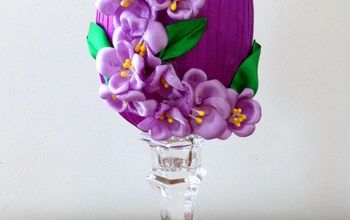
Immediately dip the egg into the water, allowing the nail polish to adhere to one side before pulling it out. You will notice the polish separate and cling to the surface of the shell. This method only covers half of the egg but once it drys, you can dip the other side or use a small paint brush to add additional color.
TIP: If you don’t feel comfortable dipping the eggs with bare fingers, use gloves or toxic free nail polish (Piggy Paint) for this project!
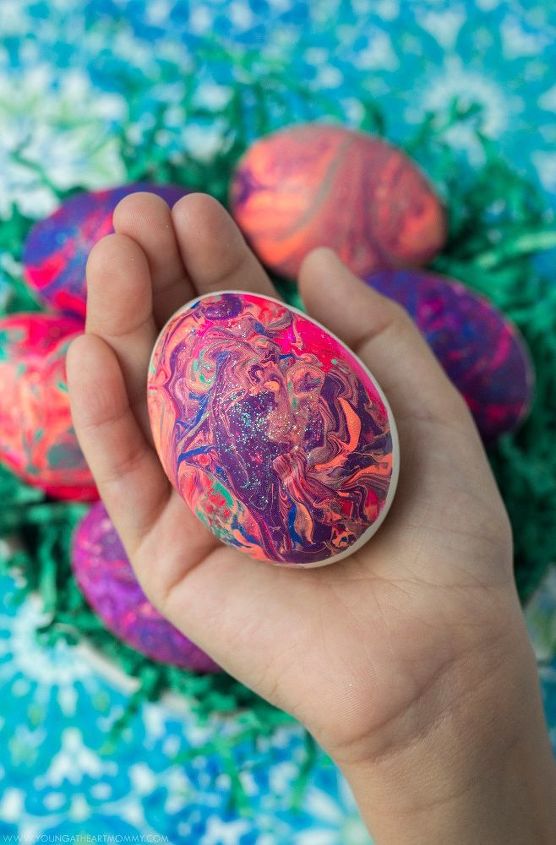
Add a little sparkle by sprinkling on a pinch of extra fine glitter. Place the eggs in an empty egg carton to dry before displaying.
Use q-tips and nail polish remover to clean your fingers. Afterwards, wash hands thoroughly with soap and water.
TIP: Spread a thin layer of petroleum jelly, like Vaseline, on your fingernails and cuticles before dipping the eggs into the nail polish. This will make the clean-up process much easier.
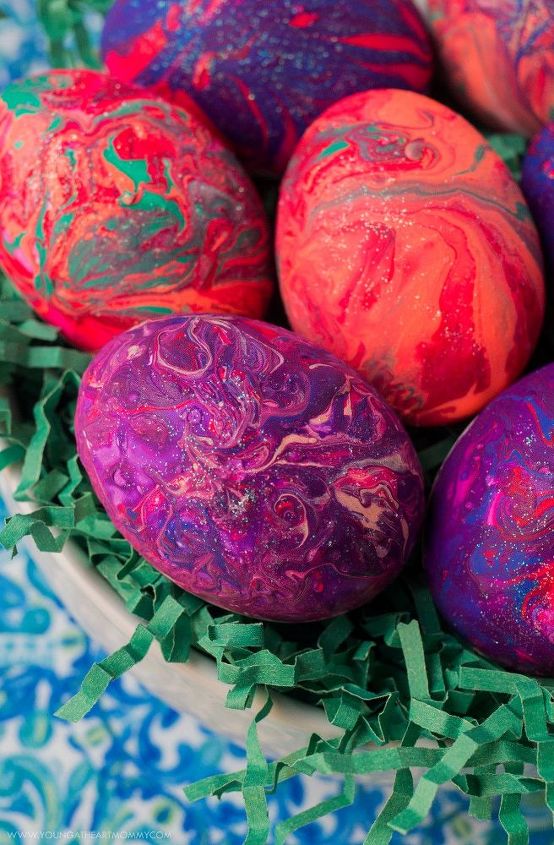
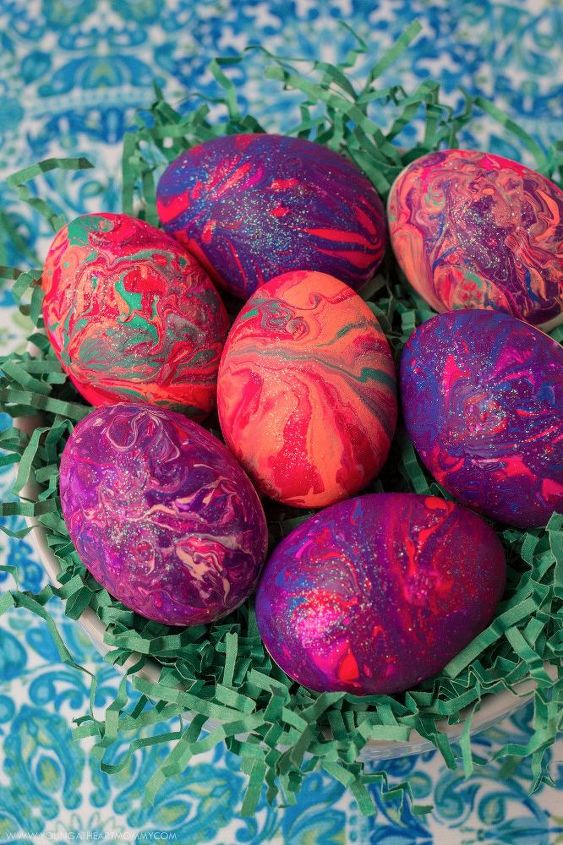
Once completely dry, place them in a bowl or Easter basket to dress up your space during springtime. No one will ever guess the secret behind these beauties is nail polish!
While these eggs may catch your eye, they’re only good for looks. I don’t recommend eating after you’ve enjoyed their beauty.
Resources for this project:
See all materials


Comments
Join the conversation
-
So no one wastes the egg. Punch a hole in the top and bottom of the egg. Blow out the egg in to a bowl. Scrambled eggs to eat. Rinse the shell as best as you can and let dry. We did this in 5 grade art class. I remember it lols yesterday. If was a fun project. Them decorate the shells. Storing the eggs, wrap them in bubble wrap if you have it. This I might do. I have some old nail polish a can use.
-
If you put a small holes in each end to blow out the egg can nail polish still be used.


Frequently asked questions
Have a question about this project?
Can plastic eggs be used?
I guess the eggs can’t be eaten afterwards.
Could you use plastic eggs so you wouldn't waste real eggs, also could keep for future use?