


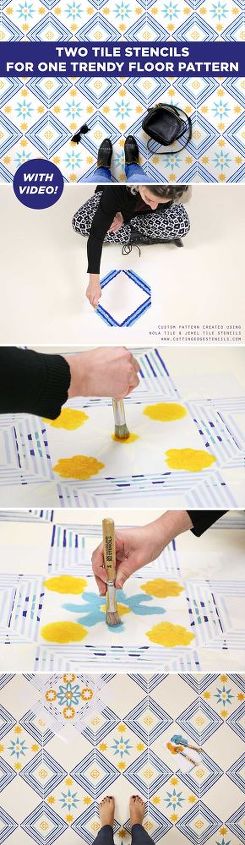
Two Tile Stencils for One Trendy Floor Pattern

Hello, my lovely Cutting Edge Stencils fans! Are you having a hard time choosing the perfect but there are just too many tile stencil options to pick from? Create your dream tile floor using TWO gorgeous tile stencil patterns from Cutting Edge Stencils! We have the perfect stencils for painting so you can mix and match paint colors and stencils to create your own trendy floor pattern. Check it out:
Before we begin stenciling, let’s make sure your floor is prepped and ready to go! No need to stress, preparing your floor is easy and doesn’t take long at all. First, sweep away any dirt that may be on the surface of your floor. Follow up with a mop and some good cleaner to ensure that the floor is clean. Tape off the bottom of your wall or baseboard with blue painter’s tape. Then, apply a good adhesive primer such as Stix. You can use a quality tight nap roller or even a foam roller for this. After the primer has fully dried you can apply your base coat. Allow this to dry for a full twenty-four hours. We wanted a bright base, so we chose our favorite Benjamin Moore Navajo White as our base coat color. For all of the supplies used on this stencil project, check the list below:
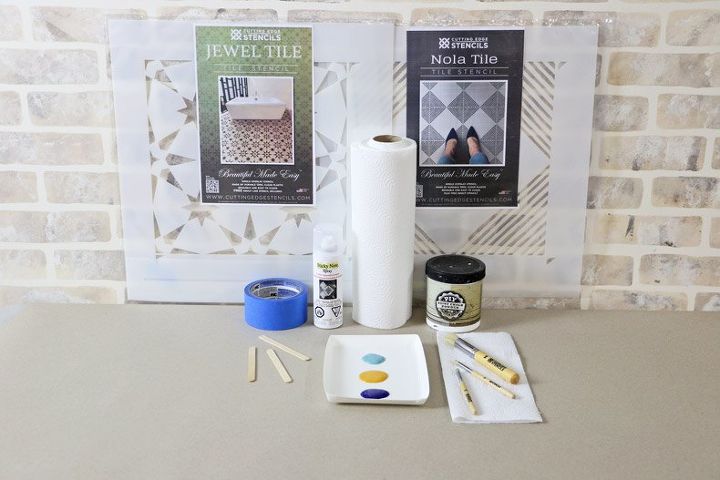
- 3/4 Professional Stencil Brush
- Spray adhesive
- Benjamin Moore Palm Cost Teal
- Benjamin Moore Gold Mine
- Benjamin Moore Midnight Navy
- Blue Painter’s tape
- Water Based Polyurethane
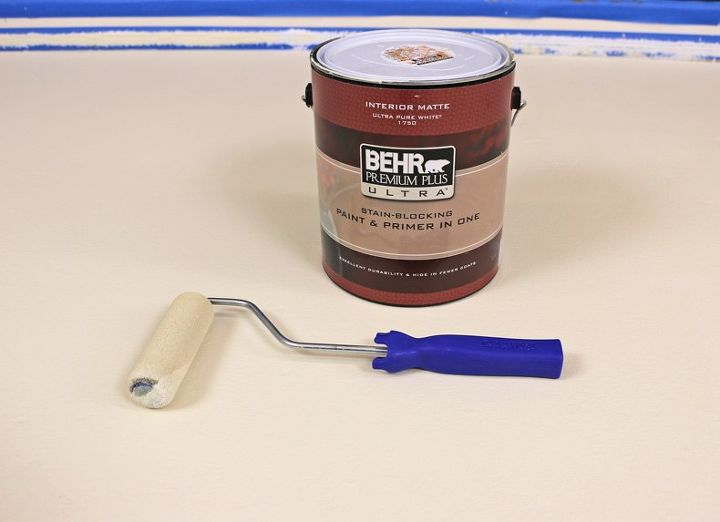
You can also purchase an easy “2 in 1” Paint and Primer to help the stenciling process go quicker. This step is optional but be sure to use Matte or Flat finish if you go in this direction. Here, we chose Behr Premium Paint & Primer In One!
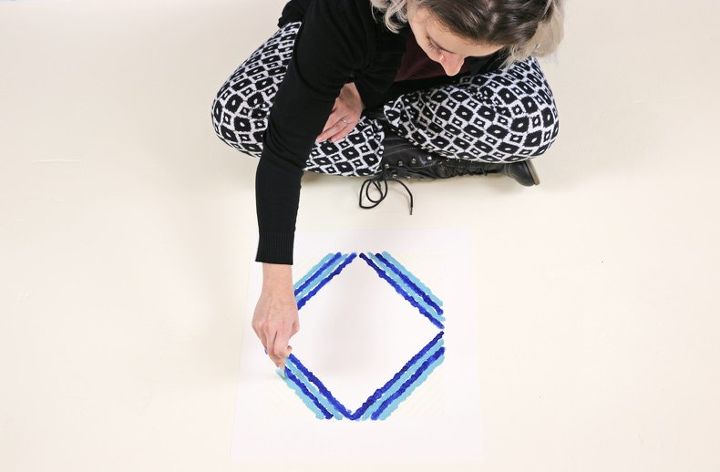
First you’ll begin by placing your Nola Tile Stencil on the center of your floor. For extra adhesion, you can apply spray adhesive to the back of the stencil before placing it on the floor. Spray adhesive can also help reduce paint seepage from underneath the stencil!
Evenly coat your professional stencil brush with paint and offload any excess paint onto a paper towel. This is one of the most important steps when it comes to stenciling! The number one mistake is having too much paint on your stencil roller or brush. The goal is to have your stencil roller evenly covered with paint but to be almost dry to the touch. For more in-depth instructions, check out our How To Stencil section on our website!
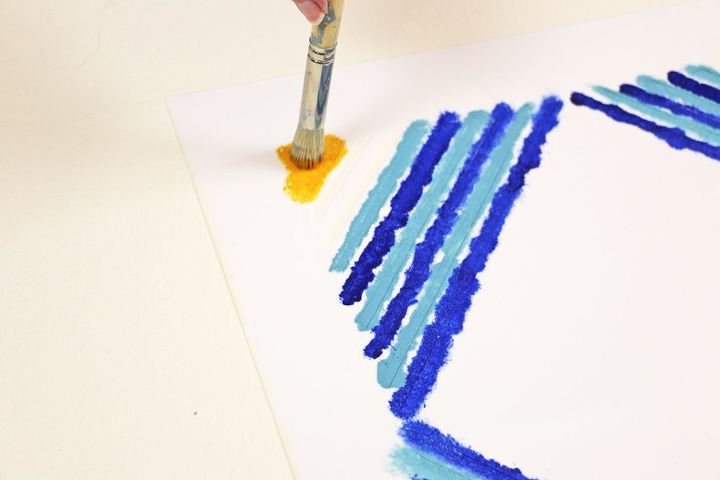
With a professional stencil brush, gently pounce the brush up and down to achieve full coverage. Start from inside openings and work your way out!
To continue the pattern along the surface, align the tile stencil using the built-in registration marks and the previously stenciled parts of the design. This system makes stenciling effortlessly easy!
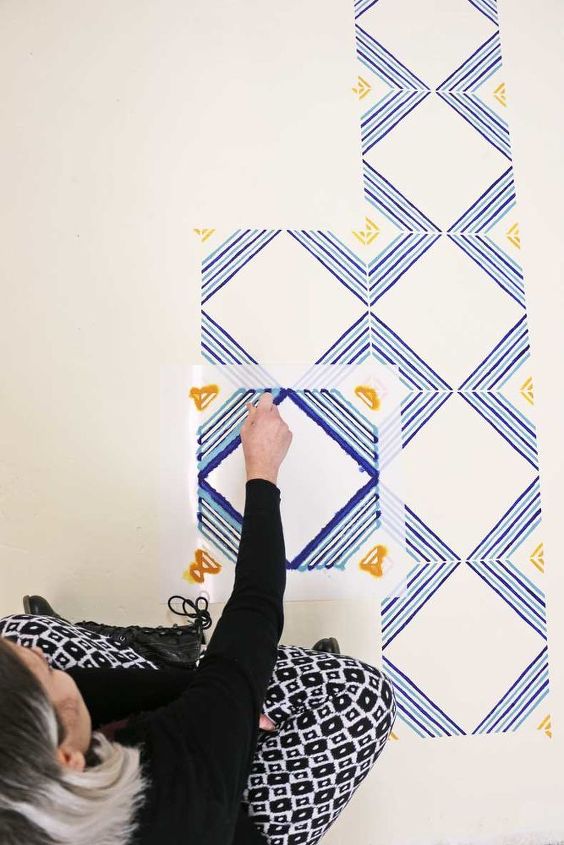
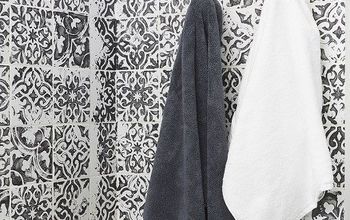
Continue the stenciling process with the Nola Tile until the entire surface is complete!
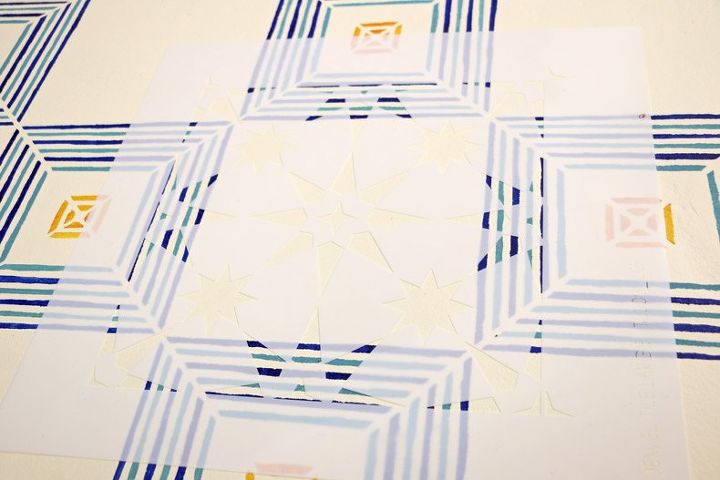
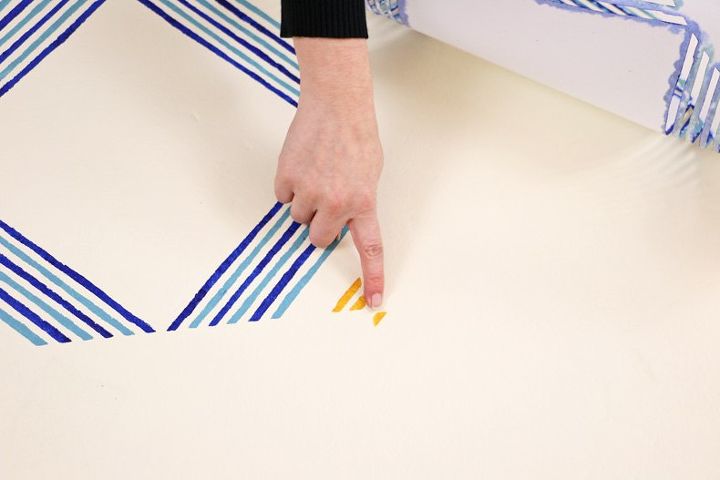
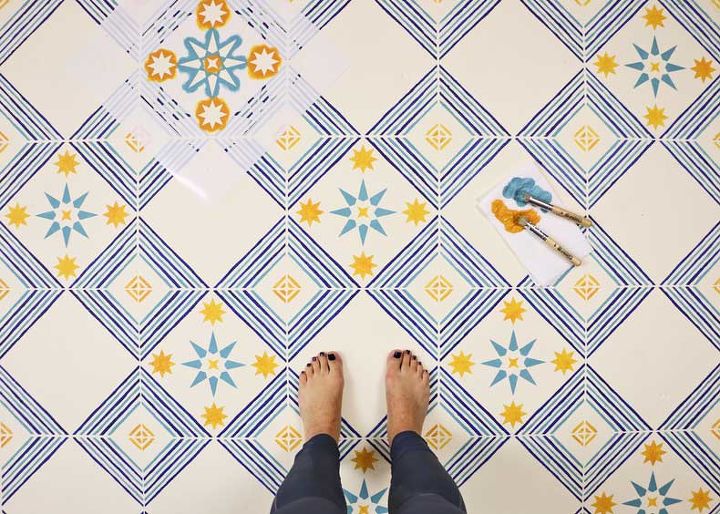
The second step for this design involves some creativity! We fell in love with the star pattern of the Jewel Tile and figured out that the outer stars are 8 8/16 inches across which would fit perfectly in the open area of the Nola tile (which equals out to 8 10/16 inches). The best part about our stencils is that they are super versatile and can be altered in any way to get the look you desire! Now, place the Jewel Tile stencil in the center of the Nola Tile Stencil.
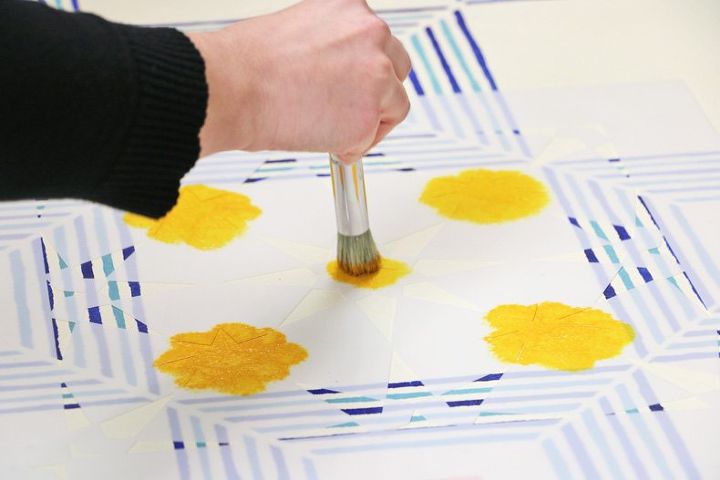
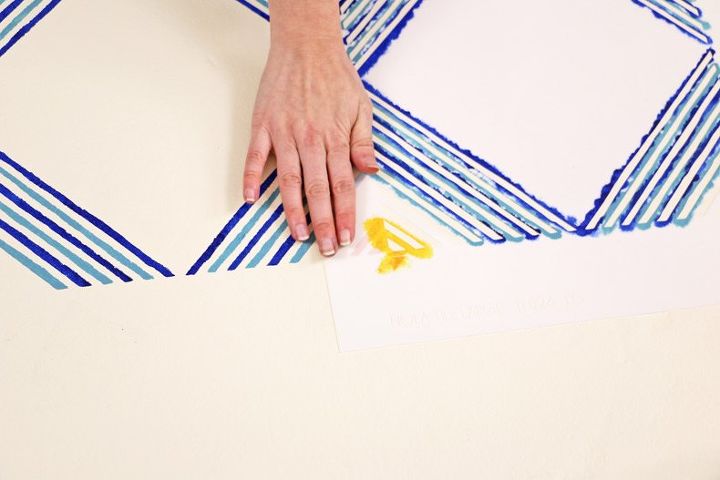
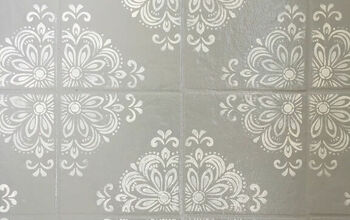
Play around with color choices and choose the best to fit your home! With a 3/4 professional stencil brush, gently pounce the brush up and down to achieve full coverage of the stars.
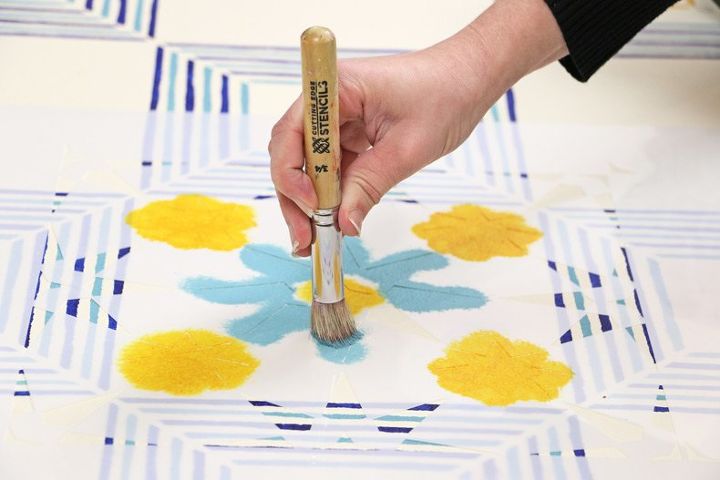
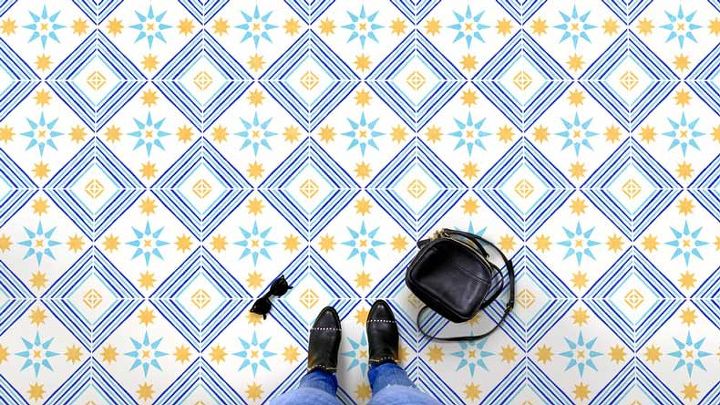
Continue these steps with the Jewel Tile Stencil until all open spaces are complete!
Last, you’ll want to seal your stenciled masterpiece with 2-3 coats of water-based polyurethane. This will provide durability for years to come!
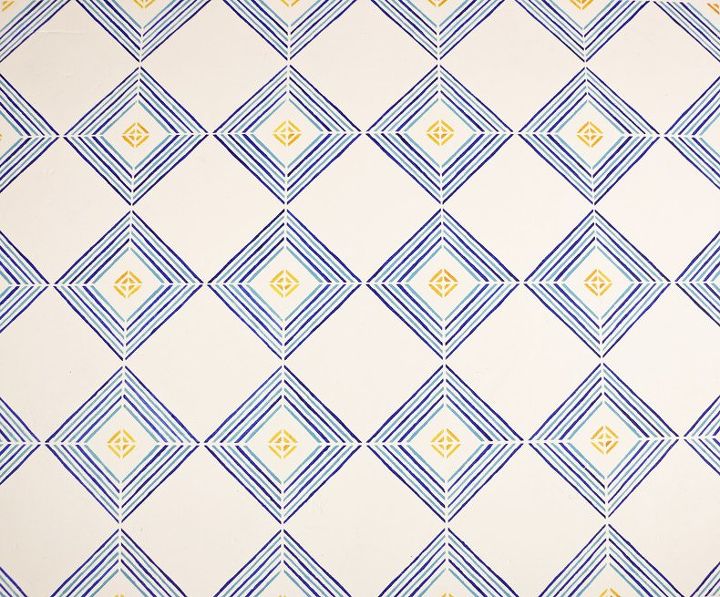
Ta Da! We are in love with how our trendy floor makeover came out using TWO tile stencils! Wow!


Comments
Join the conversation
-
I’m so inspired this is lovely. Fantastic!
-
Too time consuming. Looks beautiful though


Frequently asked questions
Have a question about this project?
Love this. Can you paint linoleum do you know? Thanks
I'm guessing since I have matt white tile, I could skip the primer and paint? Clean and stensil only? BTW I hate myself for picking out a matt floor tile!
Can this be done on ceramic tile? Also, how does it stand up to traffic? How do you clean it?