


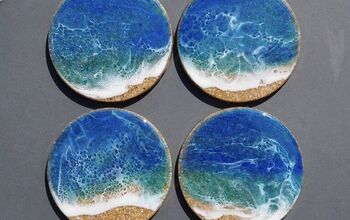
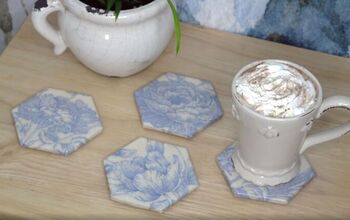
DIY Flower Tile Coaster
Turn white hexagon tiles and a little craft paint into a cute, simple, and inexpensive coaster as a gift for a friend or for your side table.
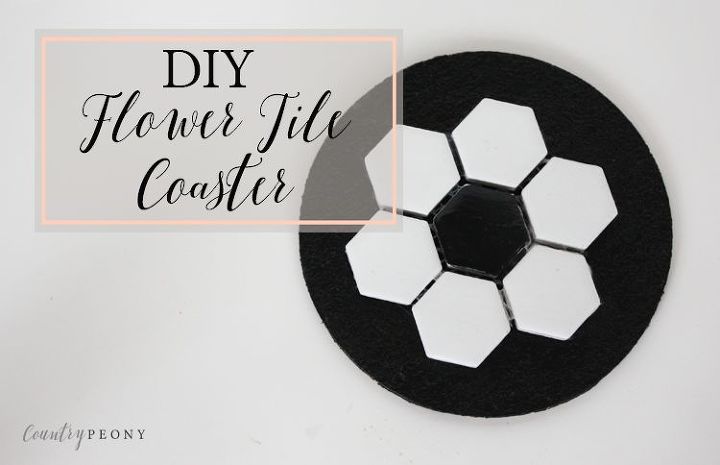
Aside from my children's bedroom (showcased on my blog) my favorite room in our farmhouse is my master bathroom. I adore the black and white hexagonal tile so much in my bathroom that I wanted to highlight it in other areas of my house. That is how I got the inspiration for today’s very simple, inexpensive, and customizable flower tile coaster. You can make a lot of coasters from one sheet of hexagonal tile as a gift for your friends or for your side table. You can also change the shape and the colors to your liking.
I am especially excited to show you today’s tutorial because I included a video to showcase the steps in more detail. You can also follow along in the post below with pictures. I hope you enjoy making your own DIY coasters.
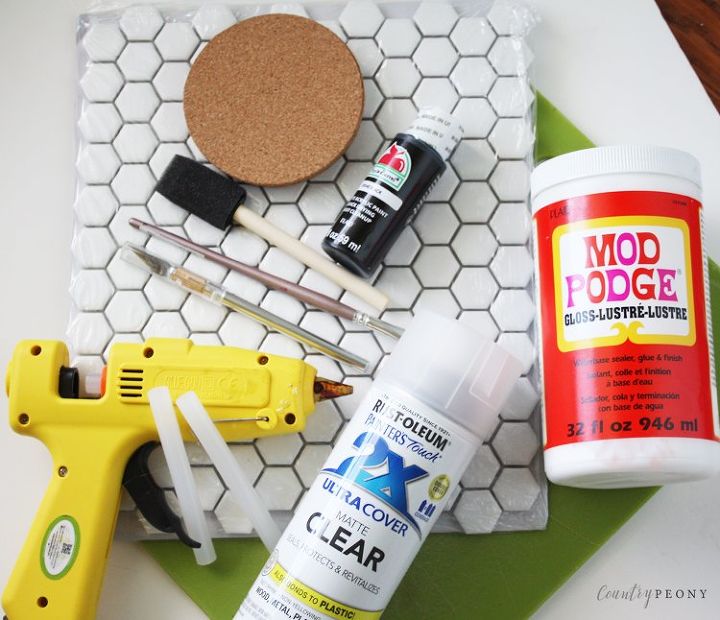
To make your own flower tile coaster, you will need:
- (affiliate link) White Hexagon Tile
- X-Acto Knife with Plastic Cutting Board
- Craft Paint with Paintbrush
- Mod Podge
- Foam Brush
- Cork Coaster
- Hot Glue Gun with Glue Sticks
- (affiliate link) Rust-Oleum Painter's Touch 2X Ultra Cover Matte Clear
*Some housekeeping before we start. There is a lot of downtime waiting for the paint and mod podge to dry. This project will go by faster if you batch work each step before you move on to the next step. Also, it is very important to complete all the steps (especially step 8) if you plan to use hot beverages on your coaster.
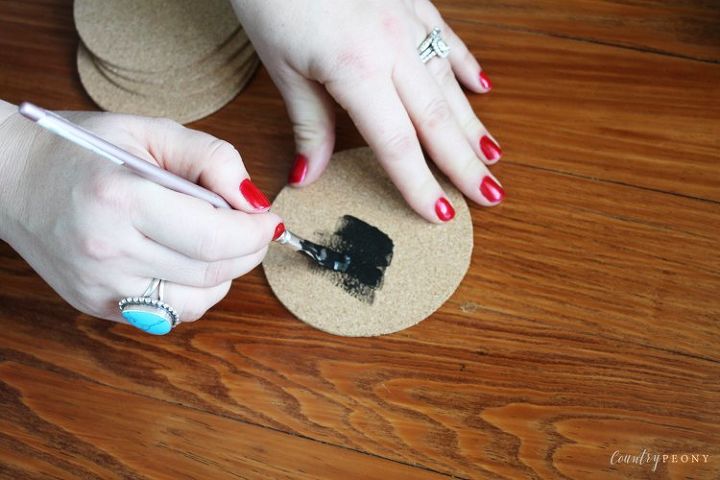
Step 1: Paint one coat of the craft paint onto the top and sides of the cork coaster.
Step 2: Set the cork coaster aside to dry.
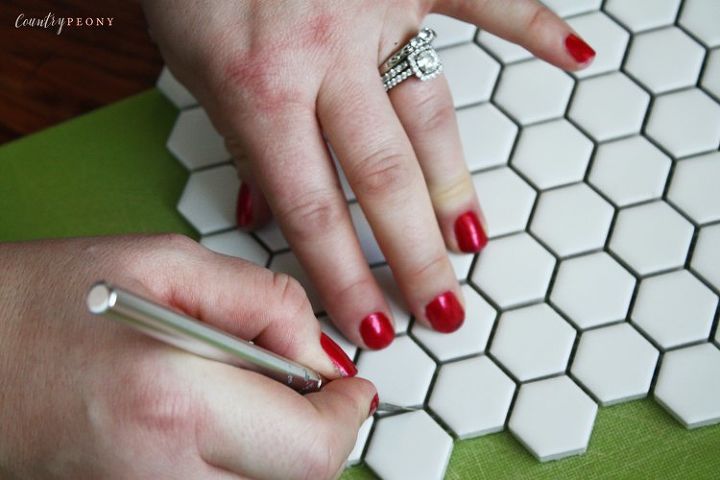
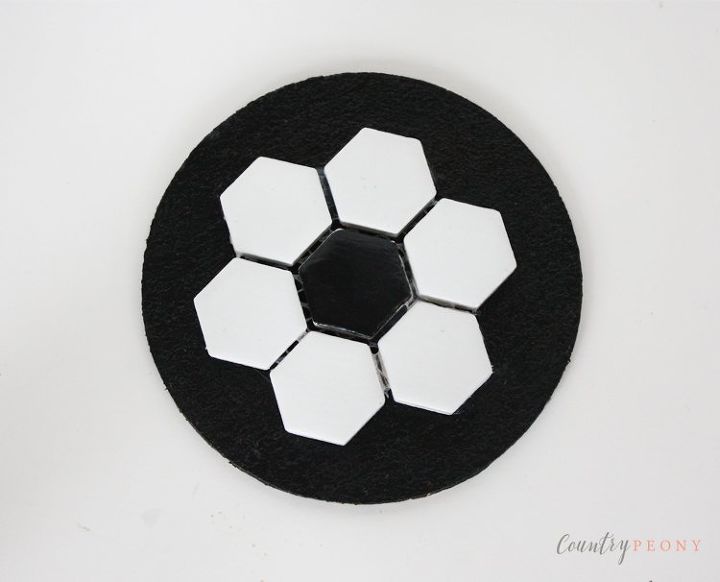
Step 3: Use the X-Acto knife and cutting board to cut out the coaster into the desired shape. I chose a flower to mimic my bathroom floor.
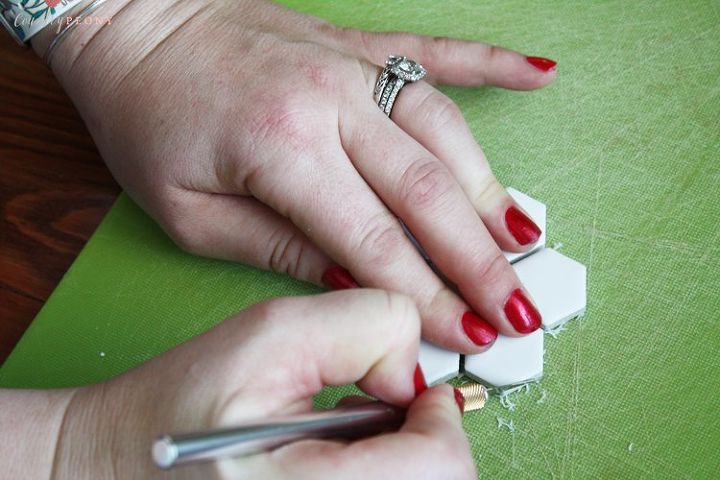
Step 4: Trim the tile glue.
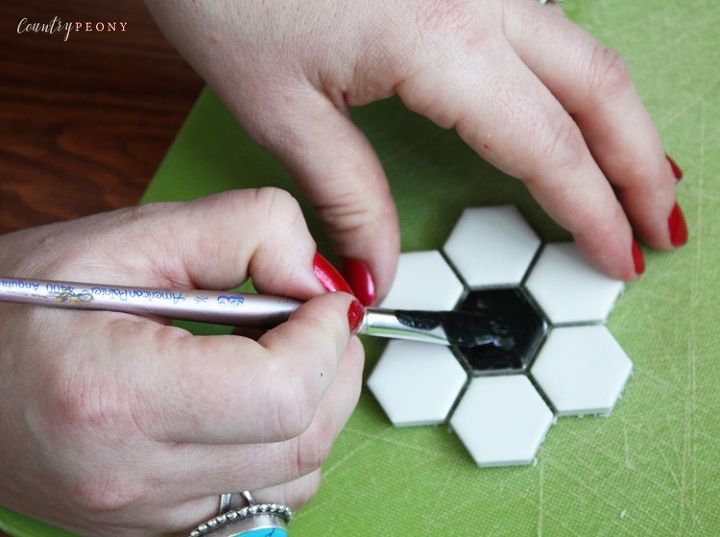
Step 5: Apply one coat of the craft paint onto the tile to create your favorite look. Set aside to dry.
Once the first coat dries, apply a second coat of craft paint to the tile. Then set aside to dry.
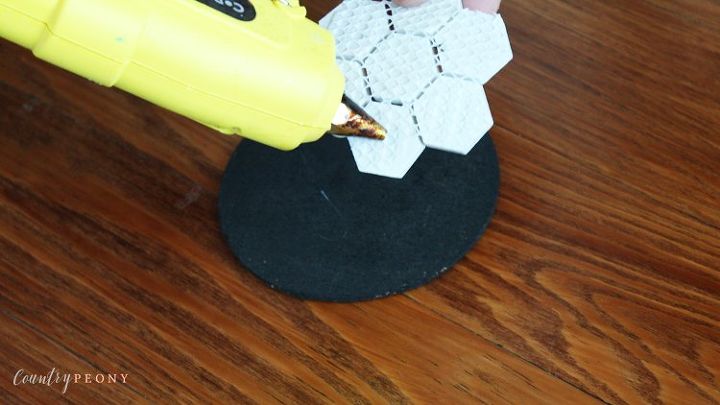
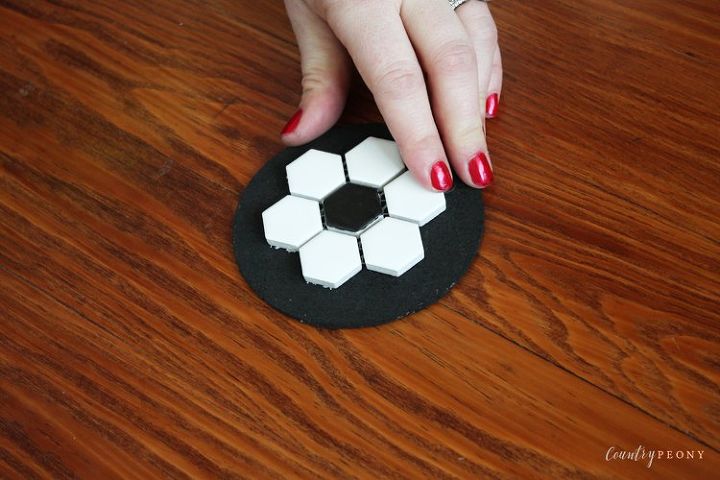
Step 6: Once the paint on the tile and coaster are dry, apply hot glue to the back of the tile and attach it to the cork coaster.
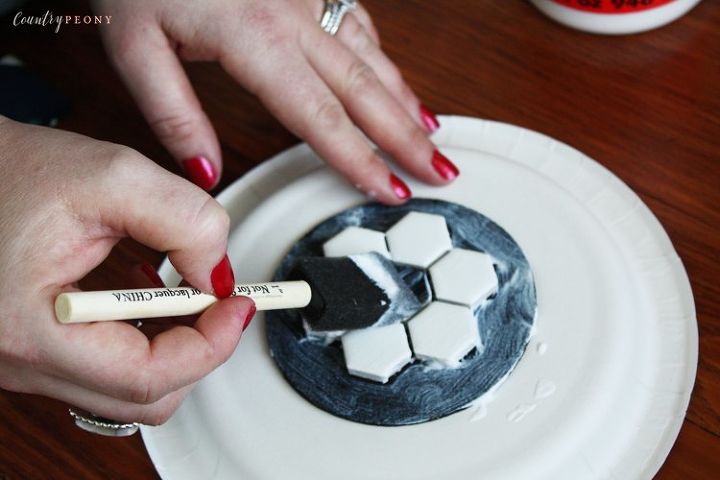
Step 7: Apply one coat of mod podge with the foam brush. Set aside to dry completely.
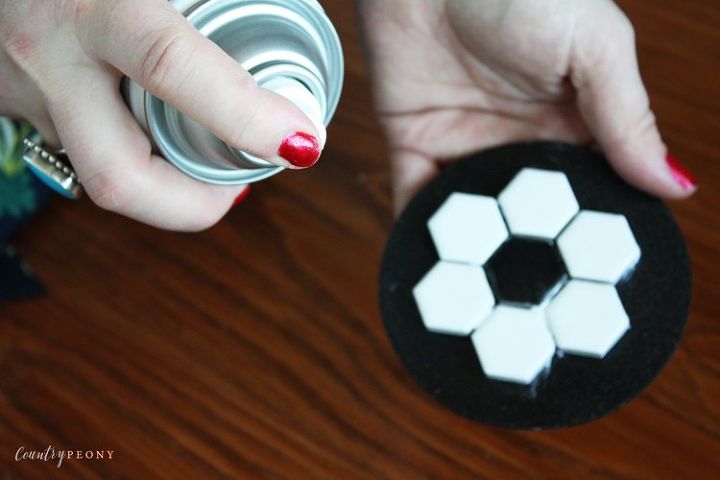
Step 8: After the mod podge dries (in a well ventilated area) spray one coat of the Rust-Oleum Painter’s Touch 2X Ultra Cover Matte Clear onto the coaster.
*This step is very important if you plan to use hot beverages on your coaster, because the spray finish will allow for the coaster to sustain up to 200 degrees Fahrenheit.
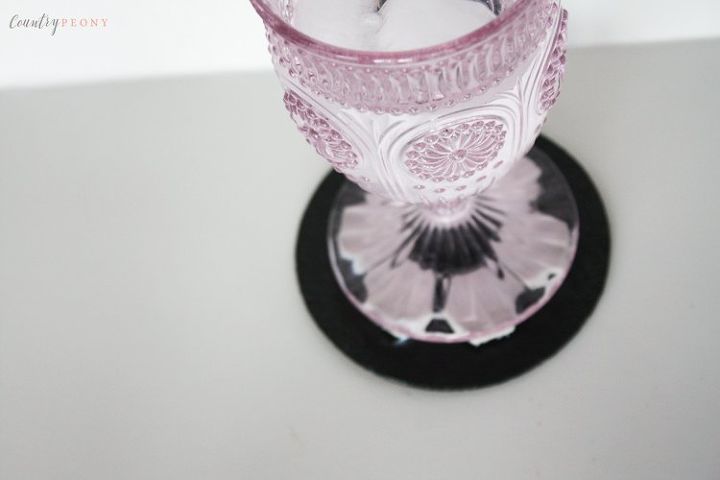
Step 9: Sit back with a warm cup of coffee or a cold beverage, and enjoy your final product!
Resources for this project:
See all materials


Comments
Join the conversation
-
This is such a creative idea, I love it!
-
This doesn't seem like a very stable coaster. I'm afraid you'll end up having your glass tip over. Cute though


Frequently asked questions
Have a question about this project?
Did you find it hard to keep the black paint just on the center tile? If you did, next time put a little petroleum jelly on the surrounding ones and your paint won't adhere. You can even get down the sides a bit. Just a tip from someone who painted her share of windows with the muntins.
Do you find that it's a little tippy toppy with the two levels on the coaster? I'm thinking you have to be careful about placement. Cute idea though!