


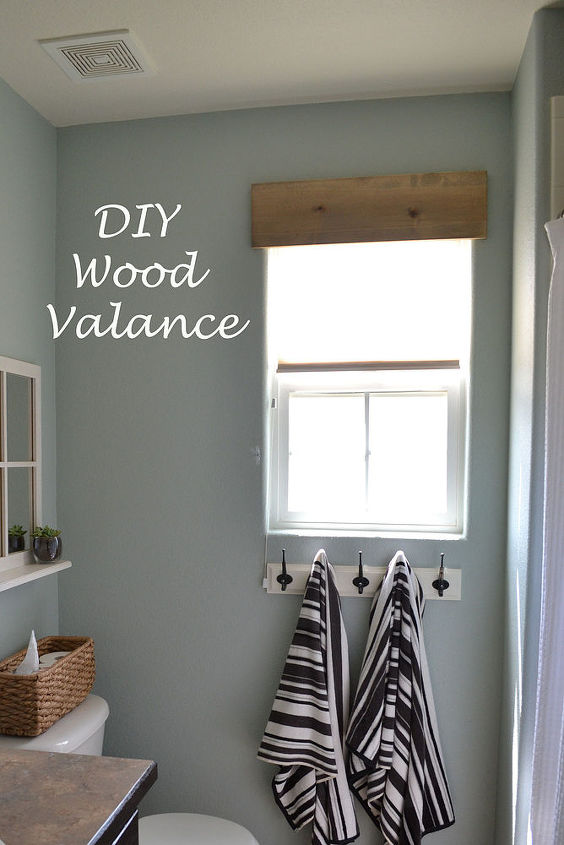
DIY Simple Wooden Valance

by
Erin Colburn
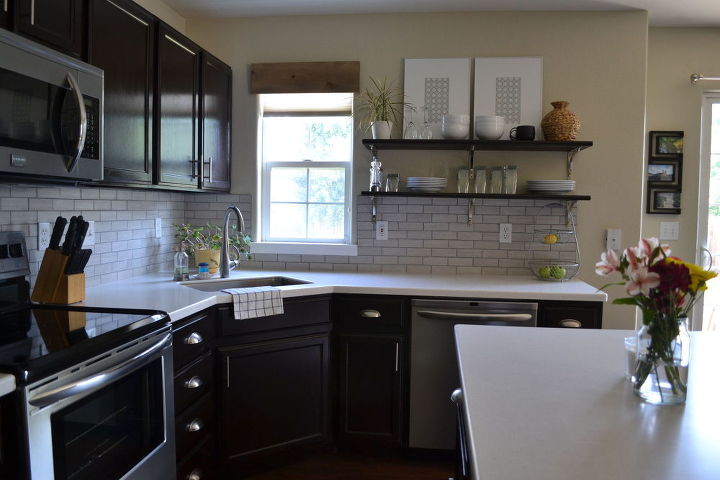
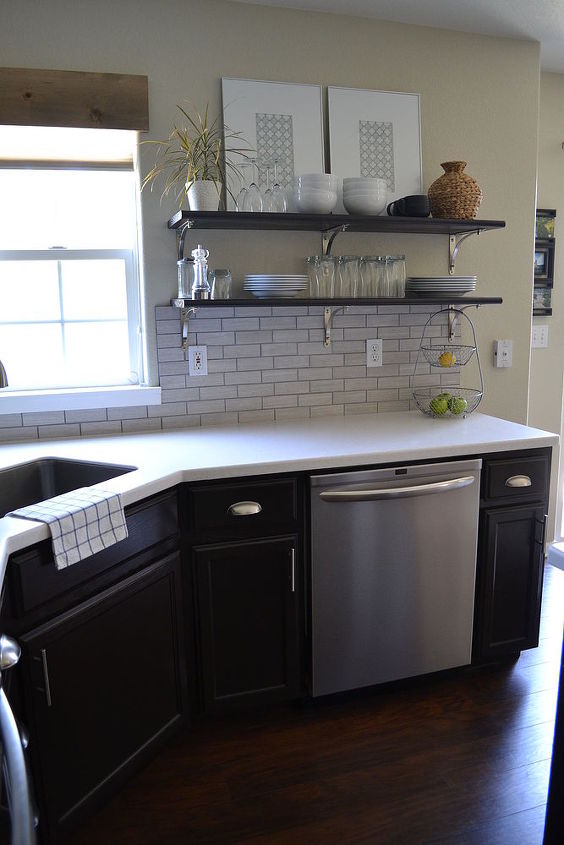
When we were putting the finishing touches on our kitchen renovation, one thing that stumped me was what to do for a window treatment. Finally, it got to be the very last thing left to do in the room, and I decided to take a chance on one of the easiest diy projects I've done, to date.
The materials I used for this project are:
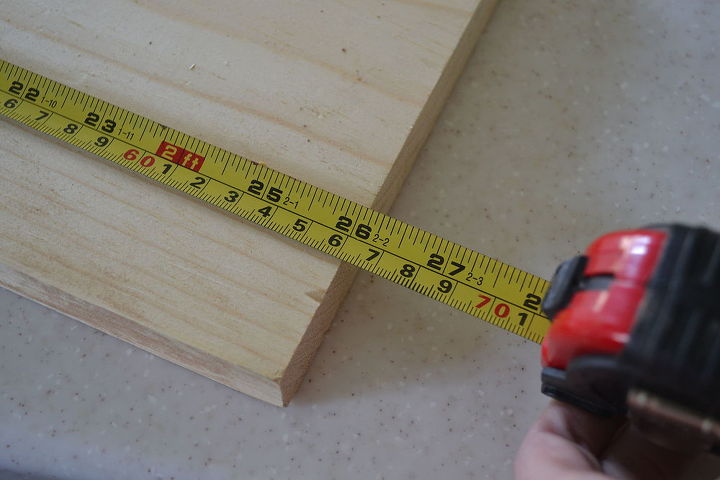
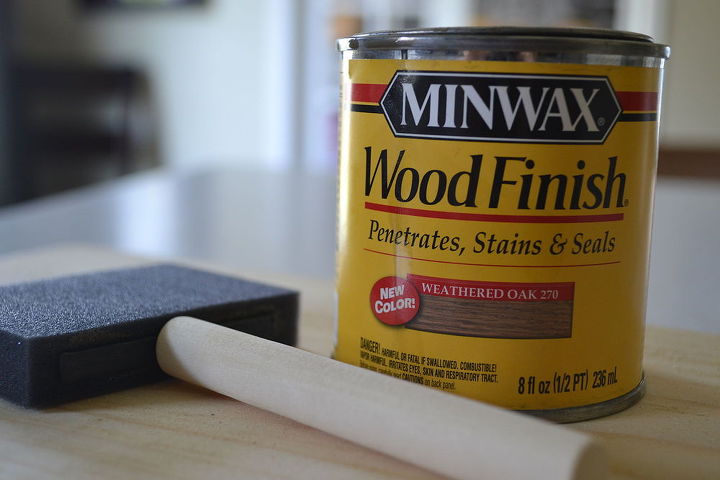
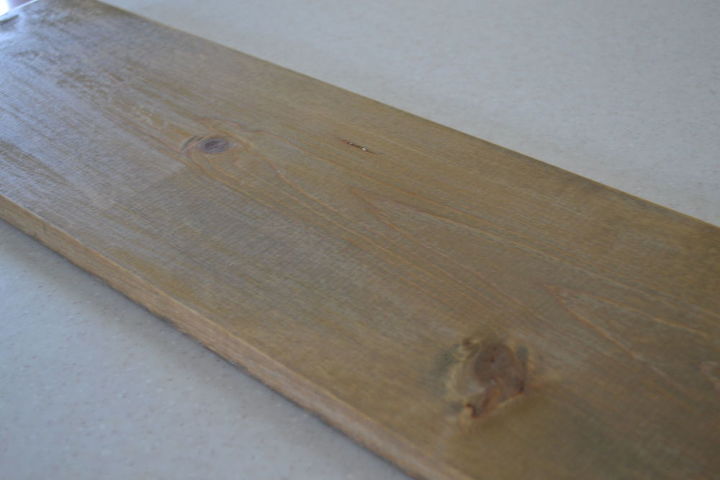
Once it was cut, I applied two coats of stain (about an hour apart) using a foam brush. The stain I used was Minwax Weathered Oak.
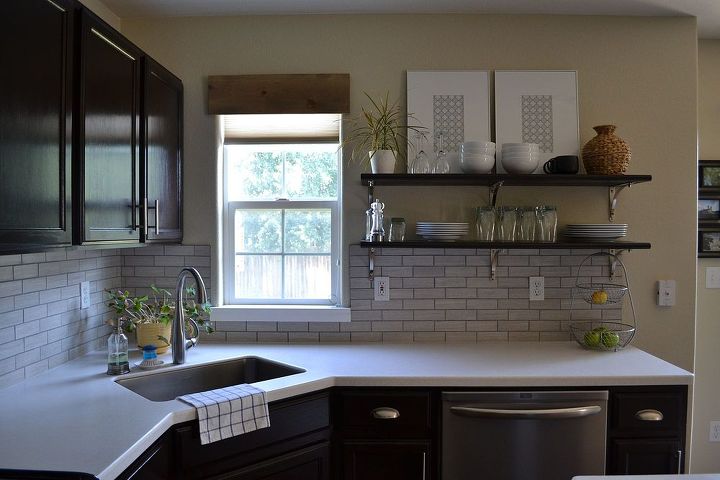
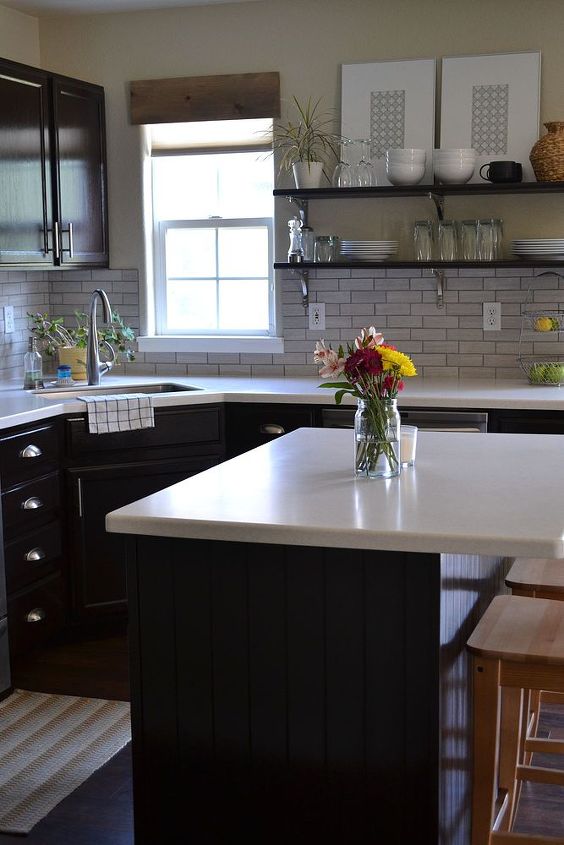
It's a beautiful light oak, with lots of grey tones that really play up with the backsplash in the kitchen, but still has that feel of wood, which we really wanted.
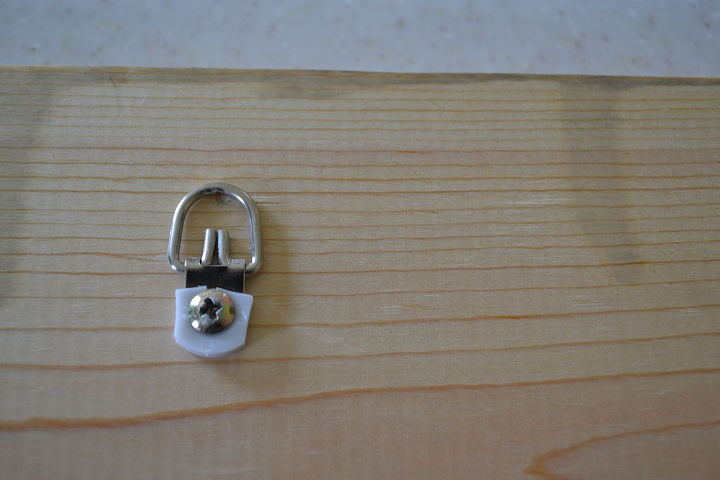
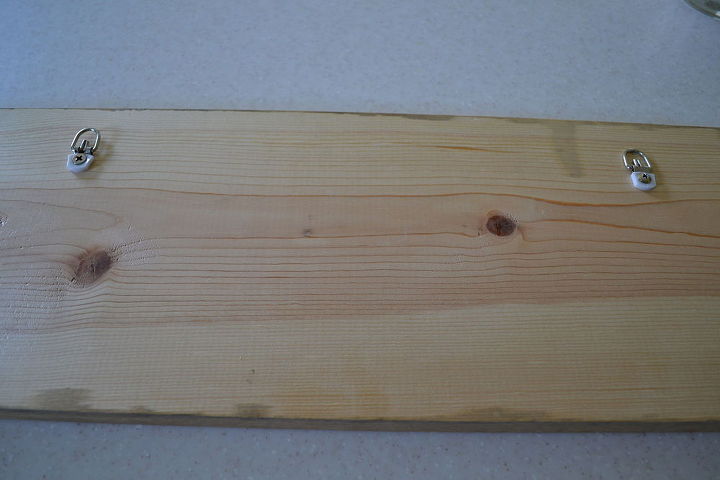
To hang the valance, I used these D-Ring Hangers from Home Depot and marked on the wall where they would hang by nails.
I love the texture and warmth the valance adds to the space.
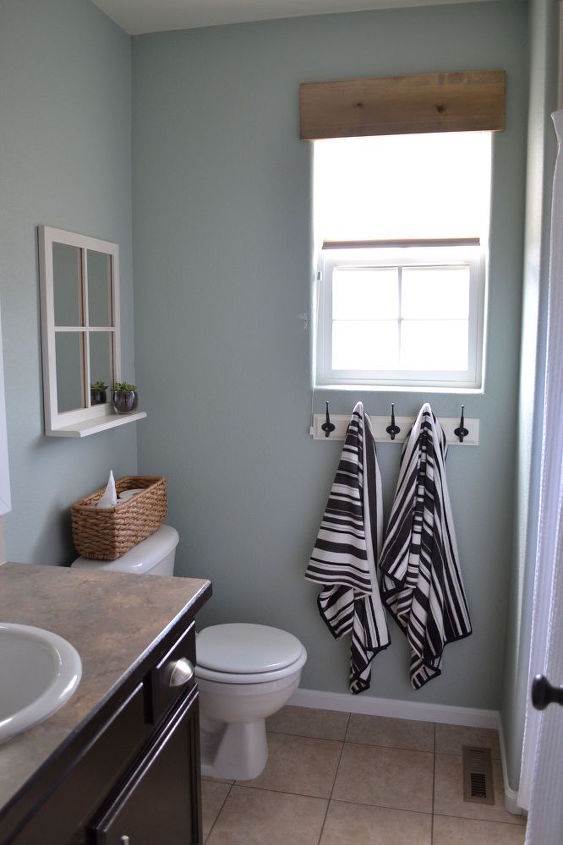
In fact, I love it so much that I made an identical valance for the guest bathroom renovation.
Want more details about this and other DIY projects? Check out my blog post!
Comments
Join the conversation
2 of 27 comments
-
I will be building a 10 foot long whitewashed valence for my living room with a press on lettering saying quoted from "Tinkerbell".
-
Wow! I love this idea! So simple yet it creates quite a unique look.... the best kind of projects! Thanks for posting this idea.


Frequently asked questions
Have a question about this project?
We love the idea for sure. We own a house that is semi-southwestern style and have added a Mexican pergola over our deck to emphasize our interest in traditional New Mexican homes. Your idea for the wooden valances reminds us of the lentils above adobe home windows. My question is this: Have you had any problem with the bottom of the boards hanging a bit away from the wall, or do they seem to stick closely to the wall at the bottom and sides of each window?