


Create a Creepy Looking Cauldron
I bought this giant-sized black plastic cauldron some years ago on sale after Halloween and if memory serves me right, I have NEVER used it for anything. I decided this year was going to be different and if I was going to use it, I was going to give it a creepy makeover. You can see more of my crafts and creations here.
This is way better than a plain plastic cauldron, isn't it? You should still be able to find these locally, but if you can't you could always get them on Amazon and have them delivered right to you. There is still plenty of time to add some creepiness to your cauldron!
Materials:
- Plastic cauldron
- Dry oatmeal
- Craft glue
- Spray sealer
- Black, white, gold spray paint
STEP 1: Clean your cauldron

This is a pretty basic plastic cauldron. It could be associated with Halloween, but there isn't anything spooky about this whatsoever. The day I decided to tackle this project I had help, and it was quite time consuming, so I am glad that I did!
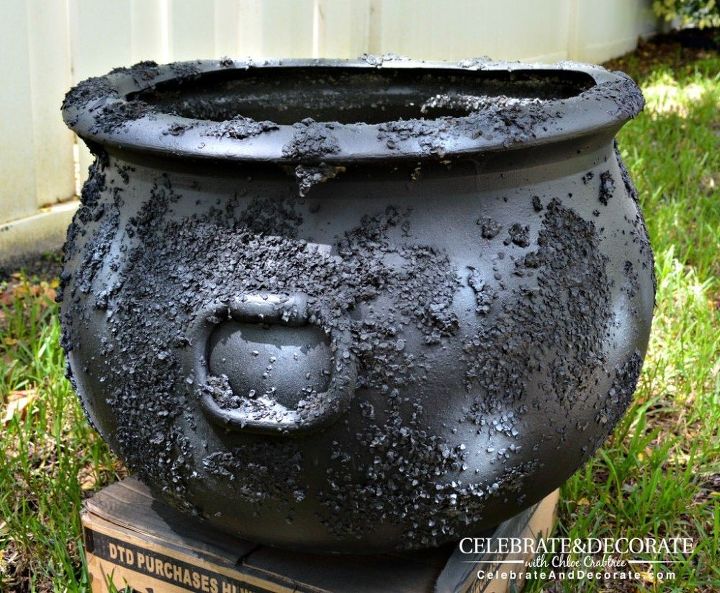
STEP 2: Add oatmeal and craft glue
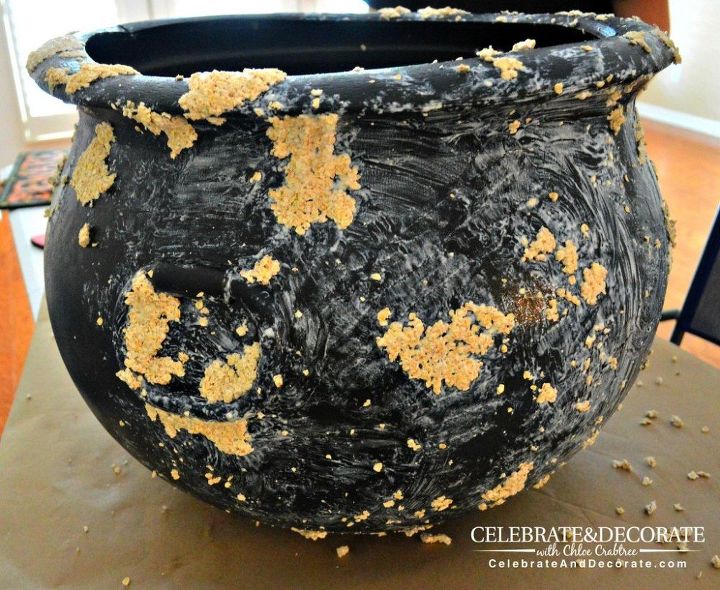
This will be messy! Using a mixture of dry oatmeal and craft glue, we coated the entire cauldron. In some places there were big spots of the oatmeal and in others, we just put a few pieces here and there.
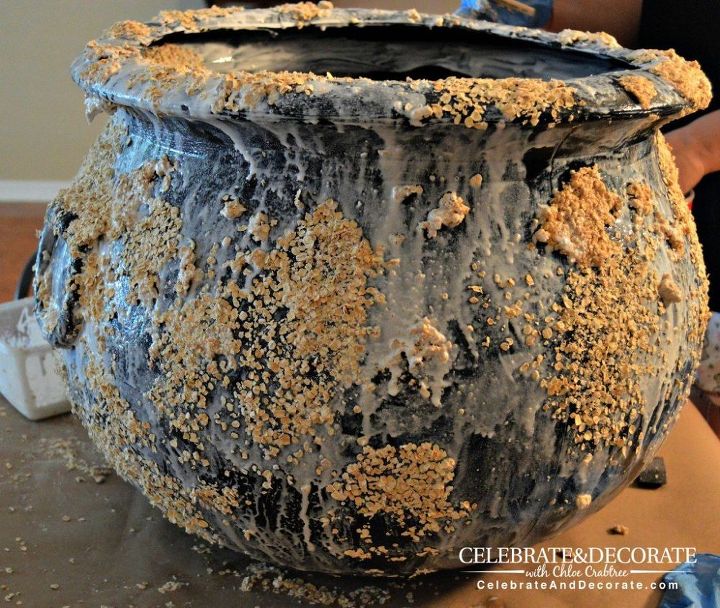
When you think you have added enough oatmeal...add more! The idea was that it looks like it has rusted and boiled over many times. I know it kind of looks like Rice Krispie treats in these pictures, but alas, no treats were enjoyed in the crafting of this cauldron. In Spots where there was no oatmeal I made sure there was a generous coating of craft glue so that the plain plastic form was given ample texture.
STEP 3: Seal with spray sealer
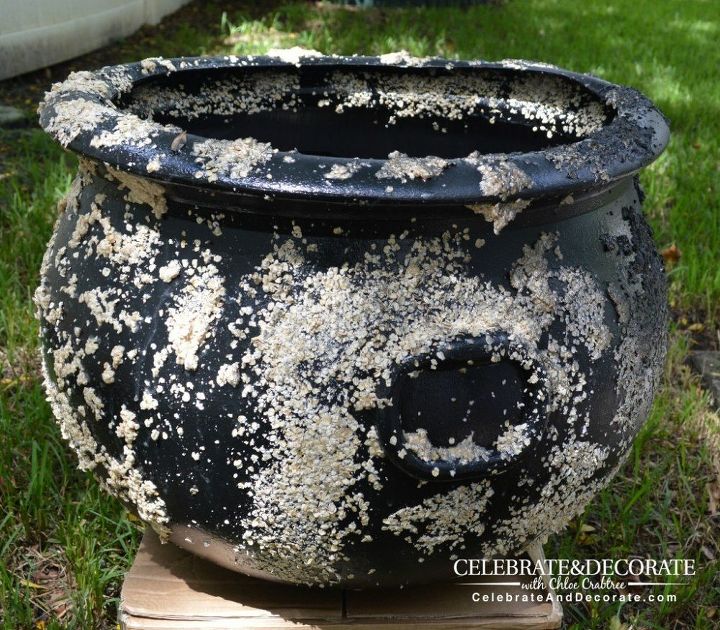
Next step was sealing it with a spray sealer. I put several coats of that on so that none of the oatmeal would fleck off. Now begins the painting. I used black, white and gold spray paint and just kind of had fun with it. I stood back and let the paint gently color the oatmeal. In the picture above you can see that somewhere along the way my cauldron got a dent in it, but I thought that just added more character to it.
STEP 4: Paint your cauldron
Can you see where the spots of white have been sprayed over the black? You could just as easily use gray to get the same look, but I had the white, so that worked.
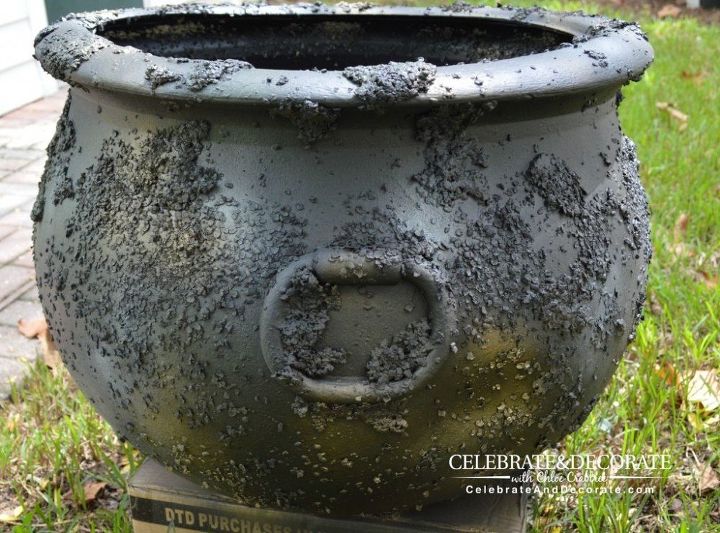
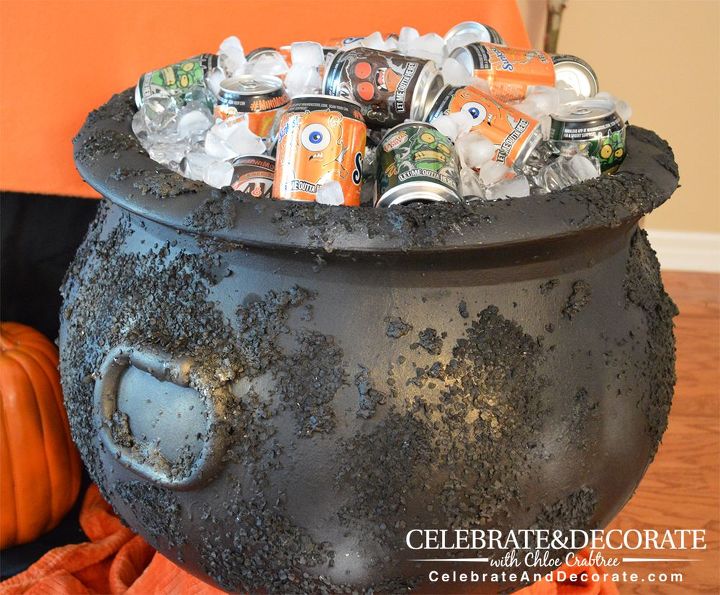
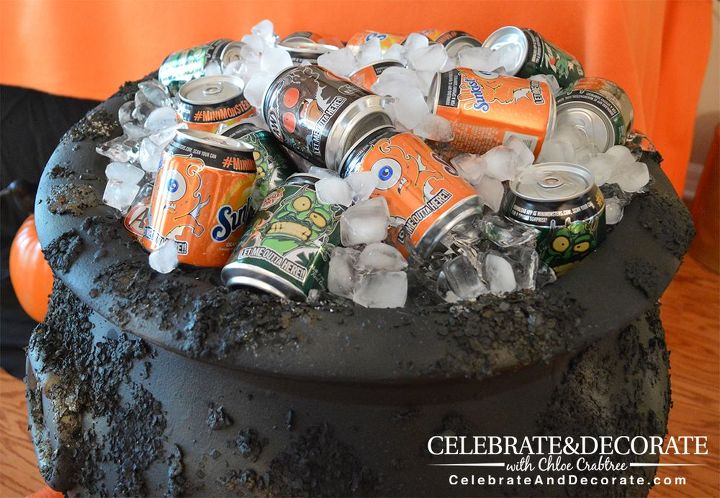
A few little sprays of gold and my witch's cauldron is complete and ready to use! I used it for icing down drinks at a little Halloween open house, but you could just as easily use this technique on a smaller cauldron for passing out candy to trick or treater's. I know I will get a lot of use out of this over the years, even if it is just as a Halloween prop on my front porch. The following are some shots from my Halloween Open House I shared last week (click through to my blog to see the party).
What would you use a creepy cauldron like this for? I would love to hear from you and see pictures of your Halloween cauldrons! I would love to have you stop by my blog, Celebrate & Decorate for the full tutorial as well as sign up for my latest creations, posts, recipes, exclusives, and more...
Resources for this project:
See all materials


Comments
Join the conversation
-
The small drinks would make a good Halloween Treat! The top just needs to be cleaned and a safe treat. Thanks for sharing the cauldron.
-
Sweet! A totally new idea for me❤️


Frequently asked questions
Have a question about this project?