


Easy Winter Container Garden Design
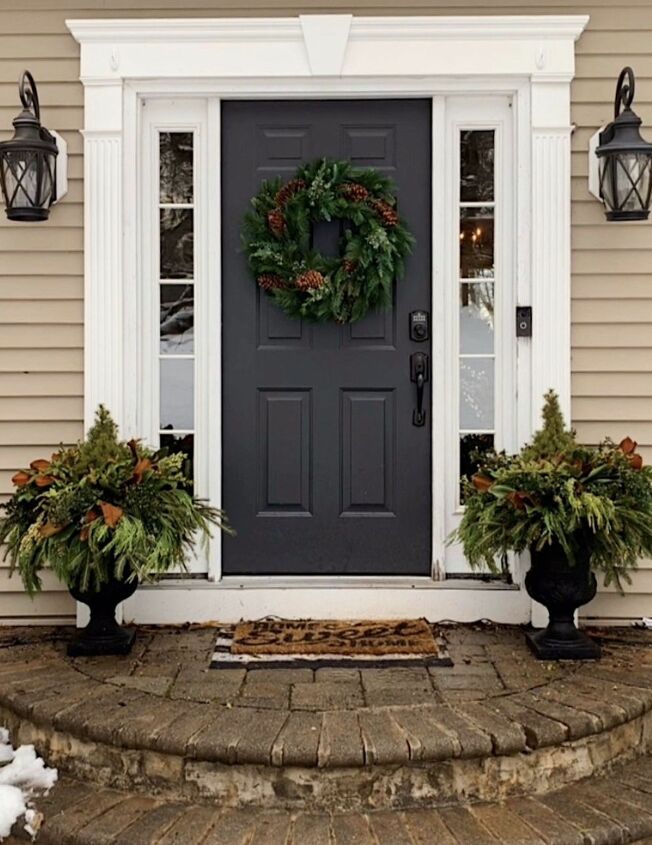
Do you love winter container arrangements as much as I do? Jazz up your porch decor with these winter container garden design tips.
Winter container gardens are a great way to extend the gardening season and are much easier to create than they look. Planters are low maintenance, require minimal investment and can last through February if properly cared for.
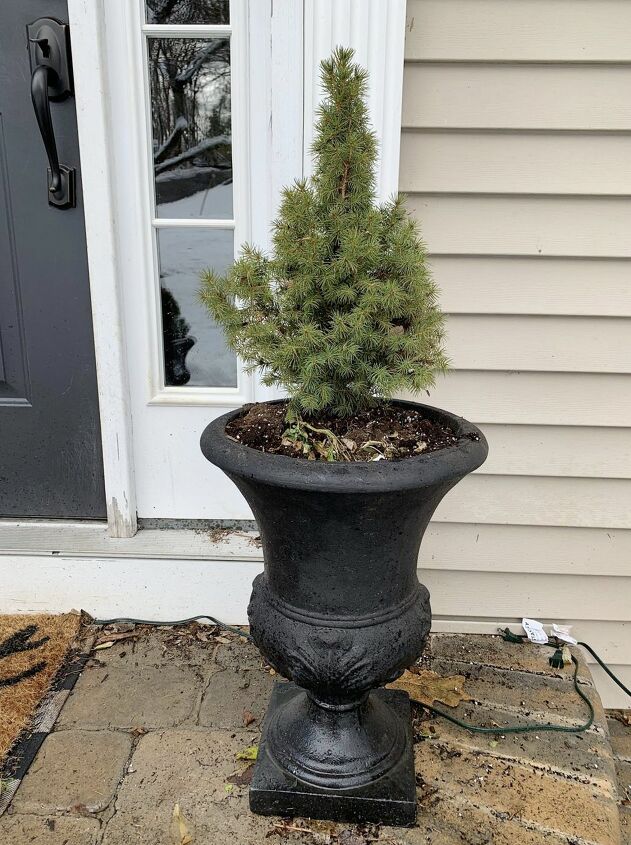
This year, I wanted to keep my Dwarf Alberta Spruces in my containers, so I decided to underplant them with winter greens cut from my yard with some Magnolia cuttings from the nursery. And I love how they turned out!!!
Find Evergreen Cuttings for Each Winter Container
Determine what containers you will use, then look around your landscape. What types of evergreen shrubs or trees do you have in your yard that you can take cuttings from? I typically use cuttings from boxwood, andromeda, rhododendrum, and other evergreen trees because that's what I have in my yard. If you don't have a good variety, cuttings can be purchased from the local nursery.
When choosing container greens, consider the container design technique: thriller, filler and spiller. Since evergreen plants and shrubs are all, well...green, I look for cuttings that are different shades of green, with different shaped or sized leaves and varying textures.
How I Designed This Year's Planters:
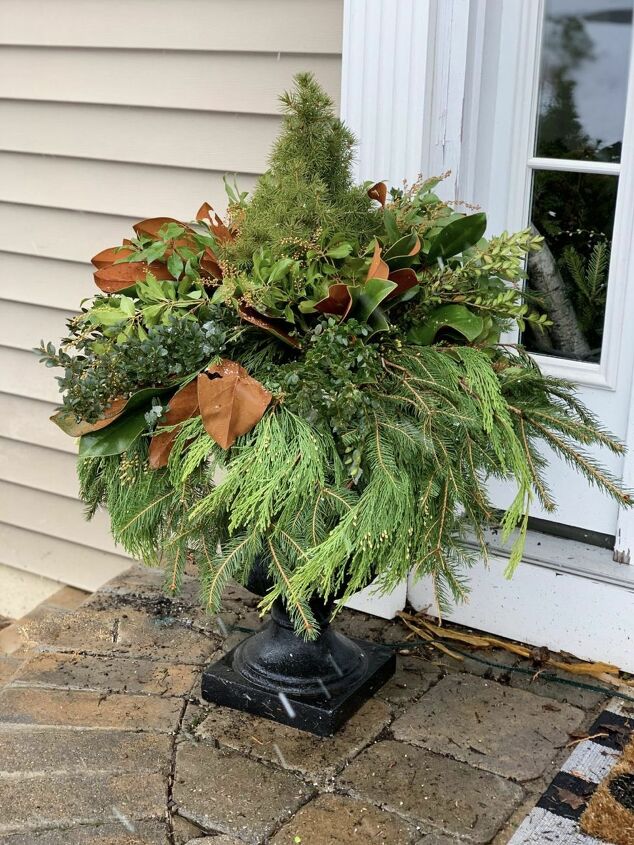
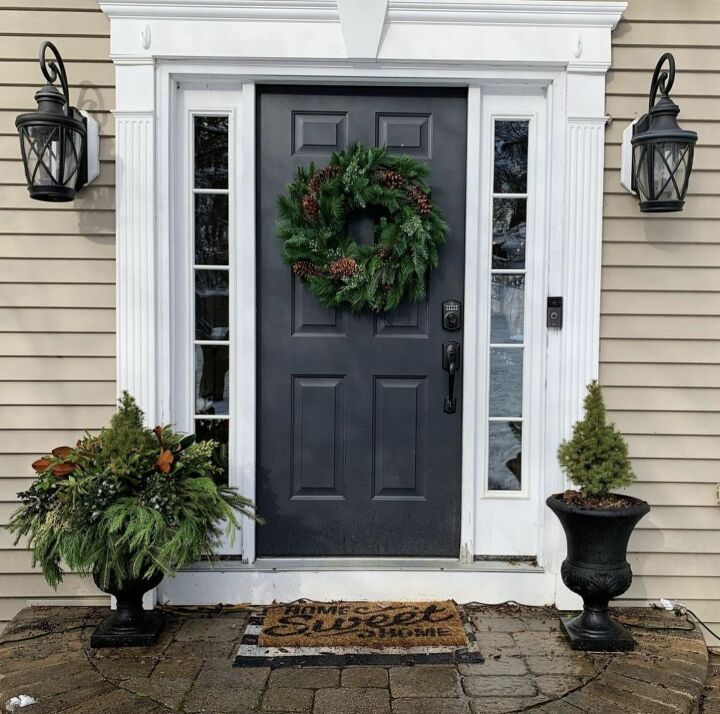
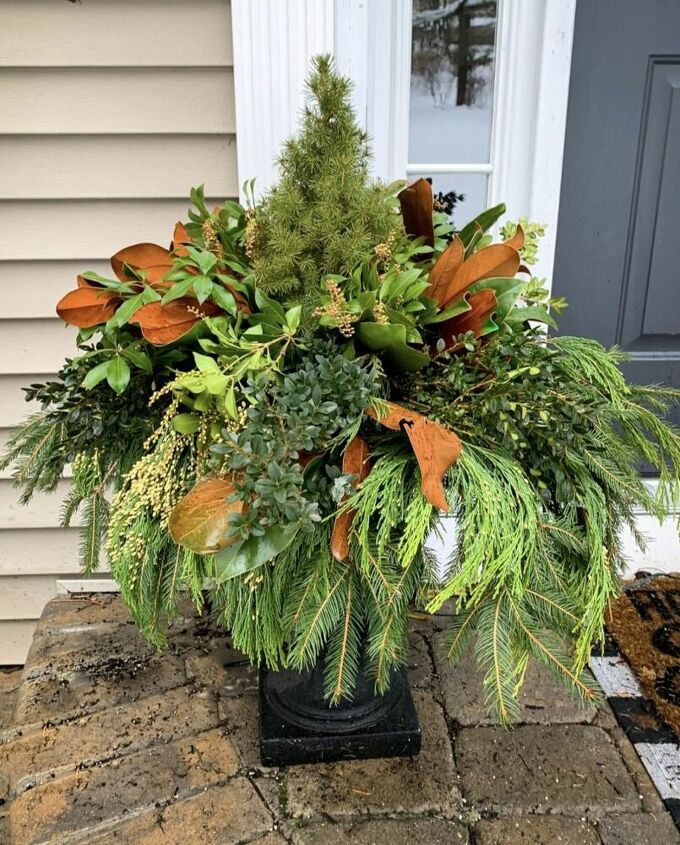
For my front porch urns, I wanted to keep my Dwarf Alberta Spruces as the focal point (thriller) of each winter container. I used cuts from our Christmas tree and Cedar Branches as the spiller (spills over the edge of the container). For the filler, I used cuttings from Boxwood and Andromeda shrubs.
To break up the varying shades and textures and add more interest, I like to incorporate some sort of large leaf or dried flower heads from my garden. Oftentimes, I use Rhododenron leaves and Sedum Autumn Joy seed heads from my garden, but this year, I decided to pick up some Magnolia cuttings from the nursery instead.
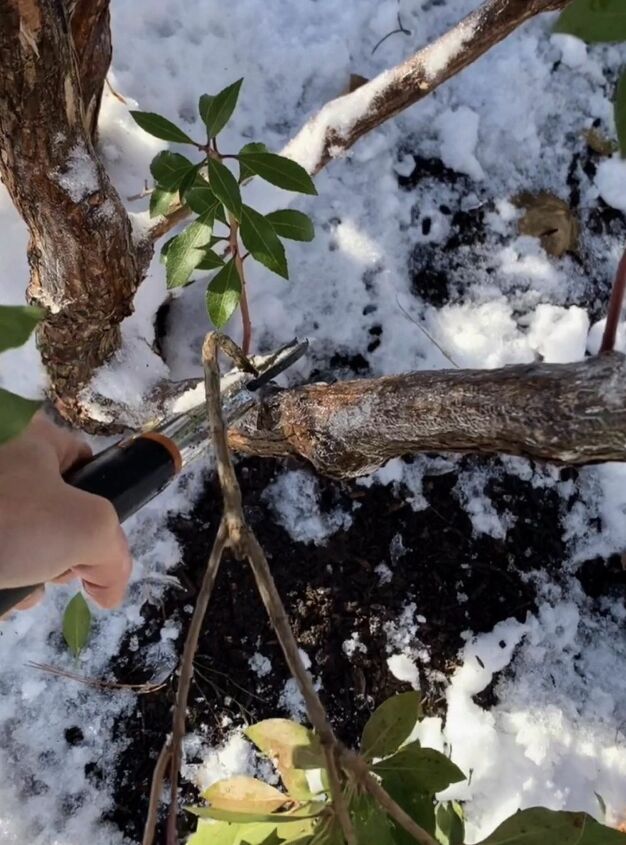
Gather Supplies and Take Cuttings
Once you determine what shrubs and trees you will take cuttings from, grab your pruners and make sure they are clean before you use them. I run a Clorox Wipe over them to clean and disinfect them before making cuts to avoid spreading disease and promote good plant hygiene. Then make your cuts at the node. Gather your cuttings, potting soil, containers and gloves (if you use them).
Since I love rustic looking containers, I do not adorn mine with much else. Depending on your style, you can add berries, pinecones, ornaments, birch branches, ribbon, bows, etc. The bottom line is, it's your container...use what you love and makes you happy!
Add Fresh Soil to Containers and Start Planting
If you do not have potting soil in your containers, add fresh soil. Then start stuffing it with the thriller, filler and spiller planting technique. Since my containers already have soil in them with the Dwarf Alberta Spruces, I did not need to add anymore.
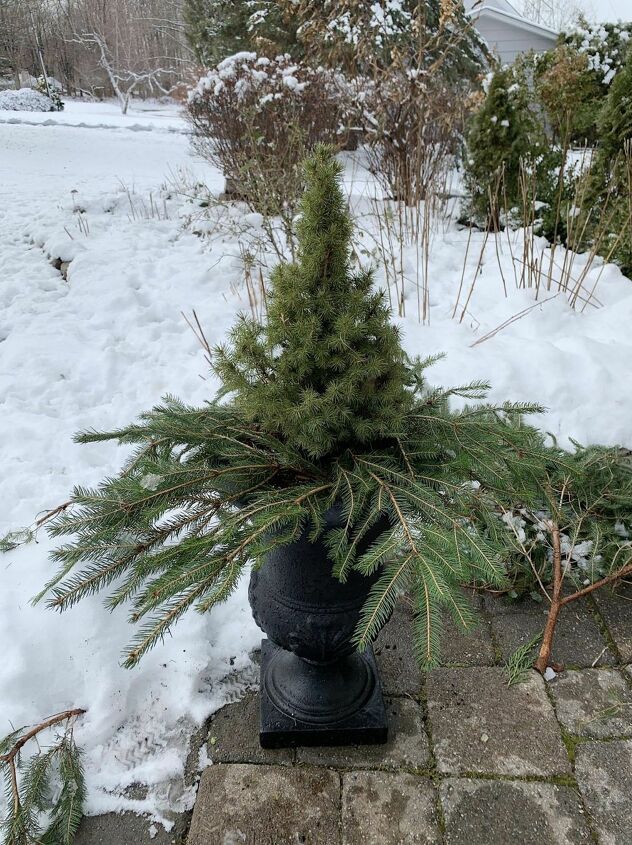
While working with the thriller, filler and spiller technique, try to plant in layers. I started with the Dwarf Alberta Spruce. Then surround it with cuttings from our Christmas tree.
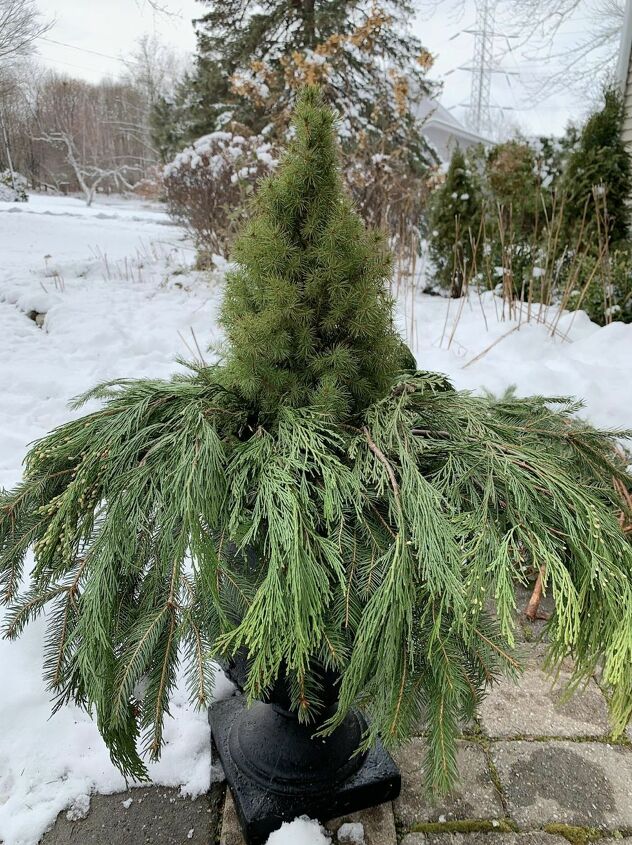
To add an additional layer of spiller texture, I tucked in Cedar Branches on top of the Christmas Tree cuts.
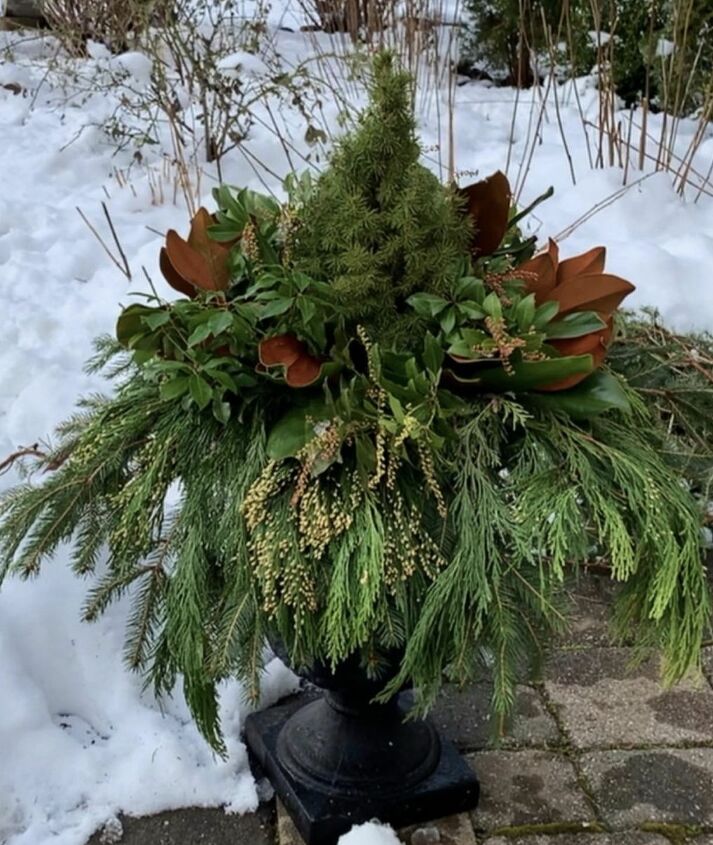
Now that the thriller and spiller features are planted, I filled in with Magnolia cuttings, Andromeda and Boxwood (in that order). To see my IGTC video explaining how I designed each layer, click here.
Pro Tip: When I am working, I stop and step back a few times so I can look at the container for symmetry and fullness. Often times, I go back into the landscape and cut more so I can stuff them as much as I can until they look nice and full.
Winter Container Care
When done creating your masterpiece, water it. If your container is not under a protected area like a front porch or awning, the outdoor elements should take care of them all winter long. If your containers are under a protected area, there are two options of care: water them every now and again, or leave them be and let them dry out when they dry out.
My containers are located under the roofline and look pretty good until about mid-February. I try to pull them away from the roof line during inclement weather or water them when I remember which will help them last longer, but to be honest, I tend to forget so I pretty much just let them be.

And that's it! You are on your way to planting your own winter containers. Side Note: the design concepts described above can be used with any type of container planting or centerpiece idea.
For more gardening tips and tricks, click here.
Resources for this project:


Comments
Join the conversation
-
Very pretty and makes your entrance so inviting! I've used boxwood cuttings and it's true, they stay pretty green through January and I'm in California.
-
These look beautiful and NOT too chrsitmas but "winter" will work through January, February, March until Spring.
Y'all did a great job!
Kevin


Frequently asked questions
Have a question about this project?