


Build a Wall in Dining Room

Going on 4 years in our home remodel projects! Last room to replace the windows in, and clean/seal the Pennsylvania Blue floor. In 2018 we moved our dining room into this room, and began using the formal dining room as a game room. I obtained a bid from the company who installed our beautiful bay living room picture windows. Replacing all 18 windows in the dining room (they are stacked 3 deep, 3 wide ceiling to wall on 2 adjoining walls) with 6 picture windows.....wait for it....$7,000 dollars for the job!!! So we decided this was something we'd have to do ourselves (like, I don't know, .... the rest of the house). We opted to build a wall on the bottom row, I tried different approaches to build the wall, and settled fo the most cost effective, and estimated $400 for the wall. Windows: I called surplus warehouse to determine the cost of a custom picture window that would fill the top two slots for the 3 window columns. Under 200 for each (whew!). When we replace those, I will post that project, probably in August. We decided the first step to build a wall was to remove the bottom row of windows on the 2 walls. One wall adjoins with our screened in porch, the other wall adjoins with the deck outside the back door. In removing the windows we would also remove some trim to allow for flat installation of 1/4 inch plywood, R30 insulation and another sheet of 1/4 in plywood. This would provide sufficient weather proofing and give us a firm foundation to install left over vinyl siding and soffit trim on the outside/inside of the wall.
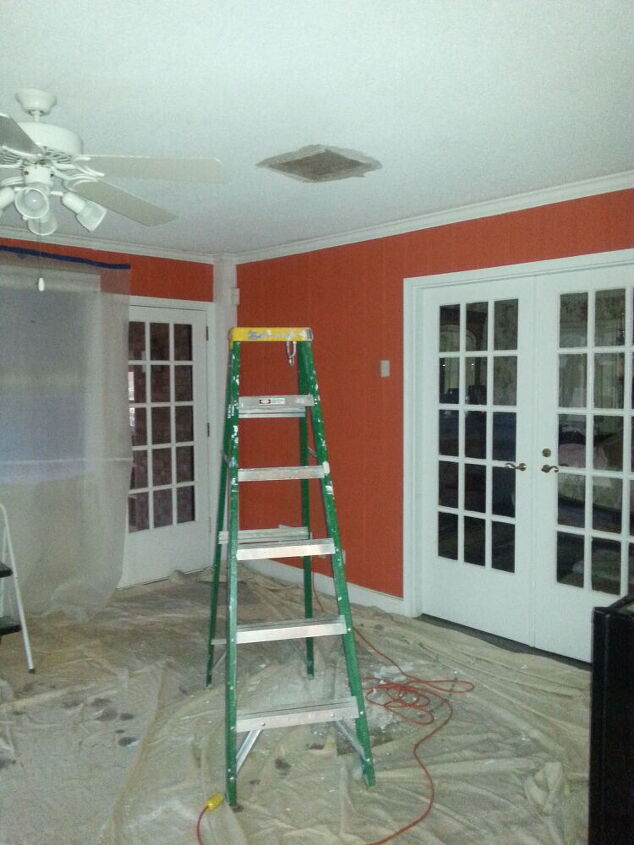
When we first bought the home in July 2016, this room was used as the family room by the seller. We removed the popcorn ceiling, re-texturized the ceiling to minimize echo from the slate floor, and painted the room to match the kitchen. We turned this room into a dining room as we were sleeping in the formal dining room during the remodel, until August of 2018.

Removing the windows was a little challenging for 2 of the 6! No room to slide them down to hit the exit channel on the side slides due to the back deck support board on one wall, and the screened portion on the back porch on 2nd wall. Took some creativity to remove without breaking glass! First we used a putty knife and hammer to break years and layers of paint on the inside and outside edges of the windows. We pried them open to remove the hardware and slid them down at an angle to remove. We also removed the center trim piece to accommodate the plywood for a flat fit.
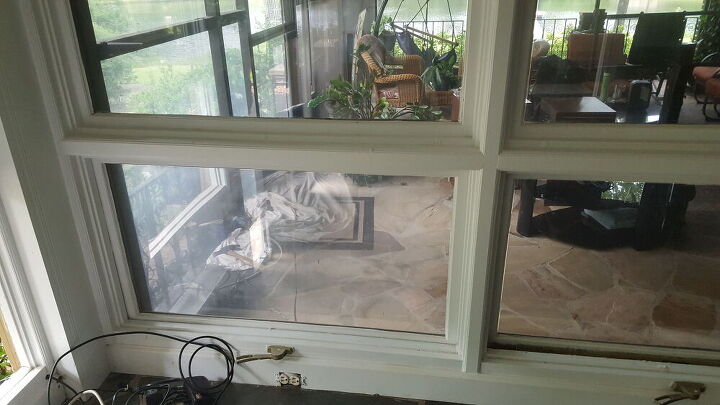
We opted for the wall at the bottom because, as you can see, the view through the windows of the floor of the porches wasn't exactly enticing. Much better to draw your view up and out to the pond. We also had to remove the piece of trim going across the handles for this horizontal level of windows. These windows were the only ones that opened, you literally had to remove the trim to unscrew 4 phillips screws to remove the handles that opened the windows. We used an oscillating saw to cut through the trim right above the handle, then pried the remaining trim pieces up with pry bar.
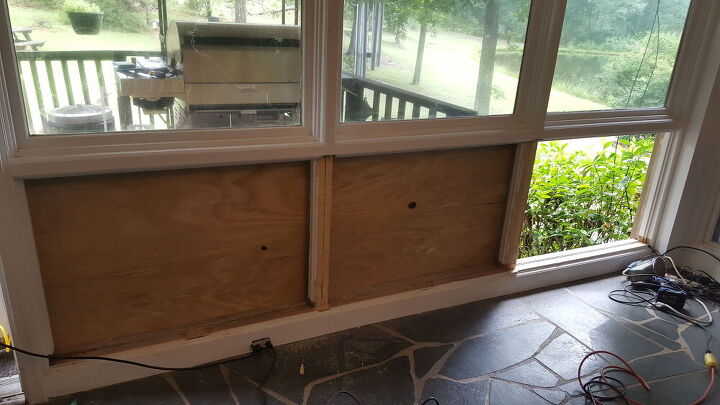
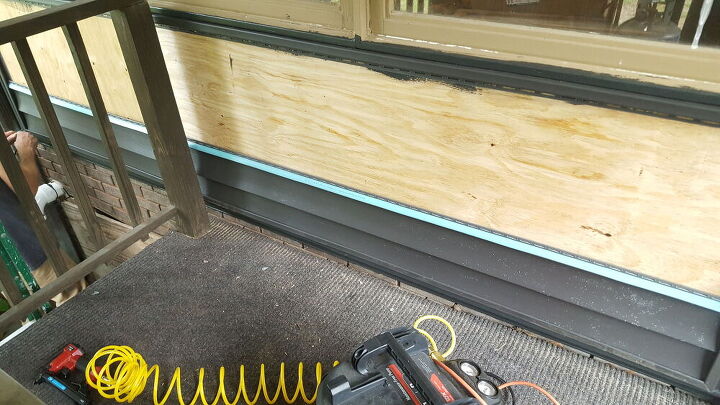
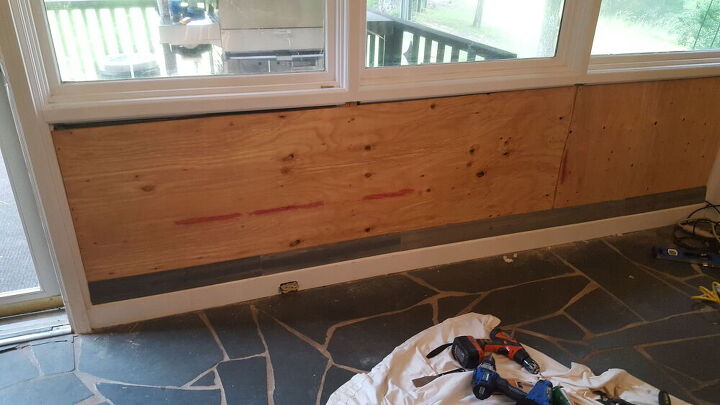
We purchased 6 sheets of 1/2 inch plywood (3 per side) to make the wall. Unfortunately the windows were 27 in tall so we couldn't use the ripped piece of plywood to line the other side. We used a finish nail gun to install the plywood into the trim, and then caulked around the inside of the plywood with silicone caulk. On this photo you can see the first piece of plywood had been installed on the outside of the windows slots and see where the trim was cut with a sawzall to allow flat installation on the inside as well. Don't know if you can see, but this allowed the plywood to sit inside of the deepest crevice of the trim, to allow for spacing for the shiplap installation.
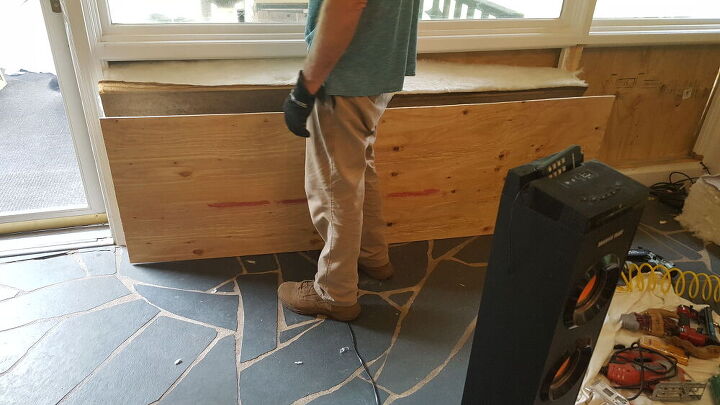
We bought R30 batting for walls/attics, but the pieces were so thick (10 inches) that we had to pull about 4 inches of the unlined side so we would not have to compress the insulation (works better with the air pockets not compressed). Then we again used a finish nail gun to attach the inside plywood.
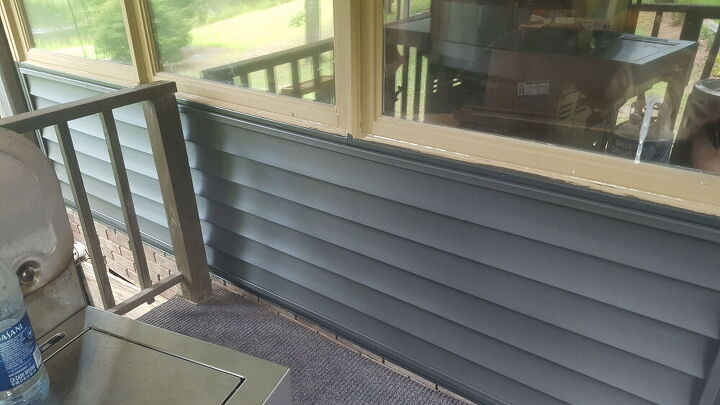
May of last year, we had a contractor install the living room bay picture windows replacing 5 sliding windows (we installed 13 windows ourselves). While here, we had the contractor aluminum/vinyl wrap all the windows on the house professionally. We don't have the equipment to bend aluminum. In May this year, we had the house vinyl wrapped, matching the color used to wrap the windows. I had ordered matching paint from Lowes for the trim for the doors, and used that paint to do the trim here. We will paint the remainder when the windows are installed. So vinyl wrapping a house consists of vinyl siding and soffit cover, installing aluminum edging on the flat area of the roof where the gutter's attach. No more painting! We had some left over soffit trim and vinyl trim which we used to trim the newly installed wall on the outside. This matches the trim the contractor put on the outside bottom of the bay windows. We used the vinyl siding trim on the deck, and soffit trim on the inside of the screened in porch. Installing meant watching YouTube 'University' on how to install vinyl siding. Educated and primed, we began by putting up 4 J channel outside trim pieces that hide the edges of the vinyl. Then measuring, cutting, and sliding in the cut siding into both ends of the J channel. We purchased a pneumatic stapler to install the siding and J channel trim pieces.
The vinyl trim turned out wonderful, much easier to install our leftover pieces from the vinyl wrap than match 40 yr old brick and hire a brick layer!
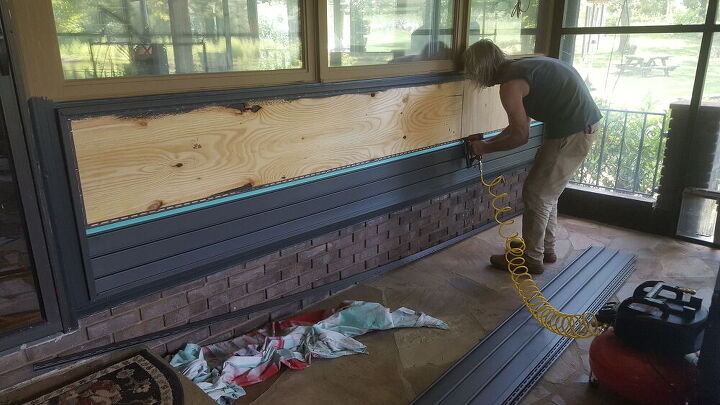
We had several pieces of left over soffit trim which is also vinyl, but not texturized like siding. We used those to install under the window bay in the screened porch. The inside of the screen porch had soffit covering so it matched. Same process, measure and install J channel, cut siding (luck for us the pieces are 10ft, and the area was nearly 9 ft long), cut the soffit piece and slide into the J channel, stapling down the length of the piece.
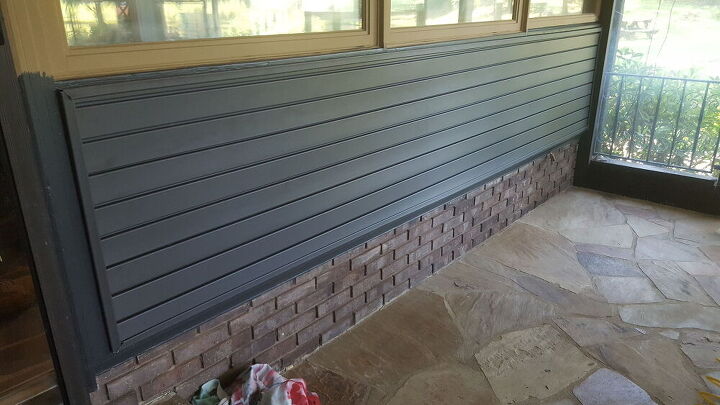
The screened in porch wall turned out lovely, since all the plywood was caulked, it is weather proof. Plus the right side of the porch here has acrylic over that section of screen to keep out water closest to the house.
We decided to install dove gray shiplap from Home Depot on the inside to accentuate the Pennsylvania Blue slate floor. The first row of shiplap must be absolutely level for the remaining boards to go on correctly. I adjusted this level down across the top of the baseboard to achieve level with an old floor.

Again, watched a video on YouTube 'University' to see how to nail up and install shiplap. I used the finish nail gun and hid the nails on the ledge that the board above would sit on. Using a finish nail gun also minimized the nail hole and on this color shiplap, you can't see the nail holes at all. I used a chop saw to cut the pieces, being careful to stagger the seams.
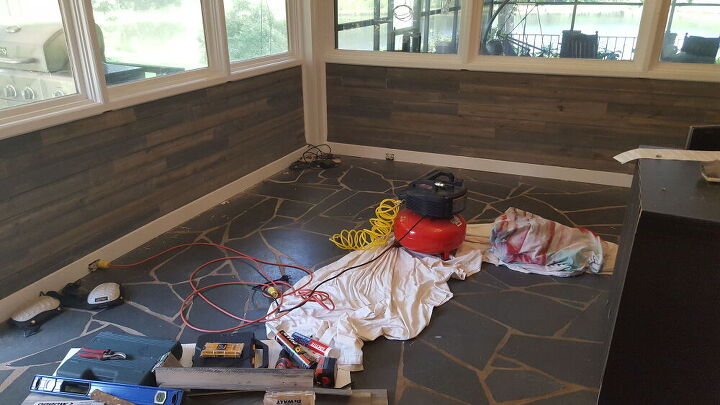
I ran a bead of white caulk around the edges of the shiplap after installation.
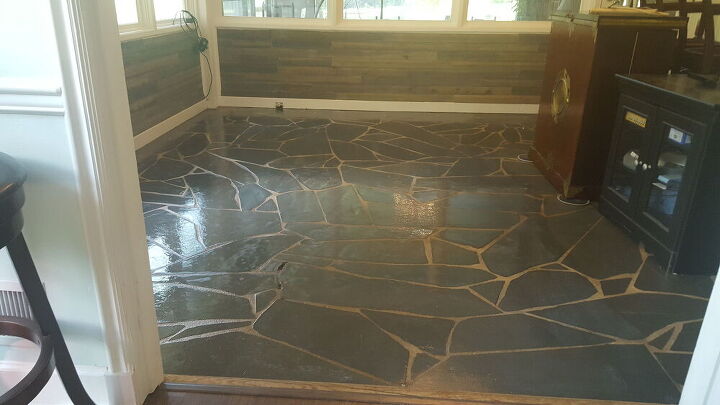
I used a natural stone cleanser on the slate and removed all paint chips from the years with a razor blade. Cleaning definitely took longer than sealing! I used a high gloss sealer to put 3 coats of sealant on the slate using a handheld applicator.
The floor turned out beautiful. Now it's time to remove the lights from the chandelier, tape off the electric tops and spray it with vinegar and a couple of drops of soap in a spray bottle to clean the chandelier before putting the furniture into place. I also need to replace the outlets (3) with new white on white outlets. I also took some acylic paint, and blended to match the color of the shiplap and painted the cut ends of the boards which hid the raw edges. I plan on removing the outside trim and ordering the windows to replace these in August. Will post that project when we are done!
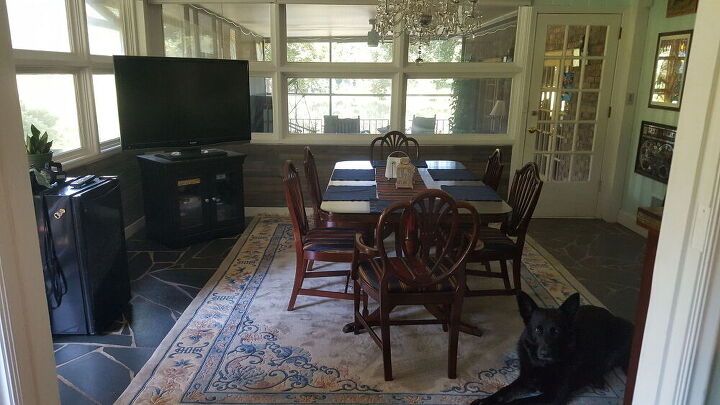
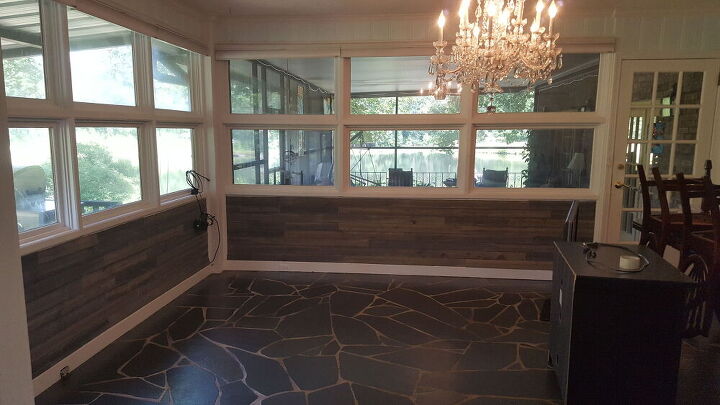
Last coat on floor, furniture back in place. The wall matches everything perfectly, and your eyes are drawn to the pond in the back of the property. Can't wait to get picture windows!
Comments
Join the conversation
-
Beautiful
-
You did man amazing job. Looks great.


Frequently asked questions
Have a question about this project?
Beautiful job! I especially love the flooring! But I have just one question, why would you put that huge tv in your dining room?
How did this affect home owner insurance?
How much did rates go up ? I live in an earthquake prone area. Even tornado or hurricane areas I would think think this would be high risk for breaking or creating more injuries...