


DIY Embroidered Halloween Silhouette
I haven’t been great at keeping the crafts coming, like I normally do. I’ve been struggling a bit with some medical issues, but have managed to keep myself busy with crafts. Thankfully, crafts have become my saving grace during the tough times. This past week I took a picture of Scout and finally got around to turning it into this DIY Embroidered Halloween Silhouette. I love how it turned out and can’t wait to work on the boys next.

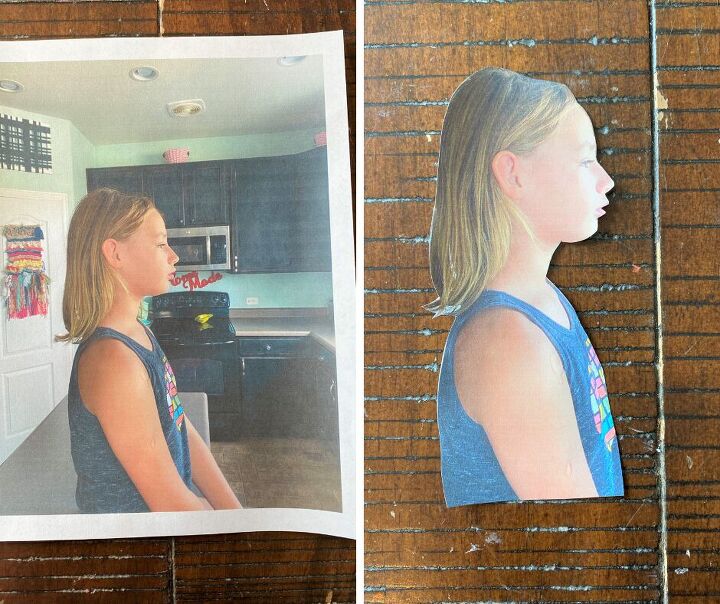
Start by taking a photo and cutting out the silhouette. I printed my photo on an 8×10 piece of paper. You don’t want it too small because you might lose some of the details with the embroidery.

Trace the silhouette onto your piece of felt and add a witch hat. Use your embroidery needle and floss to stitch over the silhouette.
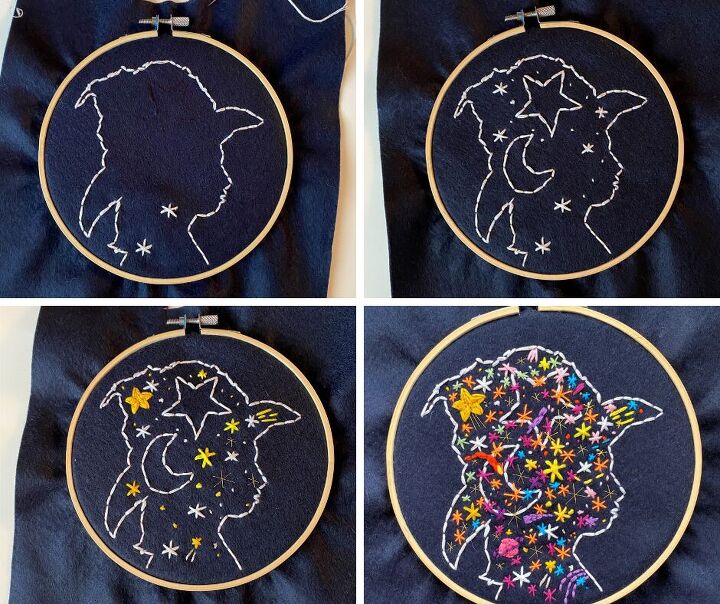
Once the outline is done, you can fill the inside with whatever you want. I decided to stick with a magic theme and started adding stars. You can use as many colors as you want for this DIY Embroidered Halloween Silhouette.
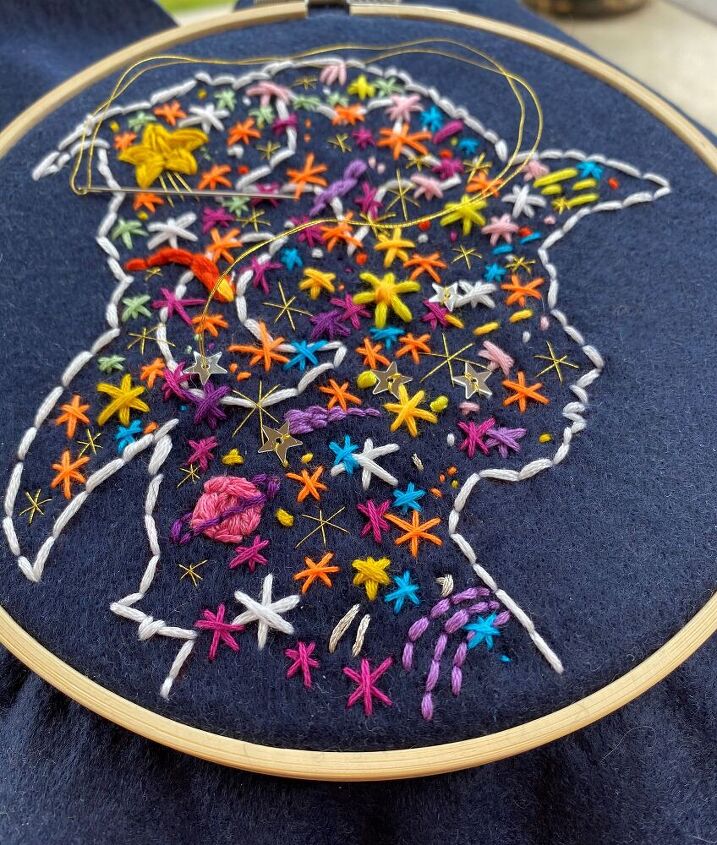
I also stars with metallic gold thread and gave it even more sparkle with some star sequins.
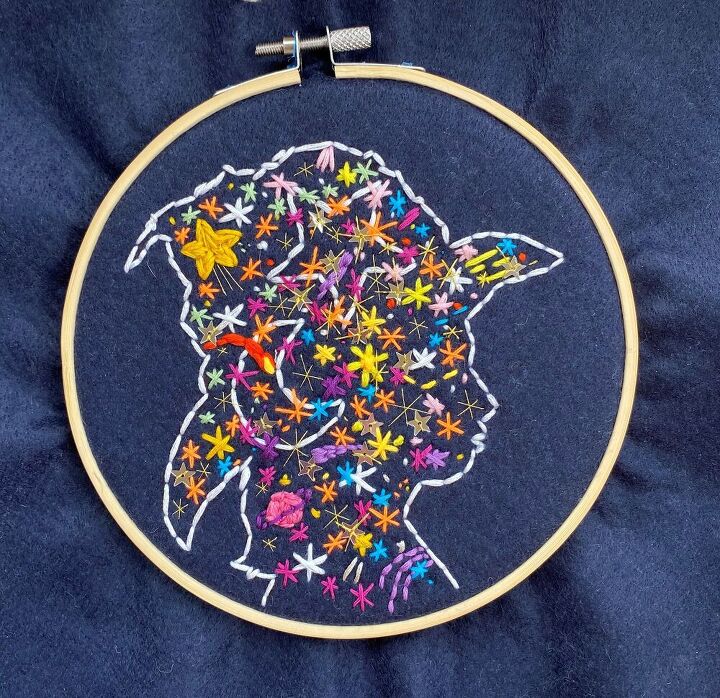
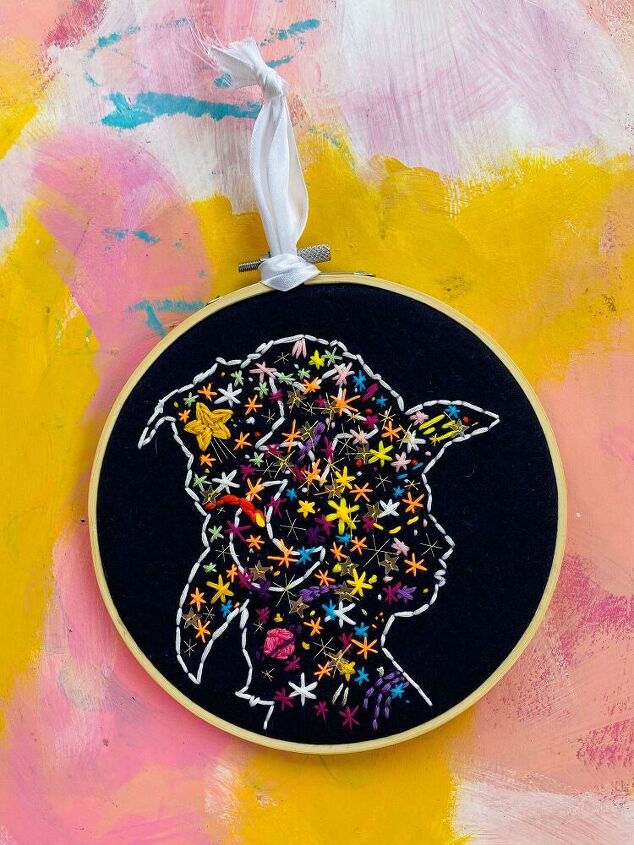
Trim the felt and add a ribbon for hanging.
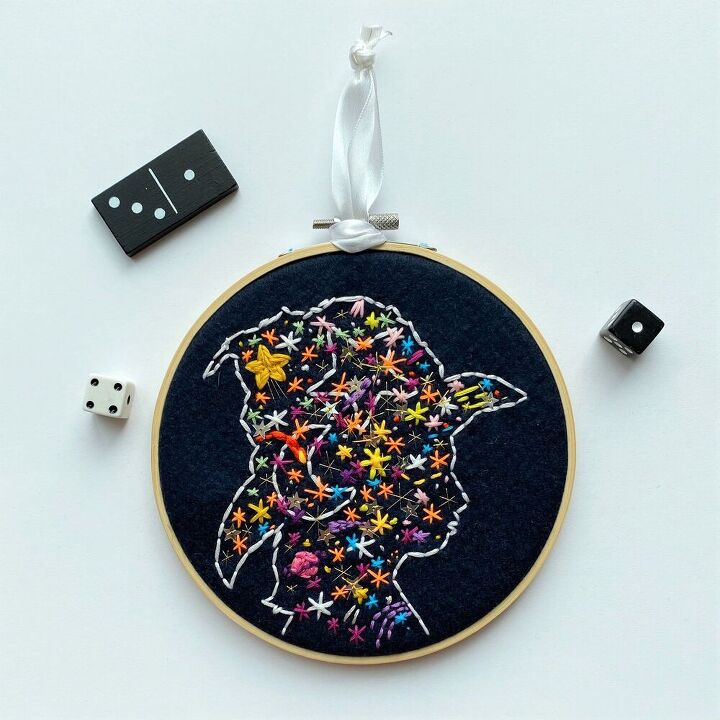
Isn't this adorable? I'll work on the boys in this house next.
Resources for this project:
See all materials


Frequently asked questions
Have a question about this project?