


A Different Twist to Constructing a Plastic Panel Patio Roof

by
Joan Hurst
$200.00
3 Days
Medium
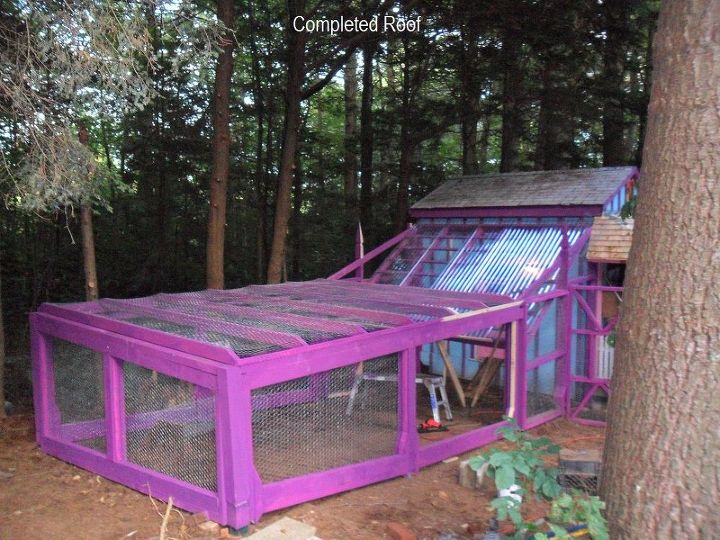
We wanted to install a patio roof over a portion of our chicken run, but we didn't want to have to deal with working on a ladder for installation and repair, as the terrain is varied and at the ages of 68 and 66, the easier the task the better it is for us.
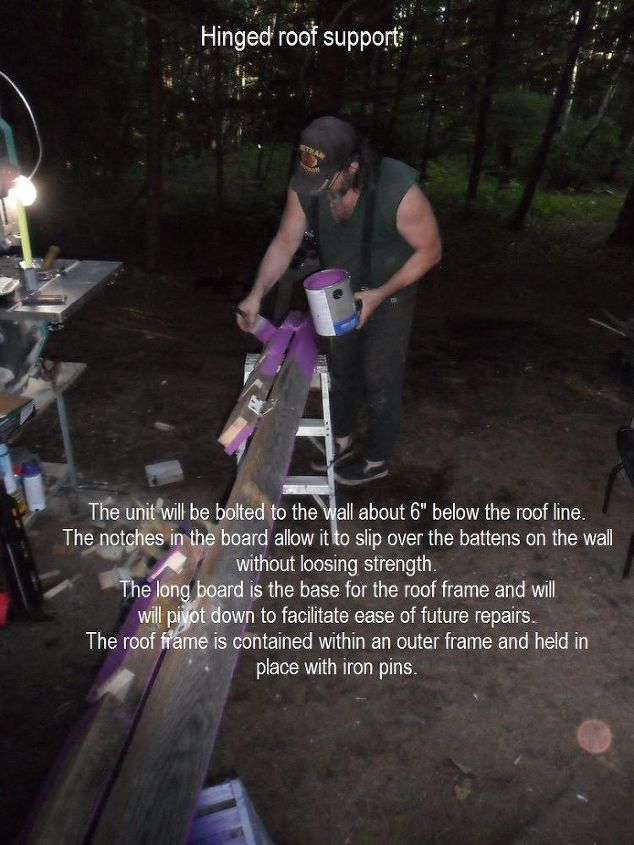
Hinged Main Building Support
We used two rough cut 2 x 4's from the saw mill. They are true 2 x 4's, beefy and strong. Four heavy duty outdoor hinges were attached to the boards, allowing the full length board (the one that will be the back of the roof frame) to tilt to an upright position for easier installation and repair.
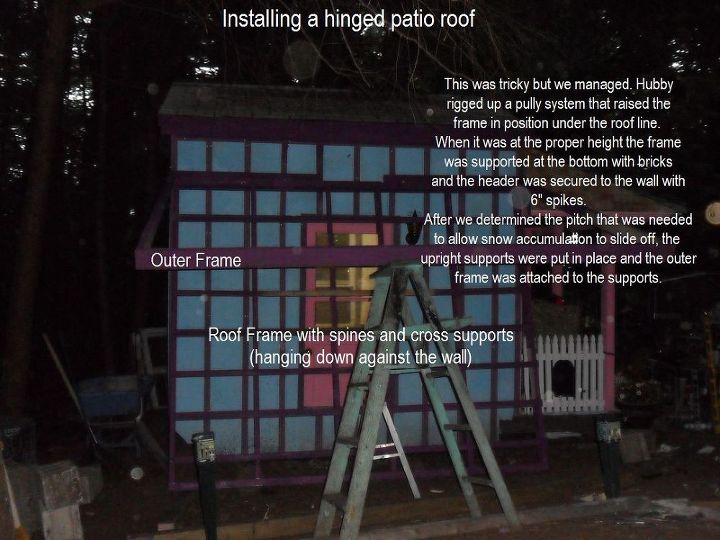
Installing the Frames
In order for the roof to pivot on the hinges, yet stay in place, an outer frame had to be made. A 1/4" gap was left on the sides and front to allow for swelling and shrinking during the seasons. You may want to use a larger or smaller gap. Keep in mind that additional layers of paint are going to make it tighter as time goes on.
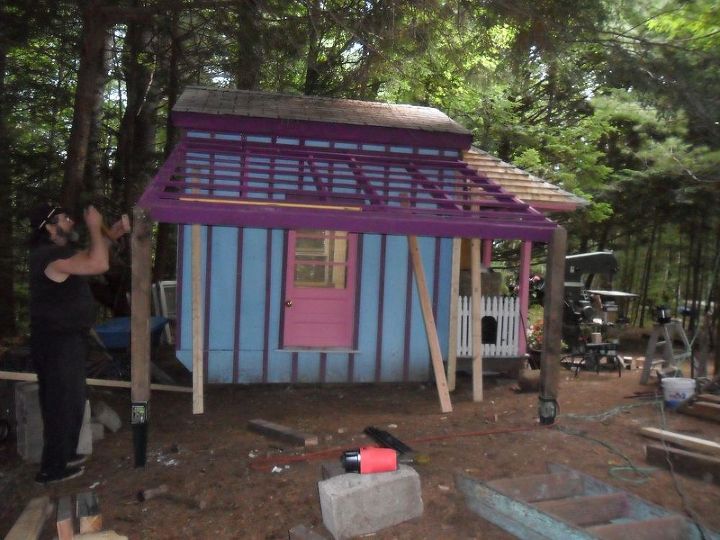
Roof in Place - Uprights Installed
We didn't install the uprights until we had the roof in place and had established the pitch that we wanted. The ground slopes in two directions here, and we wanted to keep the roof as level as possible, so we felt this was the best way to proceed. At least for us.
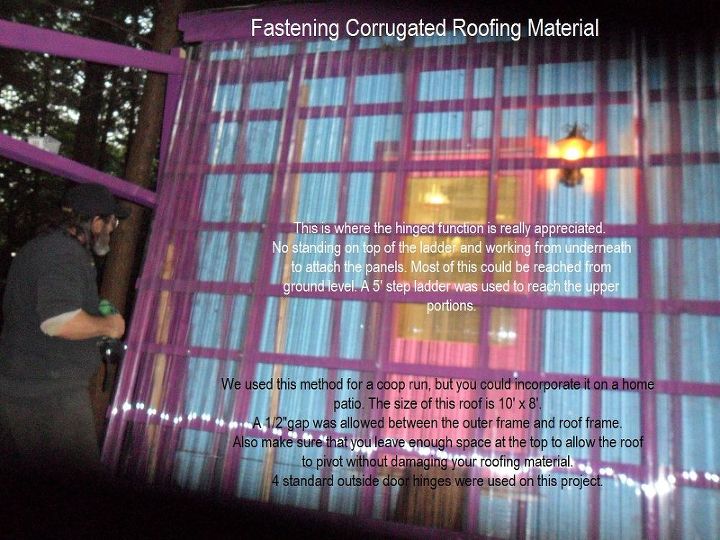
Installation of Corrugated Panels
Unlike the conventional installation, we installed 1.5" x 2" battens on top of the studs at 12" intervals. We felt this would give more support. It should also allow air to flow through the main frame, stopping or at least hindering the accumulation of moisture, reducing the risk of rot. Attaching the panels in this position allows us to do it while standing on the ground. A 6' step ladder is all that is needed to fasten the upper portion.
Roof Placement
Here the roof is ready to be raised and pinned in place. Taking into consideration that this roof is surrounded by trees, the fact that it can be easily lowered also makes pine needle and leaves easier to remove. For cleaning, all that is needed is a long handled brush and a power washer or hose if you want to REALLY clean it.
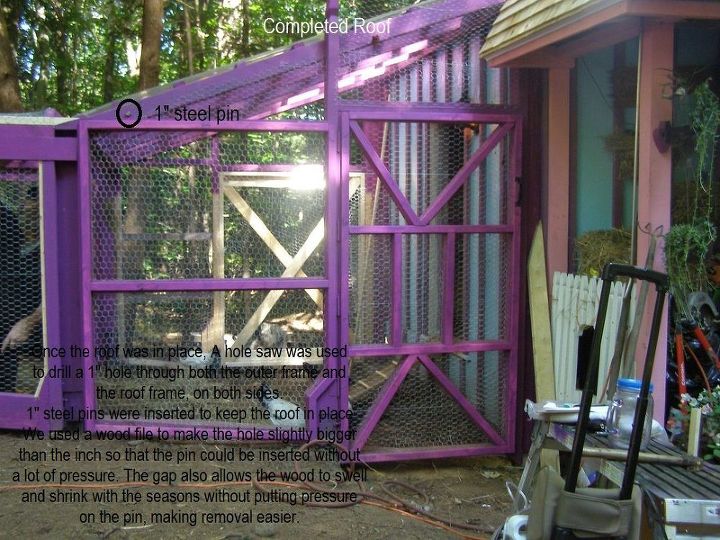
Pinned and Secure
I think the picture says it all. We might put another pin on each side half way between the wall and the current pin. The roof frame is made with standard store bought 2 x 4's, while the supporting frame is constructed with rough cut 2 x 4's. If you don't know the difference. Rough cut wood is full size. It hasn't been planed and measures a true 2" x 4". A store bought board measures 1.5" x 3.5". We prefer to use rough cut for the supporting structure because it is beefier and actually cheaper buying it from the saw mill rather than a home building supply outlet.
Want more details about this and other DIY projects? Check out my blog post!
Comments
Join the conversation
5 comments
-
Very unique. I could use this brillant idea for my Mobile Home. Keep the good ideas coming.
-
Not really a question but a helpful way to raise and lower roof , I will use crank that goes on boat trailer to pull your boat onto trailer but I'll add them to each side post at the top to lower and raise the roof panel..


Frequently asked questions
Have a question about this project?