


Black Wash

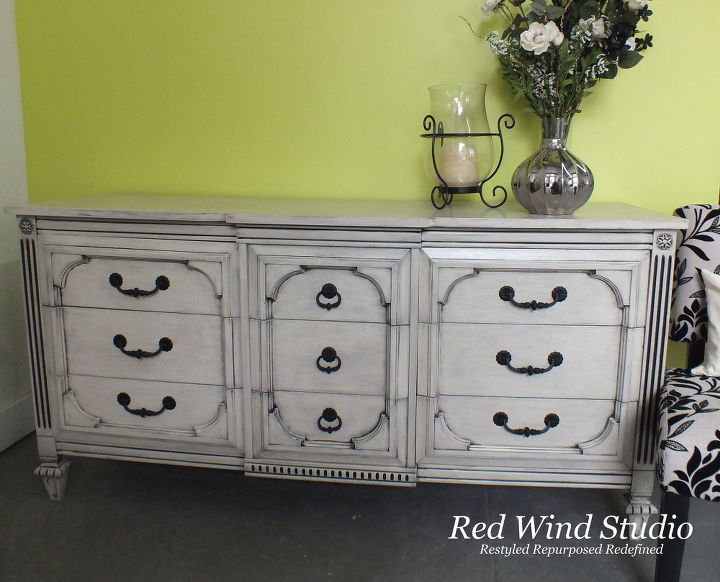
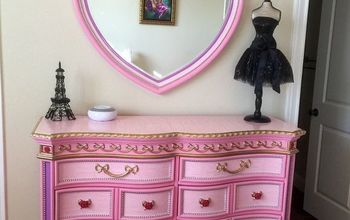
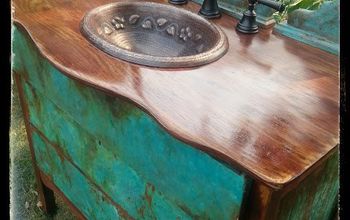
One of the first pieces of furniture I painted for my business I used this particular technique. I had no idea if it would work or if it would even look nice but I put my faith in myself and just did it. I was quite happy with the result and now I have another item I thought the technique would look great on so I did it again. This technique is definitely for pieces that have some nice details on them. Here is what the dresser looked like before I started the process.
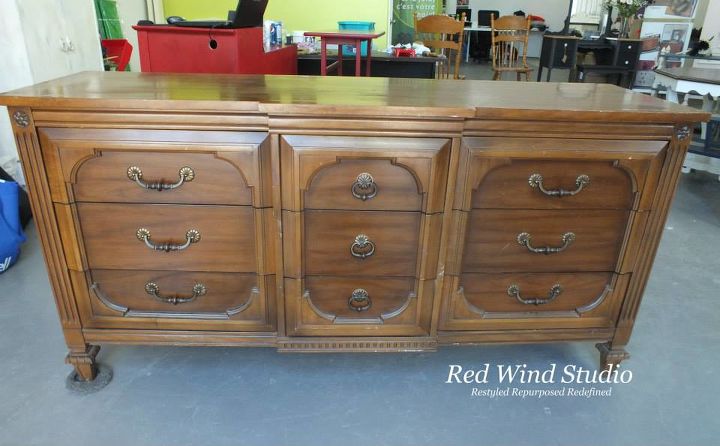
The dresser has great details and is very well constructed but the top has quite a bit of damage. Although it looks like solid wood it appears to have some veneer which is fine but in order to completely remove the damage on the top I would probably have to sand right through the veneer. So staining the top was out and painting it a solid colour I could do but I would need to do a lot of repairing and using wood filler. This technique uses those flaws and also helps disguise them.
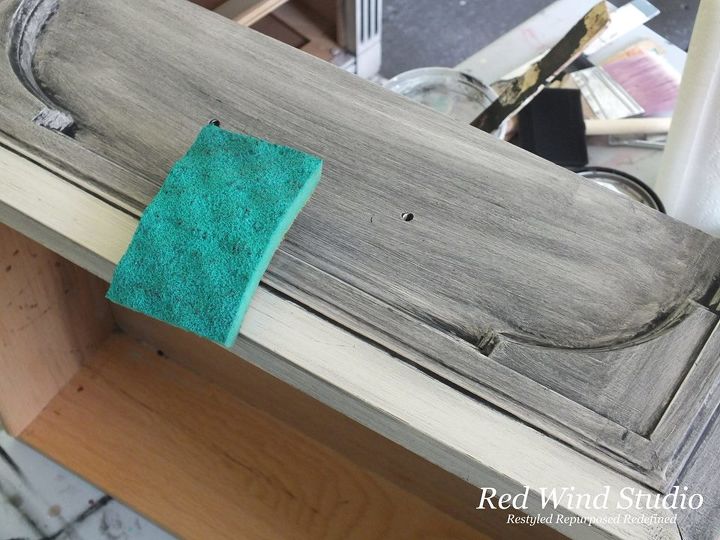
Once I have made sure all the base colour is covered with the clear coat and it is dry you can proceed to the next step. I poured some FAT Paint colour Raven into a plastic cup and added a small amount of water to thin it out slightly. I work in sections for the next part. I use the thinned Raven and paint it over one section of the dresser at a time. For example I paint the top of the dresser then take a paper towel or rag and wipe it off going in one direction. Quite a bit will still be left on which is fine. I did this with each section and then did the drawer fronts. Once I have painted each section and wiped off the paint I got a bucket of water and a sponge with a scrubby on one side and 600 grit wet/dry sand paper. I started with the first section I painted with the Raven. I wet the sponge and scrubbed using whichever side was needed to remove the Raven. Now this is where one needs to use their creative judgment on how much of the dark colour to remove. I like to keep the drawers close to the dresser in order to see that I am being consistent with all the sections. I also step back every once in a while to get a full perspective of my project.
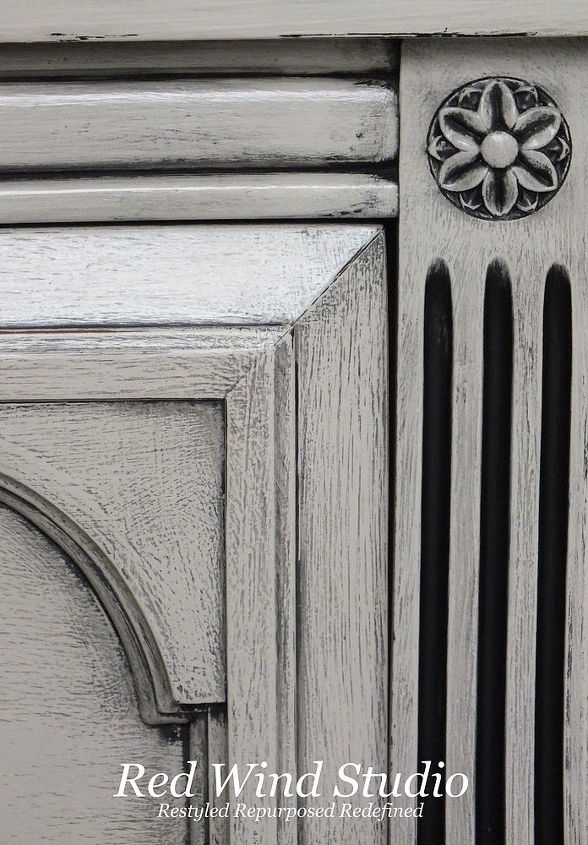
While removing the Raven I had to go back and add some Raven back to a couple of places to even things out like the little flower details were not even. In some areas the Raven was being difficult and scrubbing harder cold result in going right through to the wood and I only wanted slight distressing so I opted to wet sand using 600 grit in those difficult areas.
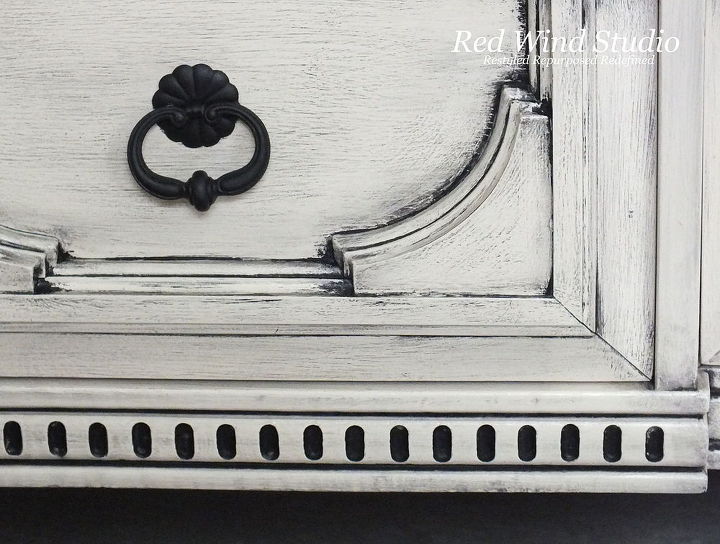
The handles were a tarnished brass colour so I chose to paint them Raven and used a new Varathane in a matt finish to seal them. (Sorry no link as I can’t seem to find it on the web).
This is not a weekend project or one for a beginner unless of course you are a daring sort of person and like to go big or go home. It is definitely more time consuming than painting and using a clear wax and then antiquing with a dark wax.
Comments
Join the conversation
2 of 72 comments
-
Wow! The dresser looks completely different from when you started the project. Thanks for posting and the great pics!
-
Thanks for sharing. I “black washed “ (lol- my term for white washing with black paint) the top of a dresser and really liked it. Thanks for sharing. This is the perfect solution for a friends table top. Hopefully, I will have the same results. It’s beautiful!


Frequently asked questions
Have a question about this project?
on the polyurethane clear satin coat, did you use an oil or water base?
Is there a particular reason that you did not use chalk paint? It is very beautiful..Le'
why do you apply Varathane between base coat and the thinned coat?