


DIY Herringbone Dining Room Table

DIY herringbone dining room table, complete! It took a couple weekends of working during my child’s nap time, but overall it was a pretty easy, quick, and painless project!
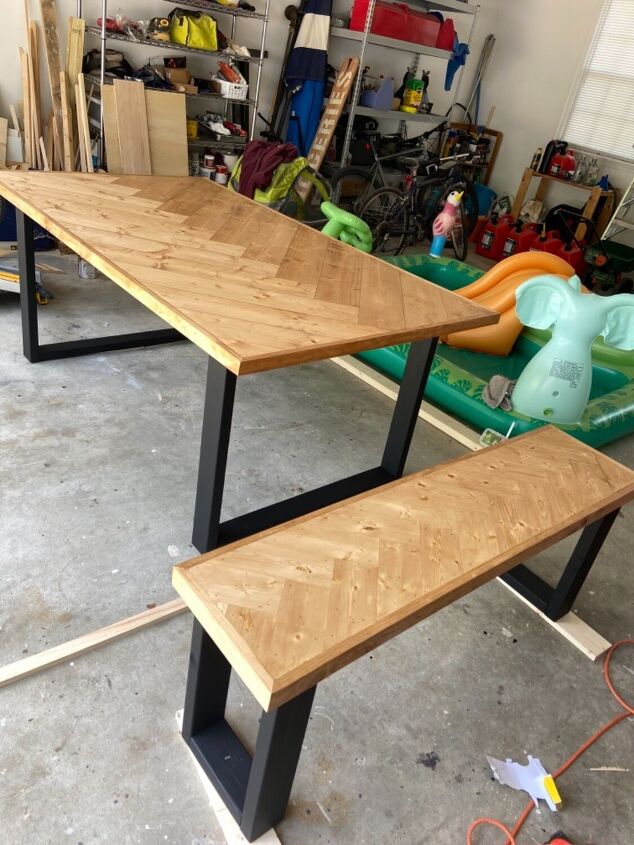
Check out these before, during and after pictures!
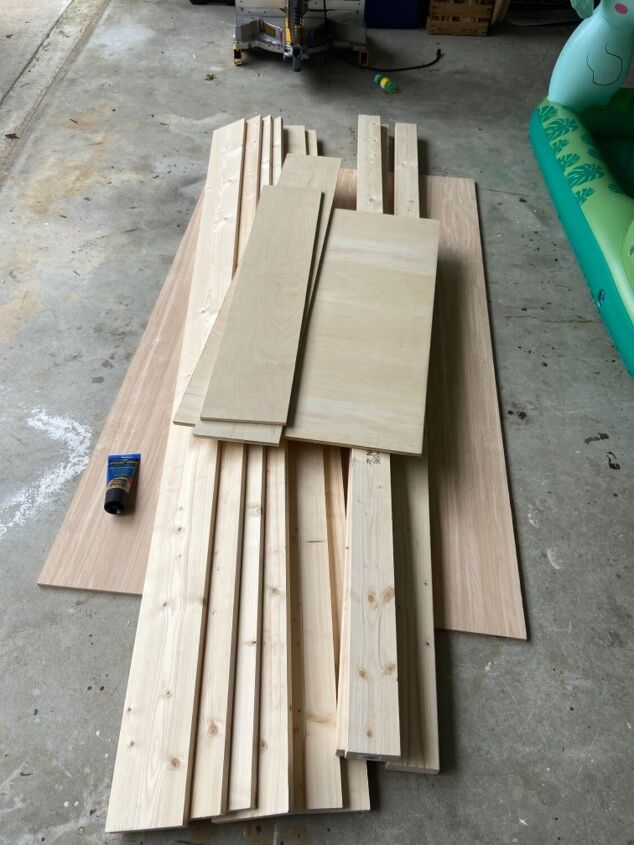
Materials used:
1/4in plywood
2x4s for legs/ supports
1x4s for herringbone strips
1x2s for framing
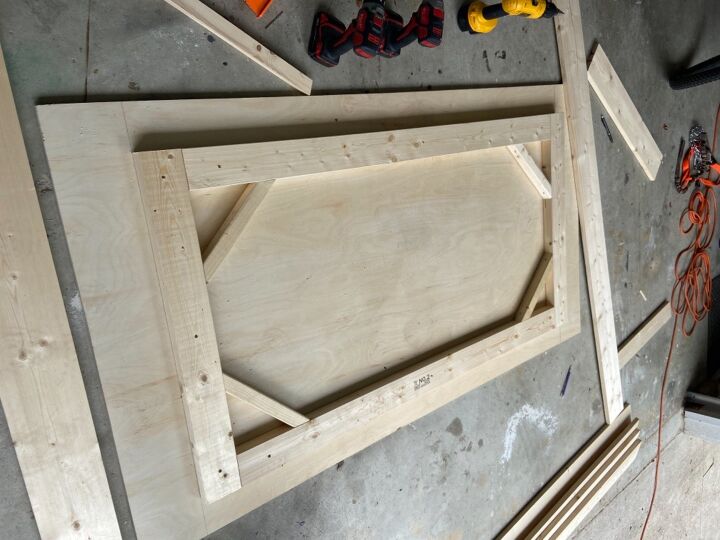
First, cut the plywood for a desired table size and attach under supports
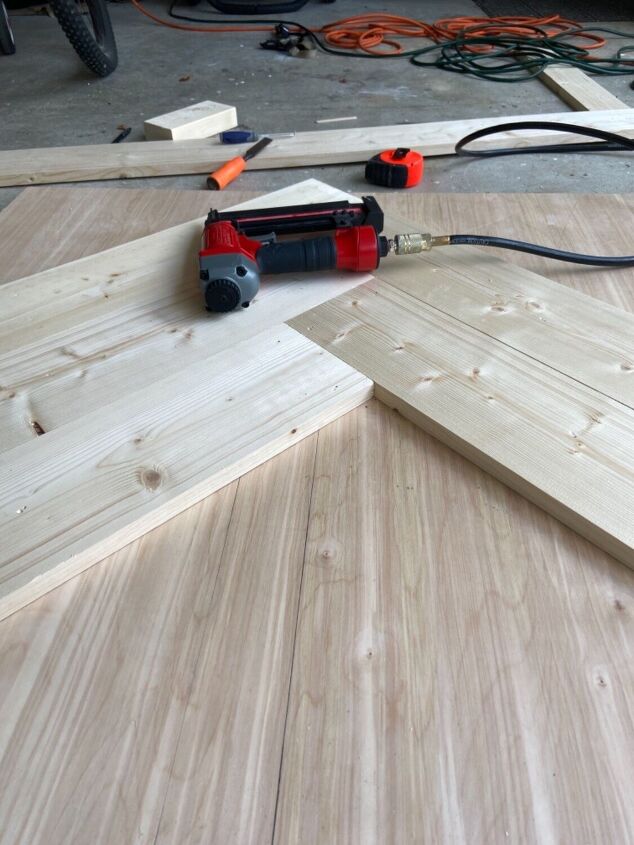
Next, attach herringbone strips- started with each full size, and cut accordingly.
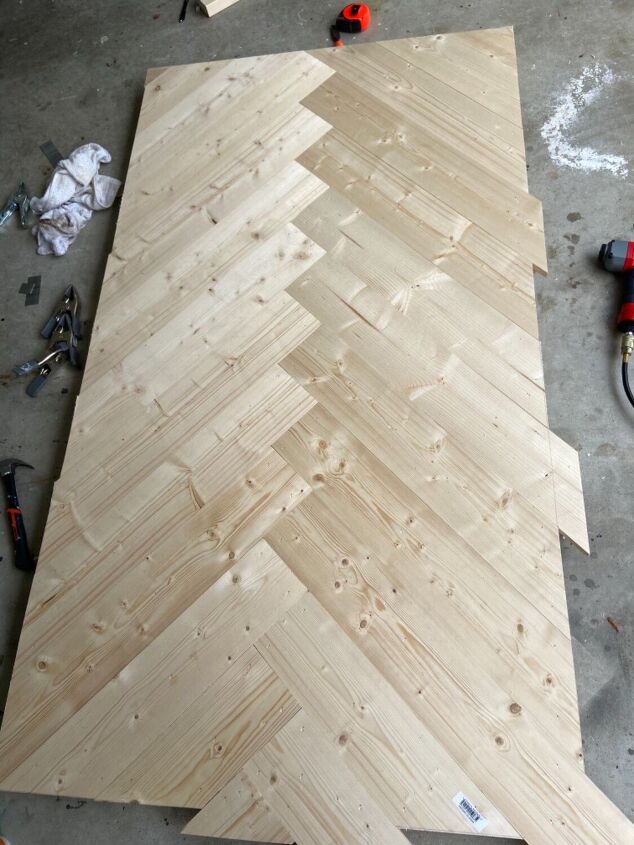
After attached, use circular saw to even the edges out and attach 1x2 strips to the outside
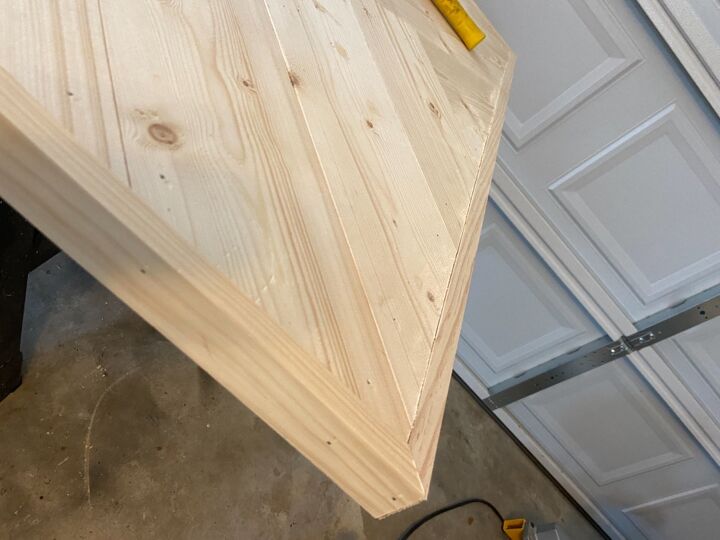
here is what one corner looks like
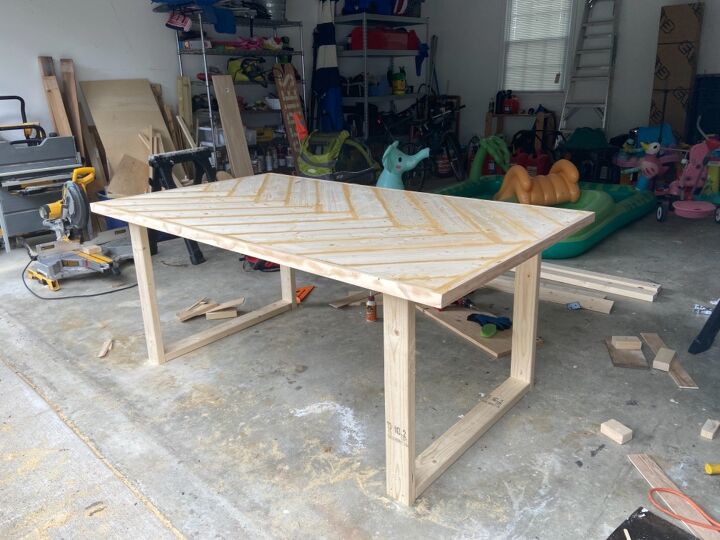
Build square leg frames and attach underneath then fill all of the small gaps with wood filler
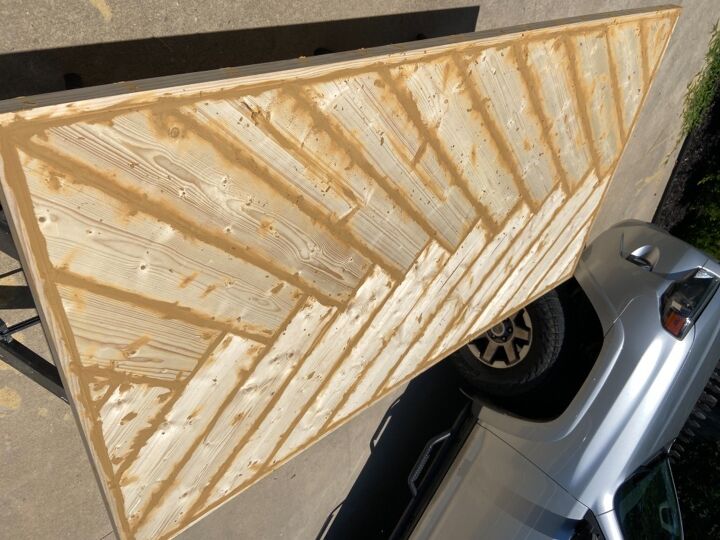
Keep filling all the tiny gaps with wood filler and sand until smooth
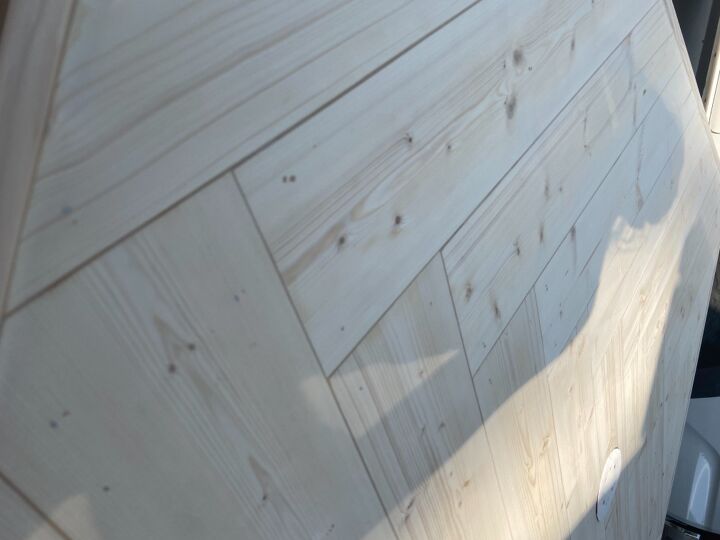
this is what it looks like after I sanded it down
Lastly, I painted the legs black (I used matte black) and apply pre-stain wood conditioner.

And then apply stain of your choice and lightly sand until smooth- apply top coat!
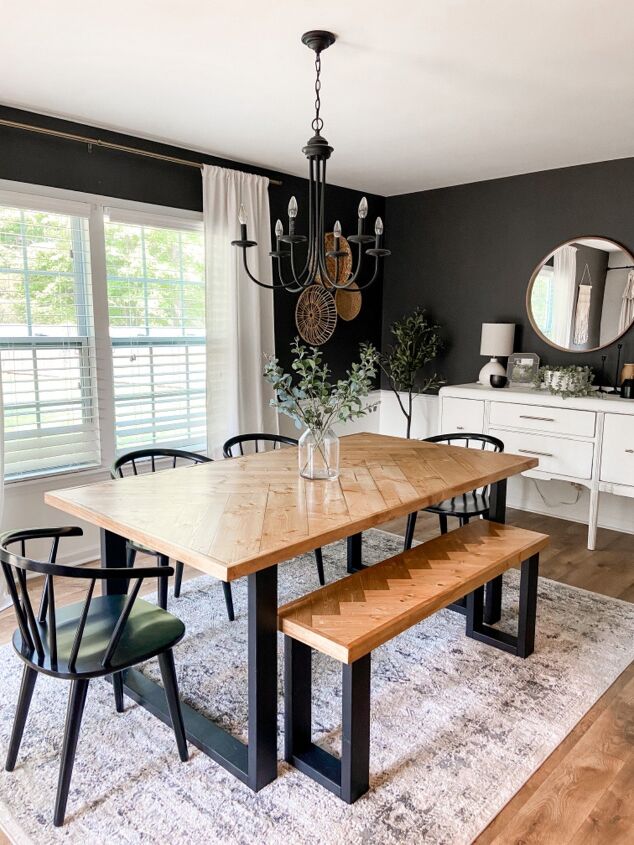
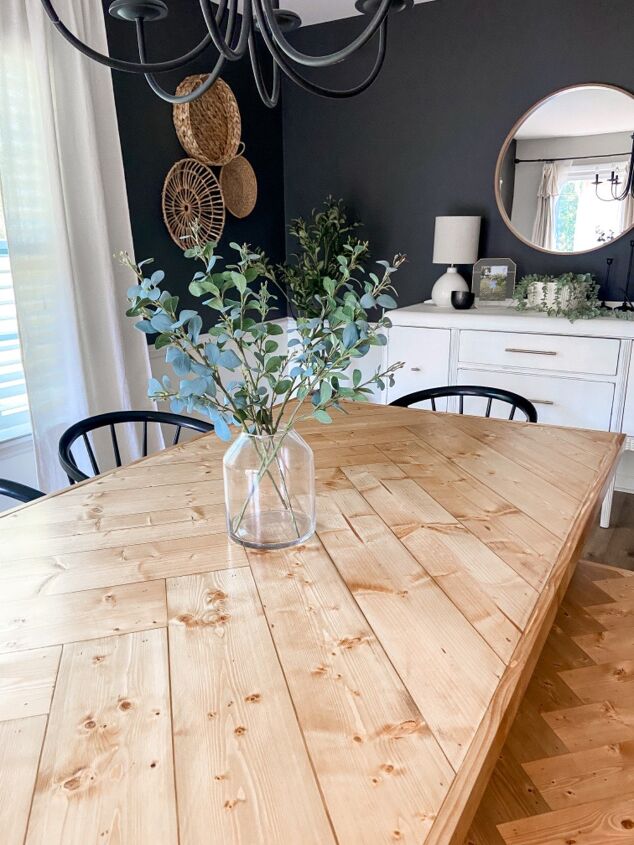
Here is the finished product! 🤩
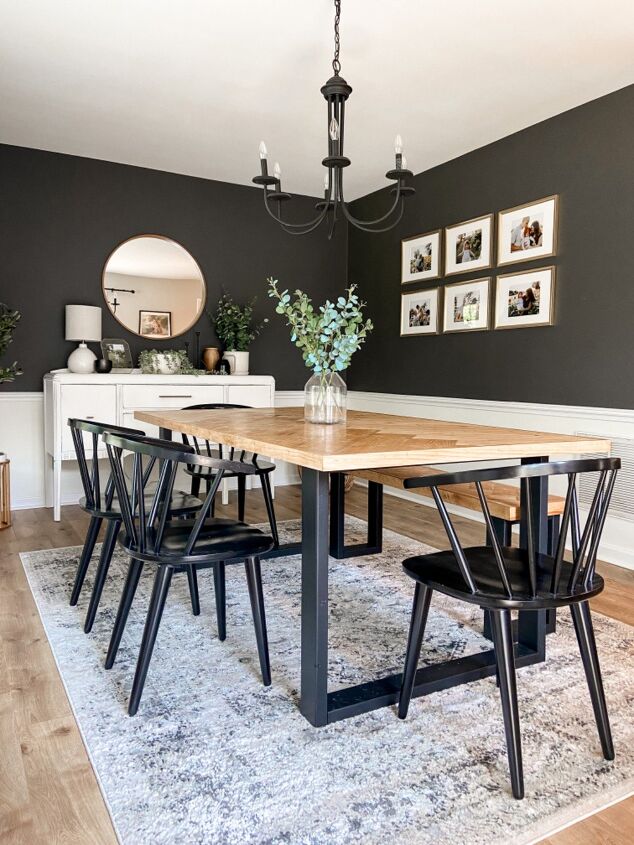
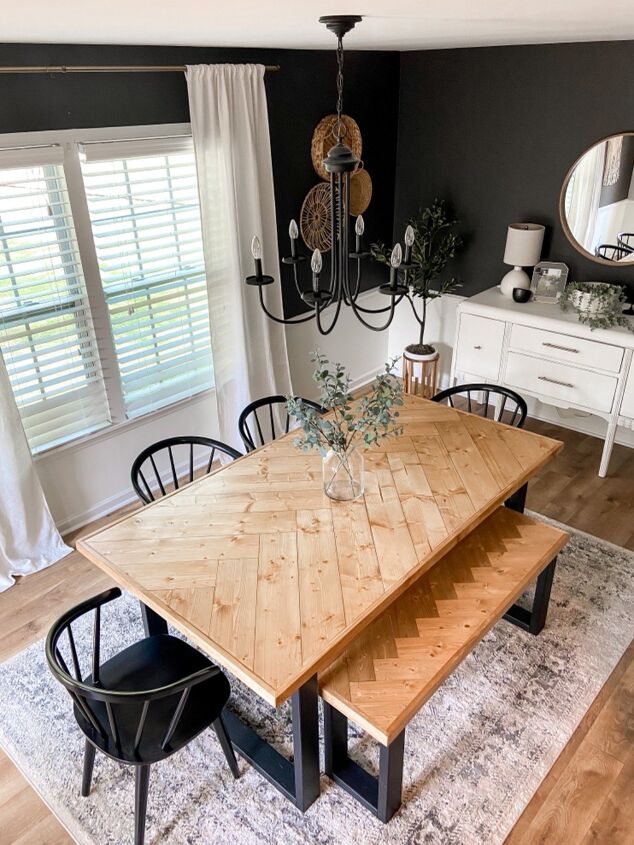
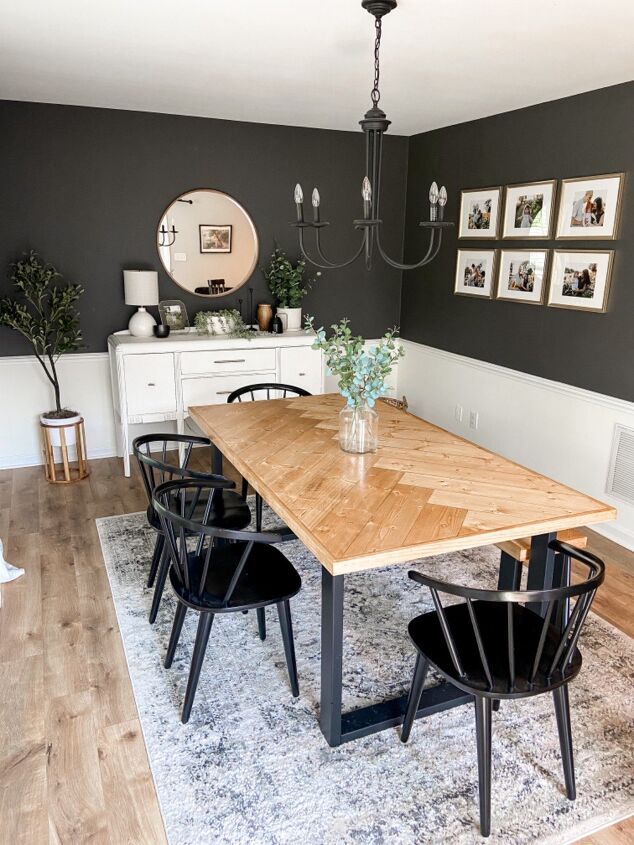
This is how I decorate it with a clear vase
Let me know what you think in the comments below
Resources for this project:


Comments
Join the conversation
-
This is a really nice looking table. I plan to add it to my to-do build list!
-
Love the table ! Do you think it would work with weathered cedar boards that I saved from my old fence?


Frequently asked questions
Have a question about this project?
Can we see a pic of where you attached the legs underneath? What size nails are in your nail gun? Super beginner…sorry if those are dumb questions! 😊
What is the length & width of your table?
Love the table and thank you for the post. I have made a table that is similar. I did not follow your exact steps. As I filled and sanded with wood filler, and stained the table after, it shows all the lines in a lighter stain. The wood filler did not stain the same color. I have attached a picture. Please help and tell me what I've done wrong. Thank you.