


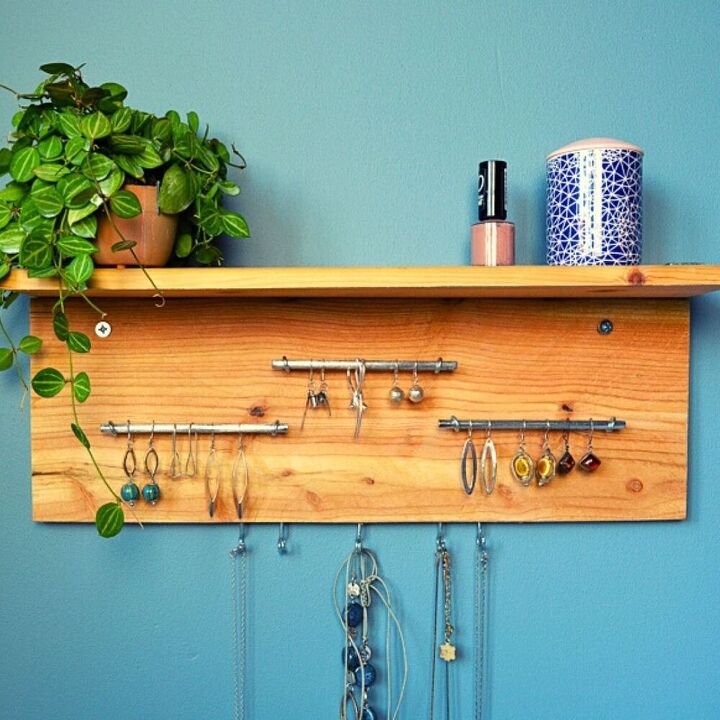
How to Make a Wall Mounted Jewelry Holder
Whilst tidying my bedroom I suddenly decided I had had enough of jumbled up earrings on my cluttered bedside table - time to take action. After browsing some lovely earring and necklace organizers on Etsy I asked my husband to make me one.This beautiful jewelry holder is made from items found in the shed - I love it when he repurposes and reuses what we have.
To make your own you will need:
- Wood board 16 1/2" by 5 1/2" by 1/2"
- Wood shelf (ours is a former skirting board), 16 1/2" by 3 3/4" by 1/2"
- 5 Hooks for necklaces (or more!)
- 3 metal rods measuring length 4 3/4" width 3/16"
- 6 Screw eyes to fix metal rods - we used suitably sized from a multi-box
- 8 Screws 1/2"
- Two right angle brackets, our from the shed are 3"
Naturally you can adjust the sizes to suit your collection of jewelry, adding additional bars for earrings and/or hooks for necklaces.
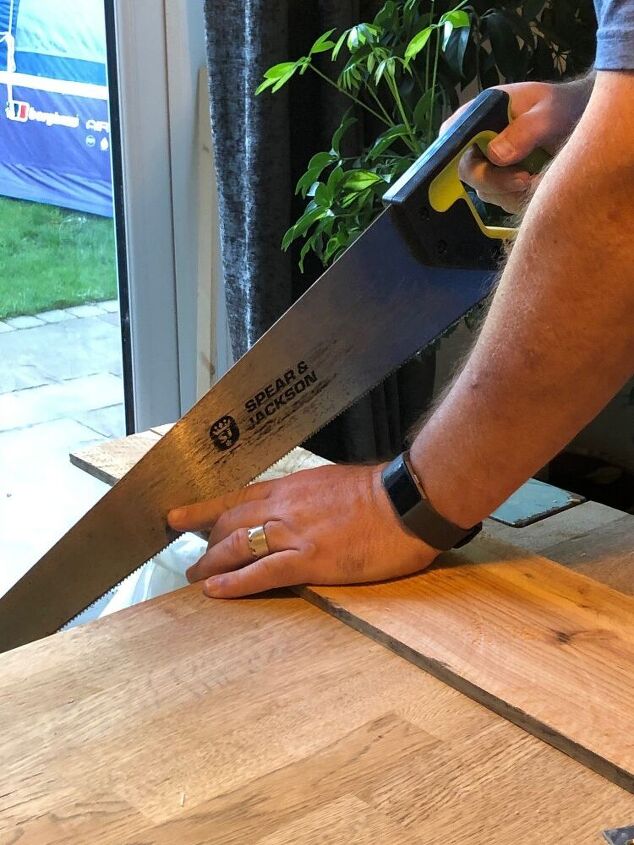
Start by cutting your wood to size and sanding the edges and surfaces.
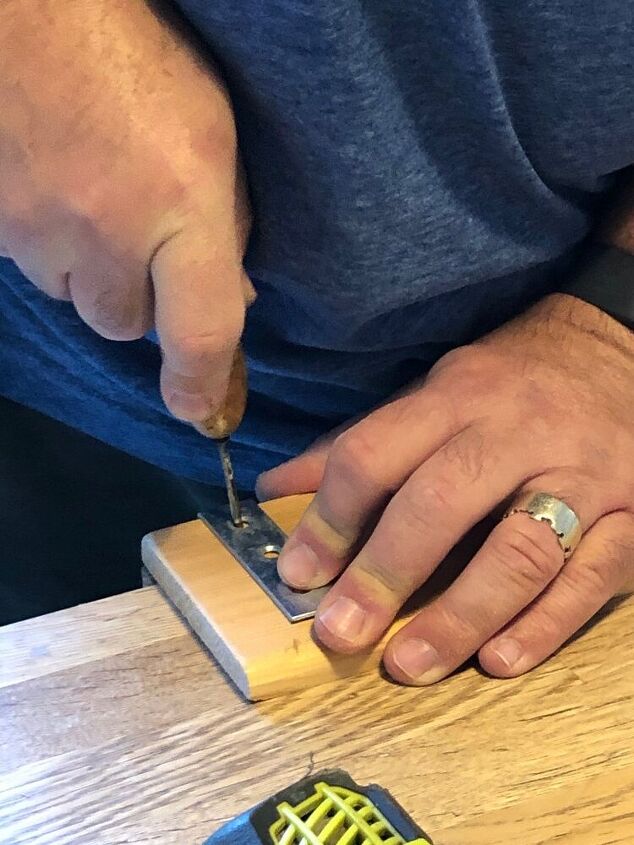
Place your two pieces of wood at right angles, mark with a drabble and then screw the right angle plates in place. We used the edge of the table to guide us for the right angle. Ensure your screws are the right length to hold securely but not come through to the front of the wood. The right angle brackets are placed on the back of the wood and top of shelf.
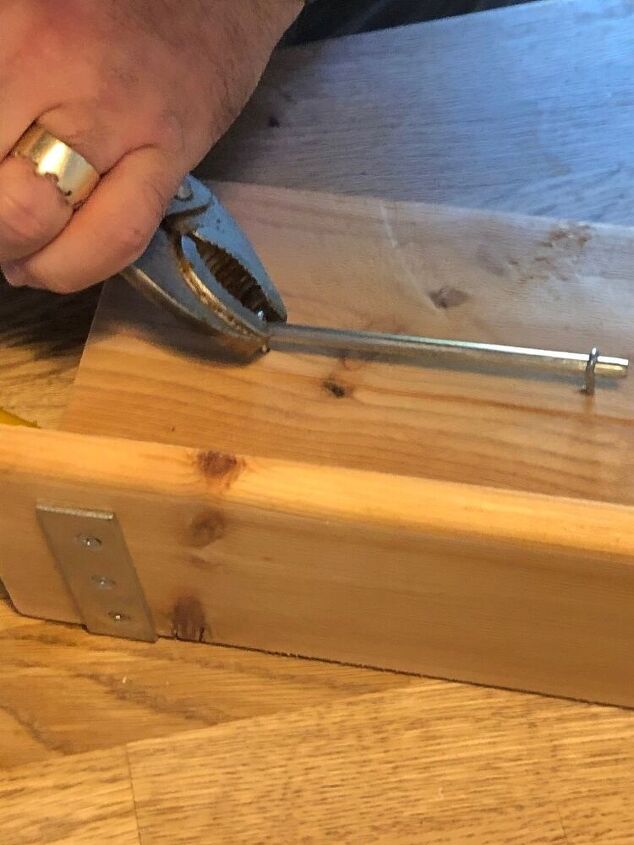
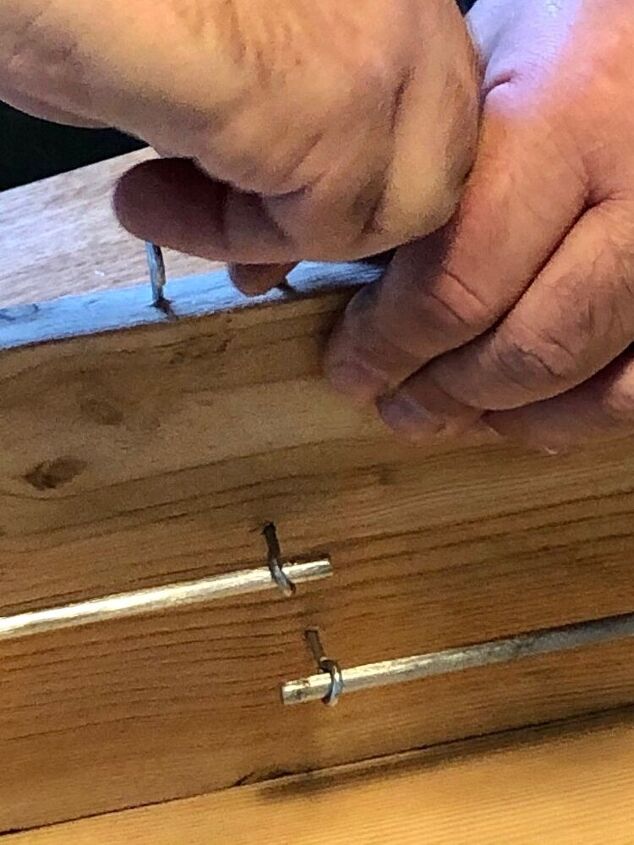
Next work out the placement of your metal rods, we have used three, two parallel with the middle one higher. You could choose to have two full-length road the length of your jewelry holder. Think about the length of your earrings.
Mark holes with a braddle for your metal eyes, then screw into position. Place your metal rods into position then with pliers slightly twist the eyes to prevent the rods sliding out.
The last step is to add hooks along the base of your jewelry holder. We started with marking the central position then measuring out from there. Mark the position with your braddle then screw in.
Finally, wall mount your rustic jewelry holder, predrill through the wood under the shelf, drill your wall adding raw plugs before screwing into position.


Comments
Join the conversation
-
Lovely jewelry display. I was wondering what your viney plant is you have sitting on the shelf?
-
Like your idea so much!! Especially the little short rods. You can easily take it down, get what you want, and replace it! Keep up the good work and ideas!


Frequently asked questions
Have a question about this project?
What is a bradle