


Easy Homemade Rustic Christmas Ornaments
These homemade rustic Christmas ornaments are easy and inexpensive to make and add a beautiful, rustic touch to your Christmas decor!
Growing up, we always had a color scheme or theme when it came to decorating for Christmas. Some years we would focus our decor around the color red, or silver and blue, et cetera. One theme I always loved was rustic and old fashioned. We would add ornaments from my parents’ childhood, rusty bells, lace bows and other rustic touches we could find. I always found it to be so simple and beautiful.
When I think of Christmas, that’s what I think of, simple and beautiful. Christmas to me isn’t about the gifts, although I really enjoy giving gifts. It’s about the time spent together with family. It’s about slowing down and enjoying the amazing time of year that it is. A tradition I had as a kid, and continue with my children today, is to drive around the neighborhood on Christmas Eve and see the beautifully decorated houses. The simplicity of those nights is really something magical.
With that said, it should be no surprise that I enjoy Christmas decor that is simple, rustic and beautiful. I also really enjoy creating my own homemade Christmas decor pieces every year. Last year I made these clothespin snowflakes, and this year I decided to make some rustic Christmas tree ornaments. I had quite a bit of scrap fabric leftover from last Christmas and I wanted to find ways to use it up. Additionally, during one of our fall hikes, my kids and I collected several small sticks with the intention of making something for Christmas. That’s when I came up with this idea!
These Christmas tree ornaments are a really simple craft projects that you’re kids can help with and are really beautiful on the tree. Even better, if you have scrap fabric laying around, they’re virtually free! Even if you don’t have all of the materials, you still can make this project very inexpensively. Now, let’s get into the tutorial!

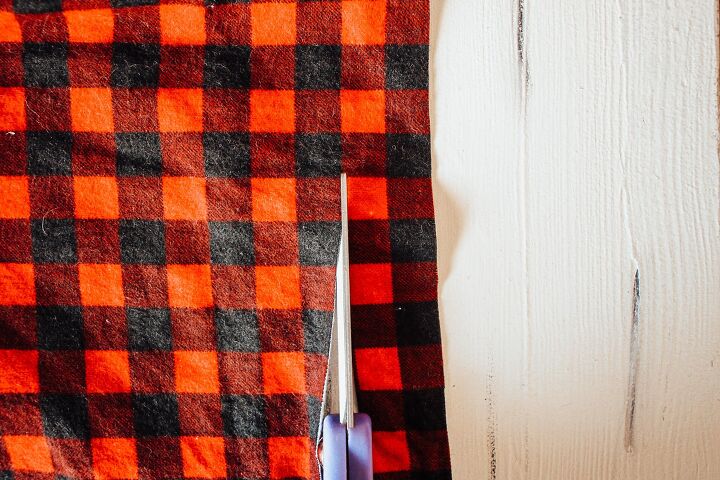
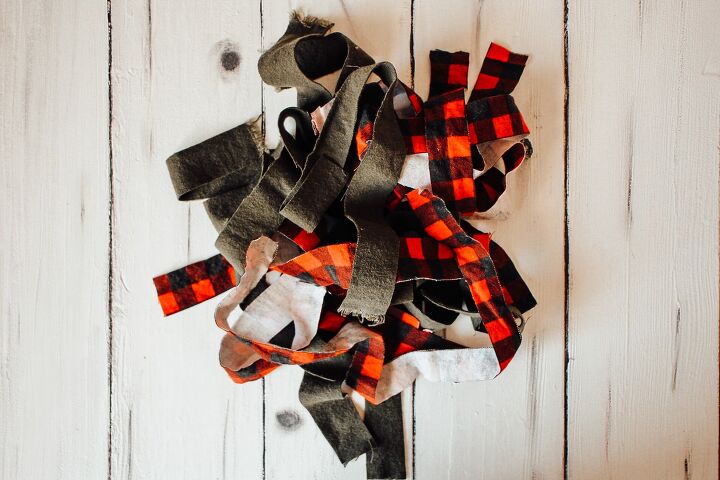
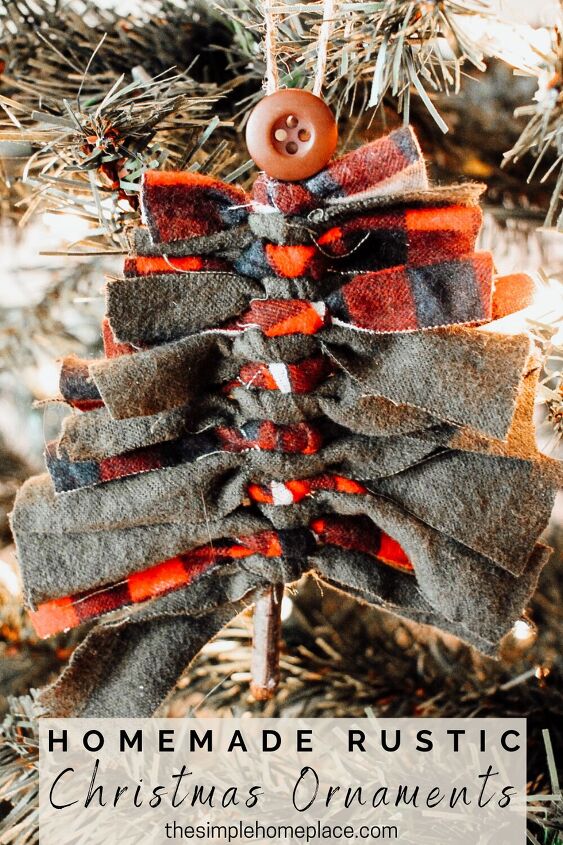
Next, cut strips of your favorite fabric that are roughly 1 inch wide by 6-7 inches long. You’ll need a total of 14 strips of fabric per ornament.
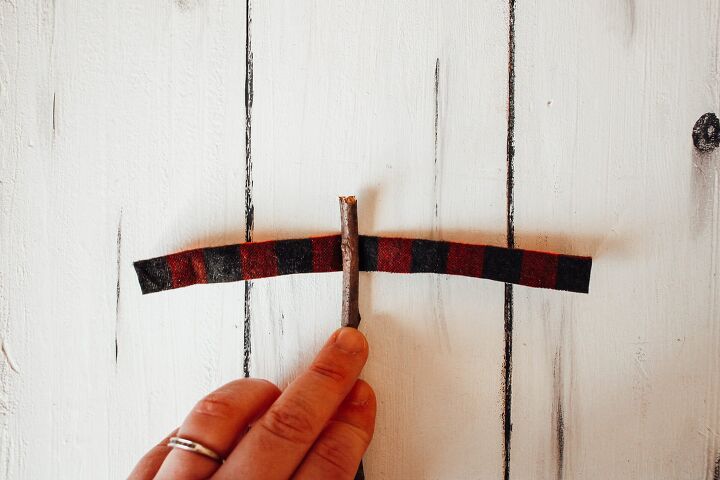
Take your first pice of fabric, then place the stick on top, making sure it centered. Leave about 1/2 inch of space at the top to save room for the button topper. If you are using a fabric that has a pattern only on one side, you may want to fold it in half as shown below.

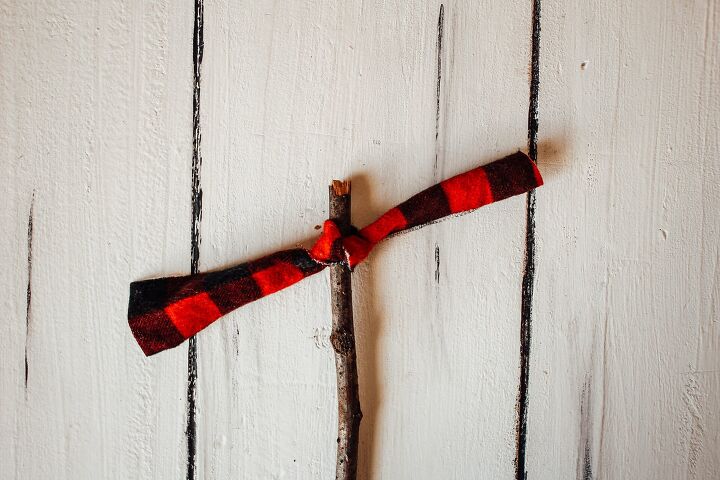
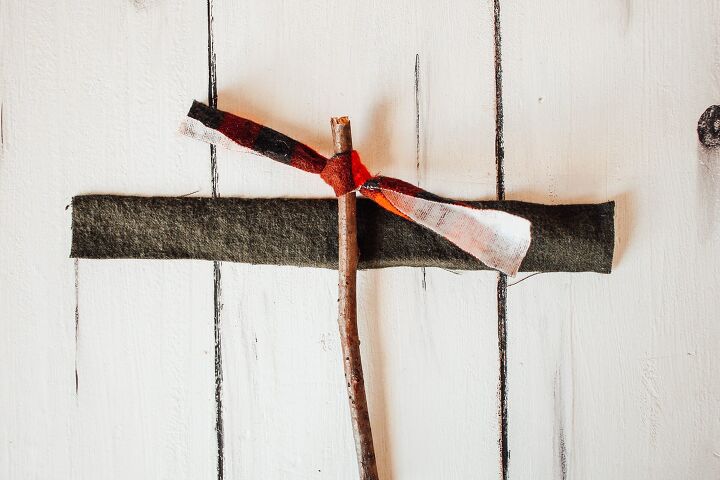
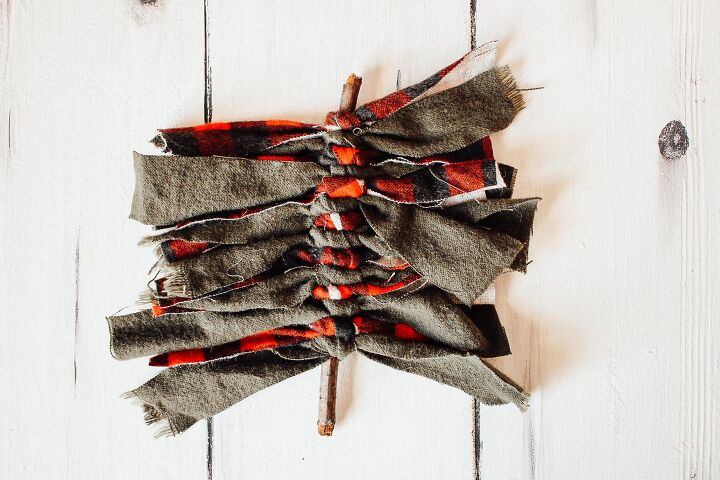
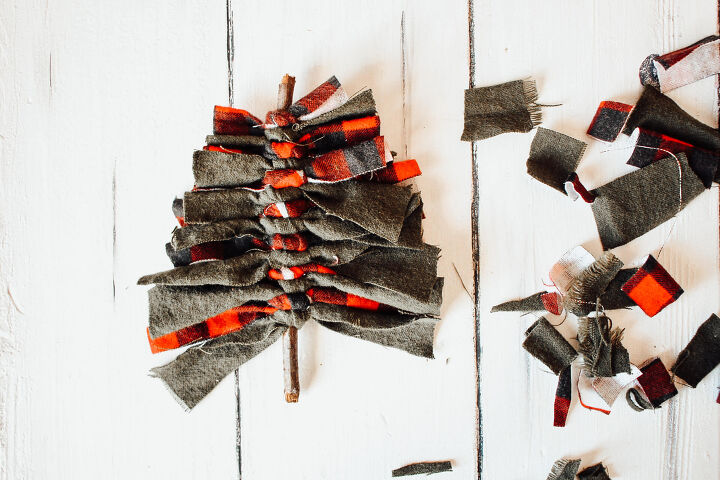
Simply tie the fabric in a knot. Repeat this down the length of the stick until you are satisfied with the look. I used 14 strips of fabric per ornament and left about 1 inch of space on the bottom to look like the trunk of a Christmas tree.
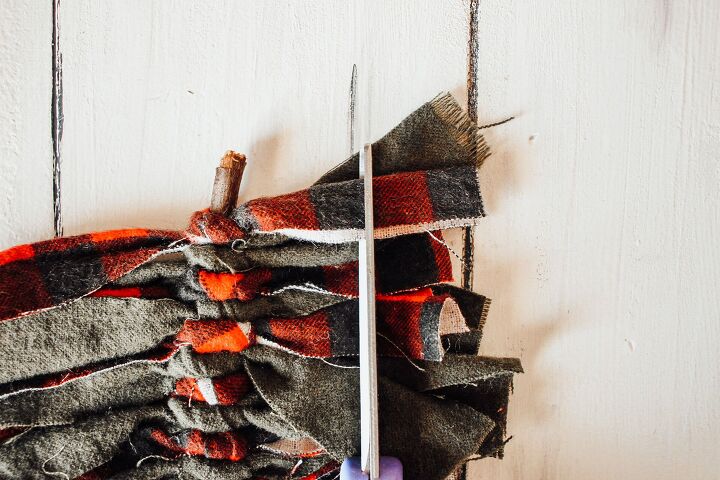
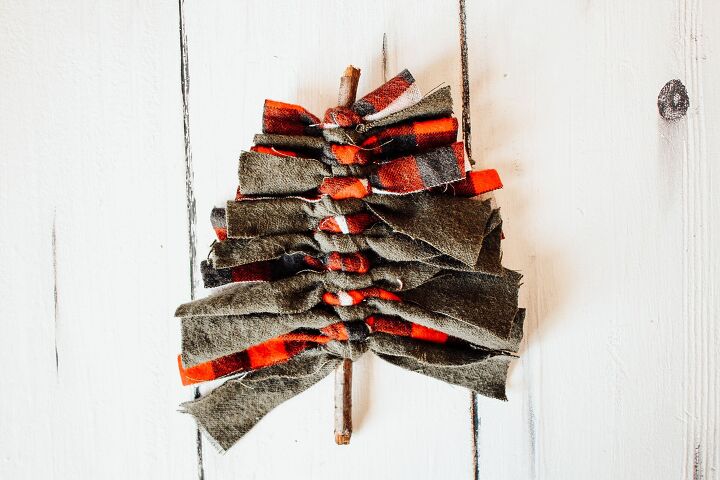
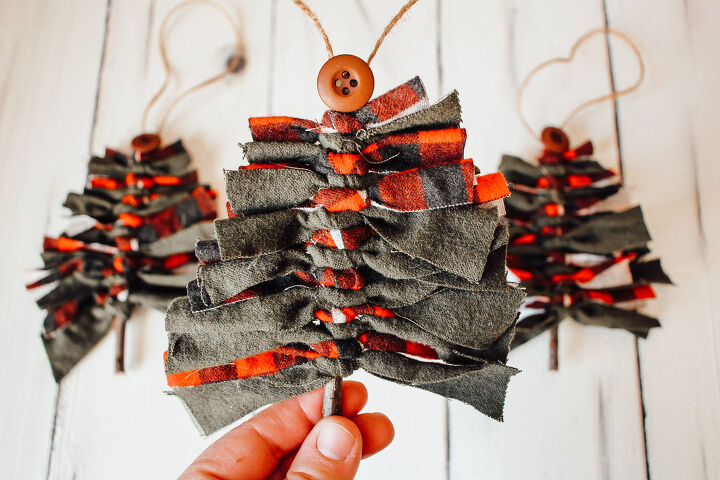
Using sharp scissors, start trimming the fabric starting at the top. Cut the strips at the top shorter and gradually taper it off so the end result is in the shape of a Christmas tree.
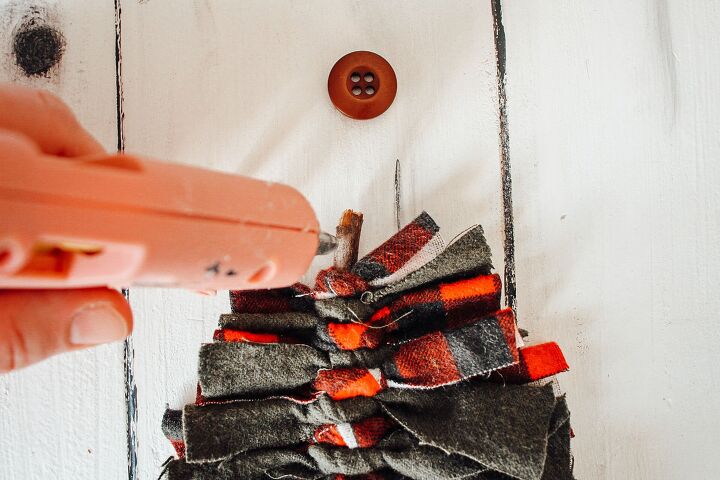
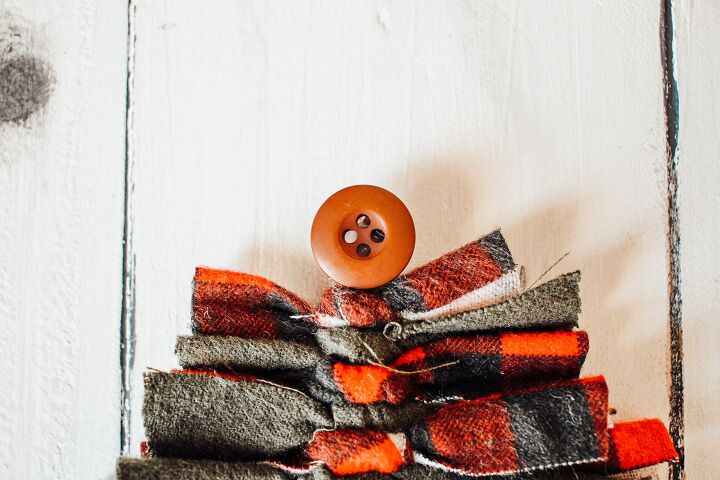
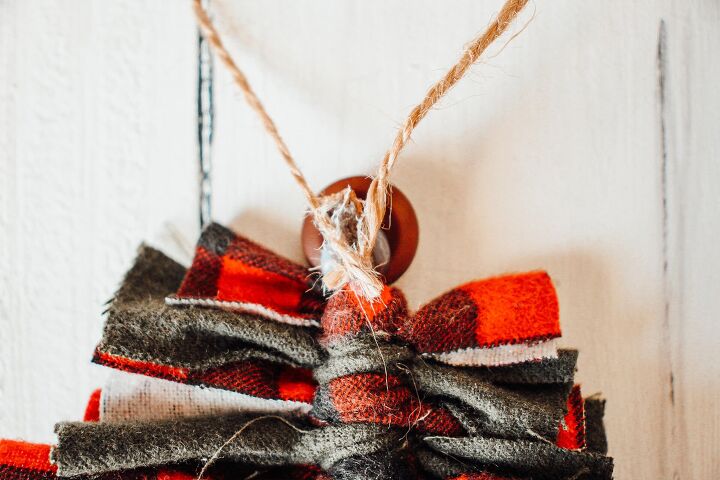
Hot glue a button or decoration of choice on the top to serve as the star or topper to the Christmas tree.
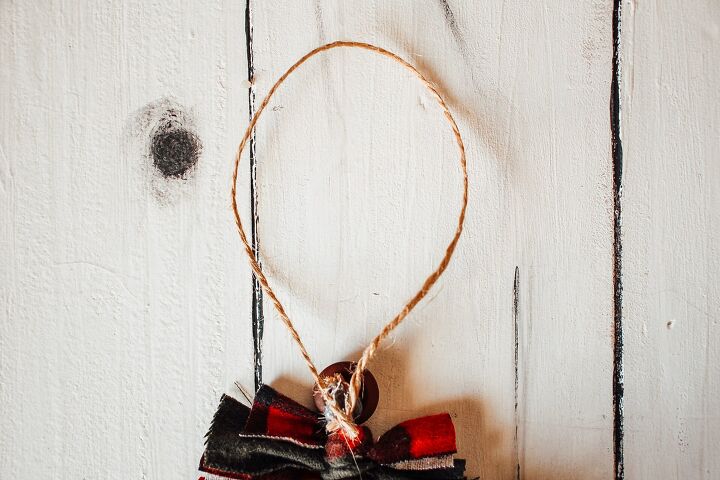
Cut a piece of twine or string that is 8-10 inches long the ends to the back behind the button to create a loop so that you can hang it on your tree.
There you have it! An easy-to-make, inexpensive Christmas ornament that is a wonderful addition to your tree!
NOTES
- If you’re using fabric that has the pattern only on one side, fold it in half lengthwise with the pattern on the outside before tying it around the stick.
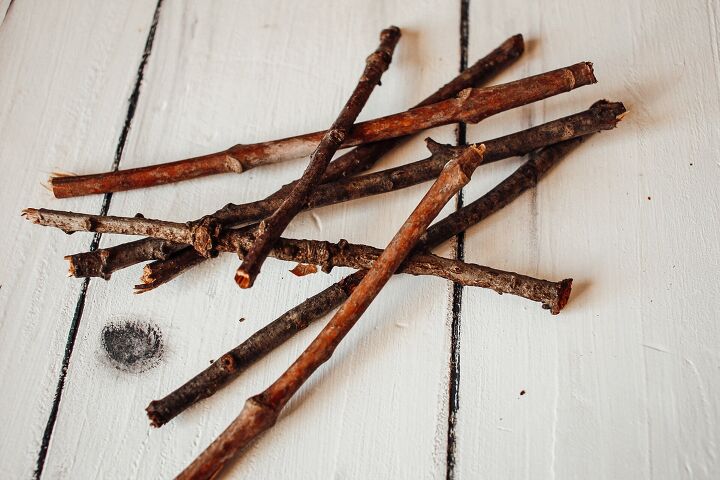
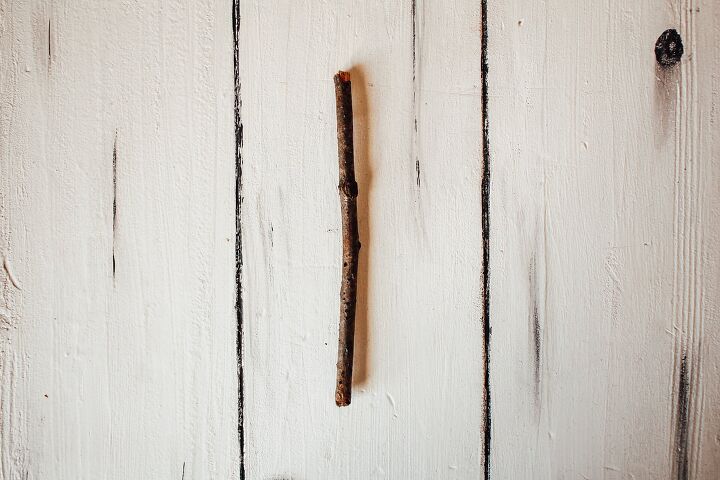
- Be sure to use sticks that are thin enough for you to cut if needed and that are dried out. If you’re collecting sticks from the ground, this should be no problem.
- If you want to make the fabric extra secure, add a dab of hot glue on the stick before tying the fabric.
- If you don’t have access to sticks, you could also use skewers or popsicle sticks.
- Instead of a button at the top, you could use a pom or other type of topper!
Materials
- Sticks or scewers
- Fabric of choice
- Buttons
- Twine, yarn or string
Tools
- Hot glue gun
- Glue sticks
- Scissors
Instructions
- Collect dry sticks and cut them so they are 5-6 inches long.
- Next, cut strips of your favorite fabric that are roughly 1 inch wide by 6-7 inches long. You'll need a total of 14 strips of fabric per ornament.
- Take your first pice of fabric, then place the stick on top, making sure it centered. Leave about 1/2 inch of space at the top to save room for the button topper. If you are using a fabric that has a pattern only on one side, you may want to fold it in half as shown below.
- Simply tie the fabric in a knot. Repeat this down the length of the stick until you are satisfied with the look. I used 14 strips of fabric per ornament and left about 1 inch of space on the bottom to look like the trunk of a Christmas tree.
- Using sharp scissors, start trimming the fabric starting at the top. Cut the strips at the top shorter and gradually taper it off so the end result is in the shape of a Christmas tree.
- Hot glue a button or decoration of choice on the top to serve as the star or topper to the Christmas tree.
- Cut a piece of twine or string that is 8-10 inches long the ends to the back behind the button to create a loop so that you can hang it on your tree.
Notes
- If you're using fabric that has the pattern only on one side, fold it in half lengthwise with the pattern on the outside before tying it around the stick.
- Be sure to use sticks that are thin enough for you to cut if needed and that are dried out. If you're collecting sticks from the ground, this should be no problem.
- If you want to make the fabric extra secure, add a dab of hot glue on the stick before tying the fabric.
- If you don't have access to sticks, you could also use skewers or popsicle sticks.
- Instead of a button at the top, you could use a pom or other type of topper!
CHECK OUT MORE OF MY HOMEMADE/DIY PROJECTS?
Looking for more homemade/DIY projects like these homemade rustic Christmas ornaments? Check these out:
- DIY Clothespin Snowflakes
- Crochet Hot Pad
- Reusable Rice Heating Pad
- Reusable DIY Bread Bag
Did you make these homemade rustic Christmas ornaments? If you did, I’d really appreciate if you came back and gave them a five star rating! Tag me on Instagram (@thesimplehomeplace) to show me your own recreation!
PIN FOR LATER!
Resources for this project:
See all materials


Comments
Join the conversation
-
These are adorable! Thank you for sharing! Love the idea shared about using a fabric with special meaning….
-
I love these. Very rustic. Thanks.


Frequently asked questions
Have a question about this project?
Could you use cinnamon sticks?