


Pine Cone Christmas Ornaments Craft

by
Mila Myk
7 Materials
$20
20 Minutes
Easy
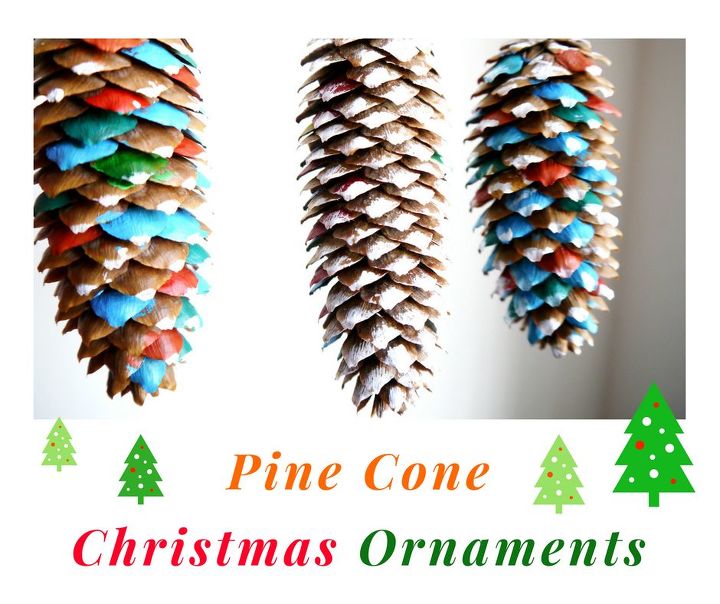
Colorful Pine Cone Ornaments - easy Christmas DIY.
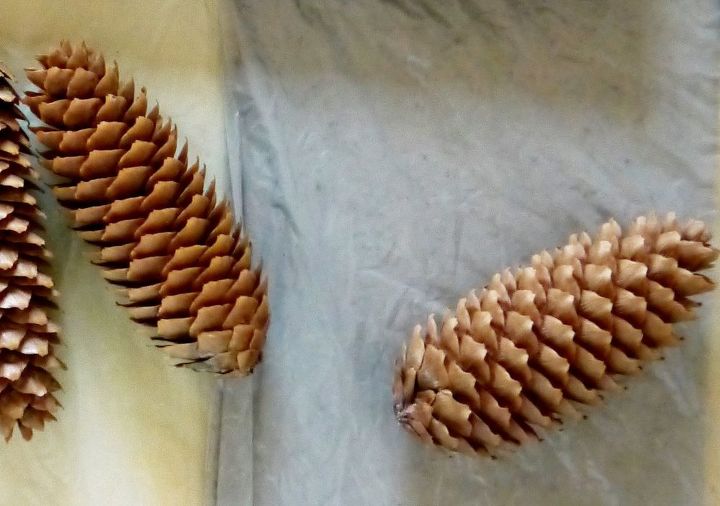
During our visit to charming Peebles last month, I’ve found exceptionally beautiful (and big!) pine cones. I used them as pieces of fall decor display, along with pumpkins and chestnuts. Although they look beautiful as they are, I really wanted to spruce them up a bit.
I came up with an easy way to use them during Holidays and to make them look more Christmassy.
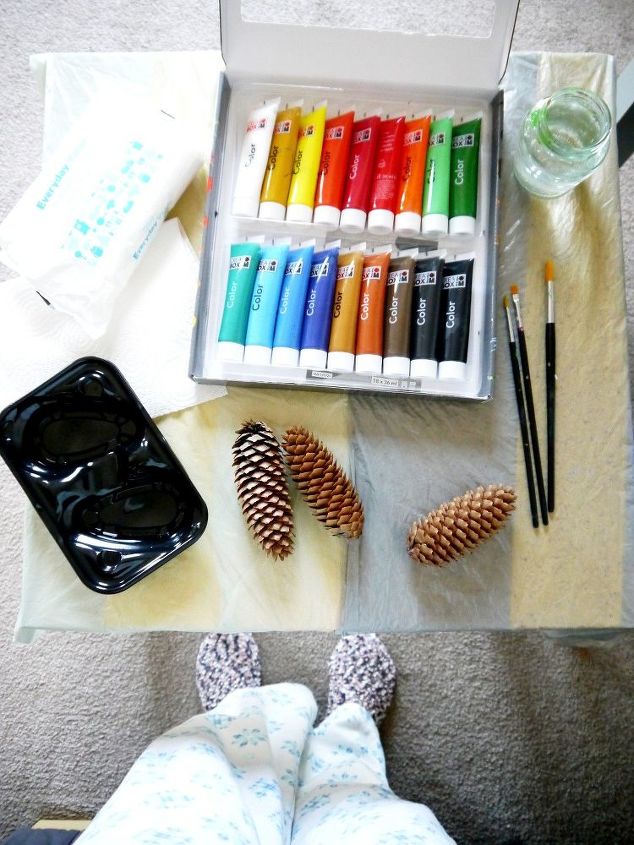
What you will need for this craft:
-pine cones
-colorful acrylic paints
-few paintbrushes
-clear spray sealer (optional)
-glue gun & glue gun stick
-few twine strings pieces
-plastic container (for mixing paints)
-scissors
Instructions:
First of all, use a brush to clean off any dirt and dust that settled on pine cones.
Then, choose paint colors you want to use. You can go all white if that fits your Christmas decor theme (like Winter Wonderland or Farmhouse Christmas).
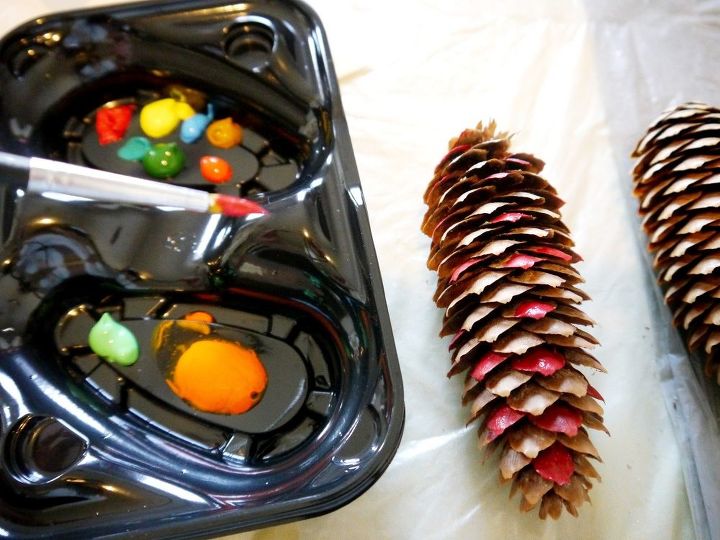
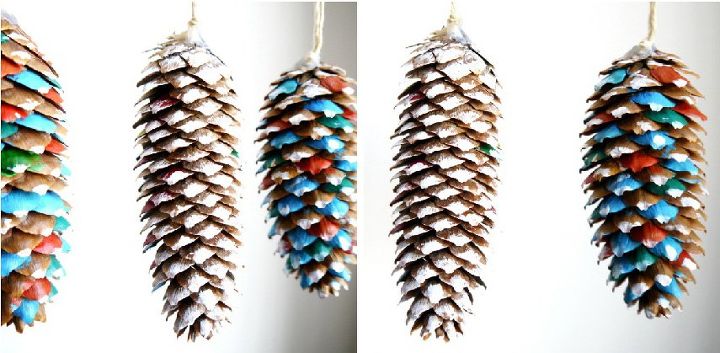
I painted one pine cone white, and I used colorful paints to decorate remaining two.
You can decorate whole scales or just the tips, or you can mix it up even more: colorful scales & white tips, or mix shades to create new colors. It all depends on which way you want to go with your decor this year.
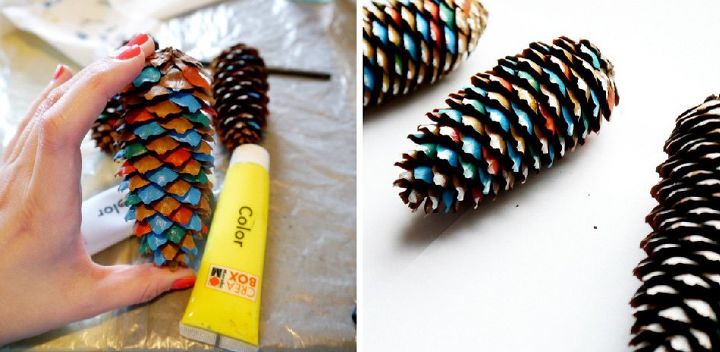
Remember, acrylic paints don’t like water. If you want to clean your brush between painting, dip it into the water-filled jar or clean it under running water and dry it throughout with the dry cloth (or use multiple brushes).
Leave pine cones to air dry.
You can spray them with clear sealer, to make them moist resistant.
Make sure pine cones are dry before you go to the next step.
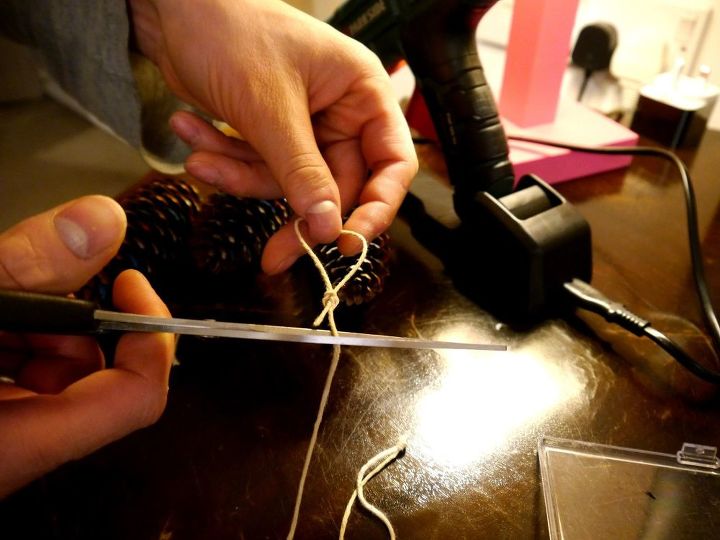
Establish how long you would like your twine string pendant to be. Form accordingly big noose and tie a simple knot at the bottom. Use scissors to cut off remaining string.
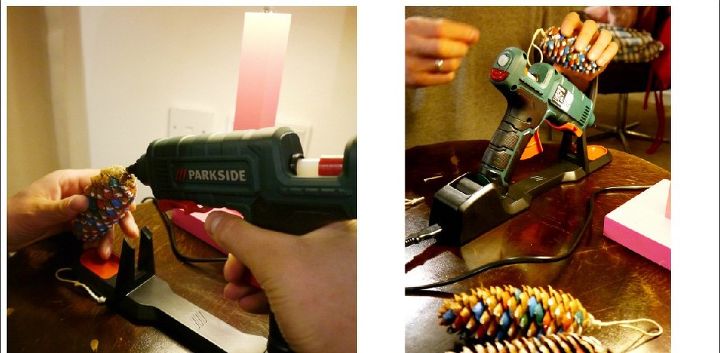
Use glue gun to attach twine piece to the bottom of the cone (Be careful- glue is super hot. You can use rubber gloves during this step!). A drop of glue should be enough to keep string in place. You can press it gently to make sure it's attached properly to the cone. Leave it to dry.
You can use something else to hang pine cones on (colorful ribbons will do, too).
Happy crafting!
Resources for this project:
See all materials


Any price and availability information displayed on [relevant Amazon Site(s), as applicable] at the time of purchase will apply to the purchase of this product.
Hometalk may collect a small share of sales from the links on this page.More info
Want more details about this and other DIY projects? Check out my blog post!


Frequently asked questions
Have a question about this project?